Showing posts with label fillets. Show all posts

Saturday, January 15, 2022

The Estes V2 - Epoxy Fillets

I put epoxy fillets on the V2. A follower on Instagram suggested JB Weld epoxy for this model, which I always have on hand. After some thought, I decided to try it, and it turned out really well.

Since it's a steel-reinforced epoxy, I had assumed JB Weld wouldn't be sandable, so I'd have to get the fillets perfect on the first try or there would be no fixing it. This turned out to be wrong - you can sand JB Weld if you need.

When making epoxy fillets, I find it best to tape off the outline to keep it clean. To make a small radius, round fillet, I chose a bamboo chop stick.

I started by marking the edges of the fillets with the chop stick. Using a soft graphite sketching pencil, I rubbed the end of the chop stick with graphite and ran it along the root edges of the fins. 


Next, I taped along these marks.

The lighting is terrible because the blue tape completely threw off the white balance of my phone camera, and I couldn't fix it for the life of me.

Due to the curvature of the boat tail, I used multiple pieces of masking tape to follow the marking on the fin and get an appropriately shaped fillet.

To keep things relatively neat and reduce wasted epoxy, I sacrificed a medical dosing syringe to lay down a bead of epoxy. Just a little did the trick.


It may not look like enough for a good fillet, but once I smoothed it out with an alcohol-dipped chopstick, the fillets spread to fill the taped-off area and looked good.

Because it's so thick and doesn't sag or self-level, I was able to do all four sets of fillets in one go. I let about an hour or so pass before trying to do any touch up with an alcohol-soaked swab.

The end result is really great. Not too heavy on the back end, and even the one fin which was slightly loose is now solidly attached.

I wouldn't use JB Weld for larger fillets, as it comes in small tubes and might get a little expensive if you use it for something large. But I can see turning to this for some smaller projects.

The basic build is done. Apart from some cleaning up of the nose cone ridges, the V2 basically ready for primer and paint. I'm pretty pleased with how this turned out and look forward to painting it and showing it off at the field next season.


Have a question you'd like to see addressed on this blog? Email me at iamtherocketn00b@gmail.com.

Tuesday, April 21, 2020

FlisKits Tres - A Challenging Build Part 3


Click here to go to the beginning of the build.

Once I had the motor mount installed in the FlisKits Tres, it looked pretty good and felt nice and solid. But there were small gaps between the motor tubes and the main BT-60 body tube. I suspect this may be the case for most, if not all, builders of this kit.

Those will need to be filled in. Now, it's not just that I don't like the way this looks. Remember that there is only one "centering ring" in this rocket, and it's at the very base, flush with the end of the body tube. So there's not a second ring at the top of the mount to make a nice, airtight seal.

When the ejection charges on the rocket motors go off, they need to pressurize the inside of the body tube in order to blow the nose cone off - and eject the parachute. If you have large gaps like the ones in the photo above, all the ejection charge gasses may just leak out the back. This would lead to a failure to deploy the parachute. The rocket would then come in ballistic, meaning it would nose dive fast and hard into the ground. This would most likely destroy the rocket - and is potentially dangerous, should it hit something or someone.

So, we'll need to fix that. To do this, we'll use glue and make a nice fillet around each of the engine tubes where they meet the body tube.

Even if your rocket has no gaps here, it's not a bad idea to put fillets around the motor tubes. It will hide any jagged edges you've got left, and will make the whole rocket look neater.

To make the fillets, I used the same thing I use for most of my fin fillets - Titebond No-Run, No-Drip molding and trim wood glue. Ever since hearing about this stuff from Chris Michielssen's Model Rocket Building blog, I've used it to make fillets. Swapping out the wide Titebond nozzle for an Elmer's fine point nozzle is a tip I picked up from Chris.


Because it's less prone to sagging and shrinking, and because it starts to dry quickly, this stuff is ideal for filleting these gaps.

I started by running a bead of glue from near the top of the motor tube to the end of the body tube.


You don't need such a thick bead, by the way. Most of this is coming off. When my bottle gets lower, sometimes I squeeze out a bead of glue, and there are gaps in it. So I went a little heavy here to make sure I had one, unbroken line of glue.

If you try to smooth the whole fillet in one swipe, you'll end up with a mess. By the time you get to the end, you'll have so much excess glue built up on your finger that it will end up overflowing the sides of your finger. It's better to do a few swipes and clean off your fingertip with a damp sponge or cloth.

So I started about a third of the way up from the back end, and swept the excess off toward the end of the tube.


I went another third of the way up, and again swiped to the bottom.


Finally, I flipped the rocket over, and attempted to smooth the last bit over the top end of the motor tube. My hope here was that with a few fillet layers, I could actually smooth that joint over, so it would look like the motor tube was simply a part of the body tube, like the branch of a tree, rather than having a sharp ridge where the tube was obviously poking through.

You may prefer to keep a sharp separation. It's an aesthetic choice.


As you can see, there was a bit of excess. That's easily cleaned up by going over it with a clean finger.


Allow the first fillets to dry, then do the other sides, allowing each to dry.

Don't worry if the glue shrinks slightly after the first fillet, leaving a little gap. Do another couple of layers and the fillets should not only close off any air leaks in the tube, but also look nicely rounded. This will show in the paint job.


Next up, the fins. That's my favorite part of a build - it's when the rocket really starts to look like something!

Follow me on Twitter.

Like my Facebook page for blog updates and extra stuff.

Have a question you'd like to see addressed on this blog? Email me at iamtherocketn00b@gmail.com. 

Tuesday, March 29, 2016

Estes Goblin - Finished!


The Goblin is a classic Estes kit. I believe they used to send it as a free gift when people ordered a certain amount of stuff. The Goblin had been out of production for years, and was brought back as a clone by Semroc.

Due probably to the popularity of the Goblin, Estes re-released their kit, so now you have a choice. Both rockets look pretty much the same, and are the same size. The main difference is the nose cone - the Semroc version uses balsa wood, while the current Estes kit features a plastic nose.

The Goblin flies on 24mm D motors. It's a very simple rocket, but this build gave me a lot of trouble! I made so many mistakes, starting with gluing the fins on. I accidentally tore the very first fin off while the glue was nearly, but not quite, dry. I had to cut it off and sand the root of the fin, but there was some tearing of the body tube.


Well, I didn't want to accept this flaw, and needed a way of covering it up. So I elected to do the fin fillets with epoxy, filled with microballoons - microscopic spheres of glass.


 This makes epoxy thicker and easier to sand if you need to. It also allowed me to get some nicely smooth, curved fillets.

Epoxy fillets make the rocket heavier, and it's probably overkill for most small rockets. But it makes a larger footprint, which successfully covered the torn paper airframe.


When sanding the primer, I sanded through and actually cut into the paper body tube, raising fibers. This would have created some hairy spots on the final paint job. So I soaked the spots with thin CA - cyanoacrylate or Super Glue - and sanded the fibers off. After re-priming, the surface looked fine.

Then I had issues with the paint! I often use Rust-Oleum 2X enamel paint, which I did here. It's a pretty good paint, but some cans of it turn out not so great. I got a really rough texture, with part of the rocket looking like sandpaper, and part of it looking like dried out earth - dark cracks all over the fins. I didn't take a picture of that, unfortunately.

I used wet/dry sandpaper to sand the rough paint off. This took a long time.

I got a new can of Rust-Oleum Marigold paint - one of my favorite shades of yellow from Rusto.

The new paint went on fine, and apart from a little flaw around the edges of the black on one fin, I'm satisfied with it.

Despite all the trouble it gave me, the Goblin turned out quite nice. I did have to leave off one waterslide decal - the Estes logo, which is supposed to go just below the black band around the rocket. Unfortunately, I cut part of the decal off when I was trimming it from the decal sheet.

Oh, well...


Like my Facebook page for blog updates and extra stuff.

Follow me on Twitter.

Monday, April 20, 2015

Mid Power: Building the Quest Big Dog (Part 8) - Fins, Fillets, and Fillers

Click here for Part 1

Once I get to the part of building a rocket where I attach the fins, I feel like things are really taking shape. The rocket starts to actually look like a rocket. Most of the hard stuff is over, and I can relax a little.

That's not to say that I can take less care - you have to be precise when you attach your fins, or things will go on crooked, and the rocket will never be all it can be.

As usual, I used the Guillotine Fin Jig.

Sometimes, I'll post a picture on The Rocketry Forum or the NAR Facebook group, and people will ask me about the jig - "Is it worth the price?"

I would say yes. I've found it so helpful - I don't fret about attaching fins the way I did when I first started. And I use it for more than that. You can use the Guillotine to hold the rocket while you work on it - which I did when I drilled the holes for launch rail buttons. I take the guide arms off so I don't catch them on something - a fin, or a sleeve, or whatever - and it's like having an extra set of hands.

You set the fin jig by using two fins, or two pieces of the same thickness material as the fins you're using. You can then remove them from the jig, and attach the fins to the rocket. Here's a fun video creator Ted Macklin sent me demonstrating the Guillotine prototype. You can see how easy it is:


I prefer to leave the front piece in place while I work, and even stick a second piece in the middle, just to make sure I haven't accidentally moved anything - by, say, squeezing the arms together.


Sometimes, I'll find I have everything aligned properly, and I find I have a mysterious tight spot. The fins fit between the arms everywhere except where I want to put them, and I can't slide the fin in place. What has happened is that I have accidentally gotten some glue on the aluminum guide arms when I built the last rocket.


If this happens, there's an easy way to fix this. I take some steel wool or some very fine sandpaper - nothing coarser than 400 grit - and gently rub off the glue. Aluminum is soft, so you don't want to use anything too harsh on the guide arms, or you'll take off material. But once you have any leftover glue removed, you should have no problem fitting the fins in place.

It would be nice if the Big Dog had through-the-wall or TTW fin construction - where the fins have tabs that go through a slot in the airframe and attach directly to the motor mount tube. On higher power rockets, this makes the fin connection much stronger. The Big Dog can take large E, F and G motors. You could even put a small H motor in there - which would be a high power motor, and you'd need a certification to do that. But I imagine that would be a bad idea - the Big Dog fins simply get glued to the outside of the airframe, like many smaller, low power rockets.

Because of this, I want to make sure the fins are on really securely. I don't want them to rip off during flight - an event called a shred or shredding. But I also want to make sure they're tight and sound when the rocket lands. These are some big fins!

I'll start by using wood glue, as I usually do with all my smaller models. And the best practice is to use a double glue joint. Put the glue on the fin root, attach the fin to the rocket, then remove the fin again and allow the glue to dry.

Double glue joint - the fin is in the foreground.
Then, you'll run glue along the root of the fin again, and this time, when you attach the fin to the rocket, it will lock in place, creating a much stronger bond.


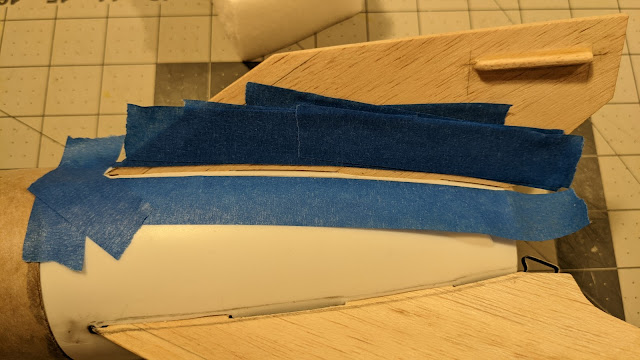
I used to attach one fin, move to the next, then the next, and the next, attaching fins around the rocket. And sometimes I'd find they'd be out of line with one another. Your pencil line will be thinner than the fin itself, so it's easy to get things slightly misaligned when you do it that way. Now, I do one fin, then turn the rocket 180 degrees, and do the opposite fin. That way, I can check the alignment as I go, and if my fin lines are marked correctly, everything will be correctly aligned.

Unfortunately, the shadows in this picture and the fact that my camera fisheyes a little bit close up distort the image and make this look a little crooked - but I double and triple checked the alignment of these fins.


Once I got all the fins on and the glue had set overnight, it was time to do the fin fillets.

I've noticed lately that on all of my previous rockets, you can't see the fillets. I know they're there, because I put them there. But I used wood glue, and I made them small. Wood glue shrinks as it dries, so unless you look very closely at the rocket, you wouldn't see them at all. They do add strength, but there's more to fillets than simply reinforcing the bond between the fins and the airframe.

Fillets also make the rocket look better. Nice, smooth round fillets are a source of pride to a rocketeer. And a good, smooth transition from the fin to the airframe can reduce aerodynamic drag, by reducing turbulence at the joint.

But fillets can go too far.

As was recently pointed out to me by an aerospace engineer (online - we don't have a lot of aerospace engineers where I live), there's a tradeoff. Because in The Handbook of Model Rocketry it is asserted that good fillets = less drag, a lot of people go kind of overboard on the fillet radius, making fillets that are far larger than necessary. They look cool, but all that extra surface area creates more friction drag, which can negate the reduction of turbulent drag you're after. Basically, this guy says you should use a fillet with a radius no larger than necessary to strengthen the joint between the fin and the airframe.

But for my purposes, and for a lot of rocketeers, I think a good idea is to choose a radius that looks right, and is proportional to the size of the rocket itself. Unless you're into competition rocketry, and have access to a wind tunnel, a nice smooth fillet that's not too large or too small will improve the look and performance of the rocket enough to be satisfactory.

A convention among some rocketeers is to go with a fillet radius that's as close as possible to 4% of the root chord of the fin - that's the length from the front to the back of the fin where it meets the rocket. I think it makes a little more sense to base the fillet radius that has to do with the diameter of the body tube. As it happens, I lucked out and got a good balance of both.

You can create decent fillets with just your finger, and a lot of people do (though you definitely need to wear skin protection if you're working with epoxy). But to create an even, smooth fillet with a consistent radius, you might use a simple tool. I looked in my tool box and found some 5/16 inch dowel rods. Half of that thickness will be the fillet radius, and it looked pretty good for this rocket.

Here you see a 5/16 inch dowel and a soft lead pencil.
In order to get a straight, clean fillet, I needed to tape off the areas where I did not want epoxy to go. To do that, I needed to mark the rocket where the edges of the fillets would go. For that, I used a soft lead pencil. Run the lead of the pencil around one edge of the dowel rod...

It was hard to do this and take a picture at the same time, but you get the idea.
Then run the leaded dowel along the fins and body tube...


This will leave a line on the fin and the airframe, showing you where the edges of your tape should go.

I taped off the fins and the airframe, plus the forward edge of the fins down to a point, and also masked the airframe in front of the fins. All this is to catch excess epoxy. Then I ran some tape around the motor retainer to protect it from drips.


Epoxy is great for fin fillets for larger rockets. Longer cure-time epoxies are better, because they're stronger. They're also self-leveling, which means that the epoxy will smooth out as it sits, before it cures. This is a good thing, but it does mean that you can lose a little of the roundness of your fin fillets. Epoxy can also be hard to sand, which you might need to do if you want to touch up your fillets.

Because of this, some people add fillers to epoxy. Fillers thicken the epoxy and give it different properties. In rocketry, one property people want is sandability. Microballoons are good fillers if you want to make your fillets weigh less and if you want to be able to sand them later.

Microballoons from TopFlite
These spheres are microscopic, and are so tiny they look like a fine powder. A full bottle feels like it has nothing in it. They are so fine, you need to wear some protection when you work with them. I wore a dust mask, some gloves and some safety glasses. When I first took the cap off the bottle, some of the microballoons drifted upward, like smoke - that's how fine these things are.

I used some more 30-minute Bob Smith Industries hobby shop epoxy.


Fillers make epoxy start to stiffen up faster than they would otherwise, giving you less time to work. Because of that, you want to have everything in place before you start. Some things in rocketry are like cooking - you're much less likely to mess up and search for things in a panic if you apply the concept of mise en place - everything in place.

Safety glasses, gloves, dust mask, tiny cup for mixing epoxy, tiny cup of rubbing alcohol, epoxy and filler, dowel rod, two craft sticks for mixing epoxy and applying it to the rocket. Also on hand but not in the picture: paper towels, folded and ready to go, and a squeeze bottle of rubbing alcohol.
Also, because I had to work fast, there are no pictures of the fillet-making process. But here's how it goes down.

Mix the epoxy according to directions. Then add in the microballoons and stir until you have a good consistency. With a craft stick, apply epoxy to the area between the fin and the airframe. Use the dowel rod to shape the fillet by running the end of it all along the joint between the fin and the airframe. On the first pass, you'll take off a lot of excess epoxy. You can clean up wet epoxy with rubbing alcohol, so you'll take a paper towel soaked in alcohol and wipe the excess off the dowel. Then you'll go back and do a second pass over the fillet with the dowel, and wipe off excess.

Basically, you want to wipe off the excess until you stop seeing the epoxy which gathers on the tape trying to creep down into the joint. Then, you can make the fillet smoother by dipping the dowel rod in the little cup of alcohol, shaking off the excess, and running the dowel over the fillet a couple of times.

Once you're satisfied with your fillet, carefully peel off all the tape, making sure not to get any excess epoxy on anything. Finally, check your rocket - if you got any drips of epoxy anywhere - on a fin, on the airframe, or especially on the motor retainer, grab a paper towel, soak it in alcohol, and wipe off the stray epoxy. Make sure to check the fins on the opposite side of the rocket to make sure epoxy didn't drip down and fall on them - once the epoxy hardens, you're going to have a heck of a time getting it off there with some rigorous sanding.

When you're done, you'll have smooth, well-rounded fillets.


I let the epoxy cure for a few hours before moving on to the next batch. You want to make sure that the fillets are cured and firm, and that the epoxy isn't sticky. Overnight is best, but a few hours should do just fine.

Now, because this was my first time using microballoons, I wanted to make sure I was using the right amount, and I was curious how strong the fillets would be with fillers. I had a scrap of body tube to which I'd glued a couple scrap fins. I had papered these fins when I was experimenting with that process. These ones turned out pretty well, and I'd wanted to see what they'd look like when they were primed - to see what a finished product with papered fins might look like.

So, I took some of each batch of epoxy from my fillets and slathered a rough fillet on the scrap fins. I did this with each batch. As you can see from the fillet on the left, the first batch was sandable, but not terribly easily. I'd have to sand more than I wanted to. More sanding means more chance to scuff up an airframe or fin. The fillets on the right were much closer to ideal - sandable, but strong.


Once the fillets were cured, I tried to snap off the fins, to see how strong the epoxy and filler was. I twisted and bent, completely distorting the body tube, but the fins would not break off! This gave me confidence - the fins on the Big Dog weren't likely to snap off on landing, at least, not at the root.

So, the first set of fillets wouldn't be that sandable, but because I'd taken extra care to shape them and smooth them with alcohol, it wouldn't be a huge deal. The main thing would be to lightly sand off the ridges between the fillet and the airframe and fin. You don't want to see a sharp edge - a nice, smooth transition is what you want. If you do it with care, there won't be much to sand.

It was tricky to see how much filler to use. The Top Flite instructions advise 3:1 epoxy to filler. But that's hard to eyeball, especially if you're trying not to get your face too close. Even with eye protection, there's no guarantee a current of air wouldn't waft some microballoons up and around my safety glasses, and call me crazy, but I don't want microscopic bits of glass in my eye.

Consistency and color are what I went by. For some fillers, you want to get the consistency of peanut butter. I felt that would have been a bit too far for this epoxy, as the thicker it got, the less time I had to work - down to minutes. So I got a consistency that was nicely thickened, such that when I lifted some epoxy out of the cup, I got a slow ooze in a single strand from the mixing stick.

As for color, the first batch had the appearance of watery skim milk - a little too translucent. The mixture I finally settled on had more the appearance of 2% milk.

Here are some pictures of the first and second batch of fillets for comparison.

Rather translucent - strong, but not very sandable

Much closer to an ideal epoxy to filler ratio
It's hard to photograph semi-translucent fillets and get a good idea of what they look like, so here's a preview of the nearly-finished rocket. You can see how nicely rounded the fillets are.


We're nearing the home stretch of the Big Dog build. Next, we'll turn our attention to the nose cone. After that, all that's left is to prime, paint, add decals, and attach the rail buttons (which you can see above).

Click here for Part 9

Like my Facebook page for blog updates.

Tuesday, October 14, 2014

Building the Big Bertha - Part 6 (For N00bs)

[Click here for Part 1]

We're getting closer to finishing our Skill Level 1 rocket!

Once the fins are on, attach the launch lug. That's the short tube that looks like a piece of drinking straw.


First, I like to scuff it up a bit, so the glue holds better. I do this on one side with rougher grit sandpaper. Then I do a double glue joint, putting a bit of glue onto the roughened surface of the launch lug and attaching it to the rocket for just a moment, as perfectly straight as I can along the launch lug line we've already marked. I remove it, and allow the glue to dry a little, then apply more glue and attach it to the rocket.


Scuff one side of the launch lug
    
Apply a thin layer of glue the entire length of the launch lug

Place it on the rocket where you have marked the launch
lug line, getting some of the glue on the rocket

Allow the glue to dry for several minutes. These reverse-
action tweezers aren't necessary, but they are a nice little tool!

Add a bit more glue and attach the launch
lug to the rocket - make sure it's straight!

You must make sure it is straight - the launch lug will slide down over a metal rod called the launch rod (when we actually take the rocket out and launch it). The rod keeps the rocket flying straight for the three feet or so it takes to gain enough speed for the fins to keep it stable in flight. If the launch lug is askew at all, the rocket can grab hold of the rod, and either not take off, or fly in a weird direction, or even try to take the rod with it! Site down the length of the body tube to make sure the launch lug is straight and true. You can even (carefully) slide a launch rod into the lug and verify that it follows the line you marked on the tube - then you'll know it's straight. Just (carefully) remove the rod so it doesn't weigh down on the glue and push the lug out of alignment as it dries.

Site down the length of the rocket to verify the launch lug alignment. Be sure to adjust it
while the glue is still pliable if it's crooked. Work fast - a double glue joint sets quickly!

Let the glue on the launch lug dry before moving on.

The fins are on, so let's reinforce the joints. We're going to make fillets. A fillet is a rounded joint in a corner, often found when two pieces are welded together at a right angle. In model rocketry, this makes the joint where the fin connects to the rocket stronger, and it also reduces interference drag, making the rocket more aerodynamic.


For our rocket, we'll use more wood glue.

The simplest way to do this is to apply a bead of glue at the base of the fin at the leading edge, then take your finger and run it along the base of the fin, dragging the glue with it. You should get smooth, even line of glue connecting the fin to the body all the way down the root of the fin.

Instead of your finger, you could also use a craft stick (popsicle stick) or coffee stir stick, or even a narrow dowel rod.

I always get extra glue on the fins if I do it the simple way, which either I can't sand off, or don't have the patience to. So I mask off my fins with a little low-tack masking tape. I've been told by some real rocket craftsmen that this isn't necessary with glue fillets, but I find it makes mine a lot neater, so I always do it.

I start by masking two fillets - two joints between the fins and the body - at a time. You'll do two fillets in one go on each side of the rocket, and by side, here I mean the space between the fins. So, if you have a four-fin rocket, like the Big Bertha, you'll have four sides. Three fins, three sides. Etc. Each side will have two fillets each, one for each fin.

Here, let me just show you...


This is what I'm talking about. I've got a tiny bit of tape on the body tube at the leading edge of the fin, then one piece of tape running the length of each fin, and tape on the tube itself, with a little gap between the tape lines where the glue fillet will go. If you're building a rocket where the fins are not flush with the base of the body tube, I'd put a piece of tape there as well.

You'll want to lay the rocket on its side with the joints you're working on facing upwards, so you can work on the fillets, and so they'll dry evenly. Here's one of the many little things I love about rocketry - coming up with a creative solution to problems. There are big problems and little problems in building rockets, and they all require creative solutions.

Here's a few ways you can do this.

You could lay the rocket on its side, with the tube supported by a thick book.


Could be just fine. But you might not want to put any lateral stress on those fins before you reinforce the glue joint. And if you're building a three-finned rocket, this won't work.

The joints aren't facing upwards!
 You could lay a dowel rod on a table, place something heavy on it, and slide the rocket body over it.


You could place the rocket down on a table (or in this picture, a thick book) with the fins hanging over it, and lay a heavy blanket over the body of the rocket. This will hold the rocket down, but won't squash the body.


In my case, the problem is solved by the Guillotine Fin Jig. The long metal arms are for holding the fins when you attach them to the rocket. But once you're done, you can slide the rocket through the jig the other way to hold it gently but firmly in the horizontal position for working on it.


Whatever solution you come up with for this little problem, just make sure the rocket is secure, that it won't fall or get crushed, and that it can remain undisturbed in a horizontal position while you work and while the glue dries.

OK, enough of that digression - back to fillets!


Drop a healthy bit of glue in the gap between the tape lines. If you're building a small rocket, a bead may be enough. The Big Bertha is pretty big, and I find if I don't put enough glue, I can't get the fillet to run the whole length of the fins, so I put a bigger blob. Don't put too much, though. You are going to pull most of it off, and the more glue you use, the more of a chance you'll get a mess.


First, notice that I don't put the bead right at the fore of the fin.  With a craft stick or coffee stir stick (depends on the size of the rocket, and therefore, the radius of the fillet I'm making - bigger rocket, fatter stick), I push a little of the glue forward to the leading edge, then run the glue back down the length of the fin, smoothing it as I go. Do this quickly, so it spreads evenly, and if there are any bubbles when you're done, smooth them over with the stick.


Once the fillet is smooth and covers the entire seam between the fin and body tube, remove the tape. Don't wait long to do this - fresh glue will smooth out and make a nice smooth seam, but once the glue has started to set, it will leave a sharp ridge.

Remove all the tape, from the fins and also the little bits from the body tube.


When you remove the tape, you should have smooth, even fillets.


Let these set and dry a bit before moving on. I can't tell you how long - 20-30 minutes, maybe? I dunno. Go have a snack or something. When the glue looks dryish on the surface and the color has changed from off white to more yellowish, you're fine to move on. Turn the rocket to the next side and do those fillets. Repeat until you're all done.

Oh, and don't forget to put a fillet on each side of the launch lug! The launch lug takes some stress from the launch rod, so you want it to be secure!


We're nearly done building our first Skill Level 1 rocket! Next up, we'll prime and paint this sucker, then we're almost ready to fly!

Click here for Part 7