I needed to stock up on some rocket parts for an upcoming project, and I wasn't sure where to get them. I looked around at various sites, and found pretty much everything I needed, but not necessarily all from the same vendor.
Then, I thought about checking a website I've used once or twice before, and which was great, but which I nonetheless never really thought of mentioning here on the blog.
I went to
Aerospace Specialty Products - ASP, for short.
Like a lot of online vendors, ASP sells model rocket kits, parts, building supplies and materials, and recovery devices. But their specialty is scale model rocketry and competition rocketry supplies.
While ASP does sell some of Estes' scale model kits, they have their own line, many of which come in low power and mid power versions.
A good example of this is the D Region Tomahawk, a popular rocket for scale modelers, as it's both striking to look at and relatively simple.
This is a kit that comes in two versions -
a small one one for 13mm mini motors, such as the Estes A3-4T, and one for much larger, 29mm mid and even high power motors.
 |
| The mini version of the D Region Tomahawk, just over 11 1/2 inches tall. |
A couple of nice features about ASP scale kits is that they are accurate in their proportions, but not heavy on detail. That means that a WAC Corporal or D Region Tomahawk will be
shaped like the real thing, but a less experienced modeler won't have to worry about difficult to apply plastic wraps or features. More experienced modelers can add any details they want to - they'll just have to figure out how to do it, something experienced scale modelers enjoy anyway.
ASP sells a few styles of parachutes in nylon and metalized Mylar.
The nylon chutes come in standard rip-stop and "thin mil" varieties, which pack up a lot smaller for fitting into smaller rockets. They're quite colorful.
Mylar "sport chutes" are a bit harder to fold, but they have a couple of advantages. They're very lightweight, and they're so shiny they can help you find a rocket which has gone so high it's out of sight by the time it reaches apogee. The chute will glint in the sun, helping you get your eyes back on the rocket for a successful recovery.
 |
| Metalized Mylar "sport chutes" come in silver, red, and purple. |
Sport chutes come with everything you need to attach them to a rocket, including a snap swivel, but they do require assembly.
Apart from that, ASP also sells a wide variety of parts, which is what I recently purchased. I needed a lot of stuff to build a small fleet of Flechette rockets for an upcoming project on the blog.
I was also low on centering rings, couplers, and other general rocket building parts. They've got a ton of great stuff, mostly for low and mid power model rocketry, but a few items you might use for high power, such as 38mm motor tubes, plywood centering rings, and even some large cluster centering rings, also made of plywood.
I also have another small payloader project I designed a while ago, and want to get started on, Cassiopeia, for which I needed a balsa transition and some sturdy centering rings.
I placed a large order, and was surprised by how affordable it was. A lot of items on ASP get cheaper if you buy a lot of them.
When you shop around online, you want to consider a number of things. Price is the obvious one, but also shipping. Some vendors will offer free shipping if you order a certain amount of stuff. Others have a flat rate, period. And some calculate the shipping based on the amount of your order, so shipping for a lot of stuff is more expensive.
ASP shipping costs a little more the more you buy, but this is offset by a couple of things - the lower price for buying in bulk I mentioned above, and the fact that the shipping is insured. If you buy things through a site like Amazon.com, whatever you order is guaranteed, meaning even if the post office crushes your package, or delivers it to the wrong address, or if the package gets stolen from your doorstep before you get home, you can get another one or get a refund. Small rocket vendors can't afford to make that guarantee, but the slightly higher cost of shipping means that you some insurance against loss should something happen in transit.
When the box came - only two days after I placed the order - I thought there was a mistake. I had ordered 165 items, but the box was very small.
But I opened it up and realized that everything had been packed with amazing efficiency and care.
 |
| I realized after I started unpacking I should have taken a photo, but I couldn't repack this as well as they did. |
When you order stuff from a rocketry vendor, the first thing you want to do is unpack everything and verify that everything is there, and that there is no damage. If you do find that something is missing or damaged,
don't freak out. Just send an email to the customer service department. You probably got an email confirmation from them about your order, and can reply directly to that email, especially if it's a small vendor like ASP, or JonRocket, or another.
Larger companies, like Estes, have a contact page on their website, and you can contact them through that.
Most model rocket suppliers are small, mom-and-pop operations, and often, the "customer service department" who contacted you is the owner of the company. The rocketry community is a small one, and apart from a few exceptions, you will get excellent service from them. If they make a mistake, just let them know, and they'll often bend over backwards to make it up to you. They will usually ship you a new item, or offer you a refund, or sometimes offer you a credit toward your next purchase, depending on the situation. Once, when I placed a large, many-item order with
JonRocket, one or two tubes were missing. It wasn't worth it to me at the time to have them rush ship me a couple of tubes, so they gave me a merchandise credit worth several times the value of the missing items to use on my next purchase.
Here's what I got, neatly packed in layers, from ASP.
Simple payloads for BT-20 rockets.
I ordered four of these for my Flechette project. I need as many as 10 payloads. Some of them I'll make from tubes I already have, but I wanted to take a close look at these and see if I liked them. They include a 2.75 inch red paper tube, a balsa
nose block, which is a solid piece acting as a bulkhead between the payload and the inside of the body tube of the rocket, plus a screw eye and snap swivel for attachment of the shock chord and parachute or streamer.
Six more balsa nose blocks or bulkheads.
The original idea was just to purchase these, and use leftover motor tubes from some Estes kits as payload sections. The motor tubes are exactly the same size and diameter as the red tubes in the simple payload kits from ASP, so these should be indistinguishable on the finished rockets.
A BT-55/BT-60 balsa transition.
This is for joining the 1.325 inch diameter airframe of Cassiopeia to the 1.637 inch diameter payload tube (see above design). This is a finely turned piece of balsa, and one of the things that strikes me is the difference between the diameters of the shoulders (the parts that go into the rocket tubes) and the diameters of the two ends of the transition itself. A lot of balsa parts I've used - nose cones and transitions alike - have a much bigger step from the outer diameter of the piece and the diameter of the shoulder. That means that the nose cone or transition is a little too wide for the body tube, so that they don't quite join up. There's a bit of a step from the nose cone or transition onto the body tube, rather than a smooth line. Ideally, for less drag, you want them to match. This transition looks like it should be pretty close, so I won't have much extra sanding to do.
It's lightweight and delicate, and I just love looking at a piece like this one. It always makes me a bit nervous handling a raw piece of turned balsa like this, because it feels so fragile. It feels like it would be so easy to accidentally gouge into it or squeeze it out of shape.
48 1/8 inch launch lugs, 1.25 inches long.
Here, I thought they had made a mistake, but I counted them, and they're all there. I really only need 10 of these for now, for the Flechette project, but they were so cheap when buying in bulk, I decided to get a ton. Now I'm not likely to run out any time soon.
A bunch of centering rings.
40 in total! Some of these will be the thrust rings or engine blocks inside Flechete, most will get used in other projects. I really like the plywood centering rings for BT-50/BT-60. I hadn't seen those before - they're pretty lightweight, but sturdier than fiberboard or card stock rings. Those will get used in something needing a bit more strength - maybe a rebuild of Ceres B.
 |
| Ceres B, my hidden camera payload rocket. A sturdy workhorse. |
Quick links.
These are for attaching parachutes to mid and high power rockets. You can get them in any hardware store, but most hardware stores in Boston are expensive places with small selection, so I got a few of these through ASP.
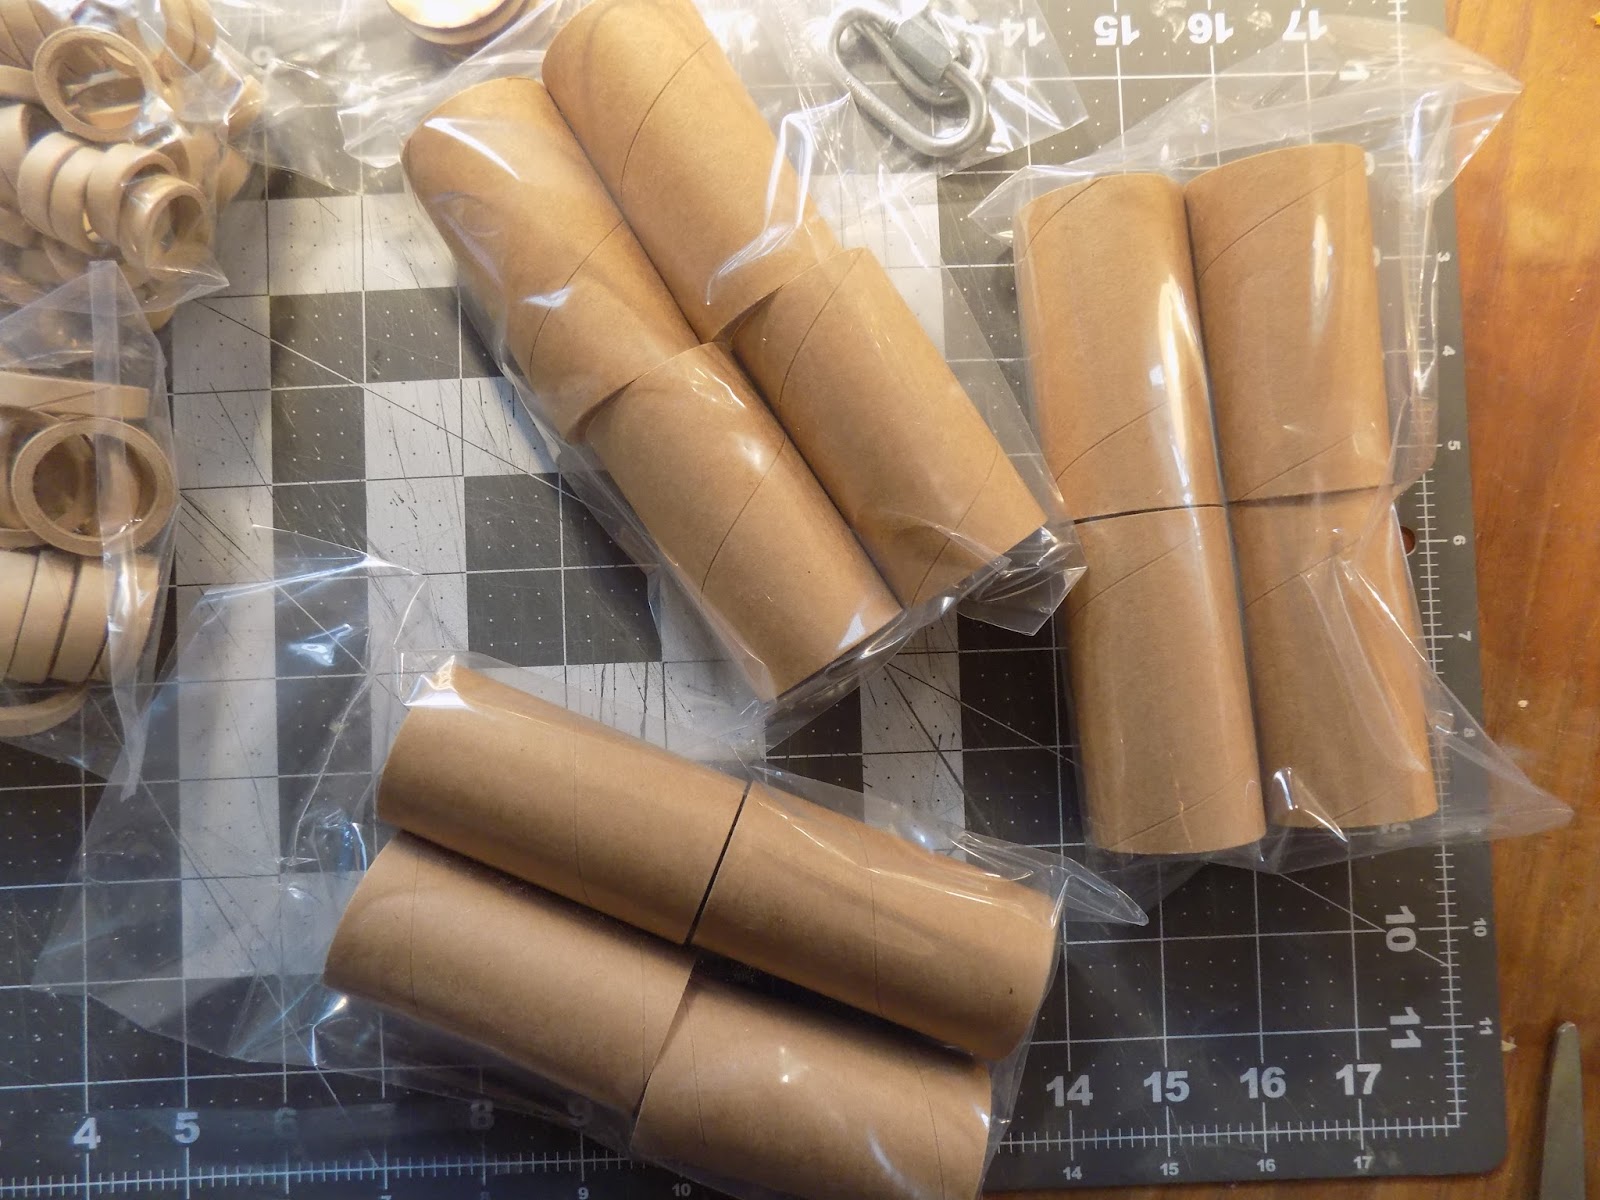
Couplers galore!
I got multiple tube couplers for all the Estes-standard tube sizes I use most frequently. Couplers are useful for a lot of things - making longer rockets by joining two or more tubes together, making booster sections for turning single-stage rockets into multi-stage rockets (the coupler gets glued into the booster and is how you join the booster to the rocket), strengthening tubes for cutting or drilling into them (slip a coupler inside where you want to cut or drill, and the tube is less likely to get crushed), even masking off parts for painting (couple a scrap of tube to the rocket you're building, and you can keep all paint out of the motor mount area - very important if you want to attach a booster later!).
I was low on couplers, and they were really cheap. Also, they packed them very well, stacking couplers inside couplers - this is why the box was so small!
165 small items, fast shipping, perfect packing, and not a single counting error - pretty darned good!
ASP will definitely be on my short list of go-to suppliers.
Aerospace Specialty Products - website www.asp-rocketry.com
Follow me on Twitter.
Like my Facebook page for blog updates and extra stuff.
Have a question you'd like to see addressed on this blog? Email me at iamtherocketn00b@gmail.com.