Recently I realized that I haven't built a new rocket start to finish in well over a year, partly due to this funk I've been in. It's been a hard couple of years. I put the finishing touches on my Estes Mercury Redstone, yes, and slapped together a quick model from spare parts of other rockets, but I haven't started and finished a new model in way too long.
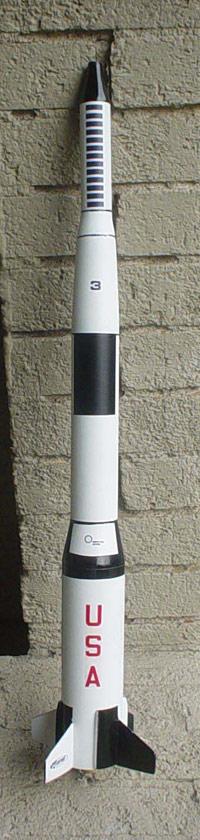
It's time to remedy that. I grabbed the Estes Super Big Bertha off the build pile and started it during my week's vacation from work.
I like the built up fins. I've done multi-ply fins on some scratch builds I've made, and they can make for very strong fins. I don't plan on beefing up anything with plywood on this one. I want to keep it light and be able to fly it on F15 black powder motors. I bet I could even get away with a D12 in this and keep the altitude really low on small fields if I watch the weight. If I want to use something thrustier, maybe I'll make a second one with plywood centering rings.
Surprisingly, this will also be my first BT-80 rocket! I have built other 2.6 inch rockets before, but they all used heavier tubing.
The fins on the Super Big Bertha are really great. 1/8 inch balsa cores and 1/16 inch balsa skins make fins which are about 1/4 inch thick when assembled. Take your time - this part can be tricky.
Instructions suggest CA (cyanoacrylate glue - Super Glue, basically) for this step. I use CA sometimes, but avoid it when I can. And in this case, I think laminating them with wood glue might make for a stronger fin. Not that it's critical - they're not likely to brake. But the wood glue, if properly applied, should soak in and make the fins one solid piece.
I spread the glue on the spars of the core, evenly and thin, then press the skins on. After holding them tight for a minute or so, I press them between waxed paper and heavy, flat books. Only one skin at a time - you want to make sure they don't slide around when you're placing them under the press! After 20-30 minutes of dry time, I flip them over and do the other skin. Then I leave them under the books for AT LEAST a day for them to dry thoroughly. Any residual moisture can still cause the fins to warp after you take them out from under the heavy weight.
The edges may not all line up perfectly when you do this - ideally, the outer skin will be slightly larger. You'll then sand everything even. Just make sure the root edges are even - that would be the hard part to fix.
Don't throw out the sheets the fins are cut from - lots of good scrap balsa there for other projects!
I really like these fins - they're solid!
I post a lot of things on Instagram these days. Follow me here.
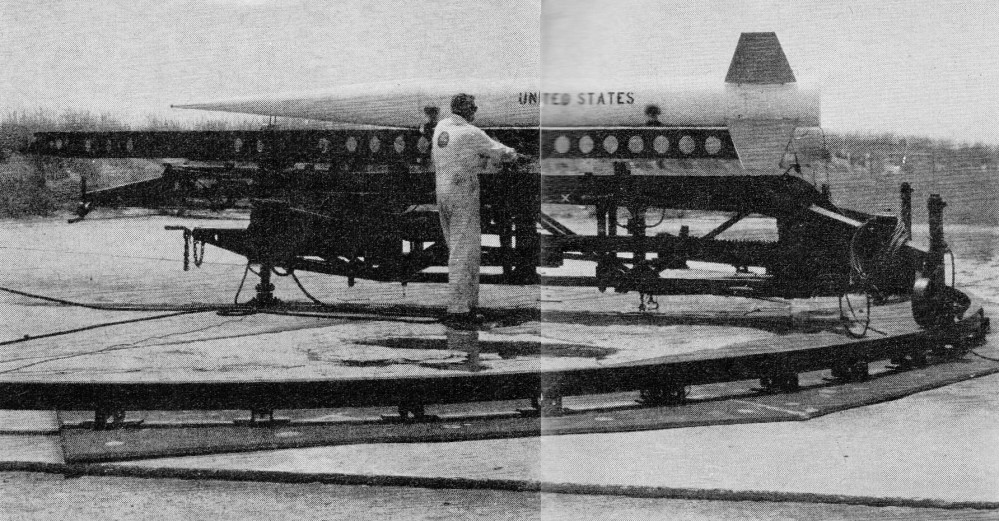
The Nike Smoke rocket was a NASA sounding rocket used during the 1960's.
A Nike Smoke being prepared for launch, 1968
A sounding rocket is one which carries instruments to conduct experiments and take measurements while in suborbital flight. It may be used for meteorological research, radiation levels in the upper atmosphere, microgravity (yes, I'm roughly paraphrasing Wikipedia here), or any number of other experimental applications.
The Nike Smoke rocket, in particular, was used to measure wind shear - the difference in speed and direction of the wind at different altitudes. This was important to space flight, as NASA rockets had to make it safely through the atmosphere on their way to space. It did this using tracking film footage which triangulated the changes of a smoke trail left by a special payload in the nose cone of the rocket. Using trigonometric functions, the cameras could tell the exact position, and direction and speed of movement of different parts of the smoke trail. (Using the same mathematics, model rocketeers can accurately track the altitude of a rocket in flight using two theodolites, as described in this Apogee Components newsletter.)
Here's a short NASA film on the subject, featuring the Nike Smoke rocket.
Because of its historical importance, as well as its iconic look but relatively simple design, it has become a favorite scale model for hobby rocketeers, and there have been several kits on the market throughout the years, as well as many scratch built versions.
High power rocketeer Neil Brown with his Nike Smoke Extreme, a "stretch" version
of the rocket, built for LDRS34 - a high power rocketry event held this July in Potter, NY.
Find his website at high-powered-rocketry.com
The Nike Smoke, like many sounding rockets, also used a solid propellant, as opposed to the liquid fuel propellants used in space vehicles, like the Saturn V rocket. Since we use only solid propellant (or sometimes hybrid fuels - but that's a more advanced topic for another time), that means that a flying replica of a Nike Smoke rocket is, in at least some ways, not too different from the real thing.
The Estes Pro Series II Nike Smoke is a great kit.
With a diameter of three inches, the rocket stands about three feet tall. The distinctive, long conical nose cone is nearly the length of the airframe itself, making this the largest nose cone that I have yet in my collection.
The rocket is pretty simple to build. But, as with Ventris, I still have some decisions to make.
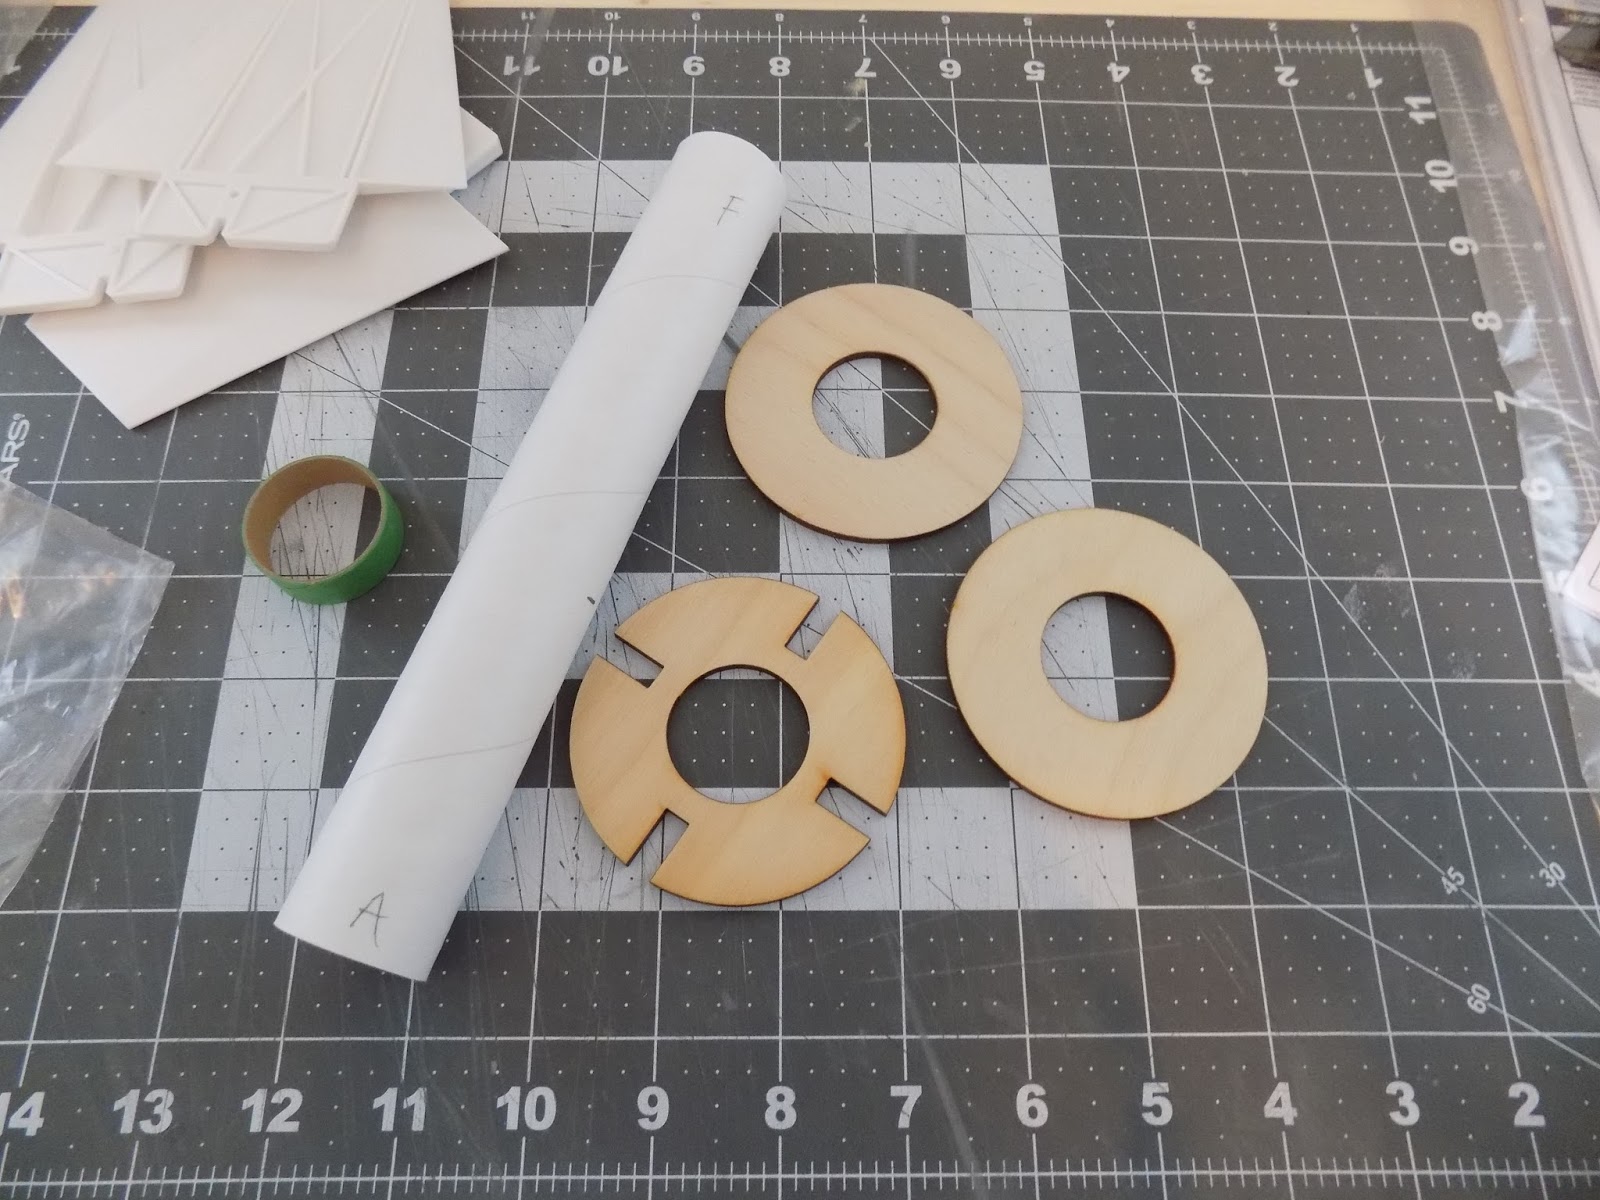
As with all Estes PSII "builder" kits, and many mid and high power rockets, the motor mount uses sturdy plywood centering rings, as opposed to the paper or cardboard rings you find with smaller model rockets. (A builder kit is one that requires a certain level of construction. Estes has several PSII rockets which are considered E2X - Easy to Assemble [or "eXecute"]. A builder kit takes more time and effort to construct. It's more of a challenge.)
In this case, the middle centering ring is special.
Parts for the Nike Smoke motor mount. The ring with the notches goes in the center.
As with all of the PSII builder kits and many other mid and high power rockets, the Estes Nike Smoke has through-the-wall fin construction, meaning the fins extend via a tab through a slot in the airframe, and attach to the motor mount. This makes the attachment much stronger than merely gluing fins on the outside, as one does with a smaller model rocket.
The ring in the center has notches. As you'll see below, this helps you get the fins perfectly aligned. The Nike Smoke shares this design element with the Pro Series II upscale version of the classic Skill Level 1 kit Der Red Max - Der Mega Red Max.
Speaking of the fins, on this kit, they're made of plastic, and come in two parts.
Two-part fins
They have a radial taper, meaning they get thinner by the same proportions they get narrower, and they are beveled at the edges. This makes them look cool and helps them slip through the atmosphere more easily.
Because they're in two parts, they must be glued together.
One fin dry fit together
Which leads me to the first decision I have to make: what to use to adhere the two parts together.
The kit instructions say to use CA - cyanoacrylate, or super glue. But they don't specify what viscosity of CA to use. The thin stuff is way too thin. So, do I use medium or thick CA - or something else? Epoxy is a possibility. CA might be too brittle. I might choose to go with epoxy, which is much stronger over time. Also, when dry fitting the fins together, you find that the edges don't come quite together. There's a bit of a gap, unless you squeeze. When you stop squeezing, the gap comes back.
So the adhesive is important. I need to choose something which will hold the fins together, won't break down, and will keep the edges from coming apart. That might prove tricky. CA will bond immediately, but might be brittle, and also might superglue my fingers to the fins. Epoxy might be stronger, but won't bond immediately, so I'll have to keep the fins squeezed together until the epoxy cures - or, at least, partly cures. And the epoxy could make a mess I won't be able to clean off if both my hands are occupied by squeezing the fins together. Like Indiana Jones in The Last Crusade, I must choose - but I must choose wisely.
I'm writing this in the present tense - "I need to choose..." etc., but in fact, I've already done this part. You'll see what I opted for.
The notched centering ring is great for getting the fins on perfectly straight. Once you get the motor mount into the rocket, the notches in the ring correspond to the notches you can see at the base of the fins.
Spoiler alert! You can see here I've already started assembling the motor mount.
The fin locks into place - perfectly aligned.
Another choice - this time an easy one - is what to use to attach the fins to the motor mount.
The kit again suggests CA, but I don't like this idea. CA can get brittle over time, and it's just not a good adhesive when you need a strong bond that might take some stress. I'll use epoxy for this.
Also, the kit suggests using wood glue for the fin fillets - which seems bizarre to me. Wood glue makes fine fillets on a small model rocket, but it shrinks, and isn't great if you want a nice, rounded fillet. Also, I feel pretty sure that wood glue would have a hard time bonding too well to the plastic. I'll use epoxy here as well.
Finally, I have to choose how I'm going to launch the rocket. As with Ventris, the Nike Smoke comes with two launch lugs.
Notice how these lugs are not simply cardboard tubes. The actual lug is raised slightly. That's because the lip of the nose cone is slightly wider than the airframe.
As with Ventris, replacing the lugs with rail buttons is something to consider, but if I do that, I'll need to make a short standoff for them.
Whether I go with launch lugs or rail buttons - and which size rail buttons - again depends on what kind of launch equipment will be available at my local club, and/or whether I can bring my own launch pad if necessary.
Luckily, I'll be able to attend a club meeting next week! CMASS - the Central Massachusetts Spacemodeling Society - has just begun holding biweekly meetings in Cambridge, just across the Charles River from my little home. Which means that, for the first time since I started this venture into rocketry, I'll be able to meet other actual human beings who are into this hobby! And I'll get the chance to ask some questions which will help me make these important build decisions.
The nice thing about these lugs, as you can see from the picture above, is that they're conformal. They are slightly curved on the bottom so that the entire underside of the lug can attach to the airframe of the rocket without leaving any gaps. Not only does this look better, but it assures a better bond, and reduces the chances of a lug pulling or snapping off at launch.
I'm excited to get this build underway!
Here's a flight of Neil Brown's above Nike Smoke Extreme before he repainted it in the traditional white, red and yellow colors:
When I first read about the existence of the new Estes Scion on Chris Michielssen's blog, he hypothesized that this might be an S.P.E.V. - a model rocketry term meaning Spare Parts Elimination Vehicle. The rocket has a 3-inch diameter tube, and the nose cone and fins look just like the Estes Leviathan's - though the Leviathan has four fins, and they are flipped around from what you see above so they are swept back.
Estes Leviathan
My Scion just arrived today, and there here are a few interesting things about it.
First of all, there's no card - no art work depicting the finished rocket, no Estes logo - nothing. Just a bag of parts.
Because of this, you can see inside. What you find are two 3-inch diameter tubes, of the same length as the upper section of the Leviathan. The Scion, like all of the larger Estes kits, has through-the-wall (or TTW) fins - meaning that the fins have tabs which go through slots in the body tube to anchor them more securely , but neither of the tubes are slotted to accept the fins. Some rocket kits from some companies require you to cut your own slots, but Estes doesn't really do this.
The dead giveaway, though, is the package of fins. The Scion design has three fins, but the kit contains four. Furthermore, the wood grain runs parallel to what would be the trailing edge of the fins on the Scion. Normally, you find the wood grain running parallel to the leading edge. This is the standard practice, and with balsa fins, it's important, because it's stronger. With these plywood fins, it probably won't matter. But it seems pretty obvious that, rather than being based on Leviathan fins, these are simply Leviathan parts repackaged.
This isn't necessarily a bad thing - a lot of rockets have similar appearances. Mixing and matching parts gives each rocket its character.
But...
I have read that Estes is getting out of the Pro Series II mid power rocket builder kit game. If this is true, it's a sad thing. I love the look of the Leviathan and the Ventris rocket, and if I happen to mess up the build, or to destroy my rockets in a crash, I like knowing that I can always get a replacement.
Estes Ventris
So, it looks like we have an SPEV on our hands.
Don't get me wrong - I love the look of the Scion, being a cool twist on the Leviathan design. But I feel a little odd about it, knowing it's basically a bag of Leviathan parts - especially if that means the Leviathan is going away.
Note: Estes used to have a rocket called the S.P.E.V., and this might be where the term comes from. It was not a kit you could buy; rather, they would send it to you if you ordered a certain amount. It's a rare rocket, and it's interesting-looking. I have no idea what kits the parts come from, but it looks a bit like a NASA mockup. I doubt they still send it out, but people do clone it from time to time.
I've written on this blog about Mike Westerfield's book Make: Rockets: Down-to-Earth Rocket Sciencebefore. It came out a few months ago, and it has been a great help to me. Without it, I doubt I would have had the courage to design and build my own first rocket.
The book starts you out building rockets from components right away - in other words, you get the components and follow instructions to build one of the author's designs, but you're not using a kit. So you cut tubes to size, cut out your own fins, etc. It helps you get away from the mindset that you need a kit to build a rocket. Doing that, with the knowledge I gained about rocket stability and standard sizes of component parts, gave me the freedom to design and build one of my own.
It doesn't stop there, of course. Since it comes from a maker movement publisher, the book gives a lot of details on how you can make all your own ground support equipment - launch controllers, launch pads - as well as tracking devices to find a rocket's altitude, and a lot of technical information about how to determine things like what size parachute you need, what kind of motor you'll want to put in your rocket... It's pretty great, and I found it very helpful - it filled in some of the "how-to" gaps I felt after reading The Handbook of Model Rocketryby G. Harry Stine and Bill Stine.
Required reading and a great book, but it left
me wanting to know more - specifically, how-to.
In the book, Westerfield mentions another, forthcoming book, Make: High Power Rockets, due out "some time in 2015." Having read and re-read Make: Rockets..., I really want to get my hands on this book, because I want to see his take on certain things.
On Friday, I emailed MakerMedia, the book's publisher, to ask if they had an expected publication date. MakerMedia also publishes Make magazine, a publication aimed at the DIY maker's movement with an emphasis on craft, electronics, at-home science and engineering, and they run Maker Faire.
I told them how much I liked the book, and attached a link to my video of Janus I - the two-stage rocket I designed and built myself, just for their interest.
What happened then was most unexpected. I heard back from several enthusiastic people at MakerMedia, including one person from the magazine who asked if they could post my video on their Facebook page. "Of course!" I said. What a cool birthday present!
High power rocketry is a large subject, so the news is that the book will probably be out some time early next year, 2016.
I hope it's sooner, but there's a lot of information to put into a high power book. Not only information - any book from MakerMedia is about making stuff, so there's surely a lot of things to design and try out before it ends up in the book.
The new book will cover both mid power and high power rocketry, as the first book only focused on models that used up to an E sized engine.
The first book gives some elegant designs for low power stuff, so I would like to see Westerfield's take on certain things for mid to high power:
1. Through-the-wall fins (also known as TTW)
This is where fins have a tab at the root, which gets inserted into a slot in the rocket body tube and attached to the motor mount.
The tab at the root of the fin (upper left)...
This goes through a slot in the body tube and is
glued directly to the motor mount tube.
This adds strength, as the fins aren't merely glued to the surface where they can easily snap off at landing.
TTW fins are mentioned in Make: Rockets, but the author says that these are less common to find in low power rockets. They're much more common - in fact, necessary - in mid and high power rockets.
While that's true, I do have a few kits with TTW fins - the Cosmic Explorer, pictured above, and the Crossfire ISX, both low power, Skill Level 1 kits.
Fins for the Crossfire ISX
I'm far less worried about these fins breaking off at landing.
In a kit, the fin slots are usually pre-cut, so you don't have to worry about getting them straight. When you build your own design, you have to cut your own tabs - something I haven't tried yet.
Here's a video from Tim Van Milligan at Apogee Components about slotting your own tubes for TTW fins:
If I had opted for TTW fins for my Janus I, I would probably not have snapped two of them off at home after the first flight.
Perhaps the Tim Van Milligan method is the one everyone uses. But what I like about Westerfield's first book is that he gives lots of explicit instructions and explanations, so I'm looking forward to seeing his take on this in the next book.
2. Launch rail construction
As I mentioned here, I think I want to build a launch rail for my larger rockets. There are a lot of designs out there on the web, but some of them can be hard to decipher for a n00b. What are these parts? How do I "shim" that thing in there? John Coker gives a great design for a launcher base, but I don't know where to get the parts, or how to cut them, or if I need to learn to weld... etc. I'm just not experienced enough at making some things.
In the previous book, Westerfield has a really elegant design for a low power launch pad. It's sturdy, and you can swivel it to any angle, and it uses a drill chuck to hold the rod, so you can put any size rod in it you want, up to a 1/4 inch or more.
I actually went for an easier option for mine - my camera tripod broke, so I can no longer raise the head. So I got the Odd'l Rockets Adeptor, which screws right onto the tripod camera shoe. I made a blast deflector from a steel box cover, and it works great.
The Adeptor from Chris Michielssen at oddlrockets.com...
...transforms a camera tripod into a launch pad. Just add a blast deflector.
My blast deflector is a steel electric box cover with a hole drilled in the middle. I can lay
the lead wires from the launch controller into the slots and hold them still with the
binder clips. This gives some slack to the wires so the initer doesn't pull out.
But Westerfield gives great instructions - and since this is a Maker publication, there is no assumption you know how to work with the parts you need. You get a complete parts list, and instructions on how to cut what where, etc. You can vary the design if you know what you're doing, but if you don't, all the instructions are in there, clearly spelled out.
So I'd like to see his rail launch pad design.
3. Launch relay system
For high power rockets, you need to be far away from the launch pad, for safety. Because of this, you might need very long wires from the launch controller out to the pad. But the longer the wires, the more resistance you have in the system, so by the time the wires reach the pad, there may not be enough current running through them to reliably fire the igniter.
A relay is basically a remote switch hooked up to a battery. The launch controller merely tells the switch to close, while the battery running power to the igniter itself is right there, near the pad. So the igniter gets all the current it needs - the igniter gets the power directly from the relay battery, not from the batteries in the launch controller.
But a relay isn't useful only for high power rockets. It's also useful for cluster rockets - where the rocket has multiple motors side by side.
The Quest Quadrunner - a four-motor cluster rocket
When you have current flowing through multiple igniters, the current through each igniter is less.
The current gets divided up among the igniters. Which means that it can
take a split second longer for each igniter to get hot enough to start
the motor. If, say, two out of three or four motors start before the
others get ignited, and the rocket leaves the pad, the igniters will
fall out the back of the unlit motor(s), and you'll get an uneven or
less powerful flight.
A view of the motor mount during construction. All four motors mustignite simultaneously, or the rocket won't fly right.
Reliable, simultaneous ignition is the main problem with a cluster launch, so having a relay with the battery right by the pad using only a short section of wire makes this less of a problem - each igniter gets as much juice as it can, simultaneously.
Now, just as with launch pads, there are a lot of plans online for relay systems. One guy on The Rocketry Forum even sent me a very detailed schematic for his relay system, and it's clear and understandable. But, I'm not very experienced with electronics - in fact, I've only built one electronics project: the launch controller from Westerfield's previous book, Make: Rockets...
The "Mono Launch Controller" from Make: Rockets..
I'd been wanting to make my own launch controller. In fact, there are lots of plans online - the National Association of Rocketry website has instructions for a very simple one. But I wanted something more versatile. I looked at lots of schematics, and thought of designing my own.
I understood how the controller should work. But, being such a n00b at electronics, I was too nervous to do it. I had no experience building anything electrical, and I thought what if I get the wrong switch or resistor or something, and I don't have enough amps or ohms or watts or whatever??
Again, Westerfield gives a detailed parts list, and explains the hows and whys of launch controllers. Included in the book are tables of the various igniters you find out there, and the minimum amperage needed to ignite them all - including how many of each igniter can reliably be used with his launch controller design. He also gives a detailed, mathematical explanation of resistance and amperage, which you are free to skip if it's over your head - you can merely follow the instructions and build the controller if you want to.
I built this thing, following the very detailed instructions, and it works beautifully.
A phono jack serves as the launch safety key
The lead wires connect to the controller with banana jacks -
you can remove them for easy transport and storage.
The controller has internal batteries, but you can connect a
12v external battery through a cigarette lighter-style jack.
But, of course, it does have a 35 foot lead wire out to the launch pad, and the external 12 volt battery is right by the launch controller.
Perhaps you've heard that one of the best igniters on the market for clusters - the Quest Q2G2 - has been off the market for many months, and will continue to be until they can bring them back. When they do, they are likely to have a different form of pyrogen on them, the substance which flares up to aid motor ignition when the wires get hot enough. They may continue to be great, but they may be slower.
Anyway, for now, I need to use Estes igniters on my cluster rockets, and I want to make sure they light reliably. A relay would be very helpful with this. Given the detailed nature of the previous book, I am eager to read Westerfield's instructions on relay systems.
I'm not into high power yet, but I am about to transition into mid power. There is a lot of information which crosses over, and I like to do my homework before I embark on a new rocketry project. 2016 seems a long time away when I think about rockets, but it's something to look forward to.
There is already a handbook on high power rockets - Modern High Power Rocketry by Mark Canepa. But it is already ten years old. Some things change - including technology and legal issues - and besides, it's always good to have more than one resource for information on a subject. I look forward to seeing what information Mike Westerfield will bring us.