Showing posts with label painting. Show all posts

Friday, May 27, 2016

The Future Experiment


Click here for the previous post.

As detailed in my previous post, I recently completed the Estes Reflector, and despite a few bad turns during construction, I managed to make the rocket look pretty nice.

But I wanted to try something I'd read about online - giving the rocket a nice shiny, protective coating, using Pledge floor polish "with Future Shine."


Rocketeers often refer to this stuff simply as "Future."

The rocket was already pretty shiny before I tried this. I used some Krylon gloss white enamel for the undercoat and some Rust-oleum red gloss enamel for the fin can, and other than a few spots where I wet sanded the paint to remove some flaws, the rocket looked pretty good. But I needed to test this stuff out before trying it on a rocket which was more precious to me.

One reason I decided to try this application is that I thought it might be a good, easy way to seal waterslide decals in place with a shiny, protective coating. Perhaps it would also turn out to be an easy way to fix a less-than stellar paint job. With the troubled history of this rocket, and the fact that I tend to fly my larger models more frequently than my smaller ones now, I was willing to risk making a bit of a mess with this rocket, to see if it was as easy and effective as it sounded.

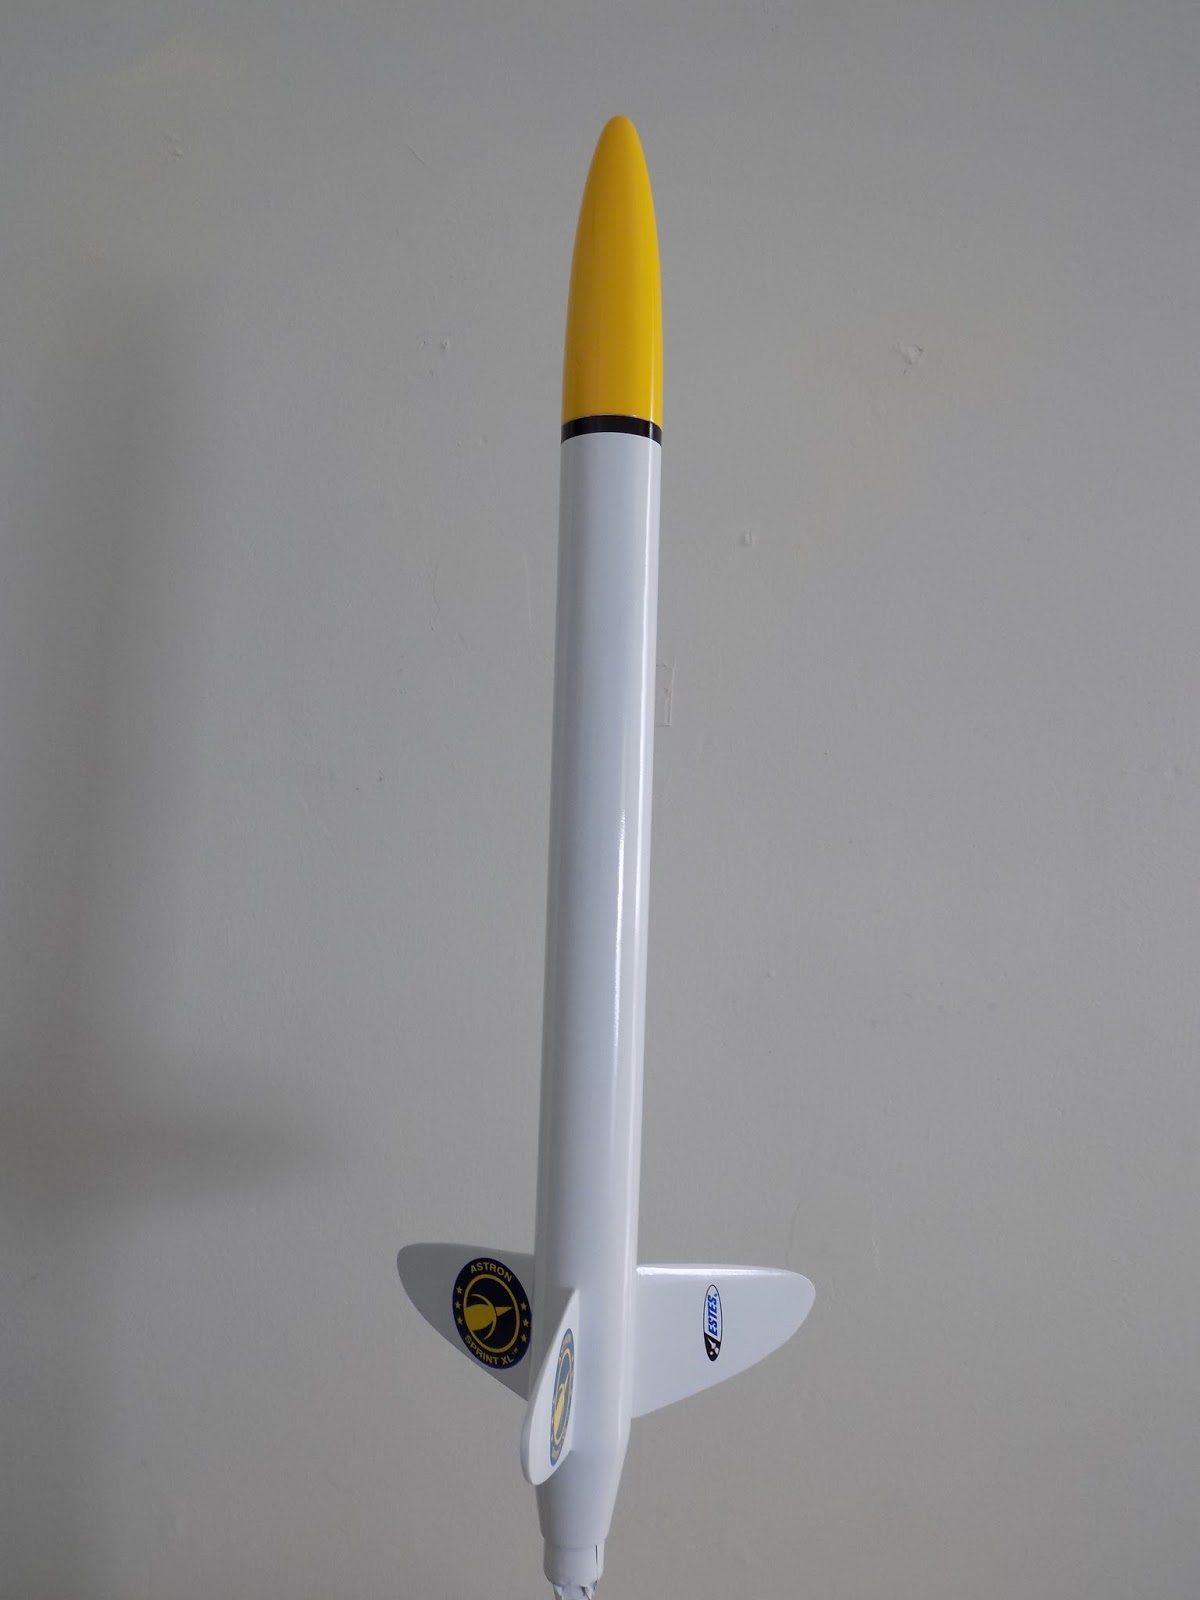
I have gotten some pretty good results on my rockets lately. My Estes Astron Sprint XL clone turned out to be as smooth and shiny as any rocket I'd ever built - darn near perfect.

My Estes Goblin, too, had turned out very nice.


But I thought I might like to add a clear protective layer to seal and protect the decals.

On the Astron Sprint XL, this would have been a good idea, as the black band near the nose cone has since started flaking off, and I haven't even flown it yet. I'll need to take that decal off, and paint a black band on.

A gloss clear coat - clear spray paint, that is - is an obvious choice for sealing and protecting decals. But I put in a lot of work on these paint jobs, and it included a little bit of wet sanding of tiny flaws in the paint, followed by polishing the rocket before adding the decals in the first place. What if my clear coat came out bumpy and irregular? I'd be hesitant to sand it smooth, as I might sand through it and into the decals. I'd rather put nothing on these rockets than ruin my work. Perhaps Future would be a good solution; it certainly sounded that way, from what I had read. But I wasn't about to do it on my best builds without testing it out first.

* * *

Before I get to the Future experiment, a word about the build, for those of you who may be building a small payload-carrying rocket like the Reflector. There are several of these model rockets, and they're pretty popular.

The face card of a lot of these little payloaders touts their "huge payload section." While it may look spacious on the outside, inside the payload compartment is another story.

The payload section is made up of a balsa nose cone at the top, a length of body tube in the middle, and a balsa transition at the bottom. The transition allows the diameter of the rocket to get wider at the payload section than the main airframe of the booster. The payload space is therefore inside the body tube, between the transition and the nose cone. As with all model rockets, the nose cone and the transition have shoulders - lengths of balsa slightly narrower than the base of the nose cone or the top of the transition - which allow you to fit them into the payload tube. The shoulders have to be long enough so that the payload section stays together in flight. What you end up with is a space only about an inch long at best inside the payload section.

The payload space inside the Reflector. Image from this Instructables project.

Not a lot of things you might want to fly will fit into that little space, but you can't simply cut the shoulders off and call it problem solved, or the rocket won't stay in one piece for flight. I wanted to be able to fly my Jolly Logic Altimeter 2, which is about 2 inches long, in this rocket.

What I did to accommodate the altimeter was to cut off about half the shoulder on the nose cone, and just a little off the upper shoulder of the transition. I left enough on the transition so that I could still get a good friction fit between the payload tube and the transition shoulder.

The big piece is from the nose cone shoulder. The thinner piece is just the conical top of the transition shoulder.

The transition piece still has enough length to be safely friction fit into the payload tube.

The nose cone would have to be glued on. There simply wouldn't be enough shoulder there to keep the parts together securely. When opening the payload, the nose cone and payload tube are now one piece.

But there still wouldn't be quite enough room. Using a drill, I carved out a little niche into the shoulder of the nose cone. Now the altimeter just fits perfectly into the payload section.


See it in there?

When you use a payload section like this, you might need to wrap some tape around the shoulders of the transition and nose cone (if you didn't need to glue it on) to get a nice snug fit with the payload tube. You don't want things to pop open during flight and lose your altimeter!

Also, it's best to drill a couple small holes, called static ports, into the payload tube. Altimeters use barometric pressure to measure altitude. The payload section needs to be ventilated so the air pressure inside matches the air pressure outside the rocket. Anywhere from two to four holes is recommended. For this small payload section, I drilled two holes, on opposite sides of the payload section, each one 1/16 inch in diameter. If you have a larger rocket, you can do a Google search for "static port hole size" to figure out how big and how many static ports you will need.

Back to the Future experiment...

* * *

When trying out a new material or building technique, it's always a good idea to try it out on something inexpensive or replaceable before committing to doing it with a rocket that's really dear to you. First, you want to make sure you've understood how to do it correctly. Sometimes you misunderstand the directions the first time you read them.

Also, sometimes a new skill isn't as easy to a beginner as it is to someone who uses it all the time. My first attempts at using paper skins to reinforce and hide the wood grain on fins were disastrous, and I still haven't quite gotten the technique down, even though a lot of people swear by it, and find it really easy.

Thirdly, sometimes a thing doesn't work - at least, for you - they way they say it will, or the way it works for them.

I'd heard of using Future a few times before, but the most complete explanation I had found was on this thread on The Rocketry Forum.

It seemed pretty straightforward, and the basic steps were as follows: Get some Pledge with Future Shine acrylic floor polish and a clean spray bottle. Optionally, add a little bit of Simple Green cleaner (which I didn't use). Make sure the nose cone is separated from the body of the rocket with a little tape, and spray the rocket down till completely wet. Go back several minutes later to remove any drops hanging from the bottom of the rocket with a paper towel, so they don't harden there. A day later, you'll have a shiny rocket.

It seemed to make sense, and it sounded so easy! This could be great! I thought. This could change everything.

What I pictured happening was that I'd spray the rocket down with the Future, it would level out and all the excess would drip off, and I'd have a nice, even, smooth, shiny protective surface over the whole rocket.

What happened when I tried this was different.

First of all, though I did blot off the excess that was dripping down off the base of the rocket, I still got a little pool of material on the trailing edges of the fins. As the Future started drying, it became gummy, and I ended up with some uneven, gooey bits. Attempting to dab it off with a paper towel, I merely made it more uneven.

Look closely, and you'll see a gooey drip slowly hardening on the corner of the fin.

The payload tube also experienced some swelling. You'll have noticed the spiral grooves running around the outside of the body tubes when you build your rockets, and perhaps you've filled those in, as I do, with wood filler.

There's a second spiral groove, running around the inside of the tube. I'm not sure how, but the Future seemed to have gotten inside the payload tube, and the internal groove started to bulge outward.


 The bumpy texture here isn't due to the Future. It's orange peel, and it's a flaw in the paint job that has nothing to do with applying Future. It can be sanded out and polished, but after the trouble I had with this build, I decided not to bother. But you can see the internal grooves bulging through the body tube after Future was applied.

According the the directions of the post, the nose cone is supposed to be set loosely on the rocket, or the Future will wick in and glue the nose cone to the rocket. In my case, the nose cone was glued on, so it was the transition I had to worry about.


First, I neglected to pull the payload tube apart from the transition before spraying, so that got stuck. But even having loosened the transition from the main body tube and masked it with tape, the whole thing still got stuck together.

Once the Future was dry, I tried to pull the payload section off the rocket, and it was firmly glued on! I was determined to get it off there, and while I did get it off, I ended up crushing the body tube slightly and damaging the decals a little from pulling so hard.


I got the payload tube and transition separated after wiggling a hobby knife and a fingernail into the joint. There was some slight damage there, but it was minimal.

Rather than leveling out and running off smoothly, the Future dried on the rocket in streaks. Some droplets didn't run off at all, and in fact hardened into acrylic blobs which won't come off the rocket.

Streaks, looking a bit like sweat, can best be seen on the left-hand fin.

Hard blobs of dried polish, the result of droplets which did not run off or self-level

The streaks and blobs may be removable, with the use of water and ammonia, but that would most likely take off the decals.

The one thing this does seem to have done is to seal the decals to the rocket - and if you look closely, you can see that I had a few loose edges which I was unable to burnish to the rocket surface, so this may at least prevent those from peeling off.

But overall, my first attempt at trying this out was a little detrimental to the final appearance of the rocket.

* * *

So, what could I do differently next time?

Well, I could decide that this technique isn't for me. I have been getting better at getting a nice smooth paint job lately, so perhaps I don't need this one.

Or, I could try again, but go about it differently.

On asking advice on the Rocketry Forum thread to which I linked above, I found a few different opinions (you'll always find a dozen different opinions when you talk rocket building with people). But one thing that a lot of people seem to agree on is that what I did here was too much. If and when you use Future, you need to do so lightly!

Some people suggest spraying the Future on, but in multiple light coats.

Some people suggest using a foam paintbrush to apply the future in a thin, even layer.

Perhaps spraying it on and wiping it off with a clean cloth would yield good results.

In the comments section of my previous post, Chris Michielssen says that while he uses Future on his builds, he only applies it to the decals, and he uses a Q-Tip to apply it in a thin layer.

Whenever you try out a new technique, the point is that sometimes you have to test it out first. Some things seem a lot easier when you read about them than they are in practice. It may take practice to get the hang of it. Even with something as simple as applying a little Future with a cotton swab, now that I've had this experience, I might first try it by applying a spare decal to a painted surface, and then sealing it to the surface with Future, just to see what it looks like (rather than doing it on a finished rocket for the first time). If I like the results, I may adopt the technique.

* * *

Applying Pledge with Future Shine to rockets to improve their surfaces isn't a terribly common practice, but some people do swear by it, so they must be on to something. At the very least, they like the results they get with it.

Others say they would never use floor polish on a rocket.

Floor polish on a model rocket? Not no way, not no how!

People in both camps are doing what works best for them, so nobody is wrong!

As you look for ways to improve your building, sometimes you'll come across techniques which are a tad controversial. Some rocketeers are pretty opinionated about what works and what doesn't, what you should always do or never do. We'll talk about one of those techniques in an upcoming post, and look at both sides of the issue (and try not to raise any hackles or ruffle any feathers).

The point of all this is, when you learn of a new building technique or material, you don't have to take anybody's word for it. Whether one person says "This is easy and amazing!" or another person says "Only an idiot would do this!" you will only know what works for you if you try something out. Just don't try it on anything too expensive or irreplaceable.

Like my Facebook page for blog updates and extra stuff.


Monday, May 23, 2016

Perfecting Your Rocket Building Skills Can Be Scary


I'm trying an experiment today, and it's got me nervous.

The rocket you see above is the Estes Reflector, a small, BT-50 (0.976 inch diameter) payload-carrying model rocket with a classic "model rocket" look to it. It's... not a big deal. I keep telling myself that.

I bought the Reflector when it was on deep discount, partly because I was considering building this model rocket camera payload project from Instructables.com, and the Reflector happens to be the rocket used in the project. I decided to simply build the rocket as a stock kit model, though I did drill a couple static port holes in the payload compartment so I could use an altimeter.

I'm not in love with the Reflector - I keep telling myself that. It was just a cheap, simple payload rocket I got so I could play around with it.

While writing this, I realized that this was the first rocket I started building after my move from Indiana to Boston last summer. I've been working on this little rocket since July - ten months. Which is far too long to spend on a little model rocket like this. It's not a big deal. I keep telling myself that.

To be clear, I have started and finished other rockets in the last ten months. And a lot of things went wrong on this build, so I really shouldn't care if it turns out alright. I keep telling myself that.

To begin with, the fins warped when I filled the wood grain with Carpenter's Wood Filler (CWF). I got them back to mostly flat, but when sanding off the filler, I had a hard time getting the darned things smooth. Photo not found.

While attaching the fins, I realized that the thumb tab from the motor hook would have prevented the rocket from standing upright on its fins for display, and I didn't like how far out the hook stuck from the back of the rocket. So, halfway through attaching fins, I tried to clip off the thumb tab. But I didn't have the right tool, and ended up bending the tab badly.


This is partly why it took me so long to complete building the Reflector - I kept screwing it up!

Unfortunately, I didn't take many pictures of the Reflector build. Since I was having such a hard time with the rocket, I thought I might never finish it, and didn't really see how I'd use it on the blog, and kept telling myself the rocket didn't matter that much. It was a slightly screwed up rocket that I'd probably never finish, and if I did, it probably wouldn't look great.


Once I'd started and finished a few other rockets, I decided I needed to get the Reflector built. Each problem I'd created, I seemed able to fix more or less. With plenty of automotive filler primer and lots of sanding, I was able to get the fins relatively smooth. They weren't badly warped - just enough so I had been unable to get all the texture of the wood filler sanded off with a sanding block. Using just a piece of 400 grit sandpaper and my fingers, I got them to where I found them acceptable.


Suffice to say that it took me ages to decide how I wanted to fill the wood grain on the balsa wood nose and transition piece. I'd never used a balsa nose before - this was my first! I didn't know if I wanted to use wood filler, creating dust, possibly leaving the pock marks I occasionally don't notice in the surface until the rocket is painted; or sanding sealer - a model rocketry standby that I've only recently started playing with; or something else.

I opted for the CWF. Turned out alright, especially after spraying on the primer and sanding it smooth. Almost as perfect as plastic.

Fast forward to the painting process. The white went on with little trouble, though I did have to sand a few flaws out of the first layers of white and touch them up with a new can.

The black nose cone and payload section got some orange peel on them - a bumpy texture you sometimes get with spray paint, so called because of its resemblance to an orange rind. I considered sanding it smooth and either repainting or trying to polish it, but decided I shouldn't spend so much effort on a rocket which wasn't that amazing and which had already caused me trouble.

Then came the red fin can...

Ugh...

Because of the payload section, the launch lug has a wooden standoff, and if you put the launch lug where the instructions tell you to, there's not much room between the leading edges of the fins and the trailing edge of the launch lug standoff. That means that in order to get a clean, straight line of tape down where you want the red bottom to stop and the white upper part to start is tricky, because there's almost no space.

I usually use clear Scotch tape to mask lines on rockets, because it's cheap and leaves a nice, sharp line.

I used Chris Michielssen's trick of marking a piece of tape with permanent marker and cutting through the black with a hobby knife and ruler to get a sharp, narrow piece of tape.

Getting a piece of tape perfectly straight around a body tube to create a seamless, perfectly straight circumferential line can be tricky. It took me several tries and three pieces of tape to get it right. You're never really sure until you take the tape off.

Once a narrow tape line had been laid down, I had to construct a mask, using blue painter's tape to protect the launch lug standoff from overspray, and paper to keep the rest of the rocket clean.

(I really wish I'd taken pictures here).

When you mask off a base coat to apply a second color, you first want to seal the edges of the tape down with a thin layer of the original color. My fins would be red, but I'd seal the edges with a blast of white.

It turns out that Sharpie markers, the kind I had on hand, while "permanent," are not the best markers for this application.

The white Krylon paint melted the sharpie, and I got a gray ooze down the rocket. Also, I got minor paint runs from doing too heavy a coat of paint.

No matter! I told myself. This rocket was doomed from the start! It. Will. Still. Fly...

I went on to do the red top coat. It was actually going not too badly. A bit bumpy, but not quite orange peely, and pretty much OK. The paint runs were hard to see, so I figured it wouldn't be a big deal.

While the paint was still tacky, I began taking the mask apart, starting with the paper, moving on to the blue painter's tape, then finally, carefully peeling back the Scotch tape at the edge, all while trying not to touch the fresh paint on the fins.

Then the Scotch tape tore.

I could not get all of it off. I have a little bit of fingernail, but I could not lift the tape off. As I became more and more frustrated, I found I was smudging the edge of the paint, getting fingerprints in it, and making a big mess, but I was getting angrier and angrier, and was not about to let the paint dry with bits of tape stuck under the edge of it. (I get really frustrated when I have something stuck to a rocket and can't get it off).

This was the result.


From the side, you can see how little room there is between the fins and the standoff.

I nearly smashed the rocket with my bare hands. HA HA HA!! WHO CARES?? I NEVER LIKED THIS ROCKET TO BEGIN WITH!!!

The problem with being a perfectionist is that you don't have the luxury of not caring. Even if you're building a little rocket that was inexpensive, and maybe not your favorite, is that the process of building is such a pleasure, especially when it's going well. If it goes badly or if you make a mistake, you might tell yourself that you don't like that rocket, and you don't care how it turns out, but it bothers you. Then, if you're able to fix the problem, you are back to feeling good about the project.

One thing I've realized when building this rocket is that, even if it's not my favorite, one that I'd been eyeing for months on some website, dang it, I do care about this rocket. There's no rocket build, large or small, where I decide I don't care.

But sometimes, to develop a craft, you have to take the risk of ruining your work in order to try a new technique or skill, or even to practice techniques you already use. I've only been doing this for going on two years now, so I'm not an old hand yet. I'm still the Rocket N00b.

Also, when you make a mistake, sometimes if you set the rocket down, breathe, and think about it, you can fix things. Even this.

First of all, in my frustration, I'd gotten some pink marks from fresh paint on my fingers all over the rocket. No problem. I grabbed a Mr. Clean Magic Eraser (a tip from Chris Michielssen), and got rid of that.

Those red smudges were sticky the next day. That told me that there was mushed up tape mixed in there. I knew how to take care of that. The dark marks were either primer (I did take a hobby knife to the rocket while trying to remove the tape) or Sharpie. Again, I had a plan.

Mushy adhesive stuff can be removed from dry paint (test before you try on your rocket, but it has worked for me) with a little Ronsonol lighter fluid (as you'll see I found out if you clicked the link above leading to the Quest Quadrunner post). I dabbed a little on a Q-Tip and got most of the gummy red off. It also loosened up the few little bits of tape I discovered once I cleaned off the gummed-up red bits, which I was able to carefully lift off with the tip of a hobby knife.

I finally wet-sanded the edge where the red meets the white with either 600 or 800 grit wet/dry sandpaper.

This was the result.


Not perfect - but much better than what I'd had before. Also, you can see that I got that tape line perfectly straight, so that was encouraging. Smaller rockets are harder to build, because the details are harder to get right.

There is a black decal which goes around the rocket just below the launch lug standoff. You're supposed to leave a bit of white between the black and red, but in this case, I decided the decal would hide the flawed edge. It would be slightly different from the stock look of the rocket, but it would look better this way, and that one little detail would make it my own.

I finally ended up with a rocket which didn't look too bad, considering everything that went wrong. I could have left well enough alone, but I decided to try one more thing. Not that I don't care about this rocket, but I figured this one, with all I messed up and all I was able to fix, would be the ideal candidate to try a treatment I'd read about, before using it on a rocket I really cared about.

The experiment I'm trying is to make the rocket shiner, using Pledge with Future Shine - a floor polish which is said to give a high gloss shine to your rockets, and I hope may seal the decals in place and protect them from damage.


Doing something I've never tried like this is a little scary. The Reflector has gone from being a problem build to a pretty nice looking little rocket, and now that it's done, I don't want to mess it up. But I really don't want to try it for the first time on a more expensive rocket or one I'm really attached to.

How will it turn out? We'll see in the next post. But sometimes you gotta break a few eggs.

Like my Facebook page for blog updates and extra stuff.

Follow me on Twitter.

Saturday, April 9, 2016

Build It Yourself - Expandable Model Rocket Painting Wand Stand - For Home or Classroom Use


Until recently, I had a rocket painting problem.

To paint a model rocket, you need some way to hold the rocket, while simultaneously not touching the surface to be painted. The solution for most rocketeers is to use some kind of painting wand. The simplest painting wand is made of rolled up newspaper, stuck into the top of the body tube. I usually use dowel rods with used rocket motor casings on top.

Regardless of what kind of wand I was using, the problem was the same: I spray a coat of paint onto the rocket and then wonder Where do I set this thing while it dries? I had a couple of hack solutions which usually worked, but made me nervous.

I would either stick the wand into either the pen holder of my desk lamp, and try to position it so the rocket wouldn't touch the lamp as it dried...


...or I would stick the wand into a large empty food can, wedged in among a bunch of craft sticks, with a large clay weight in the bottom to keep the can from falling over.


Obviously, neither solution was ideal. For one thing, if I were painting more than two rockets at a time, I'd have to find something else. For another, both of these solutions mean that I risked taller rockets falling over and damaging the paint.

I kept thinking I'd need to build some kind of stand. For that, I thought I'd need to get some wood, drill some holes, find someone with some kind of power saw which I don't own, design a stand which would hold X amounts of rockets at one time, and find a place to store the finished stand.

Then, I realized this doesn't have to be complicated - PVC is the answer!

The solution was so simple, I kicked myself for not thinking of it a year and a half ago, when I first got started building.

At the top of the page, you can see what I came up with - a PVC stand which will hold up to four rockets at a time. But the stand is also expandable - you can make one large enough to hold a bunch of rockets at a time, which is ideal if you build a lot, or if you are incorporating rocketry into a classroom setting.

First, let's talk about painting wands

Painting Wands - Paper vs. Wood

The paper wand is a simple solution for your first rockets, and is mentioned in The Handbook of Model Rocketry. You just roll up a newspaper, stick it into the front end of the rocket, and you're good to go.


It does work great, especially if you're painting your first rocket and don't have any used motor casings yet. But there are a few drawbacks.

First, you're holding the rocket from the forward end, which makes painting the trailing edges of the fins tricky, especially with longer rockets. A wooden dowel wand gets inserted into the motor mount on the back of the rocket, so you have easy access to the fins when painting.

Second, there's the problem of where to put the rocket while it dries.

Third, if you squeeze the wand too hard, it will kink and flop over, so you can't hold the rocket upright. This might not be a problem for you if you're an adult with reasonable manual dexterity, but from teaching rocketry to kids, I can tell you that kids get nervous the first time they use spray paint. They tend squeeze the wand so tight, and they might shake and get sweaty palms, and the paper wand just falls apart.

The wooden dowel wand, on the other hand, is sturdy, reusable, gives good manual control (since it doesn't have to be handled gently), and gives you something to do with the dozens of used motor casings you'll soon have on hand.


Making a Painting Wand

This couldn't be easier. Save a few used motor casings, and get yourself a pack of craft dowel rods, about 12-16 inches long.


Craft dowels have all sorts of uses in hobby rocketry, so you will need some anyway. The ones I have are about 5/16 inch in diameter. A 1/2 inch diameter dowel will just about fit perfectly into a motor casing, though you may have to sand the inside of the casing to get all the used propellant out of it.
You need to remove at least some of the soot from the used motor casing. Unless the fit is too tight, you don't have to sand it perfectly clean, but you should at least knock out all the loose black stuff with a screwdriver, so you're not dropping ashes all over the place.

If you are using 1/2 inch dowels, you can then use wood glue to permanently attach the motor casing to the dowel rod. But I prefer to use masking tape to build up the diameter of the rod, and then slide the motor casing onto the dowel.


Sometimes a motor casing will get so caked with paint, you need to replace it. Since my painting wands aren't glued together, I can just take the motor casing off and put a new one on. Dowel rods aren't expensive, but this way I have less to throw away.

Building the Painting Wand Stand

The picture at the top of the page may be perfectly self-explanatory to you. But I never like to assume someone new to rocket building has prior knowledge of tools or materials, or building techniques, so I'm going to show you step by step how to build the stand, and how to expand the stand to hold as many rockets as you need. If you have a classroom with 22 kids and need a place to hold 22 rockets as the paint dries, this might be a good solution for you.
To build the basic stand, you need the following parts, and one tool.

  • A length of 1/2 inch PVC pipe, to be cut into shorter pieces
  • Four PVC elbow fixtures or T fixtures*
  • One PVC cross fixture
  • A tool for cutting the PVC pipe to length


*Note: If you want to build the expanded version of the painting wand stand, you'll need some T fixtures. Either elbows or T's will work for the basic stand, so get whatever is cheaper or more easily available.

You can use a hand saw to cut the PVC, but as in the post where we built a rocket cradle, I find a PVC pipe cutter, available from hardware stores for not too much money (mine was about $12), to be much easier and cleaner to use.


Start by cutting four 3-inch lengths of the PVC pipe, and inserting one piece into each end of the cross fixture.


Cap the ends of the 3-inch pieces with the elbows (or T's), all facing the same direction - 90 degrees from the 3-inch pieces.


Cut four more lengths of PVC pipe, at least 3 inches long. I cut a few even longer, so that larger or heavier rockets would have less wiggle room in the stand when drying.

Insert these into the elbows (or T's), and you're done.


You can cement the stand together with PVC cement if you want to, but you skip the cement, you can take the stand apart for storage, or moving to a new home, or to expand it for more rockets.

Making the Expanded Stand

 Replace one of the elbow fixtures with a T fixture.


The upright piece from the elbow will go into the T fixture. Cut another 3-inch length, and join it to the other end of the T fixture. Then, add another cross.


Add three more 3-inch pieces to the cross, and finish with more elbows and upright pieces.


You now have a painting wand stand that can hold up to seven rockets at a time!


You can continue to expand the stand in either direction, using more T's, crosses, and elbows, to hold as many rockets as you need to. You can even expand the stand sideways, as long as you don't make it so wide that it's hard to reach rockets for adding coats of paint.

This project was so, so easy, and so helpful. I built it a few weeks ago, and have since gotten so much use from it - not only for when painting rocket, but as a good place to keep a few rockets safely out of the way when cleaning my work space, and for when applying decals.

I wish I'd thought of this before teaching a model rocketry camp last summer. This summer, I have an easy solution.

Like my Facebook page for blog updates and extra stuff.

Sunday, June 21, 2015

Rocket Camp Keeps You Busy

I feel guilty for not blogging much recently. Between teaching rocket camp, my day job, and preparing to move to Boston a week from Tuesday, I don't have much free time.

But camp has been going well. Several parents have told me that their kids have learned a lot. Which is great - and sort of surprising. These kids have absorbed a lot of technical information. Sometimes I've mentioned something once on one day, and half the kids don't look like they're even listening, and two days later, I'll ask a question, thinking I'll need to re-teach the information - but the kids know it! Concepts like total impulse and center of pressure are not easy to grasp at first, but these are some smart kids.

Anyway, rather than writing up each week in separate posts, I'll take what I've learned about teaching rocketry when I'm all done, after Friday. While this blog is partly for people who are n00bs to rocketry, maybe there are a few more experienced rocketeers who are n00bs to teaching rocketry, and maybe my experience will help you prepare.

In any case, I was able to get a little painting done. Ivy Tech has a really nice spray painting booth, and I was able to get Keith's Rocket painted. I'm pretty proud of it.


I'd originally bought the copper paint for the fins on the 3D Rocketry Nautilus II, but that rocket was lost before it was finished. Still, it looks great! I'm going to have to build one of these for myself.

The rocket has a payload compartment. Four small holes - known as static ports - allow you to fly with a barometric altimeter, such as the Jolly Logic. An altimeter needs to breathe to function, so you put static ports in your rocket to allow the payload compartment to equalize in pressure with the air outside the rocket.


I have four more Donor's Rockets to finish painting. I hope to launch these next week - after rocket school!

Here, the Ivy Tech Rocket Kids launch one of Chad's rockets:


Like my Facebook page for blog updates.

Sunday, April 26, 2015

Mid Power: Building the Quest Big Dog (Part 10) - Priming and Painting

Click here for Part 1

I usually use Rust-Oleum 2X gloss spray paint for my rockets. It's a decent brand, not too expensive, but with a good reputation among rocketeers.

The Big Dog is meant to be painted all white, with a red nose cone. The red should match, as closely as possible, the color of the large, wraparound decal which will go on the airframe over the white paint. That's tricky, because the decal comes on a yellow backing, so it's hard to tell what the final color will be. I had to judge from pictures online, and on the box.

Tim Van Milligan, of Apogee Components

I painted the Quad Runner gloss white and "Apple Red," and I had originally intended to use this same paint on the Big Dog.


But I stopped into a Pep Boys auto parts store, and decided to look at their paints.

A lot of people on The Rocketry Forum use an auto paint going by the name of Dupli-Color. They had this paint at the Pep Boys, and I'd heard good things about it. I picked up a can of their filler primer and two paints - Super White and Cardinal Red.


Dupli-Color is more expensive - by about 3-4 dollars a can, but I was hoping I might get a smoother, finer texture than I usually get on my paint jobs. I think I do rather well, but up close, I can see a slight texture there. I thought a special auto paint might be the solution.

Filler primer is used to fill in flaws and scratches. On rockets, it's good for filling in little spots on the airframe you didn't successfully fill with CWF (wood filler), and also for filling in small amounts of wood grain on the fins, if some is still exposed after you've worked on those. It has a "build" to it, so it fills small flaws in nicely, which can then be sanded smooth.

Usually, when I paint smaller, low power rockets, I use a little rig I built. It consists of a piece of wood with a dowel rod coming out the top, and at the end of the dowel is a used rocket motor. I just insert the motor into the rocket, and it stays upright on the stand. This works great for a standard A-C 18mm motor rocket, and if I need to paint a rocket that has a 24mm D or E motor mount, that's easy - a used 24mm D or E motor will fit right over a standard 18mm motor.


I put this rig on a lazy Susan and I can paint the whole rocket, keeping it upright and turning it as I go. As I mentioned in the Skill Level 1 Big Bertha series, you can use a rolled up newspaper as a painting wand, but then you have to figure out where to put the painting wand and rocket as the paint dries.

Using a paper wand

With this rig, I can leave everything as it is, and don't have to worry about messing up the paint job - or having the rocket fall over and getting paint on a table or the carpet.

Problem with the Big Dog is that it's much larger than any rocket I've painted so far - and it has a 29mm motor mount. I don't have any used 29mm motors, because this is my first such rocket. The rocket is a little too large for a paper wand, and any way, I wanted to let the paint dry undisturbed, without having to ram the paper wand in between some books or... whatever.

So, I went to the hardware store with my digital caliper in search of a solution. I needed... something... cylindrical, which was as close to 29mm in diameter without being any larger. I was hoping the plumbing section would offer a solution.

Turned out, it did. Turns out, a coupler for 1/2 inch PVC pipe is just over 27mm in diameter. A little masking tape would make a snug fit inside the rocket body. I found some adapters and some kind of base everything could screw into, and made a kind of wand I could either screw to a plank of wood to make a new painting stand, or simply set the wand down upright - the base is heavy enough, it won't tip over.

A 3/4 inch PVC adapter screws into the base and holds a length of 3/4 inch pipe. It is joined
via another 3/4 inch adapter to a 1/2 inch adapter, which  holds a length of 1/2 inch pipe.
Finally, at the top, is a 1/2 inch coupler. Tape goes around the coupler and the top
of the 1/2 inch adapter. The rocket slides over the coupler and the top of the adapter.
Ted Macklin pointed out to me that a 1 1/8 inch dowel is about perfect to fit into a 29mm motor mount, so that's another option for you. But with this, I didn't have to do any sawing or drilling, and I can screw down the base for heavier rockets if I need to.

I put the rocket onto the PVC stand/wand, and made sure to mask off the screw-on motor retainer - you don't want paint or primer on that, or you could have a tough time getting the retainer on and off!

Something I've recently learned about priming rockets, which I had not done before, is that it's important to lightly scuff the plastic nose cone first. For a long time, I was obsessed with making sure everything was as smooth as possible, and the nose cone was the easiest part to get perfectly smooth.

But primer works, basically, by giving the paint something to hold on to. A plastic nose cone, especially after we've sanded off the flash and filled in the divots and troughs, is very smooth. The primer itself may have a hard time holding on to that. You need to give the primer something to grip to.

I had read about scuffing the nose cone first, but I was nervous about it - wasn't I supposed to make the surface perfect first?

But I have one rocket which has suffered some chipping because of a smooth nose cone - the Estes Mini Honest John. It's got some spots where the paint and primer have completely chipped off - probably due to the nose cone colliding with the rocket body after the nose cone ejects.

You can also see here I hadn't yet learned how to fill in the low spots on the nose cone.

This isn't merely a paint chip. This is paint and primer flaking completely off!

You do this with sandpaper. You don't have to scuff the heck out of it - don't use anything too coarse. You're just giving the nose cone a little tooth - something for the primer to hold on to.

The instructions on the primer can said to use 320 grit sandpaper, which is what I did. That's still a "fine" sandpaper, but it will take the shine off. Sand the whole nose cone until it's slightly rough to the touch - and then wash off the dust.

Remember in the last post how I wrapped some tape around the shoulder of the nose cone?


Some people just put the nose right on the rocket and prime and paint away. Apparently, this is usually OK. But I've lived in enough apartments with windows painted shut, that I worry I might seal the nose cone to the rocket - then I'd have to break that seal, potentially chipping the paint in the process.

I used to pop the nose cone onto a dowel rod and prime and paint it separately. Then I'd have to find some place to put the dowel rod while the nose cone dried - usually in a cup full of pens.

Now I prime the whole thing together, and if the rocket and nose get the same color paint, I paint it this way as well.

I put the nose, wrapped in a couple layers of tape, into the airframe. Because of the thickness of the tape, it won't go all the way in - there will be a gap.


That's what I want. Then I prime - and sometimes paint - the whole thing at once. The nose cone does stick, but when I have to break the paint seal, I break it at the tape on the nose cone, not on the airframe.

Here's the whole process from an upcoming build post - the Estes Cosmic Explorer with an E-motor upgrade.

Step 1: Mask the shoulder with tape

Step 2: Put the nose cone into the rocket, leaving a gap

Step 3: Prime the rocket

Step 4: The seal breaks at the tape - not on the body
Before priming, you want to dust the rocket to remove any epoxy you sanded off the fillets, any CWF from the tube spirals and fins, and any ambient dust which has settled on the rocket. I tried a tack cloth for the first time.

Tack cloth is basically cheese cloth infused with a sticky substance.

Rocketeers have mixed feelings about tack cloth, because some feel it leaves a sticky residue on the rocket, which can effect the paint job. It certainly leaves a residue on your fingers! But if you go lightly over the rocket, it should pick up the dust, and not leave anything behind. Wash your hands before moving on.

The Dupli-Color filler primer was really nice, though it took more coats than Rust-Oleum filler primer to fully cover the rocket.


The filler primer does its job, filling in any wood grain, tube spiral - and those scuff marks you put on the nose cone. You may think, at first, that the tube spirals and wood grain haven't been properly filled in, but once you sand the primer, you should see that most of that stuff is gone, and if it isn't, another coating of primer will take care of it.

I usually do the fins first, then the rest of the rocket. Start with the trailing edges, then the tip edges and leading edges. Do each face of each fin. Then I go up to the nose cone and spray a line all the way down to the bottom, turn the rocket a little, and repeat the process, trying to overlap slightly with each pass. It's best to do light coats.

When painting, you want to avoid coats that are too heavy, because you can get a run in the paint. But if this happens with primer, don't freak out - most of the primer will be sanded off anyway.

Once the primer has fully cured, you sand everything smooth. The can I was using said you can sand after two hours, but I waited until the next day.

Using 400 grit sandpaper, I sanded the whole rocket, in little circular motions. The Dupli-Color primer didn't load up the sandpaper the way other primers have done. Sometimes, when sanding, you get a mass of primer stuck to the sandpaper - a little silvery splotch that isn't good for anything, because the abrasive is clogged in that spot.

This is what sandpaper looks like when it's been loaded up with primer. Dust from the primer gets impacted
into the abrasive surface, creating dull, silvery patches, and the paper is no longer any good for sanding.

You can extend the life of your sandpaper by occasionally brushing out the excess dust with an old tooth brush.

Once you're done sanding, before you paint, you should clean all the dust off the rocket. At this point, instead of a tack cloth, I used a piece of microfiber towel with a little rubbing alcohol. This takes off all the dust, and it evaporates quickly.

The Rust-o 2X paint is enamel. The Duplicolor is lacquer-based paint. I don't know the technical, chemical difference, but I do know that you should pick one or the other - do not mix them, or you may get weird bubbles and smearing, as the paints can react with one another.

The lacquer paint took a lot more coats to cover the rocket. In fact, by the time I was satisfied that I could no longer see through the white, I had used the whole can. The texture was fine, but nothing better than I'd gotten with Rust-o. But it was pretty.

A day later, I removed the nose cone and did the Cardinal Red top coat. The whole rocket turned out beautiful. After the red dried, I put the rocket together to take a look.


The rocket is nearly done. Just a few more steps to go.

Click here for Part 11

Like my Facebook page for blog updates.