You may have heard the news: Starting January 1, 2020, rocketeers under the age of 18 who wish to get a Junior Level 1 high power rocketry certification from the National Association of Rocketry will take a written test prior to conducting their certification flight.
The test will be twenty questions long, and there will be a study guide available. If you fail the test once, you may take it again - immediately, if you wish. The test can only be taken twice within a seven-day period, so if you fail twice, you do have to wait a week before trying again.
The purpose of this test is to increase safe flying for Junior Level 1 members, and to bring the NAR in line with some of the standards practiced by the Tripoli Rocketry Association. It's an improvement, and will cover things that any HPR flier should know.
Randy Boadway, of eRockets.biz, who is a sponsor of The Rocketry Show podcast, is also on the NAR board, and we've recorded a short segment on the upcoming changes. Look for it in the next episode of The Rocketry Show.
Follow me on Twitter.
Like my Facebook page for blog updates and extra stuff.
Have a question you'd like to see addressed on this blog? Email me at iamtherocketn00b@gmail.com.

Showing posts with label high power. Show all posts
Showing posts with label high power. Show all posts
Sunday, November 3, 2019

Sunday, November 25, 2018
Build Series - The SBR Diablo - Part 1: Unboxing

Scott Binder of SBR sent me his latest high power rocket kit to check out: The Diablo. This is a simple, easy to build, short and fat (4 inches in diameter!) high power kit, as easy to build as a common model rocket - just bigger. Because it's a draggy rocket, it's good for small fields. With its light weight, it can fly on anything from an F motor all the way up to an I or maybe some J motors. And its small size makes it easy to transport to a launch even if you have a compact car.
I'm working on a video build series of this rocket to show how simple it is to put together. Here's the first installment, shot on my phone (sorry about the sound quality) - Unboxing:
Follow me on Twitter.
Like my Facebook page for blog updates and extra stuff.
Have a question you'd like to see addressed on this blog? Email me at iamtherocketn00b@gmail.com.
Tuesday, December 5, 2017
Make: High-Power Rockets - New Book on HPR Is Now Out!
 |
| Make: High-Power Rockets by Mike Westerfield |
After a long wait, we now have a new book on rocketry by author Mike Westerfield. He wrote a book I often talk about here on the blog, Make: Rockets: Down-to-Earth Rocket Science about low power model rocketry. If you haven't read it, I do highly recommend it.

The new book has been in the works for some time, and when we had Mike on The Rocketry Show podcast a while back, it was still in development. It's called Make: High-Power Rockets, and it came out last week.
The book is compact but full of great information. Because it's by Maker Media, it focuses on building your own projects, rather than working with kits. This is exactly the approach taken with the previous Make: Rockets book, and I for one found it so helpful.
After reading The Handbook of Model Rocketry, which gave me a great understanding of the principles of rocketry, I still felt I would forever be a rocketeer who merely built kits. Scratch building, I assumed, was for people who had all kinds of skills - and tools - that I didn't have access to.
Make: Rockets takes you through a series of projects, building designs by the author, just from parts. Once you've built a few model rockets, then see how easy it is to cut parts to size and come up with your own design, scratch building becomes pretty easy. Sure, you may still not know how to design and make your own nose cones or body tubes, but you can come up with some interesting designs of your own using commercially available parts. After reading it, I designed and flew my very first scratch build - a two-stager which flew beautifully.
Make: High-Power Rockets is great in that same way. It starts off with the basics of getting a Level 1 high power rocketry certification - which you must have in order to purchase and fly H or I rocket motors.
But instead of suggesting this or that kit - the "perfect kit for an L1" - the author takes you through the steps of building an original design of his, called Callisto.
 |
| My rendering of Callisto, a good L1 rocket you can build from scratch. |
The really terrific part of building Callisto is that in putting together your plan to build it, the author takes you step by step through creating a simulation in OpenRocket from scratch. This is a great way to learn how to build a design in a rocket simulator - especially since they don't come with instructions!
Callisto is a great-looking but simple 2.6 inch diameter rocket which flies on 29mm motors, meaning it can be flown as a mid power rocket if you either don't have a certification or wish to fly without a waiver from the FAA. It's simple to construct and is mostly made of LOC Precision parts, available online.
Make: High-Power Rockets takes you from Level 1 certification all the way through Level 3, which allows you to fly M motors and above. The book is very clearly written, and since it's for beginning makers, it is full of color photographs and detail.


While it doesn't cover every aspect of HPR (for instance, it doesn't go into detail on more difficult areas of HPR, like clustered or multistage rockets), it covers important basics most HPR fliers will want to know about, such as dual deployment, assembling motor reloads, working with materials such as fiberglass and what Public Missiles Limited refers to as "quantum tubing," and of course safety and how to pass the Level 2 and Level 3 written exams. And the Level 2 and 3 projects are capable of high altitudes and Mach-busting flights.
Make: High-Power Rockets is a great, clearly written, beautifully photographed edition to the rather small library of hobby rocketry books. Since the previous book on HPR - Modern High Power Rocketry 2 by Mark Canepa - is nearly 13 years old, it's good to have an update and a second author's point of view on the subject.

Keep an eye out - we'll be talking with Mike Westerfield on The Rocketry Show podcast in a future episode, and we may have some free copies of the book to give away! We'll iron out the details of that shortly.
Follow me on Twitter.
Like my Facebook page for blog updates and extra stuff.
Have a question you'd like to see addressed on this blog? Email me at iamtherocketn00b@gmail.com.
Saturday, May 20, 2017
Mega Der Red Max CATO

The weather was great today, and it was really a terrific launch up in Berwick, Maine. But a few of us really had bad luck, myself included.
These pictures are not my rocket. But they are of the rather tragic fate of one CMASS member's beautiful Estes Mega Der Red Max, made even harder to take due to the rocket being out of production, and quite hard to find for a reasonable price these days.

There are CATOs, and then there are CATOs, and this one was quite the CATO.
I ran over to help stomp out burning grass, but those flames had already been taken care of by the time I got over there. While waiting for the water pump to arrive, I decided to snap a few pictures. I knew this had to be captured for posterity.

Despite several attempts to snuff the rocket out on the ground, it kept reigniting, and only water managed to put it out.
It's a sad fate for such a nice rocket, but on the other hand, it did smell amazing - like a campfire using only premium logs.


All my launches went badly to middling today. I didn't have as expensive or irreplaceable loss as this one, but the photos below kind of encapsulate how I felt about my flights.


So the day was still mostly good.


Follow me on Twitter.
Like my Facebook page for blog updates and extra stuff.
Have a question you'd like to see addressed on this blog? Email me at iamtherocketn00b@gmail.com.
Monday, May 8, 2017
New Rocketry YouTube Channel - Ryan's Rocketshop
 |
| A 400% upscale Centuri Javelin, posted by Reddit user AscendingNike, who runs today's featured YouTube Channel. |
In addition to the new "Featured Vendor" series I recently started, I've been considering a "Featured YouTube Channel" series for a while. There are a lot of great channels devoted solely or mostly to rocketry on YouTube, and I keep finding more.
Today's Featured Channel is a brand new one, and it looks like it's got some potential to be pretty exciting. It's called Ryan's Rocketshop, and can be found here. As of this writing, only two videos have been posted, but Ryan hopes to post a video per week.
The focus of Ryan's Rocketshop is high power rocketry, but from a beginner's perspective. The idea is to follow along with Ryan and learn with him. Even though he's just now getting into HPR, his knowledge and building skills are really impressive, partly gained from building RC airplanes, and likely some time spent building smaller low and mid power rockets.
The first video is the build and test flight of Ryan's Level 1 project, a 400% upscale of the Centuri Javelin model rocket.
Another potentially fun feature is the Rocketshop News. I look forward to more building videos and lots of cool launch videos.
I'm excited about a new channel, especially one that promises to explain things so clearly. I hope to pick up some tips from Ryan. Check it out.
Follow me on Twitter.
Like my Facebook page for blog updates and extra stuff.
Have a question you'd like to see addressed on this blog? Email me at iamtherocketn00b@gmail.com.
Thursday, January 7, 2016
My First High Power Rocket
I've just purchased my first true high power rocket kit: the Aerobee 150A, by Mad Cow Rocketry, from JonRocket.com.

My Estes Pro Series II rockets could technically be flown as high power rockets. Their 29mm motor mounts would allow me to install a small H motor. But they are generally considered mid power "model" rockets.
The Aerobee 150A has a 38mm motor mount - a high power mount. At 38mm, there is a wide selection of motors you can use to fly to different altitudes, and with a motor adapter, you can still use the smaller 29mm motors.
JonRocket only had one left in stock, and since I've been shopping there for over a year, I've accrued a lot of rewards points. When you buy from JonRocket, you get some points with every purchase, and each point is worth one dollar toward future purchases.
I only recently found this out - so I got this large kit, which normally sells for nearly $70, for only 18 bucks! Too good to pass up.
The Aerobee 150A was a NASA sounding rocket from the 1960s, and was part of the whole Aerobee "family" of sounding rockets.
Mad Cow has a great reputation for good quality kits. I won't be able to fly this rocket until I get a Level 1 high power certification. But I want to set this aside and do a little homework before I build it.
Here's another article from a 1997 edition of High Power Rocketry magazine on the Aerobee family of rockets. The 150A (which was similar to the 150, but with four fins instead of three) has its own section. Finding scale data on historic rockets can sometimes be difficult. I'd like to see what I can find out about what colors this rocket was before I build.
I also need to do some research on what's called dual deployment, a method in HPR of deploying the recovery system using altimeters rather than just an ejection charge in the rocket motor. Instead of simply having one big parachute come out when the rocket is at apogee, and instead of relying on an ejection charge built into the rocket motor as with model rocketry, in dual deployment, there are two ejection charges, controlled by an electronic, barometric altimeter. The first charge fires at apogee - the highest point in the rocket's flight - and the rocket descends on a small drogue parachute. This stabilizes the rocket's descent, and brings it down quickly to a lower altitude. But that's not really enough for a soft landing.
At a lower altitude, the altimeter causes a second ejection charge to fire, which deploys the main parachute. This chute is large enough to bring the rocket down to a soft touchdown.
The main reason for dual deployment is to keep the rocket from drifting too far for successful recovery. If it came down on one big chute from apogee, like a small model rocket, a high-flying, high power rocket might drift very, very far.
Also, some rocketeers like the added complexity of building a system with two events. And, of course, the altimeter will tell you how high the rocket flew, once you recover it.
I understand the basics, but have never tried it myself, so I've got some homework to do. In the mean time, I have tons of low and mid power rockets to finish building.
In any case, I'm pretty excited to have this large rocket on its way to my house.
Like my Facebook page for blog updates and extra stuff.
My Estes Pro Series II rockets could technically be flown as high power rockets. Their 29mm motor mounts would allow me to install a small H motor. But they are generally considered mid power "model" rockets.
The Aerobee 150A has a 38mm motor mount - a high power mount. At 38mm, there is a wide selection of motors you can use to fly to different altitudes, and with a motor adapter, you can still use the smaller 29mm motors.
JonRocket only had one left in stock, and since I've been shopping there for over a year, I've accrued a lot of rewards points. When you buy from JonRocket, you get some points with every purchase, and each point is worth one dollar toward future purchases.
I only recently found this out - so I got this large kit, which normally sells for nearly $70, for only 18 bucks! Too good to pass up.
The Aerobee 150A was a NASA sounding rocket from the 1960s, and was part of the whole Aerobee "family" of sounding rockets.
 |
| The Aeorbee 150 sounding rocket - different from the Aerobee 150A rocket (see below) |
Mad Cow has a great reputation for good quality kits. I won't be able to fly this rocket until I get a Level 1 high power certification. But I want to set this aside and do a little homework before I build it.
Here's another article from a 1997 edition of High Power Rocketry magazine on the Aerobee family of rockets. The 150A (which was similar to the 150, but with four fins instead of three) has its own section. Finding scale data on historic rockets can sometimes be difficult. I'd like to see what I can find out about what colors this rocket was before I build.
I also need to do some research on what's called dual deployment, a method in HPR of deploying the recovery system using altimeters rather than just an ejection charge in the rocket motor. Instead of simply having one big parachute come out when the rocket is at apogee, and instead of relying on an ejection charge built into the rocket motor as with model rocketry, in dual deployment, there are two ejection charges, controlled by an electronic, barometric altimeter. The first charge fires at apogee - the highest point in the rocket's flight - and the rocket descends on a small drogue parachute. This stabilizes the rocket's descent, and brings it down quickly to a lower altitude. But that's not really enough for a soft landing.
At a lower altitude, the altimeter causes a second ejection charge to fire, which deploys the main parachute. This chute is large enough to bring the rocket down to a soft touchdown.
 |
| A diagram of the flight events in a dual deployment rocket. From westrocketry.com. |
The main reason for dual deployment is to keep the rocket from drifting too far for successful recovery. If it came down on one big chute from apogee, like a small model rocket, a high-flying, high power rocket might drift very, very far.
Also, some rocketeers like the added complexity of building a system with two events. And, of course, the altimeter will tell you how high the rocket flew, once you recover it.
I understand the basics, but have never tried it myself, so I've got some homework to do. In the mean time, I have tons of low and mid power rockets to finish building.
In any case, I'm pretty excited to have this large rocket on its way to my house.
Like my Facebook page for blog updates and extra stuff.
Saturday, January 2, 2016
2016 Rocketry To-Do List
I walked into the Rocket Room today, and it hit me that I hadn't touched anything in there in maybe a week or more. The sun was streaming in through the windows, and it looks like my girlfriend tidied up in there a bit. It looks pretty in the sunlight.
Time to put it to good use.
I've had a few things holding be back from being as productive a rocketeer as I was a year ago. My job sometimes has me starting at 4:30 in the morning, and sometimes has me quitting at 11:30 at night. This back and forth can be a bit draining. But things are about to get more regular for me, and I should have my Saturdays clear for launches.
So, here are some goals I have for the upcoming year.
5. Finish Building My Estes Pro Series II Kits
 |
| This is much cleaner than it is when I'm working on something. |
Time to put it to good use.
I've had a few things holding be back from being as productive a rocketeer as I was a year ago. My job sometimes has me starting at 4:30 in the morning, and sometimes has me quitting at 11:30 at night. This back and forth can be a bit draining. But things are about to get more regular for me, and I should have my Saturdays clear for launches.
So, here are some goals I have for the upcoming year.
1. Blog More Frequently
I was asked to be on The Rocketry Show because of what I had been doing on this blog - writing informative posts for rocket n00bs. But in the last few months, I really haven't written as much as I'd like to.
I have started about 8-10 good blog post topics, but haven't finished any of them. The kind of post I feel most proud of on this blog is a bit long (for a blog), but is clearly spelled out with lots of photos, so any rocket n00b who comes along can understand it. That takes time and energy, and if I'm too tired, I don't write. If there's not enough light, I have to wait on taking photos.
Yet, I'm still getting page views - usually between 25-50 per day. Some of these may be brand new people, but some may be previous readers checking back to see if I have anything new on the blog. I have no idea. Anyway, my first goal for the year is to create more content for rocket n00bs and rocket veterans to have something new to look at. A commitment to a little bit of writing each day might be called for, even if I don't finish a post in one sitting.

I have started about 8-10 good blog post topics, but haven't finished any of them. The kind of post I feel most proud of on this blog is a bit long (for a blog), but is clearly spelled out with lots of photos, so any rocket n00b who comes along can understand it. That takes time and energy, and if I'm too tired, I don't write. If there's not enough light, I have to wait on taking photos.
Yet, I'm still getting page views - usually between 25-50 per day. Some of these may be brand new people, but some may be previous readers checking back to see if I have anything new on the blog. I have no idea. Anyway, my first goal for the year is to create more content for rocket n00bs and rocket veterans to have something new to look at. A commitment to a little bit of writing each day might be called for, even if I don't finish a post in one sitting.
The new work schedule should help with that.
2. Figure Out the Painting Situation
Since my move to Boston, I haven't finished a single rocket. Not a single one - in six months. A major roadblock to completing a rocket for me is painting.
Back in Bloomington, I had plenty of outdoor space to paint rockets - and to do so privately.
 |
| Estes Big Bertha on a painting stand behind my old apartment |
Here in Boston, I have to paint out front, and there's not much space between my apartment and the street. I don't want to get paint on the house. I need to figure out where to paint - especially larger rockets.
One option may be to join a makerspace - also called a hackerspace. These are a sort of co-op, where people get together to share tools and ideas.
I'm also considering building an indoor spray painting booth. But this must be done with care. A spray booth must keep paint inside, but must be properly ventilated. I've seen a few DIY spray booths online, but some of them are potentially dangerous. A box of sealed plastic sheeting is not enough if there's no ventilation. Spray paint fumes can cause brain damage in high concentrations!
A few weeks ago, I did manage to get a few small rockets primed, but that's it so far.
 |
| Estes Goblin |
 |
| Estes Reflector |
 |
| Imperius D - my own design. This was originally called "Donor's Rocket" on this blog. Mine will hold a D motor. |
 |
| Astron Sprint XL Clone - this is a clone of an Estes kit. I'm building the kit, but wanted to practice sanding the eliptical fins into airfoil shapes properly before trying it on the real thing. |
3. Improve My Recovery Rate

4. Launch an Electronic Payload

The first several months I launched rockets, I had great success. Chad lost a ton of his rockets. I managed to keep all mine on the field and recover them with little to no damage.
Then, my first launch of 2015, I had my first loss to a tree.
 |
| 3D Rocketry Nautilus II - my first tree loss. |
The 3D Rocketry Nautilus II got badly tangled on a tiny tree branch very high on a tree on a steep incline. There was no retrieving it. It was still stuck there six months later, when I last launched on that field.
Most of my Bloomington launches went well. Some of them left the field, but I was able to retrieve them. Nonetheless, my record took a few hits.
Since moving to Massachusetts, I've had worse luck. Despite flying on a much bigger field, I have recovered far fewer rockets. Amesbury gets breezy. And I have been trying to fly higher. The higher you fly, the bigger the chance of losing a rocket. I've had several leave the field entirely and disappear in deep scrub, sticker bushes and swampy grassy areas. It has made me nervous to launch anything at all, and I only launch a few of the rockets I take out each time.
Since my first club launch, I'd say I've had recovery failures of over 50% of all my rockets. I look at the fleet in my rocket room, and it looks a lot smaller than I remember it. I need to fix this, and get back to launching with confidence.
This can largely be improved with careful parachute selection. It seems that Estes kits often come with parachutes that are a little larger than they need to be. The Cosmic Explorer has a large, 18 inch parachute which brings the rocket down very slowly. It's beautiful to watch, but it does mean the rocket has more time to drift in the breeze. Replacing the chute with something smaller would bring the rocket down a little faster, and it would still likely land intact.
Some rockets may need to recover on a streamer. I admit I have only done this with rockets which come with a streamer as a kit. Streamers make me nervous otherwise. But my first scratch build, the Janus I two-stage rocket, which flew very, very high, was pretty lightweight.

A nice, big streamer would probably have brought it down closer to the launch site and it would have survived intact despite a faster descent. Instead, I lost it - the first rocket I flew at my very first club launch. Streamer recovery is something I need to experiment with.
Another tactic to improve odds of recovery is to angle the rocket into the wind. For safety's sake, the NAR Model Rocket Safety Code states that you shall not launch at more than 30 degrees from the vertical. But that does give you some leeway. How much angle to tilt the launch rod will require some practice on my part.
Of course, selecting the right motor for the day's wind conditions is also important. But I've seen plenty of rockets at CMASS launches which went much higher than mine, yet which recovered just fine while mine did not.
4. Launch an Electronic Payload
I've had a Jolly Logic altimeter for nearly a year now, but I have never launched it! Consequently, I really have no idea how high any of my flights have been.

Until I can more reliably recover my rockets, however, I'm reluctant to use a $70 altimeter. In the mean time, I'll probably pick up the much less expensive FireFly altimeter and try that out.
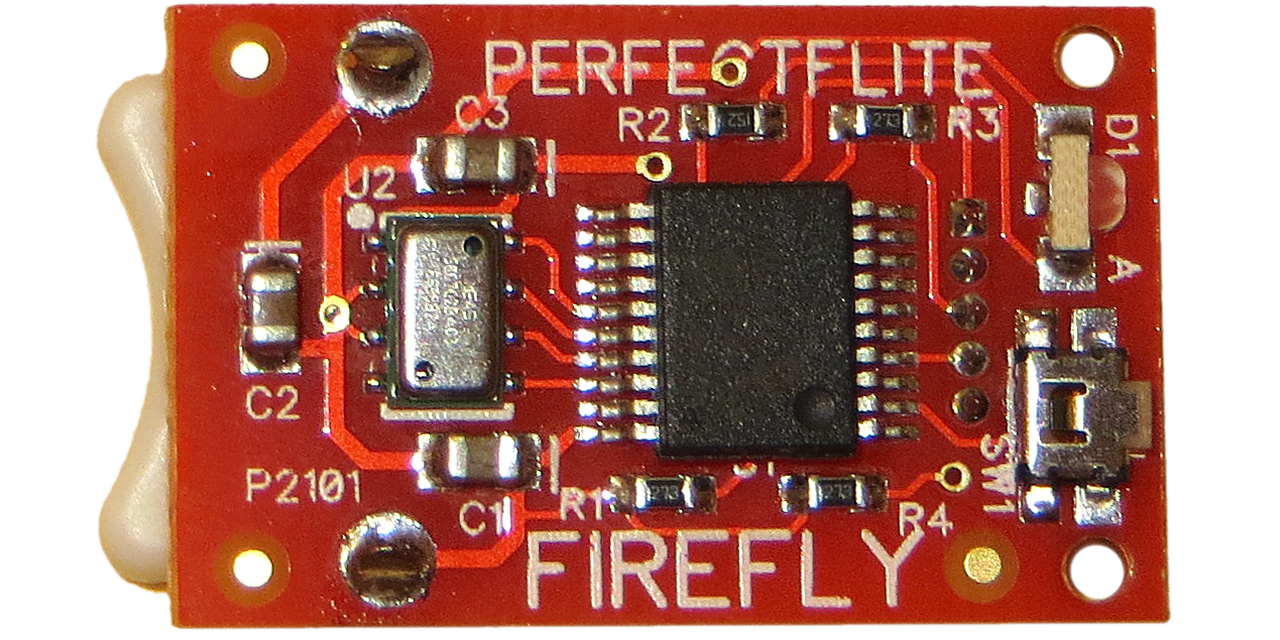 |
| The FireFly altimeter, from PerfectFlite |
The FireFly, from PerfectFlite Direct, is not as fancy as the Jolly Logic, but it's tiny, and at about $22, it's a good choice.
I also need to successfully launch a camera. I've had a few tries. I've had a few failed cameras, and lost one on a payload section which drifted far from the launch site on the wind. The closest I've gotten to success were a couple of bad flights.
5. Finish Building My Estes Pro Series II Kits
Earlier, I wrote about beginning to build two of the Estes Pro Series II kits - large mid power rockets with 29mm motor mounts. I began with the Nike Smoke, a scale model of a NASA sounding rocket, and the Ventris, a cool-looking rocket with a fat payload section.
These are great kits, and Estes has been selling many of its Pro Series II kits dirt cheap (there has been much speculation that Estes is getting out of the mid power market. I have a feeling they'll hold on to their E2X kits and maybe the Mega Der Red Max and Nike Smoke, but Ventris, Leviathan, Partizon and Argent will probably all be gone soon.). These are meant to fly mostly on F and G motors, but many people use them to get into high power rocketry, as they will also hold a small H motor. They're big and impressive in person, especially if you've only built small low power model rockets.
I've been chipping away on both the Nike Smoke and Ventris for months. They're nearly ready for primer and paint. I've also quietly been working on the Estes Leviathan, a nice fat model (now discontinued by Estes), and a pretty good choice for a Level 1 high power certification flight, if you choose to use a 29mm rocket for that purpose.
I need to finish these guys. I want to have them ready by April, when CMASS, my NAR section, begins flying again.


 |
| Nike Smoke |
 |
| Ventris |
I've been chipping away on both the Nike Smoke and Ventris for months. They're nearly ready for primer and paint. I've also quietly been working on the Estes Leviathan, a nice fat model (now discontinued by Estes), and a pretty good choice for a Level 1 high power certification flight, if you choose to use a 29mm rocket for that purpose.
I need to finish these guys. I want to have them ready by April, when CMASS, my NAR section, begins flying again.
6. Find a Nearby Launch Site
Because I live in Boston, I go out of town to launch rockets with CMASS. In the summer, they fly at a smaller field in Acton, MA, which is not terribly far from where I live. In the fall and spring, I have to drive all the way up to Amesbury, which usually takes me much longer than it should - at least an hour and a half, sometimes two hours.
But, unlike when I lived in Bloomington, IN, there's no place for me to go and casually launch a few small rockets. This is a sad state of affairs. If I want to go try out a new design, or if I want to show someone a quick launch (I have a coworker who is also a nanny as a second job, and I told her those kids would love rockets), or if I just need a little inspiration... When I haven't launched in a while, my building slows down, because I forget that feeling of why I'm doing this. Launching a few gets me hyped about building again... Anyway, if I just want to do a casual, non-club launch, by myself or with a few friends, I have nowhere to do it.
It's not that Boston doesn't have parks. It's that I don't want trouble.
Model rocketry is an overwhelmingly safe activity, despite the recent accident in California you may have read about. And model rocketry is legal in all but a few areas which have unfortunately banned it. I don't know for sure, but I'd bet there's nothing on the books banning model rocketry in Boston.
Despite this, I have heard of people having trouble. This guy in particular had the Boston police break up a scout launch, and it sounds like it was kind of a frightening experience!
Part of the problem is that model rocketry has a low public profile. Public familiarity with the hobby of model rocketry was probably much higher in the 1960s and 1970s, even the '80s.
 |
| From retroland.com |
These days, however, despite the fact that the hobby seems to be growing, it's not as well-known a hobby outside the community of those who pursue it.
And despite the fact that rocketry is very safe, it looks really dangerous to an outsider. I've heard people say "that can't be legal!" People have mistaken model rockets for fireworks, for tiny missiles, etc. And if you're launching in a park and someone sees you and complains to the authorities, they have to respond. Not every officer can be expected to know every statute by heart, I suppose, and if something looks illegal or dangerous, they can shut you down. This is not an experience I want to have.
There is one giant park in a part of Boston I'm unfamiliar with. It's called Millennium Park, and apparently people do occasionally launch there. One local cub scout troop reportedly launches there each year. It's supposedly really big. I'll have to go check that out. Maybe I'll try to make some contacts at MIT - they do a model rocketry camp for kids in the summer. Perhaps they know of a good launch site.
7. High Power Rocketry Level 1 Certification
High power rocketry (HPR) is the big brother to model rocketry. Unlike low and mid power model rocketry, you must obtain a certification to fly, and launches must be conducted using a waiver from the Federal Aviation Administration. There are several criteria which define a rocket as "high power," but a really basic definition is a rocket which uses an H motor or higher.
 |
| A "Stretch Leviathan" by Jim Seibyl - Gheem of The Rocketry Show - lifts off |
High power rocketry has three certification levels. Level 1 allows you to purchase and launch H and I motors. Level 2 will allow you to purchase and use J, K, and L motors, and a Level 3 certification will allow you to fly M motors and above, and to spend all of your money.
To obtain a high power certification, you must be a member of either the National Association of Rocketry or the Tripoli Rocketry Association. A Level 1 certification can be pretty simple if you do not try to make it complicated.
You have to build and fly a rocket on an H motor (which you may purchase if it is for the certification flight). You have to have one or more witnesses who are NAR or Tripoli certified. The flight must be successful and the rocket must be recovered. The recovered rocket must be judged to be able to fly again without major repair. In other words, minor damage, such as a chip in the paint job, will not disqualify your flight, but a broken fin will.
You can make a Level 1 certification flight more complicated by adding electronic parachute deployment, but you may keep it as simple as a very large model rocket launch.
The idea is that you must prove you are capable of building, launching and recovering a high power rocket safely, because these things are larger and heavier, so the risks are greater. Once you pass your certification flight, you may purchase and use H and I motors.
At one point, I thought I might have obtained my Level 1 by now. Then I realized I was in no hurry. Mid power rockets are quite impressive, and have a lot of the thrill of HPR with less of the cost and no certification requirements. And I haven't launched many MPR rockets yet, so I have that to look forward to still. HPR is costly, so I probably won't launch much. And yet...
And yet, there's a certain pride to be had from having a high power certification. Besides, I have the rockets and casing.
At a CMASS launch this fall, I went to our club vendor, Animal Motor Works - which sells kits and Cesaroni motors. Gloria of AMW had made turkey soup for the occasion. I'd arrived late, so I missed the famous CMASS hot dogs. I went to have some soup and introduce myself to Gloria.
Gloria's a charming lady. We chatted for a bit, and I said I might want to get some F or G motors. After a bit, she said "Why don't you have your Level 1 yet?"
I left with a belly full of soup and a Cesaroni Pro 29 Starter kit, which includes 29mm 3-grain reloadable motor casing, which can hold F, G or H motors. It would be perfect for a Level 1 cert flight. I promised Gloria I'd work on it and do my flight some time up at the large field in Berwick, Maine. What can I say? She talked me into it.

What rocket will I use for the cert flight? I haven't decided yet. Perhaps the Nike Smoke. Perhaps something else. I quite like the LOC Precision Iris, a scale model of another sounding rocket.

The Iris has a 38mm motor mount, which is more versatile than the 29mm, as there is a wide variety of 38mm diameter motors in various impulse classes. And with a motor adapter, you can use a 29mm motor in the 38mm mount.
These are my main goals for the year. I'll keep you all posted on how they're coming along - by sticking with Goal #1.
Like my Facebook page for blog updates and extra features.
Thursday, June 4, 2015
A Few New Things
Rocket Camp
The model rocketry College for Kids camp I'm teaching starts Monday. For the first week-long session, I have five kids. I'm still finalizing my plan for the week's schedule, and I need to figure out what to do if it rains on Friday and we can't launch - that would be a huge disappointment!
Donor's Rockets
These are coming along great.

I'm building a fifth one for myself, with a D motor mount, but it's still in pieces.
These rockets need a cool name, though. "Donor's Rocket" doesn't have much of a ring to it.
New Book
I just acquired a copy of Mark Canepa's book Modern High Power Rocketry 2.

I'm not in a rush to get a high power certification, but I like having another book on hobby rocketry (side note: I don't like that term, "hobby rocketry." Something about the word "hobby" - like, a hobby horse is a child's fake wooden horse, not a real horse. Model rockets and high power rockets actually fly! But you know what I mean...). And I'm sure that some of the stuff in this book can be applied to mid power rockets as well. If I learn something from this book that I think my fellow rocket n00bs might find useful, I'll certainly incorporate that knowledge into this blog.
Something Else Cool
Who's that good-looking dude on Skype with CG of The Rocketry Show?

OK, it's off to Ivy Tech to submit my paperwork to HR. Rocket Camp, T-minus 4 days and counting!
Like my Facebook page for blog updates.
Sunday, January 11, 2015
Forthcoming Rocketry Book
I've written on this blog about Mike Westerfield's book Make: Rockets: Down-to-Earth Rocket Science before. It came out a few months ago, and it has been a great help to me. Without it, I doubt I would have had the courage to design and build my own first rocket.
 The book starts you out building rockets from components right away - in other words, you get the components and follow instructions to build one of the author's designs, but you're not using a kit. So you cut tubes to size, cut out your own fins, etc. It helps you get away from the mindset that you need a kit to build a rocket. Doing that, with the knowledge I gained about rocket stability and standard sizes of component parts, gave me the freedom to design and build one of my own.
It doesn't stop there, of course. Since it comes from a maker movement publisher, the book gives a lot of details on how you can make all your own ground support equipment - launch controllers, launch pads - as well as tracking devices to find a rocket's altitude, and a lot of technical information about how to determine things like what size parachute you need, what kind of motor you'll want to put in your rocket... It's pretty great, and I found it very helpful - it filled in some of the "how-to" gaps I felt after reading The Handbook of Model Rocketry by G. Harry Stine and Bill Stine.
In the book, Westerfield mentions another, forthcoming book, Make: High Power Rockets, due out "some time in 2015." Having read and re-read Make: Rockets..., I really want to get my hands on this book, because I want to see his take on certain things.
On Friday, I emailed MakerMedia, the book's publisher, to ask if they had an expected publication date. MakerMedia also publishes Make magazine, a publication aimed at the DIY maker's movement with an emphasis on craft, electronics, at-home science and engineering, and they run Maker Faire.
I told them how much I liked the book, and attached a link to my video of Janus I - the two-stage rocket I designed and built myself, just for their interest.
What happened then was most unexpected. I heard back from several enthusiastic people at MakerMedia, including one person from the magazine who asked if they could post my video on their Facebook page. "Of course!" I said. What a cool birthday present!
High power rocketry is a large subject, so the news is that the book will probably be out some time early next year, 2016.
I hope it's sooner, but there's a lot of information to put into a high power book. Not only information - any book from MakerMedia is about making stuff, so there's surely a lot of things to design and try out before it ends up in the book.
The new book will cover both mid power and high power rocketry, as the first book only focused on models that used up to an E sized engine.
The first book gives some elegant designs for low power stuff, so I would like to see Westerfield's take on certain things for mid to high power:
1. Through-the-wall fins (also known as TTW)
This is where fins have a tab at the root, which gets inserted into a slot in the rocket body tube and attached to the motor mount.
This adds strength, as the fins aren't merely glued to the surface where they can easily snap off at landing.
TTW fins are mentioned in Make: Rockets, but the author says that these are less common to find in low power rockets. They're much more common - in fact, necessary - in mid and high power rockets.
While that's true, I do have a few kits with TTW fins - the Cosmic Explorer, pictured above, and the Crossfire ISX, both low power, Skill Level 1 kits.
 I'm far less worried about these fins breaking off at landing.
In a kit, the fin slots are usually pre-cut, so you don't have to worry about getting them straight. When you build your own design, you have to cut your own tabs - something I haven't tried yet.
Here's a video from Tim Van Milligan at Apogee Components about slotting your own tubes for TTW fins:
If I had opted for TTW fins for my Janus I, I would probably not have snapped two of them off at home after the first flight.

 Perhaps the Tim Van Milligan method is the one everyone uses. But what I like about Westerfield's first book is that he gives lots of explicit instructions and explanations, so I'm looking forward to seeing his take on this in the next book.
2. Launch rail construction
As I mentioned here, I think I want to build a launch rail for my larger rockets. There are a lot of designs out there on the web, but some of them can be hard to decipher for a n00b. What are these parts? How do I "shim" that thing in there? John Coker gives a great design for a launcher base, but I don't know where to get the parts, or how to cut them, or if I need to learn to weld... etc. I'm just not experienced enough at making some things.
In the previous book, Westerfield has a really elegant design for a low power launch pad. It's sturdy, and you can swivel it to any angle, and it uses a drill chuck to hold the rod, so you can put any size rod in it you want, up to a 1/4 inch or more.
I actually went for an easier option for mine - my camera tripod broke, so I can no longer raise the head. So I got the Odd'l Rockets Adeptor, which screws right onto the tripod camera shoe. I made a blast deflector from a steel box cover, and it works great.
But Westerfield gives great instructions - and since this is a Maker publication, there is no assumption you know how to work with the parts you need. You get a complete parts list, and instructions on how to cut what where, etc. You can vary the design if you know what you're doing, but if you don't, all the instructions are in there, clearly spelled out.
So I'd like to see his rail launch pad design.
3. Launch relay system
For high power rockets, you need to be far away from the launch pad, for safety. Because of this, you might need very long wires from the launch controller out to the pad. But the longer the wires, the more resistance you have in the system, so by the time the wires reach the pad, there may not be enough current running through them to reliably fire the igniter.
A relay is basically a remote switch hooked up to a battery. The launch controller merely tells the switch to close, while the battery running power to the igniter itself is right there, near the pad. So the igniter gets all the current it needs - the igniter gets the power directly from the relay battery, not from the batteries in the launch controller.
But a relay isn't useful only for high power rockets. It's also useful for cluster rockets - where the rocket has multiple motors side by side.
When you have current flowing through multiple igniters, the current through each igniter is less.
The current gets divided up among the igniters. Which means that it can
take a split second longer for each igniter to get hot enough to start
the motor. If, say, two out of three or four motors start before the
others get ignited, and the rocket leaves the pad, the igniters will
fall out the back of the unlit motor(s), and you'll get an uneven or
less powerful flight.
Reliable, simultaneous ignition is the main problem with a cluster launch, so having a relay with the battery right by the pad using only a short section of wire makes this less of a problem - each igniter gets as much juice as it can, simultaneously.
Now, just as with launch pads, there are a lot of plans online for relay systems. One guy on The Rocketry Forum even sent me a very detailed schematic for his relay system, and it's clear and understandable. But, I'm not very experienced with electronics - in fact, I've only built one electronics project: the launch controller from Westerfield's previous book, Make: Rockets...
I'd been wanting to make my own launch controller. In fact, there are lots of plans online - the National Association of Rocketry website has instructions for a very simple one. But I wanted something more versatile. I looked at lots of schematics, and thought of designing my own.
I understood how the controller should work. But, being such a n00b at electronics, I was too nervous to do it. I had no experience building anything electrical, and I thought what if I get the wrong switch or resistor or something, and I don't have enough amps or ohms or watts or whatever??
Again, Westerfield gives a detailed parts list, and explains the hows and whys of launch controllers. Included in the book are tables of the various igniters you find out there, and the minimum amperage needed to ignite them all - including how many of each igniter can reliably be used with his launch controller design. He also gives a detailed, mathematical explanation of resistance and amperage, which you are free to skip if it's over your head - you can merely follow the instructions and build the controller if you want to.
I built this thing, following the very detailed instructions, and it works beautifully.
But, of course, it does have a 35 foot lead wire out to the launch pad, and the external 12 volt battery is right by the launch controller.
Perhaps you've heard that one of the best igniters on the market for clusters - the Quest Q2G2 - has been off the market for many months, and will continue to be until they can bring them back. When they do, they are likely to have a different form of pyrogen on them, the substance which flares up to aid motor ignition when the wires get hot enough. They may continue to be great, but they may be slower.
Anyway, for now, I need to use Estes igniters on my cluster rockets, and I want to make sure they light reliably. A relay would be very helpful with this. Given the detailed nature of the previous book, I am eager to read Westerfield's instructions on relay systems.
I'm not into high power yet, but I am about to transition into mid power. There is a lot of information which crosses over, and I like to do my homework before I embark on a new rocketry project. 2016 seems a long time away when I think about rockets, but it's something to look forward to.
There is already a handbook on high power rockets - Modern High Power Rocketry by Mark Canepa. But it is already ten years old. Some things change - including technology and legal issues - and besides, it's always good to have more than one resource for information on a subject. I look forward to seeing what information Mike Westerfield will bring us.
In the meantime, check out the first book!
Like my Facebook page for blog updates.

It doesn't stop there, of course. Since it comes from a maker movement publisher, the book gives a lot of details on how you can make all your own ground support equipment - launch controllers, launch pads - as well as tracking devices to find a rocket's altitude, and a lot of technical information about how to determine things like what size parachute you need, what kind of motor you'll want to put in your rocket... It's pretty great, and I found it very helpful - it filled in some of the "how-to" gaps I felt after reading The Handbook of Model Rocketry by G. Harry Stine and Bill Stine.
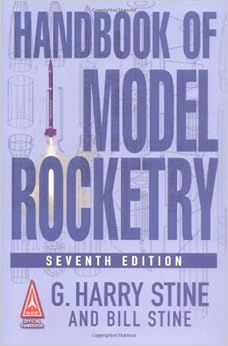 |
| Required reading and a great book, but it left me wanting to know more - specifically, how-to. |
On Friday, I emailed MakerMedia, the book's publisher, to ask if they had an expected publication date. MakerMedia also publishes Make magazine, a publication aimed at the DIY maker's movement with an emphasis on craft, electronics, at-home science and engineering, and they run Maker Faire.
I told them how much I liked the book, and attached a link to my video of Janus I - the two-stage rocket I designed and built myself, just for their interest.
High power rocketry is a large subject, so the news is that the book will probably be out some time early next year, 2016.
I hope it's sooner, but there's a lot of information to put into a high power book. Not only information - any book from MakerMedia is about making stuff, so there's surely a lot of things to design and try out before it ends up in the book.
The new book will cover both mid power and high power rocketry, as the first book only focused on models that used up to an E sized engine.
The first book gives some elegant designs for low power stuff, so I would like to see Westerfield's take on certain things for mid to high power:
1. Through-the-wall fins (also known as TTW)
This is where fins have a tab at the root, which gets inserted into a slot in the rocket body tube and attached to the motor mount.
 |
| The tab at the root of the fin (upper left)... |
 |
| This goes through a slot in the body tube and is glued directly to the motor mount tube. |
This adds strength, as the fins aren't merely glued to the surface where they can easily snap off at landing.
TTW fins are mentioned in Make: Rockets, but the author says that these are less common to find in low power rockets. They're much more common - in fact, necessary - in mid and high power rockets.
While that's true, I do have a few kits with TTW fins - the Cosmic Explorer, pictured above, and the Crossfire ISX, both low power, Skill Level 1 kits.
 |
| Fins for the Crossfire ISX |
In a kit, the fin slots are usually pre-cut, so you don't have to worry about getting them straight. When you build your own design, you have to cut your own tabs - something I haven't tried yet.
Here's a video from Tim Van Milligan at Apogee Components about slotting your own tubes for TTW fins:
2. Launch rail construction
As I mentioned here, I think I want to build a launch rail for my larger rockets. There are a lot of designs out there on the web, but some of them can be hard to decipher for a n00b. What are these parts? How do I "shim" that thing in there? John Coker gives a great design for a launcher base, but I don't know where to get the parts, or how to cut them, or if I need to learn to weld... etc. I'm just not experienced enough at making some things.
In the previous book, Westerfield has a really elegant design for a low power launch pad. It's sturdy, and you can swivel it to any angle, and it uses a drill chuck to hold the rod, so you can put any size rod in it you want, up to a 1/4 inch or more.
I actually went for an easier option for mine - my camera tripod broke, so I can no longer raise the head. So I got the Odd'l Rockets Adeptor, which screws right onto the tripod camera shoe. I made a blast deflector from a steel box cover, and it works great.
 |
| The Adeptor from Chris Michielssen at oddlrockets.com... |
 |
| ...transforms a camera tripod into a launch pad. Just add a blast deflector. |
 |
| My blast deflector is a steel electric box cover with a hole drilled in the middle. I can lay the lead wires from the launch controller into the slots and hold them still with the binder clips. This gives some slack to the wires so the initer doesn't pull out. |
So I'd like to see his rail launch pad design.
3. Launch relay system
For high power rockets, you need to be far away from the launch pad, for safety. Because of this, you might need very long wires from the launch controller out to the pad. But the longer the wires, the more resistance you have in the system, so by the time the wires reach the pad, there may not be enough current running through them to reliably fire the igniter.
A relay is basically a remote switch hooked up to a battery. The launch controller merely tells the switch to close, while the battery running power to the igniter itself is right there, near the pad. So the igniter gets all the current it needs - the igniter gets the power directly from the relay battery, not from the batteries in the launch controller.
But a relay isn't useful only for high power rockets. It's also useful for cluster rockets - where the rocket has multiple motors side by side.
 |
| The Quest Quadrunner - a four-motor cluster rocket |
 |
| A view of the motor mount during construction. All four motors mustignite simultaneously, or the rocket won't fly right. |
Reliable, simultaneous ignition is the main problem with a cluster launch, so having a relay with the battery right by the pad using only a short section of wire makes this less of a problem - each igniter gets as much juice as it can, simultaneously.
Now, just as with launch pads, there are a lot of plans online for relay systems. One guy on The Rocketry Forum even sent me a very detailed schematic for his relay system, and it's clear and understandable. But, I'm not very experienced with electronics - in fact, I've only built one electronics project: the launch controller from Westerfield's previous book, Make: Rockets...
 |
| The "Mono Launch Controller" from Make: Rockets.. |
I understood how the controller should work. But, being such a n00b at electronics, I was too nervous to do it. I had no experience building anything electrical, and I thought what if I get the wrong switch or resistor or something, and I don't have enough amps or ohms or watts or whatever??
Again, Westerfield gives a detailed parts list, and explains the hows and whys of launch controllers. Included in the book are tables of the various igniters you find out there, and the minimum amperage needed to ignite them all - including how many of each igniter can reliably be used with his launch controller design. He also gives a detailed, mathematical explanation of resistance and amperage, which you are free to skip if it's over your head - you can merely follow the instructions and build the controller if you want to.
I built this thing, following the very detailed instructions, and it works beautifully.
 |
| A phono jack serves as the launch safety key |
 |
| The lead wires connect to the controller with banana jacks - you can remove them for easy transport and storage. |
 |
| The controller has internal batteries, but you can connect a 12v external battery through a cigarette lighter-style jack. |
Perhaps you've heard that one of the best igniters on the market for clusters - the Quest Q2G2 - has been off the market for many months, and will continue to be until they can bring them back. When they do, they are likely to have a different form of pyrogen on them, the substance which flares up to aid motor ignition when the wires get hot enough. They may continue to be great, but they may be slower.
Anyway, for now, I need to use Estes igniters on my cluster rockets, and I want to make sure they light reliably. A relay would be very helpful with this. Given the detailed nature of the previous book, I am eager to read Westerfield's instructions on relay systems.
I'm not into high power yet, but I am about to transition into mid power. There is a lot of information which crosses over, and I like to do my homework before I embark on a new rocketry project. 2016 seems a long time away when I think about rockets, but it's something to look forward to.
There is already a handbook on high power rockets - Modern High Power Rocketry by Mark Canepa. But it is already ten years old. Some things change - including technology and legal issues - and besides, it's always good to have more than one resource for information on a subject. I look forward to seeing what information Mike Westerfield will bring us.
In the meantime, check out the first book!
Like my Facebook page for blog updates.
Subscribe to:
Posts (Atom)