All this month I'm posting photos on Twitter for #Rocketober. They'll appear here with slightly expanded text.
I've been battling a cold the past few days, so I haven't done much building or Rocketober tweeting. I had some time today, though, so here's what I've done so far.
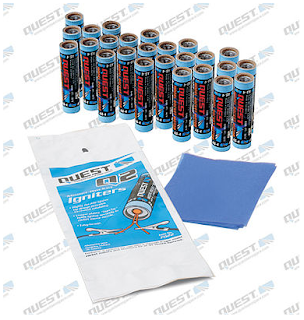
The Apogee Components theme of the day is "Rocket Wish List." I have a lot of things on my wish list, but the biggest one is for Quest motors and Q2G2 igniters to come back.
Back to Sky Wolf...
Once the electrical tape was removed, the shock chord was securely epoxied to the motor tube. A bit of sanding was required, as some epoxy oozed down the sides of the motor tube under the tape edges, and you need a clear space to attach the fins to the motor tube.
The knot in the shock chord stuck up a little bit above the forward centering ring and hardened. While I could still get the motor mount into the airframe, the pressure would cause the airframe to distort. I sanded the knot down level with the centering rings. Since the knot isn't tied to anything, and is only used as a shock chord stop, this will be fine.
The fins came wrapped in masking tape, which left sticky residue on the fins. This would need to be removed.
I decided to try my standby for removing sticky adhesive goo, Ronsonol lighter fluid. Goo Gone would work, but it would soak into the fins and leave a greasy residue, possibly ruining them. The lighter fluid would evaporate, making it a better choice.
Just a small bit of lighter fluid on a swab takes care of the tape residue.
The fins are now all clean, and can be sanded.
First, I need to check the accuracy of the shape of the fins from my simulation. I printed out the fin templates on paper and laid the actual fins on them. The aft fin is just about perfect. The forward fin is pretty close - close enough for a simulation. The difference in center of pressure between my simulation and a "correct" one will probably be less than a millimeter.
This tool is called a sewing gauge. It's used for marking hems and button hole locations on clothing. I use it to mark guide line positions on fins when I sand airfoils or beveled edges. It costs around a dollar and can be found at fabric stores or craft stores, or anywhere that sells any kind of sewing supplies.
The leading edges of the forward fins will have a short bevel and rounded edge. I set the sewing gauge for 1/4 inch and make two or three marks about 1/4 inch back from each leading edge. I do all leading edges first, then adjust the gauge, and do all trailing edges.
The trailing edges of the fins will have a longer bevel - about 3/4 inch - down to a much sharper edge.
Once all the marks have been made, connect them with a ruler.
Now I have clear guide lines for sanding my beveled edges. I'll sand to the pencil lines, then stop.
I use my ruler to mark a center line down the edges of the fins. I make a mark, then flip the fin over and make another mark. Now I have a double line which gives me an indication of how close to the true center of the fin edge I'm sanding.
I've rounded the leading edge of one fin. By sandwiching the fins together, I can check the sides and make sure I'm sanding evenly. Then I'll do some touch-ups if necessary. See my pencil lines?
Once all three fins have been rounded over, I sandwich them together again and compare them. You should continually check your work as you sand so you can make things more even if necessary.
Look at the fins edge-on as well, to make sure things are staying straight.
When beveling trailing edges, again, stack the fins together to compare them. Make sure you're sanding evenly.
This one will need a little touch-up, as it's slightly uneven. And when I'm done with all three trailing edges, I'll gently go over all fins to take off the sharp transition between the flat part and beveled part.
When I install the motor mount, the shock chord must not be in line with any of the fin slots, because the fins will be attached to the motor tube. The shock chord must go between fin slots, and to keep things neat, I'll like it up with the launch lug line, as shown.
To make sure I don't get confused when gluing in the motor mount, I've made a pencil mark in line with where the shock chord is mounted. I'll line that up with the launch lug line, and everything should fit together just fine.
Follow me on Twitter.
Like my Facebook page for blog updates and extra stuff.
Have a question you'd like to see addressed on this blog? Email me at iamtherocketn00b@gmail.com.


No comments:
Post a Comment