Monday, March 18, 2019

Estes Saturn V Build - Getting Started - Tube Ends, Motor Mount


Click Here for Part 1

Maybe you recently purchased an Estes Saturn V, and yet you are afraid to begin building it. Am I ready for this? you might ask yourself. The Saturn V is listed as a Skill Level 4 kit (some might consider it more of a Skill Level 5 rocket). That term - Skill Level - can be intimidating for people. How do you know if you've graduated to the next one?

When I was first starting out, building Skill Level 1 rockets, I was nervous about building a Skill Level 2 kit, but it turns out a lot of these things are arbitrary. The Crossfire ISX, for example, one of two rockets which come with the Tandem X Launch Set, is considered a Skill Level 1 kit.


I actually think it should be labeled a 2, because some of the thick plastic parts require some cutting and trimming, and it might be a bit tricky for a new builder.

On the other hand, the Goblin is a Skill Level 2 kit, and for the life of me, I cannot figure out why.


The Goblin could hardly be a simpler build. The only thing I can think of is that it flies on D motors, and maybe Estes wants beginners to start out with something in the A-B-C range first.

Nevertheless, the Saturn V is an advanced rocket kit. It certainly shouldn't be one of your first builds. But, if you've been doing this for a while now, and if the rockets you're currently building look better than the ones you built when you started, you're probably better at this than you think. And, as I indicated in the title of my previous post, the thing about building a challenging kit like this, if it's a new level of building for you, is to take it one small step at a time. Follow the directions, work slowly, and think about what you're doing before you do it, and you'll probably end up with a pretty good looking Saturn V.

Can you screw this up? Sure! As I write this, I'm still in the early stages of building, and there's plenty of time for me to make mistakes. But there's no other equivalent rocket for you to "practice" on, and if you want a Saturn V, I suggest you take your time and build one. You'll definitely learn something, and I'm pretty sure you'll be happy with the results.

OK, on to the build! Here's a picture of the box with the contents inside. I should probably have taken pictures of all the parts laid out, but I didn't, so there we are. If you're building an Estes Saturn V, you can take a look in your own box and see all the parts.


Prepping the Tube Ends

The first thing I do is prep all the tube ends, by running a ring of thin CA - cyanoacrylate or hobby grade super glue - around the inside edge of both ends of each tube.


CA can be hazardous, so be careful. Specifically, it can glue parts of your body together (including fingers and eyelids, so keep it away from your face!), and large quantities of it can give you a bad chemical burn as it cures.

I try to do both ends of all tubes when building a model rocket. I used to only do the nose cone end, and sometimes I forget to do the motor tube, but I try to do all of them. Thin or medium thickness CA can be used. I like the thin stuff, because it wicks into all the paper fibers, even on thicker high power rocket tubes. Run a bit around the edge and quickly wipe off excess with a bit of paper towel or cotton swab.

The advantage of CA on the ends of the tubes are threefold. First, it hardens the paper fibers and adds a bit of strength to the ends of the tubes, which can be pretty thin on some rockets. Second, if you need to sand the inside of the tube to get something to fit, it will enable you to sand it nice and smooth, rather than shredding the paper. Thirdly, it protects the vulnerable edges of the tubes from water damage.

For example, let's say your rocket lands on some wet grass, and it takes you a few minutes to get to it. Well, if the rocket is painted, the body tube will be sealed from water damage, and be just fine. But if the ends of the tube - either the motor end or the nose cone end - aren't covered completely in paint, moisture can get in between the layers and quickly cause them to separate. Not a problem if you've prepped the ends with CA.

Or even way before that, when you're just starting to paint your rocket, say you're halfway through painting a nice coat of white when the spray can starts spitting chunks of pigment. You end up with sharp little bumps that look horrible, and would never allow you to put any decals on the rocket (this has happened to me many times). The solution is then to let the paint dry and wet sand the damaged paint off, using some wet/dry sandpaper and little bit of water. Again, the paint on the rocket will protect the tube from water damage, but if a dribble of water runs down the tube while you're sanding, and gets on the end of the tube, again, the layers will delaminate, and you'll have a terrible looking rocket. A bit of CA during building can help prevent this.

Assembling the Motor Mount

The motor mount for the Saturn V is similar to most Estes kits. There is a green thrust ring, sometimes called an engine block, which gets glued into the motor tube to prevent the motor sliding forward. There is a motor hook - a long one in this case, for longer E black powder and composite motors. And there is a sleeve to hold the hook in place on the outside of the motor tube. Rather than being a thin Mylar ring as is the case with low power Estes kits, this sleeve is a sturdy paper tube.


Instructions are standard. Run a ring of glue around the inside of the tube, insert the thrust ring and push it into place with the supplied spacer/pusher tube, cut a slit for the hook and insert it, then glue the sleeve into place over the hook.


Estes' instructions recommend two motors for this rocket: the Estes E12-4 black powder motor, and the Estes E30-4 composite motor, but in fact there are a number of motors which would fit. The hook gives you 95mm of space from front to back, so any 24mm composite motor from AeroTech would also fit (for shorter ones, you'd need to insert a spacer into the motor tube).

The AeroTech 24/60 casing, top, and 24/40 casing, bottom. The 24/60 is 95mm long - the same length as an Estes E12.

Distortion in the first photo makes the 24/60 casing look too long for the hook. It's not.

So, there are a variety of great motors, from Estes and AeroTech, available for you to try in the Saturn V. (Actually, the Estes composite motors were all manufactured by AeroTech, so if you've flown one of those, you've flown what is essentially an AeroTech motor).

But there are other 24mm motors which will not fit, and I happen to fly some of those. My club's on-site vendor is Animal Motor Works, and they deal mostly in Cesaroni composite motors. I have a casing for their three-grain motors, which is too long to fit with the hook and thrust block in place.

A Cesaroni 3-grain motor casing compared with an Estes E12 motor. CTI has 24mm motors as long as six grains!

One motor I'm looking to try in particular is the Cesaroni F30, which is a 3-grain composite motor which leaves a white smoke trail and burns for about 2.4 seconds - pretty long for a small composite motor. It's longer burn time is due in part to its core geometry, or the shape of the hole running down through the propellant grains. It's what's known as a moon burner, since the hole is off center.

The end of a Cesaroni F-30 motor grain, showing the core running down one side. The hole in the middle
is at an angle, and only about an inch deep, and is just there to guide the igniter into the side core.

A moon burner sounds pretty perfect for a moon rocket, so I decided to deviate from the instructions a bit.

Motor Retainer


Luckily, Estes makes a 24mm screw-on motor retainer. These come in two parts - one gets epoxied to the end of the motor tube, and the screw-on cap comes on and off to install or remove a motor. They use the 29mm version in their Pro Series kits, and the 24mm in a few of their smaller kits. They also sell both sizes separately, and they're great!

Nearly all composite motors on the market now have a built-in thrust ring on the back end. That's the wider bit you see on the back end of the AeroTech and Cesaroni casings above. They are also present on all AeroTech and Estes single-use composite motors. The nice thing about them is that they do the job of the little green engine block ring you normally glue into the motor tube. If you are lucky enough to get your hands on one of the discontinued Pro Series "builder" kits - like the Leviathan, Partizon, Ventris, or Argent - experienced rocketeers will tell you to leave the green thrust ring out of the motor tube. You'll only be limiting the size of motors you can use, because anything that's too long won't fit!

If I wanted to fly with a motor that didn't come with a built in thrust ring, I could simply create one, by wrapping a narrow strip of tape around the base of the motor until it was wide enough to prevent the motor moving forward. Then I could install it just like a composite motor, and screw the retainer in place.


Some people are skeptical that this would work - wouldn't the tape fail? And isn't that a violation of the Model Rocket Safety Code's rule about modifying motors?

But it really does work, and the MRSC has a rule against "tampering with" motors, which is not the same as putting a little tape on the outside of it. The NAR does not consider wrapping tape around a motor to be tampering. Heck, using a wrap of tape to get a friction fit in small competition models is common practice!

Mass Components and Stability


Whenever you alter the design of a kit, especially if you might be using a heavier motor than what was in mind when it was designed, you need to make sure the rocket remains stable. Your distribution of mass might change, and therefore the center of gravity (CG) may change. If the CG moves too far aftward, toward the bottom of the rocket, your CG may end up too close to the center of pressure (CP), resulting in a marginally stable rocket. Anything other than ideal flying conditions would make the rocket go unstable. Or worse, your CG may end up behind the center of pressure. In that case, you'd have an unstable rocket.

I'll need to keep my eye on stability as I choose motors. For now, though, I wanted to see if I was changing the CG by switching from a motor hook, sleeve, and engine block to a simple screw-on retainer.

You can see in the above photo, the kit combo weighs in at 8.7 grams, minus glue (which is negligible, if you use white or yellow wood glue).


The screw-on motor retainer weighs in at about 1 gram less than the kit parts, not counting the epoxy. Epoxy is a bit heavy, but I'd keep it to a minimum here. Also, while the kit retention system weighs more than the retainer, the retainer's mass is all concentrated at the very end of the motor tube, so the weight distribution won't be the same. But, at the very least, it didn't look like I'd be adding significant weight to the back end just yet.

The smooth inside of the motor retainer got sanded to roughen it up a bit, then glued on with a thin layer of JB Weld steel-reinforced epoxy. Any epoxy that goes where you don't want it (like inside the end of the tube or on the threads of the retainer - or on your cutting mat) can be cleaned up with rubbing alcohol while the epoxy is still liquid. Just use a cotton ball or swab and a bit of alcohol, and wipe off the excess.


After epoxying on the motor retainer, I moved on to gluing the centering rings onto the motor tube, and to aid in this task, I used an unusual tool - the Estes Tube Cutting Guides.


These plastic rings are intended to help you cut a tube in two pieces, and to make a straight, clean cut. The guides come in a set of several sizes corresponding to standard Estes body tube diameters. Each one is made of two pieces. They come together and clamp firmly to a body tube, and you can then run around them with a hobby knife to make a clean cut with a factory edge.

I recently saw an experienced rocketeer online describe the Estes Tube Cutting Guides as "a waste of money." While I respect that rocketeer's level of experience, I'm afraid I have to disagree.

First of all, they're cheap. Depending on where you buy them, they cost between 8-12 dollars - hardly throwing your money away. Secondly, a tool is only a waste of money if you don't use it. And while it's certainly possible to get a clean cut of a body tube by hand, simply by wrapping a piece of paper around the tube and using that as a guide for your hobby knife, you do need a steady hand. If you need a little help, these cutting guides are great. But they even have other uses you might find handy.

In fact, I don't even use Estes Tube Cutting Guides for cutting tubes that often (I have other tools for that). But I do use them for other things. And often, I'll use them as a pushing tool to get centering rings on perfectly perpendicular to the motor tube.

For the sake of clarity, let's call one end of the motor tube the top, and one end the bottom. First, mark the tube where the centering rings are supposed to go, according to kit instructions (or your own design). We're going to start from top to bottom.

Slide the tube cutting guide onto the motor tube below the top centering ring mark. Don't clamp the guide down too tightly - it needs to slide on the tube.

Then place the centering ring on the tube, also below the top mark. Give some space between the centering ring and the mark on the tube. Then apply a bead of glue just below the top mark. Use the Tube Cutting Guide to push the centering ring up to your mark, thus creating a thick fillet of glue. With a fingertip, smooth the fillet and wipe away the excess glue (it will dry more quickly that way!).


After a few minutes, the glue will have grabbed hold of the centering ring, and you can remove the cutting guide before the glue dries completely. Even if it does dry, white and yellow glue don't adhere to plastic too well, and you should be able to remove the guide without too much effort.

Work from one end to the other, making sure you don't accidentally trap the guide between two centering rings!

As a result, you should end up with a motor mount with perfectly straight rings.
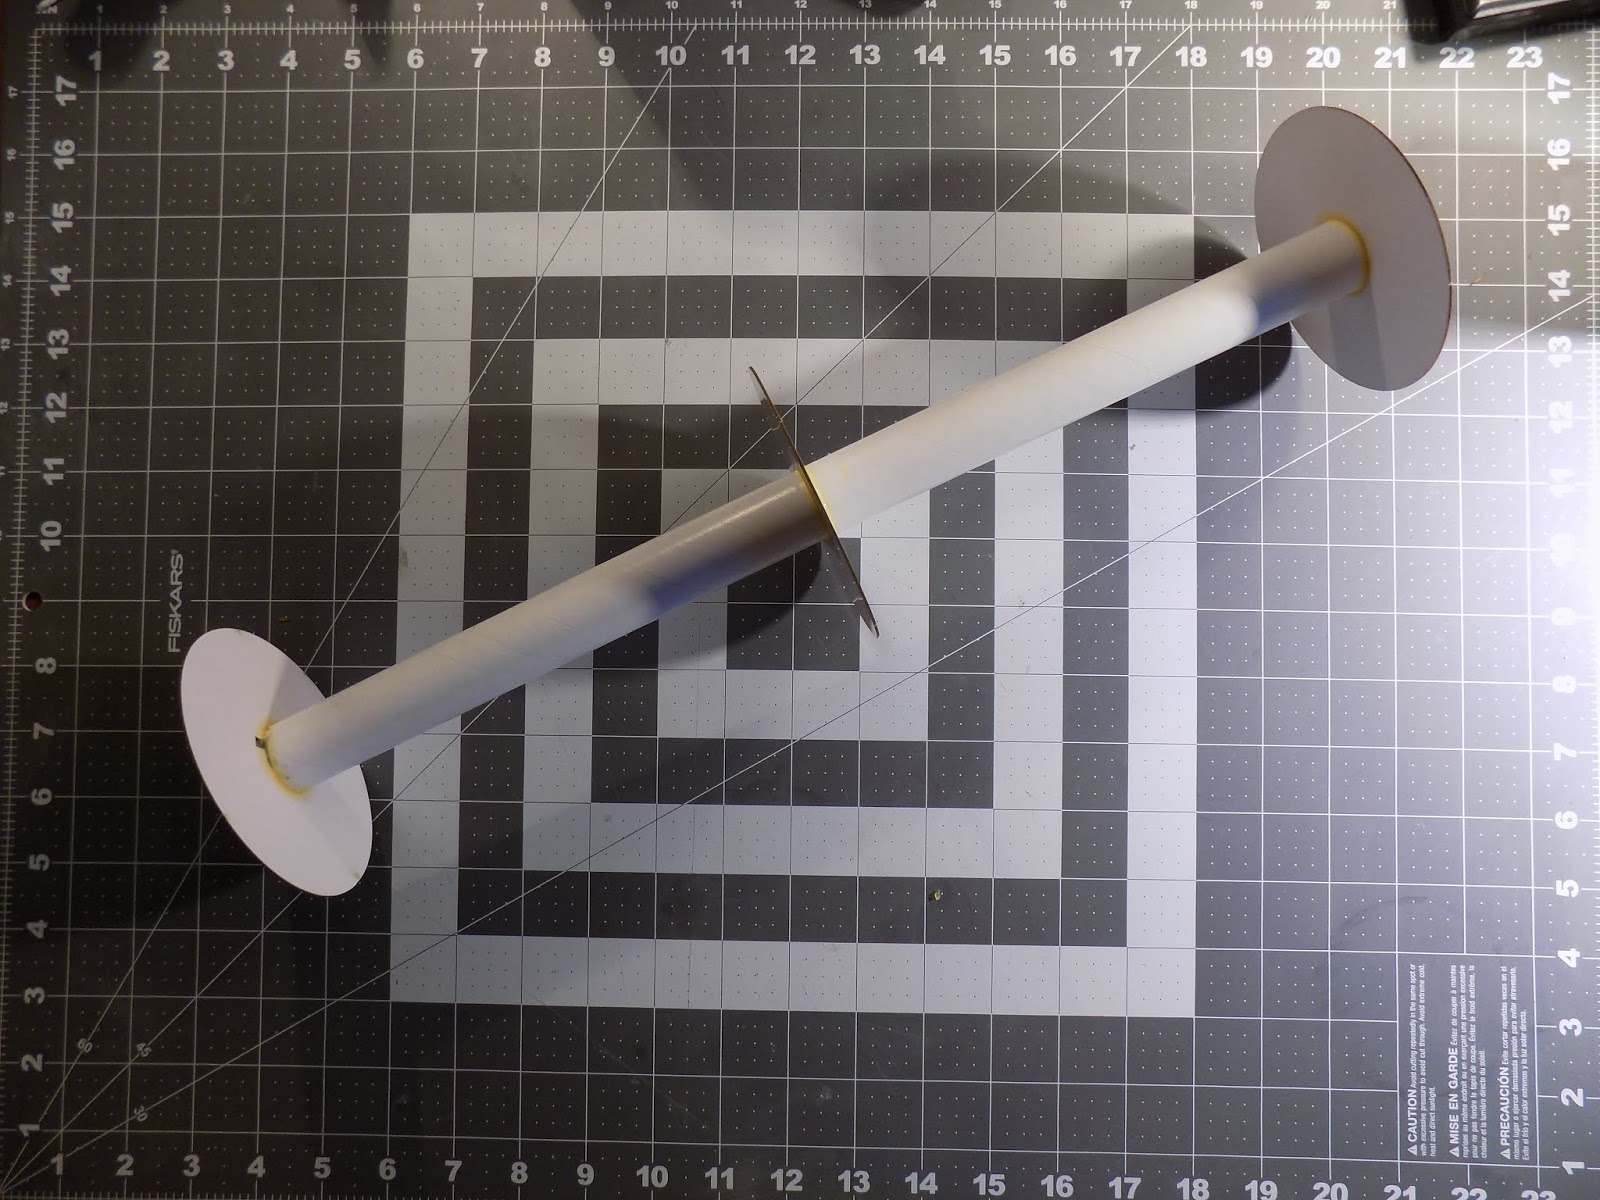

Of course, this doesn't work if you have a motor hook in the way, but for larger projects like this, it's a handy trick. It can even be used on some high power rockets - the BT-60 sized Estes Tube Cutting Guide fits a 38mm high power motor tube almost perfectly, since the outer diameters of the tubes are nearly identical.

Assembling the motor mount for a prototype of the AeroTech Monstra

I first tacked the centering rings on with wood glue, then made epoxy fillets

Perfectly aligned!

Adding Strength


Here's a step I'm not sure I needed to do, and in fact, might not have been a great idea, but I did it and there we are.

Since I may use more powerful motors than the two recommended by Estes, I thought it might be a good idea to add a bit of strength to the motor mount. There's a lot of distance between the motor tube and the edges of the centering rings, and it seemed to me that there was a lot of room for bending and failure because of that.

So I decided to cut some braces, or gussets, and install them for strength between the centering rings. I considered balsa, but I had some scrap corrugated cardboard lying around, and was able to quickly measure and cut it to the correct length.

I glued two in place, and that's when I started to wonder if this was perhaps not the best idea. I thought the gussets would be pretty light, but just installing the first two added some weight I could feel. Not much, maybe, but it really adds up in model rocketry. One thing I hadn't noticed until I got the first two gussets on was that the cardboard had a lot of packing tape on it, which added some mass.

But I started, so I decided to finish. It would have been stronger to have a set of three or four braces radiating out from the motor tube between each pair of centering rings. But that would have added a lot of weight, I worried. So I only did two, and I staggered them, in the hopes that they'd provide extra strength.


This might have been flawed thinking. I might have done better to have the braces go end to end. Or to make more of them, but keep them narrower, just bracing either the base of the centering rings, or the very edges.

Did I go to far? Should I have simply used the hook and engine block, flown the Saturn V on the recommended motors, and left well enough alone?

Well, it was too late at this point. The beefing up had already begun, so I'll just have to keep an eye on that center of gravity as I go, and try some fun motors. Worst case scenario, I'd end up building my second Saturn V sooner than I thought.

In the next post in this series, I'll install the motor mount.

Follow me on Twitter.

Like my Facebook page for blog updates and extra stuff.

Have a question you'd like to see addressed on this blog? Email me at iamtherocketn00b@gmail.com.

Tuesday, March 5, 2019

Estes Black Brant II Coming Back!


The new Estes catalog came out today, and among other things, they're bringing back the Black Brant II, a scale model of the Canadian sounding rocket.

I love BT-55 sized rockets, and I love the look of the Black Brant II. I've wanted one for a while now. Until now, my two choices were to go to the work of making a clone, or searching eBay for an overpriced model. These were popular rockets, and they sometimes tend to go for more than I feel comfortable paying. Now I can get a new one directly from Estes.

For an ongoing build series on this kit, check out Chris Michielssen's Model Rocket Building blog (click here). I finally had the honor of meeting him this weekend at NARCON. Very nice guy, incredibly skilled builder, and very talented musical saw player. Listen for him on an upcoming episode of The Rocketry Show podcast.

Chris Michielssen at The Rocketry Show table with two of his Dr. Zooch models. They're very impressive close up.
Follow me on Twitter.

Like my Facebook page for blog updates and extra stuff.

Have a question you'd like to see addressed on this blog? Email me at iamtherocketn00b@gmail.com.

Monday, March 4, 2019

Coming Soon from Estes


Estes has a new website design debuting soon - probably in a day or two, if what Ellis Langford and Bill Stine told us at The Rocketry Show stays on schedule. For now, the above picture is all you'll see when you go to their website.

Along with a new website will be a new catalog, both a print version and a free, online version in downloadable PDF form.

I'm betting there will be some really cool new stuff to buy as well, so keep an eye on the site!

Follow me on Twitter.

Like my Facebook page for blog updates and extra stuff.

Have a question you'd like to see addressed on this blog? Email me at iamtherocketn00b@gmail.com.

Thursday, February 28, 2019

Interview with Estes - Just In Time for NARCON


The latest episode of The Rocketry Show podcast was released today - just before we all head down to Cape Canaveral for NARCON 2019.

This is one we've wanted for a long time - Ellis Langford and Bill Stine of Estes Industries! There are some good tidbits in this show: stuff about the Saturn V kit, information about the upcoming 2019 catalog, and some tantalizing hints about new motors coming out!

To listen to the show, subscribe on your favorite podcast app, or just click here and listen online.

Hope to see some of you in Florida this weekend!


Follow me on Twitter.

Like my Facebook page for blog updates and extra stuff.

Have a question you'd like to see addressed on this blog? Email me at iamtherocketn00b@gmail.com.

Thursday, February 21, 2019

Estes Saturn V Build - One Small Step At A Time


I've decided to post a build series as I work on the new, 50th anniversary edition, Estes Saturn V. This rocket has been covered before, most extensively and best by Chris Michielssen on the Model Rocket Building blog. If you're building this rocket and want to see real craftsmanship, you definitely should check out his build process by clicking here and following the links to the first post in the series.

I could just build this rocket without doing a whole series on it, because it's been done before by more experienced and skilled builders than myself. But I've decided to write it up for a few reasons.

First, I've been posting photos of builds on my Instagram and Twitter accounts, which is great, but it seems like a waste of this blog space not to write the build up here as well.

Second, this new edition is not merely a re-release of the previous Estes Saturn V. It's a re-design. There are improved wraps, and one or two different parts. There will be some interesting tidbits about this kit in the next episode of The Rocketry Show podcast, which will be out very soon.

Also, rocketeers like reading rocket builds, and I don't post a lot of those. This seems like one people would find interesting.

Besides, I want to show you that you don't need to be afraid to try tackling a challenging build, even if you're not a master rocket builder like a Chris Michielssen. The only way to get to that level is to go for it. If you wait until you're "ready" to "do the Saturn V justice," you'll never build it.

The Dr. Zooch Saturn V, a challenging "ant-scale" rocket

I tackled the Dr. Zooch Saturn V months ago, which, while not as detailed, was a really tough build because of the small parts. It was a rocket I'd been waiting to build until I was "ready" for a long time. Then, when Dr. Zooch went out of business, I decided I needed to just go for it.

Did it turn out perfect? No. But it turned out better than I thought it would, and I learned some things from the build. Mostly, I learned that even if you make mistakes on a challenging build, you're probably going to be happier with your results than you think you will. Most likely, you'll be the only person who'll notice those mistakes, unless you point them out to people, and once you're done building it an are actually flying it, you won't notice them much either.

I've gotten pretty good at building basic sport models which usually turn out the way I want them to. This Saturn V is a much more ambitious project than something like a Der Red Max or Big Bertha, though. But July 20, 2019 - the 50th anniversary of the Apollo 11 moon landing - is fast approaching, and I want to have a Saturn V to fly on that day, so it's time to get building, even if this rocket is more than I've taken on in the past.


I haven't abandoned the Scratch-Built Big Bertha series, by the way. But since I'm doing the Saturn V in little pieces, I should be able to put out short posts on it regularly. Don't worry - the hand-turned balsa nose cone post in the Bertha series is coming soon.

This series isn't meant to be a how-to. In fact, I've deviated from the instructions in a couple significant ways. I don't recommend you do that, unless you understand the principles of model rocket stability and how to make sure your rocket is stable. I won't be sticking to the two motors Estes recommends for flight, so I need to be sure the rocket will be safe when it flies.

You'll notice from the photo at the top of the page that I have two of these. That is, I have two of the 50th Anniversary Apollo 11 release with the bonus Lunar Module static model. I also have one of the previous models which went out of production early last year, as I managed to buy it just before it was discontinued.

While it's true that the Saturn V is an expensive model rocket kit, and retails for around $90, you can find it for less. A number of sites and vendors sell the Saturn V kit at a discount. I got mine from AC Supply, which sells most Estes stuff at 40% off retail. They're around $54 on that site, and by buying two I not only have given myself permission to make a less-than-perfect build, I also got free shipping for purchasing more than $100 of merchandise (I always consolidate purchases on sites that offer free shipping over a certain amount).

I kept watching the tracking information, and for about a week, I was convinced the USPS had lost my package in transit, somewhere in western Massachusetts. Finally, the rockets arrived, and I was beyond excited!

I'll often buy a kit and hold on to it for a long time before I get around to building it. In this case, I want to have the rocket built, painted, and ready to fly by July 20, 2019, the 50th anniversary of the moon landing. As soon as I got a free moment, I started building.

I'll show my first steps in the next post.

Follow me on Twitter.

Like my Facebook page for blog updates and extra stuff.

Have a question you'd like to see addressed on this blog? Email me at iamtherocketn00b@gmail.com.

Saturday, January 26, 2019

SBR/Fusion Rocket Closing


Yesterday on Facebook, Scott Binder of SBR/FusionRocket.biz posted the following announcement.

This is the End.... due to health reasons, Scott Binder Rocketry (SBR) and www.fusionrocket.biz will close.

First, let me thank all of the customers we've had over the past 3 years. I started out with the Fusion - offering a one-stop solution for L1 and L2 certifications, and added several more models along the way. Sales were good - good enough for a one-man company, which is what I wanted it to be - something I could do in my spare time, and still offer personal technical support to our customers.

On January 14, 2019 I underwent double-bypass open heart surgery - something that a week earlier was was not even on my radar. Although the surgery went well, I feel I can no longer offer the same level of service as before - and feel I just need to concentrate on recovering from the surgery, and enjoying the remainder of my life as stress-free a manner as possible.

Therefore, I've decided to close SBR/fusionrocket.biz

Effective immediately, there will be no further production runs of any of our kits. The remaining inventory of kits will be sold on the website as usual, and each kit's ordering options will be removed as they are sold out. First come, first-served basis.

Currently, we still have Fusions, Thors, Diablos, Horizon, and ArrowX kits. We are already out of stock on the Honest John, and it has been removed from the website. In addition, I will be discounting the remaining inventory of tubing, nosecones, etc. to sell quickly, until it is gone. Adjustments will be made to website pricing on these items over the next few days. When everything is gone, we'll remove the website and delete the FB page.

Again, thank you to those of you who supported SBR - I still fully intend to attend launches as soon as I am able, but just as a spectator/flyer.

Sincerely,
Scott Binder

I'm currently building and shooting video of the SBR Diablo kit, which Scott sent me to review. The unboxing video is currently on my YouTube channel. The rest of the build videos have been complicated by some poor shots being a little difficult to edit, but there's still some fine material there.

With SBR going out of business, I suppose there's no need for a review now, but I intend to continue with the build and videos out of respect for Scott. It may take me a while. The rocket itself is pretty simple, and it's nearly done - though paint will most likely have to wait until winter is over.

Take care of yourself, Scott.

Friday, January 11, 2019

Built from Scratch - A Tale of Two Berthas - Part 2 (The Plan)


Click here for Part 1

Scanned, downloadable PDF files of The Model Rocket News can be found in a few places around the Internet. There are probably a few missing, and I don't know that any one site has the whole collection, but a lot of these have fortunately been preserved.

A note to the long-timers and the historical detail-oriented: I'm not going to do much fact-checking on this post. I'd like to get to the build. Feel free to add any historical facts, details, or corrections in the comments (but be nice!).

These can be downloaded for free, and you can read them online or print them out. It's interesting to go through and see where or when some of the ideas we now find common practice in model rocketry originated.

If you print these PDFs out, they should print in the original size. This is particularly helpful if you want to try and build one of the many rocket designs published by Estes in the 1960's and 1970's. Some plans use parts and tube sizes which are no longer produced by Estes (though you may find something similar through Semroc at eRockets.biz - you can always email Randy Boadway and ask. Sometimes he has made custom parts for people), but a lot of plans use still-common parts or tubes.

Instructions are pretty simple, and if you've put together a few kits, you should be able to follow the plans.


The Big Bertha was originally published in a 1963 edition of the MRN - Volume 3, Number 2 (click here for the PDF). A printout of the page would make a nice, framed wall hanging, I think. But if you're building a rocket, you need the printout for the fin templates, which you will cut out and trace onto some balsa sheet.

While I planned to make the rocket look as close as I could to the original Bertha plans, I'd make a few minor changes.

I would follow the fin templates exactly. These were of a slightly different shape than the current kits. Things change over time, due to plans being re-drawn, or tools used to cut parts wearing out over time and changing shape (this is particularly true of balsa nose cones), or what have you.

The motor mount from the original Big Bertha plans

Early instructions called for motor mounts being assembled with the centering rings attached to either end of a coupler. I guess they wanted more strength back then, or felt this would give better alignment. From what I've read, they'd sometimes get stuck halfway in when the glue would seize up. But I almost considered giving this a try. In the end, I decided against it. I would do a standard, modern motor mount - two centering rings and a motor tube, without the coupler.

You'll also notice there is no motor hook mentioned in the original plan. Presumably, you would keep a motor installed in the rocket with a wrap of tape, either friction fitting the motor into the tube, or wrapping tape around the base of the motor and motor tube.

That's fine to do, but I prefer the convenience of a hook, so I decided to include one.

These plans also predate the trifold paper shock cord mount common in today's Estes kits {sometimes referred to as a "teabag mount" because of its resemblance to a tea bag). Instead, two slits were made in the rocket body, and a shock cord was passed through from the back to the front and secured in place.


I really have no idea how they did this. That looks like some tricky weaving to me, threading that shock cord from back to front from the inside of the body tube. I would find that terribly frustrating. In any case, I didn't want to mar the rocket by cutting slits into it, so I'd use an internal shock cord mount on my Bertha.

One thing I was unsure of was the nose cone. I wasn't exactly going for 100% historical accuracy with this rocket, but if I had been, I'd have had some questions about the nose cone.

The current Big Bertha kit comes with a plastic, elliptical nose cone which is about 2.5 inches long (not counting the shoulder), and notably, it isn't pointy.

In the old days, of course, all nose cones were made of balsa, not plastic. The part, as listed, is called BNC-60L. BNC for "balsa nose cone," 60 for the fact that it fit a BT-60 body tube, and I suppose L... because it was long.

A couple of rocketry suppliers sell a BNC-60L today - eRockets.biz with their Semroc line, and Balsa Machining Service.

The plan drawing shows a nose cone which is nearly elliptical, except that it's got a slight point on the end. Is it an ogive? Is it a pointy ellipsis (if that's a thing)? I don't know, except that it's a different shape than on the Berthas I'm used to seeing. Does the drawing in the plan accurately represent the shape of the part Estes was selling at the time, or did it differ?


One thing that's sure is that nose cones changed shape over time, as parts used to machine them either changed through wear, or were replaced, or the parts themselves were redesigned either for aesthetic reasons or maybe even to save a little bit of balsa.

The current Estes Big Bertha kit uses a 2.5 inch elliptical (non-pointy) plastic nose cone. Estes stopped selling that cone as a retail part a couple years ago, when they started selling a new 3-pack of BT-60 cones.

A few vendors sell Bertha-style balsa cones. eRockets.biz sells a BNC60-L, the part listed in the plan, and it's 3.1 inches long. The image shows it as a non-pointy elliptical cone. They also sell a BNC60-MS. It's about 2.6 inches long. Balsa Machining Service and Aerospace Specialty Products also sell the BNC60-MS, though they're slightly different lengths. Balsa Machining describes it as the Bertha cone. This may represent another era of Bertha cones.


Now Vern Estes' original Big Bertha definitely looks like it has a longer nose cone than the current one. In pictures I've seen online, it really doesn't appear to have a pointed tip, though things sometimes look deceptive in photographs.

Detail of an image of Vern's Bertha
from NARAMlive.com

So, I'm going to guess, at this point, that the prototypical Big Bertha, the one you'd have built from the plan in the Model Rocket News, using parts purchased from Estes available in 1963, would have been about 3.1 inches long, maybe pointy/maybe not. And if I'd have intended to build a historically accurate 1963 Big Bertha, and had done all of this research beforehand, a 3.1 inch nose cone is what I'd have settled on.

But it was a lot of information to digest, and not being sure about any of it, I went with a guess. I decided on a 2.6 inch nose cone, which I would attempt to make myself. If that failed, I'd go online and buy one.

I figured I'd have a well-made, scratch built model rocket which most people would look at and simply say "That's a Big Bertha" without nitpicking nose cone length or historical this or that.

Which is what I did. In the next post: making the nose cone - from scratch!

Click here for the next scratch Bertha post!

Follow me on Twitter.

Like my Facebook page for blog updates and extra stuff.

Have a question you'd like to see addressed on this blog? Email me at iamtherocketn00b@gmail.com.