
When I say "we," I mean Chad and I, and the other friends we drag along to watch us launch rockets. We usually take a cooler of drinks and some snacks. This will be our first launch where we won't be sweating through our sun screen.
Problem is, it looks like I'm going to have trouble finishing my two new rockets. I've got the Estes Hi Flier painted, but I wanted to add a flat clear coat to it. A lot of sport models are pretty shiny, but since I've gone for a Blue Angels theme on this one, and it's a small rocket, I'd like it to have a flat finish - flat finishes tend to make the rocket look a little bigger. But the humidity today was at 80%, and tomorrow it looks like it will be about 75% - pleasant, but the clear coat I have calls for painting in no higher than 65% humidity. I don't want to go against this instruction, since I'm worried it might fog the clear coat, and ruin the look of the rocket - and I've been working on this one for over three weeks.

You can't tell from the lighting, but that's gloss paint, and it looks rather shiny - even though I haven't really perfected getting a super smooth finish on it.
I like this paint scheme, but now that I've got the rocket together, it does look a little plain. If I were to do it over, I might do one or two rings of gold around the body tube a half inch or so below the nose cone. On a sport model like this one and the Cosmic Explorer, details in paint as well as decals help to break up the monotony of a single color.
Here's a photo from my second build - the Estes Crossfire ISX, drying after the first base coat of red went on:

It's a pretty color, but see how boring the rocket would have looked if I'd left it all one color? This makes it look like a toy - the kind made by Santa's elves in one of those claymation Christmas specials - instead of a badass death machine.
The problem with my Cosmic Explorer is a different one. It comes with decals to apply thin red lines on the fins, around the body, and down the length of the body, in addition to a logo decal to be applied in the center. Instead of decals, for the stripes, I opted to mask off the body and use red paint. When you're as much of a n00b as I am, decals are tricky to get on straight, and I can remove and adjust masking tape until I'm satisfied I've got everything where I want it. Decals can also break easily - especially long, skinny ones. You can fix that, but I'm just not that skilled yet. Also, a line of paint is less likely to flake off.
The Cosmic Explorer is supposed to have one red ring stripe around the tube halfway up, and one down either of two opposing sides. But I decided it might look even better with two ring stripes. I got the first one in place, and it looks pretty nice.
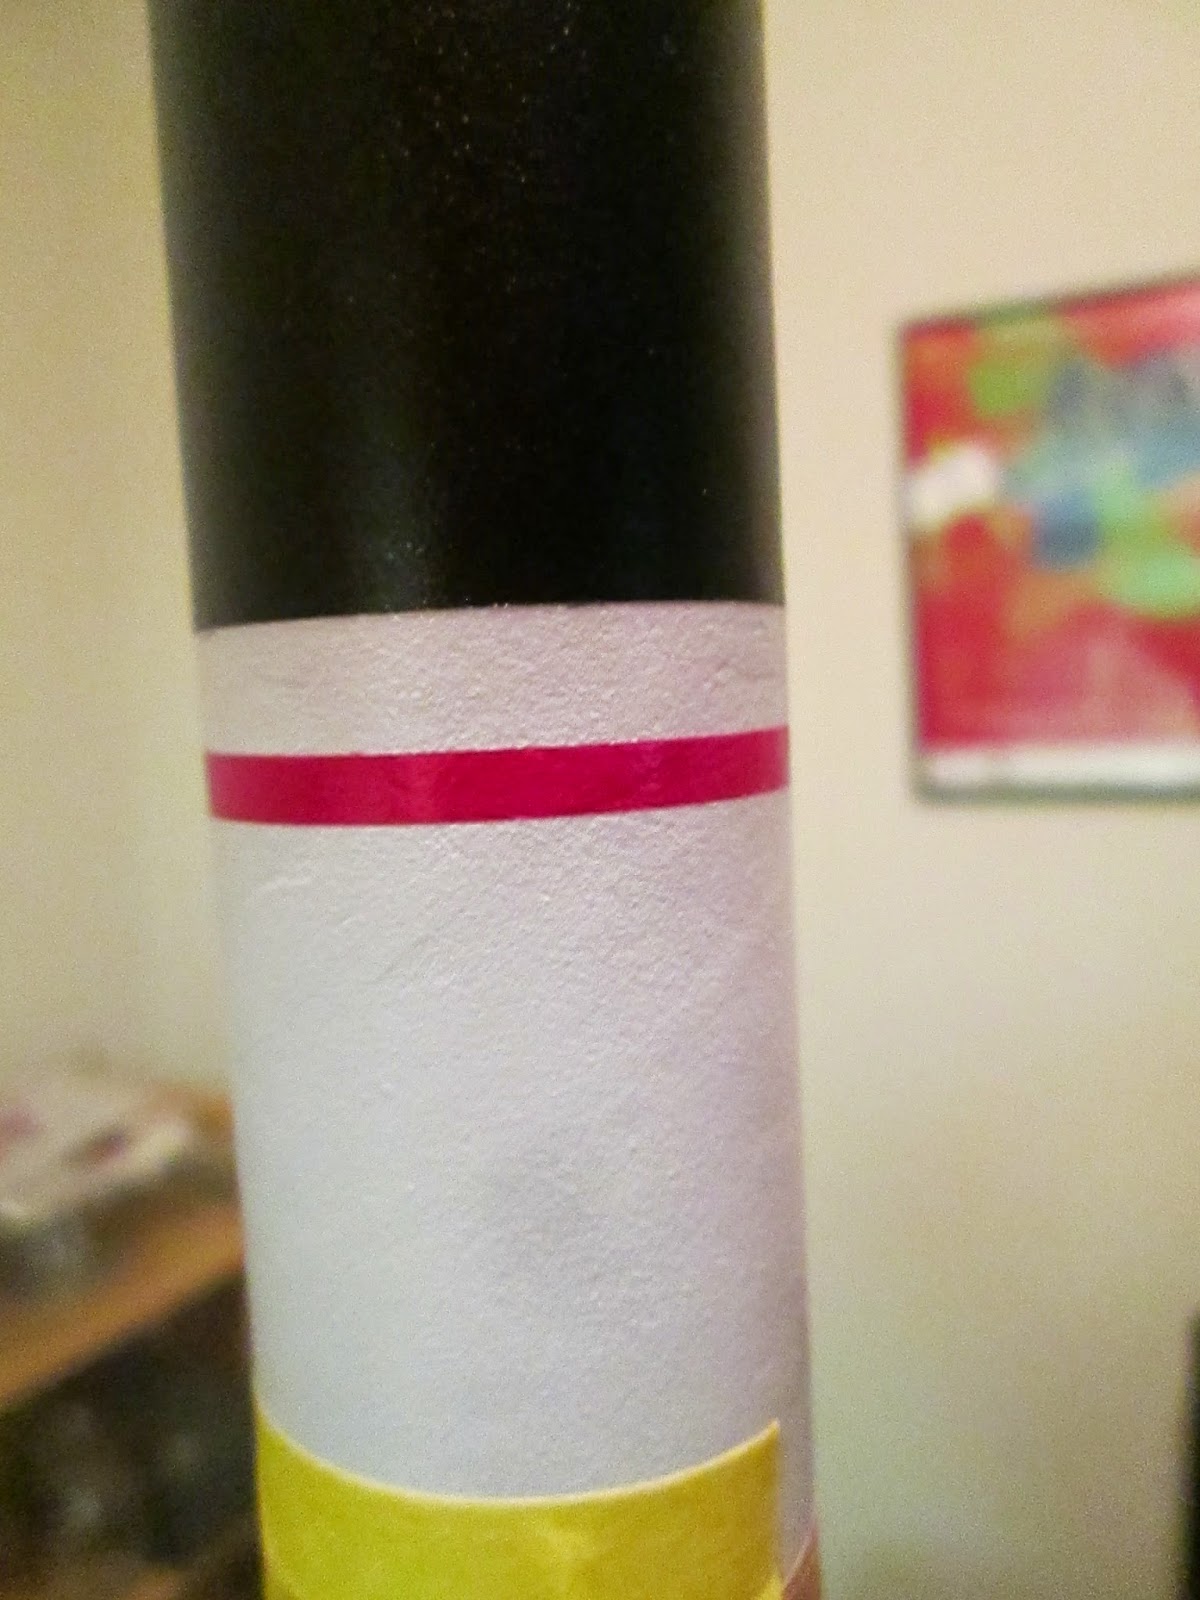 |
| Lighting's not great - this is a much nicer shade of red than shows here |
But before I mask off the second stripe, I need to let this dry over night. I could, of course, just skip the second stripe, but I have already decided I want it - note my comment above about the details breaking up the monotony of a single color, and adding interest to the rocket's appearance. Once that is dry, I need to do the two stripes up the side - which will be its own challenge, since I'll have to do a long, narrow mask for a line 1/8 inch wide nearly 12 inches long, down the airframe and between two fins for each line.
Then I'll need to apply that compass logo sticker. And I have a few smudges on the body that I want to see if I can remove with a bit of light wet sanding before I do that. And then, I'd like to apply a gloss clear coat, to seal everything together and protect the decal.
I've thought of launching these rockets as-is, and (if they survive) finishing them afterwards. But I take pride in my craftsmanship (not that I'm a great craftsman, but I'm working on that), and I hate to present an unfinished rocket. And if I lose the rocket, then I won't get to finish it the way I want before it flies again. The Cosmic Explorer also has airfoiled fins - my first time really doing that - and might well chip upon landing after the first flight - a risk I was willing to take in order to make this rocket look and perform as well as it might, and to learn the skill of airfoiling fins.
Some people would perhaps say "What's the point of going through all that work if you might end up losing the rocket anyway?"
But, for me, the building process is part of the point. I'm not just throwing these together to get them into the sky. I enjoy the craft of making these look right. This is a craft, like any other, and as in any craft, while I do have an end product in mind, if I didn't enjoy the process of crafting the rocket, I'd just buy some ready-mades and launch them.
Chad has lost 16-18 rockets this summer - that's like $400 worth of rockets! I haven't lost one yet, but there's always a first time. We constantly joke at our launches about "hubris." I need to get him a t-shirt that says "#YOLO - You Only Launch Once."
Of the two rockets, the Hi Flier is closest to finish, so I'll almost certainly launch that one on Saturday. But I'm going to try my hardest to finish this Cosmic Explorer without cutting corners. I really want to see this rocket go up. I've been working on it one for even longer than the Hi Flier! And I really want something new to launch - all my others have already gone up multiple times.
It's been weeks since I've launched. I can't wait for Saturday!
No comments:
Post a Comment