I put epoxy fillets on the V2. A follower on Instagram suggested JB Weld epoxy for this model, which I always have on hand. After some thought, I decided to try it, and it turned out really well.
Since it's a steel-reinforced epoxy, I had assumed JB Weld wouldn't be sandable, so I'd have to get the fillets perfect on the first try or there would be no fixing it. This turned out to be wrong - you can sand JB Weld if you need.
When making epoxy fillets, I find it best to tape off the outline to keep it clean. To make a small radius, round fillet, I chose a bamboo chop stick.
I started by marking the edges of the fillets with the chop stick. Using a soft graphite sketching pencil, I rubbed the end of the chop stick with graphite and ran it along the root edges of the fins.
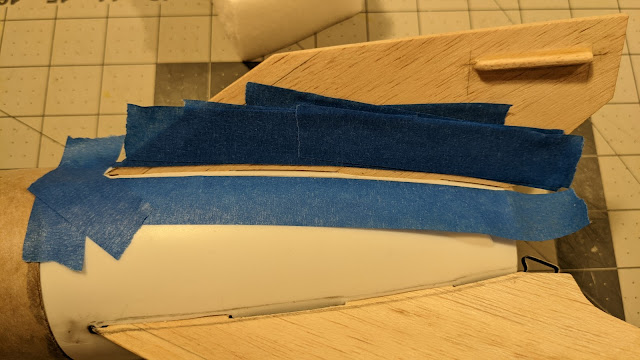
Next, I taped along these marks.
The lighting is terrible because the blue tape completely threw off the white balance of my phone camera, and I couldn't fix it for the life of me.
Due to the curvature of the boat tail, I used multiple pieces of masking tape to follow the marking on the fin and get an appropriately shaped fillet.
To keep things relatively neat and reduce wasted epoxy, I sacrificed a medical dosing syringe to lay down a bead of epoxy. Just a little did the trick.
It may not look like enough for a good fillet, but once I smoothed it out with an alcohol-dipped chopstick, the fillets spread to fill the taped-off area and looked good.
Because it's so thick and doesn't sag or self-level, I was able to do all four sets of fillets in one go. I let about an hour or so pass before trying to do any touch up with an alcohol-soaked swab.
The end result is really great. Not too heavy on the back end, and even the one fin which was slightly loose is now solidly attached.
I wouldn't use JB Weld for larger fillets, as it comes in small tubes and might get a little expensive if you use it for something large. But I can see turning to this for some smaller projects.
The basic build is done. Apart from some cleaning up of the nose cone ridges, the V2 basically ready for primer and paint. I'm pretty pleased with how this turned out and look forward to painting it and showing it off at the field next season.


No comments:
Post a Comment