Today was a launch day in Amesbury, MA. While I had anticipated pretty clear skies and low wind, by the time I arrived (late), clouds had rolled in, and the wind was blowing toward the power lines. Not enough to halt the launch, but enough to disallow high power rocket flights.
The winds were slight enough to fly, but chilly, and made me a bit skittish. There were a lot of CATO's today, too, and the whole thing just felt a little spooky.
I had brought a number of rockets which had never flown, including the Estes Saturn V which I finished building before the July 20 anniversary of the Apollo 11 landing, but which I've been unable to get off the pad for one reason or another.
My first attempt was thwarted by the extreme heat. The launch was called short before I got the chance to get my Saturn on the pad.
The second time I took my Saturn to a launch, the shoulder of the upper section had grown tight. I was worried it wouldn't come off, that there would be no parachutes, and that the whole beautiful thing would come in ballistic and smash to pieces on the ground.
I took it home and worked on the shoulder until it could slide in and out of the rocket without too much force.
Last month, I was finally going to fly the Saturn, but as I was setting it up on the launch pad, the string holding the upper portion's recovery system broke. It was too short to re-tie it on the field, so I had to come home without flying it once again.
Today, after all that, the wind had me worried, and though I want to see how this rocket flies, I wasn't willing to launch it if I was likely to lose the upper section. "Go fever" has caused me to lose a number of rockets I worked really hard on, so I've learned to say no if the weather isn't feeling right.
So, I didn't fly much today - not the Saturn V, nor a number of other unflown builds.
I started with the N00b T00b, its second flight. The first flight, in October, should have been low risk. I only put it up on an A8-3! But I had a PerfectFlite Firefly altimeter on board, and the nose cone wasn't tight enough, so at apogee, the nose and altimeter both popped out of the rocket and I didn't see where they fell! I found the nose cone later, as it had landed right at the base of Pad 7, which I was assigned for my to-be-aborted Saturn flight. The altimeter never turned up, despite my combing the area. Good thing they're pretty inexpensive.
Today's N00b T00b flight went better. No altimeter, but a high flight on a B6-4, and the nose stayed on.
I also flew my Estes Photon Probe on a B6-4, a nice flight with a nice motor. I used to put C's or nothing in my rockets, but the last few years I've learned to really appreciate the B motor.
I'd have flown more B stuff, but I didn't bring anything that small, and realized I'd left my motor adapters at home. There were one or two things I'd have been willing to fly on a D12-5, but I didn't have a spacer, and the motor tubes were too long.
Finally, the weather cleared, and the wind died down a bit, and I though I should have a bit more guts. There was only 45 minutes left in the launch, so I didn't want to do anything too complicated (like attaching the metric rail I'd brought for some of my rockets to the high power pad), but I felt pretty good about putting up my Estes Leviathan on an F26-6 composite motor.
Because I built the Leviathan for my high power level 1 certification flight, I of course way overbuilt it. It's heavy and wouldn't go too high on an F26. That, and the Jolly Logic Chute Release, and the fact that the Leviathan is just... big... made me feel it was unlikely I'd lose it.
I think this was only the third flight of the Leviathan since I'd built it. Maybe fourth.
I taped a camera to its side and filmed the launch from the ground. The F26 is a fun motor. The flight was great. Chute Release performed perfectly. Of course my Rocketry Show MacBook Air doesn't recognize the little camera I had taped to the side of the rocket, but once I figure out how to get the video off of it, it should be a fun little short video.
After the site was broken down, I combed the area again, wondering if maybe I'd stumble across that Firefly altimeter I'd lost over a month ago. You never know. You can find all sorts of things at regular launch sites, even years later. Someone today found an Estes Mosquito they'd lost in early October, in perfect shape, so anything's possible.
I didn't find the altimeter, but I did come across the remnants of an old CATO. A damp, spongy blue propellant grain from a 38mm composite motor which must have been here since at least last month. Probably the nozzle blew out and the fuel grain fell out, unburned. It had sat there unnoticed, blending in with the ground, till I saw the unusual shape and kicked at it with my boot to reveal the blue grain.
There's one more launch this year, in two weeks. This time, I'll prepare better, ahead of time, go early, and see if I can't get that Saturn off the ground.
I did it! I got my Level 1 high power rocketry certification! This means that I can now purchase and fly H and I impulse rocket motors!
Yesterday's 14th Annual FlisKits Anniversary Launch in Berwick, Maine, was incredible. The field is huge and flat, and despite the breeze, most people got all their rockets back.
I took a total of 10 rockets with me, but only flew three. Those three flights, however, were spectacular. I flew the Estes Nike Smoke and the Ventris on Estes G40 composite motors.
But my first flight of the day was the certification flight, which I did with the Estes Leviathan. I decided to do that one first, so I could get over my nerves and just have fun the rest of the day.
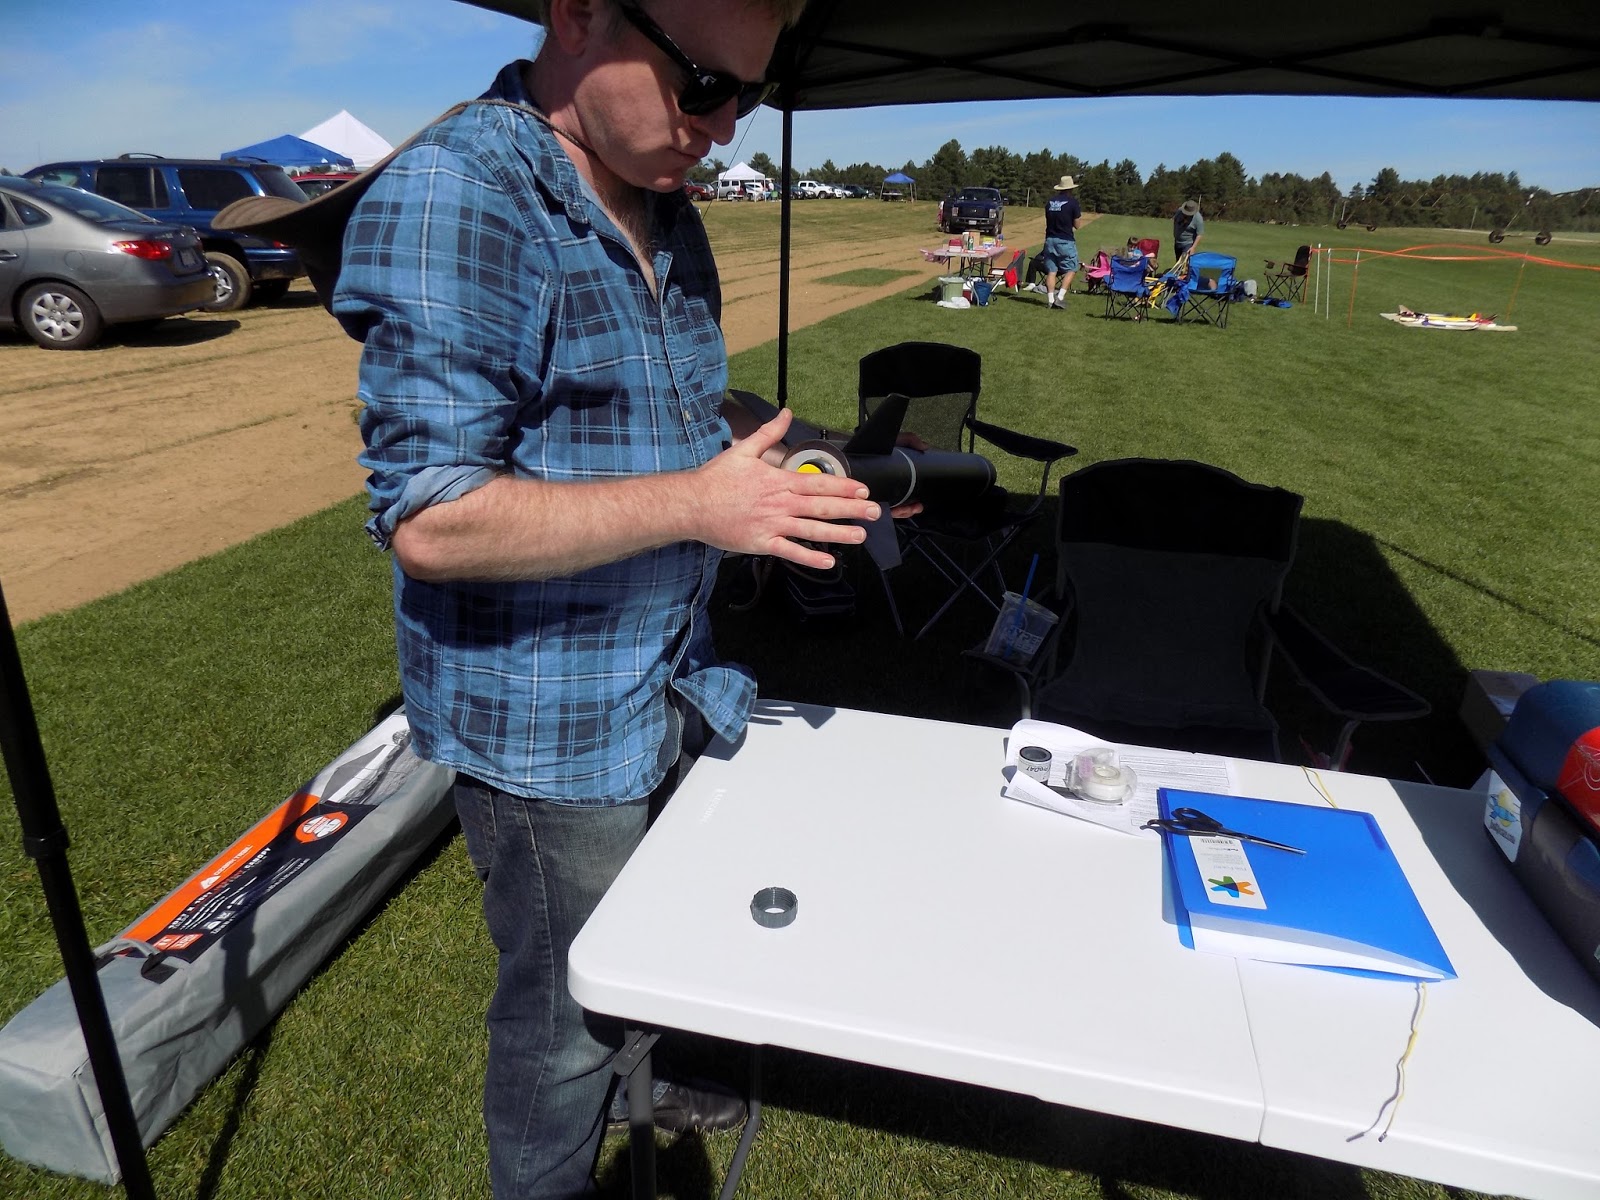
I'm still waiting for some pictures, and need to edit video, but here are the photos of the preparation I did for flight.
The motor I used was a Cesaroni H133 composite reload. The motor comes with a 14-second delay.
The H133 burns for about 1.2 seconds. Its average thrust is 133 newtons, but its peak thrust is around 200 newtons.
Cesaroni reloads are really easy to assemble, but you should always
read the instructions. They come wrapped around the motor.
Siting on the folder is the delay grain. Next to the folder is a delay drilling tool. 14 seconds is too long a delay for this flight. I need about 9 seconds' delay between motor burnout and ejection of the recovery system.
I set the delay drilling tool to remove 5 seconds from the delay grain. I then put the tool against
the delay grain and twist and twist, drilling out material until the tool won't go any further.
I've removed just enough material from the center of the delay grain to make it burn for only 9 seconds.
After returning the delay grain to the motor liner, I insert the whole reload - delay grain first - into the aluminum casing.
Closing up the motor with the aft closure
Uncoiling the igniter wire
Next, I insert the motor into the rocket and screw on the Quick Release motor retainer.
Then I tape the igniter to the rocket so I won't lose it on the way to the launch pad.
With high power motors, you're not supposed to insert the igniter until the rocket is on the pad.
I pull off the nose cone and unpack the recovery system, so that I can re-pack it properly.
Folding the parachute on the table proved an impossible task in the wind, so I moved to the ground for this step.
After folding the chute, I attached the Jolly Logic Chute Release. My simulations told me the rocket would fly between 2010 and 2090 feet high. I don't want the chute to open at apogee, or I might have a long walk to recover the rocket.
I set the Chute Release to open at 400 feet.
Finally, I re-pack the recovery system.
Although I've packed a little cellulose insulation into the rocket as wadding - rocketeers commonly refer to this as "dog barf" - I use added protection for the parachute and Jolly Logic Chute Release. This is a flame-retardant Nomex parachute protector. I wrap the chute and Chute Release in what rocketeers refer to as a "burrito."
It's not the most neatly-folded burrito, but it will do the trick. Some rocketeers rely solely on a Nomex sheet. While it does work, Nomex can burn through after a few flights. A combination of Nomex and cellulose "dog barf" wadding increases chances of a successful recovery.
I used a dowel to push the recovery system down into the rocket so I could get the nose cone all the way on.
Waiting in line for the safety check-in, with my filled-out flight card, Level 1 certification application, and Ron, one of my flight witnesses.
The Leviathan is a nice, big kit. I'm pretty proud of how it turned out!
It looks great on the pad!
Ready and awaiting countdown and launch!
Video and photos of launch and recovery coming soon!
Due to drought, the fire marshal in Amesbury has said we cannot launch there. Too much dry grass.
Good news is, the FlisKits Anniversary launch has been moved up to Berwick, Maine, thanks to the Maine Missile Math and Science Club. They have a much larger field, much larger recovery area, and a 10,000 foot ceiling for HPR. That's twice as high as our permitted flight ceiling. They also launch on motors up to M impulse, which means I may see some mind-blowing stuff this weekend. I've wanted to get up there for a year now.
I finally finished Ventris.
This rocket is tall and beautiful, and I can't stop staring at it.
All three of the Estes Pro Series II rockets I wanted to finish are done. I'll be doing a level 1 HPR certification attempt with the Leviathan.
I haven't posted anything on this blog in about two weeks. Apologies to my regular readers, particularly if you've been waiting for the most recent installment of the Rocket Camp series of posts. I write this blog when I have the time, and some posts - particularly the Rocket Camp ones - take a while to finish, as I don't want to leave anything out. I just finished a 7-day work week, so writing anything of substance had to wait.
But I thought I'd get the ball rolling again with a Current Projects post, an idea I had for a regular feature on the blog, which I haven't revisited since last December.
One reason I haven't been writing much lately is that I've been trying to finish a few rocket projects. The most recent I've finished is the Estes Leviathan, a hulking beast of a model rocket on which I started construction nearly a year ago.
Estes stopped making the Leviathan recently, and it's a real shame that they did. It's a very popular kit. The rocket is a big, beautiful, four-finned rocket, part of their Pro Series II lineup. It's three inches in diameter and over 41 inches tall, and has a 29mm diameter motor mount. It's designed to be a mid power rocket (mid power is generally considered to be any rocket which uses E-G impulse motors), but with its strong construction and 29mm mount, it can be flown on motors up to H impulse.
H is where high power rocketry ("HPR") begins, and the Leviathan is a popular rocket for Level 1 HPR certification flights. Because it was relatively inexpensive (especially when Estes was liquidating them at about $22 per kit) and simple to build and fly, it's ideal for certification, because if the flight failed, it didn't cost so much, and could easily be replaced on a lower budget. A lot of dedicated HPR rockets cost much more, so a failure could hurt the wallet a lot more.
Though when I started building the Leviathan, I figured I'd just use it on F and G motors, I've decided to use it for my L1 cert flight, which I plan to do in September.
Because this blog is mainly aimed at beginners - rocket n00bs - we haven't talked about HPR much. And there's lots of exciting stuff to do in LPR and MPR (low power and mid power rocketry, respectively), and a lot of beginner stuff I haven't touched on yet. But the basics of getting a Level 1 certification are pretty simple.
First of all, you do need a certification to fly HPR. You can build all the HPR rockets you want to, but in order to purchase the motors you'll need to fly them, you must be certified.
High Power Rocketry has three levels of certification. Level 1 allows you to fly rockets with H or I impulse motors (or clusters of lower power motors which exceed the propellant weight or combined total impulse allowed in model rocketry - more on this at another time). With a Level 2, you can fly J, K, or L motors. And at Level 3, the top level of HPR, you can fly M motors and above.
Since each letter essentially doubles the total impulse - the total power a motor can impart to the rocket - you can see how quickly the rockets flown by high power rocketeers can get bigger and louder, can fly higher, and certainly get much, much more expensive! And restrictive - there aren't many places in the country where you can fly an N, O, or P motor. But if you get to witness a flight like that, it's really impressive. Motors that powerful are - well, they're very much like "real" rockets (actually, even an Estes Alpha is a real rocket, but you know what I mean).
While Level 2 and 3 certifications are more complicated, including written tests - and redundant recovery system deployment required for L3 - a Level 1 certification flight can be very, very simple. Some people go for more complexity on their certification flight, using electronically-controlled recovery deployment, but an L1 flight can be as simple as a model rocket flight, just with a bigger rocket.
What's required is that you be a member of one of two rocketry associations - the National Association of Rocketry or Tripoli Rocketry Association. You must build the rocket yourself. It can be either a kit or scratch built. You have to fill out some basic paperwork (though there's no written exam). You must then fly the rocket with qualified witnesses, usually at a club-sponsored event. The rocket has to fly on either an H or I motor, must have a stable flight, and must be successfully recovered undamaged, and with the motor still in the rocket (in other words, the motor has not accidentally been ejected during flight). Undamaged in this context means that the rocket must be judged by the witnesses to be immediately flightworthy again without making any repairs. So, while a little chip in the paint job (which will probably happen to any rocket) is OK, losing a fin is not!
* * *
But, I'm getting off track. This isn't meant to be a primer on HPR - it's a Current Projects post.
It took me nearly a year to finish the Leviathan. That's much longer than you need - this is essentially a larger model rocket with pretty simple construction. But I had to make some decisions on how I was going to build it, and I wanted to make it look as nice as I could. For me, that takes a little extra work, and I didn't have the time to do it all at once.
One thing I had to decide - would I attempt to streamline the fins? On most of my smaller model rockets, I sand the balsa fins into airfoil shapes. I enjoy doing it, I'm getting pretty good at it, and I really like the way it makes a rocket look. And it may help increase your altitude significantly.
The Leviathan has fins made of birch plywood - much tougher than the balsa fins of a basic model rocket. I don't have any power tools for shaping, cutting or sanding. My only tool for that is my Great Planes hand sander.
Well, it takes a little longer, but it's no more difficult to streamline plywood fins with a sanding block than it is with balsa. I did about a fin a day, and it came out great.
The finished rocket is flat black with two thin silver bands. Instead of a launch lug, I installed two rail buttons for use with a launch rail - which is fast replacing launch rods on high power launch pads.
I'm pretty pleased with how the Leviathan turned out, and I can't wait to fly it.
Also nearly finished is the Estes Nike Smoke, another large Pro Series II rocket. This is a sport scale model of a NASA sounding rocket from the 1960s, and it's another impressive kit.
The Nike Smoke was flown during the 1960s, and was used to test wind shear.
It has also taken me a year to complete. I worked on a lot of rockets at once - probably too many - so it took me a little longer.
Painting the Nike Smoke has given me major problems. My first three attempts at a white undercoat came out terribly - horrible, sharp bumps all over the rocket!
After my first attempt at painting the Nike Smoke
The results of my third attempt...
Finally, two days ago, I managed to get a nice, smooth gloss white coat on.
In a day or two, I'll move on to the orange and yellow fins, followed by the United States decals, and finally a flat clear top coat (scale models are often painted with a flat top coat - real launch vehicles are rarely shiny like a nice sport model rocket, and flat colors make a model look larger).
Also nearing completion, though lagging behind, is a third Pro Series II kit, the Ventris.
This is a nice tall rocket with a larger payload section. The build has come along slowly but well, and I can't wait to finish it and fly, hopefully in September. I have a launch this weekend, but at a smaller field, and I'm not going to fly the Leviathan until my Level 1 attempt. I hope to show up at the field with all three of these, because they're pretty impressive-looking.
I also finished and flew the Copperhead a while back. The Copperhead is a rocket I designed and built for a friend, and I liked it so much I built my own. I decided to add a booster, transforming it into a two-stage rocket.
I've flown it three times - once with the booster, and twice as a single-stage rocket. I've already broken a fin off both the booster and the sustainer. I glued them back on, so the rocket can fly again. It's not as pretty as it was when I finished it, but they never are after your first flight.
* * *
Back in April, I flew a number of new things, including a rocket from the book Make: Rockets: Down-to-Earth Rocket Science, by Mike Westerfield. This rocket is called Ceres B, and has a hidden camera payload.
The Ceres B has a 24mm motor mount. The original design, from the book, is meant to be flown on E9 black powder motors. But with a composite, you can fly much higher, and use motors up to G impulse.
I had ordered some composites for that launch by AeroTech, but they didn't arrive in time. Well, they're here now! In fact, a few days ago, I took inventory of all the motors I have.
My supply of C6 motors is dwindling. I have no idea where I got all the B6-4 motors. The G40-7 composite motors at the bottom will be used in my Pro Series II rockets. I've heard that these are impressive motors to watch - a decent 2.5-second burn time with a thick plume of white smoke. I'm excited to try these guys out! The Cesaroni H133 is the motor I purchased for my Level 1 HPR attempt.
Finally, I got a hat.
My official rocket hat
Anyone who's serious about rocketry seems to have a hat. Now I have a hat. This is a big step.
Joking aside, if you spend lots of time in the sun launching rockets, you should consider getting a sun hat. Sun screen is a must, but you will probably need extra protection. If you join a club, you'll see lots of people wearing sun hats, and it's experience (and possibly a dermatologist) which has taught them that they need these.
Back to instructional posts soon.
I'll do full build posts of the Leviathan, Nike Smoke, and Ventris, when all of them are finished - and probably after they've flown. In the mean time, I am uploading photos of the build on The Rocketry Forum. You can find the Leviathan thread here, the Nike Smoke thread here, and the Ventris here.