

This page is a list of my fleet of rockets, beginning with the most recent. This page is a work in progress. Check back from time to time.
One new thing I'm doing is noting the primers and paints - brand and color - if I can remember them. On my earlier builds I didn't always record this.
Estes Mercury Redstone (Liberty Bell 7)

Not gonna lie, this one was tough. I had more trouble building this than any other model rocket, including the Saturn V (see below). The first try with the capsule and escape tower was a complete disaster, partly because the Tamiya Color airbrush paint I used turned out to be rather fragile and didn't stand up to the plastic cement I use to try and attach the tower. It melted the paint.
Plus, the tower wouldn't adhere. It kept coming off in a gummy mess.
I finally smashed it in frustration.

Estes had offered extra capsules on their website, but they were out of stock for a long time, so I bought four more kits. I decided not to let this one defeat me.
Then the capsules came back in stock, and I got several of those.
I managed to get this one together, but it's got some flaws, if you know where to look. That escape tower isn't even on properly - there are several points where the spars do not make contact with the capsule, and are held in place with a chunk of gap-filling CA (cyanoacrylate, or hobbyist's super glue). So I fully expect this to break at some point, probably after the first launch.
But it's done, and if you don't look too close, it looks pretty good.
Primer: Rust-Oleum Filler Primer on the body only. No primer on the capsule
Paint: Krylon Color Master Gloss White, Rust-Oleum Painter's Touch 2X Gloss Black, Rust-Oleum Painter's Touch 2X Gloss Apple Red
Yellowjacket

This is my largest and heaviest rocket to date, at 4 inches in diameter, and a dry mass of 1,388 grams, or 3 pounds, 1 ounce. It has a 38mm motor tube, and needs a kick to lift it safely off the pad.
Its first flight was on an AeroTech H100 DMS single use motor. This was only my second high power flight ever. The first was my successful certification attempt.

The flight wasn't bad - it wiggled a little, and veered off the pad slightly in a way I didn't like. I wish I could remember it more clearly, but I was trying to shoot the flight on video. When I do that, I have a hard time remembering what the flight looked like - I only remember the video.
Unfortunately, I didn't manage to keep the flight in frame at all - very frustrating. And the onboard camera I had strapped to the side turned itself off shortly before launch. So I have no record of the flight - only the word of one or two people who said it looked good, and my own half-remembered recollection of a flight which was a little suboptimal.
Looking forward to trying it again next spring with either another H100 or an I175.
Estes Hornet


This is a classic looking BT-55 kit I really like. As I often do, I started building this and started making a copy of it, trying to decide what I wanted to do with the fins and the motor tube. This finished model was actually the copy made with spare parts, and I upgraded the motor tube to hold 24mm D motors and sanded the fins into airfoils.
I also added an optional payload extension.

I may add a booster stage at a later date.
Once this "copy" was done I liked it well enough I used the kit decals on it. The original kit parts are still only half assembled, and when I'm done I'll either paint it differently or make my own decals.
Primer: Rust-Oleum Filler Primer
Paint: Krylon Color Master Gloss Sun Yellow, Rust-Oleum Painter's Touch 2X Gloss Black
FlisKits Tres

The Tres is a three-motor cluster rocket, with canted motor tubes. The canted motors make for a wider flame and smoke trail, and a Tres makes a big impression at a launch. This is a large model, over 42 inches tall. It looks like a two-stage rocket, but the upper section is passive. You can use it as a payload section, if you don't glue the nose cone on, which is what I've chosen to do.
I often attach the nose of a payload with a little shock cord of its own, just in case it comes out. I don't want to lose. the nose cone - or the altimeter, if I'm flying one - and keeping all parts tied together helps prevent that.
In this case, though, I went with removable plastic rivets to keep the nose on.

To ensure I line up the rivet holes on the body tube and nose cone shoulder correctly, I made a witness mark on the nose and body tube.

This isn't actually easier. These little rivets are fiddly and easy to lose, especially in the field, which is why I take extras with me in my range box. A friction fit with tape would be quicker and less hassle. But I like the added detail of the little black rivet it gives the rocket.
Estes D Region Tomahawk

I have wanted to build one of these discontinued Estes models for a long time. I love the tall, sleek look of this 1/5 scale model of a sounding rocket. I've purchased a few of them - in fact, I kind of lost track of how many I had, and snapped one up each time I could find one on eBay for a reasonable price.
This is a large model, over three feet tall, and was painted exclusively with Tamiya acrylic airbrush paint. That's what caused some of the minor cosmetic flaws, as I handled what turned out to be kind of fragile paint. Luckily, I have more of these.
At 290 grams, or 10.2 ounces, this is a bit heavy, and is one of the tallest rockets in my fleet. I won't fly this on black powder - it'll get composite motors only.
Estes Nike-X


I liked the look of this bringback from Estes, a "pseudo-scale" missile based loosely on the Nike Zeus B anti ballistic missile missile.
 |
| West Point cadets posing in front of a Nike Zeus B missile at White Sands range, N.M. |
To get a more "scale-like" appearance, I beveled the leading edges of the fins, rather than simply rounding them over as indicated in the instructions.


In doing so, I got some of the bevels uneven. This wasn't my best work! But I decided not to let it bug me.
Once I put decals on, though I had a hard time getting the first fin roll pattern decal to lay down flat. It's one piece that fits right into the groove between the body tube and fin. I kept trying to gently coax it into place with the tip of a small paint brush, when finally, it tore.

Then I realized - of course! Because of the bevel, the flat decal would not conform easily to that shape. I wish I'd done the launch lug side first, because then the tear would be on the backside of the rocket. As for the other sides, I decided to try leaving the decal as is and then brushing on some Micro Sol decal setting solution. Three coats did the trick.


I do wish Estes provided enough decals for that roll pattern on all sides of all fins - it looks a little blank on the sides without them.
I'll often scan decals in case I need to make spares or mess something up. I forgot to do that in the case of this kit. Then again, if I made my own, I bet the setting solution would have ruined them.
Despite its cosmetic flaws, I like this one. Another great BT-55 rocket for the fleet.
Primer: Rust-Oleum Filler Primer
Paint: Krylon Color Master Gloss White
Semroc Bandit

The decals are nice and sturdy - though a couple of them couldn't be used, as the original had white lettering over black paint. White lettering is hard for small manufacturers to produce, so those decals come in black in this kit. Since they wouldn't be seen if I placed them where they're supposed to go, I left them off.
The motor mount includes an ejection baffle, so there's no need for recovery wadding.

Primer: Rust-Oleum Filler Primer, Rust-Oleum Flat White Primer
Paint: Krylon Color Master Gloss White, Krylon Color Master Sun Yellow, Rust-Oleum Painter's Touch 2X Gloss Black
Semroc Cherokee D

I don't go back quite that far in the hobby, but I always liked the sleek, classic look of this kit. The Semroc version features really nice parts, including a beautifully turned balsa nose cone. The waterslide decals on this kit are really nice. They don't tear easily like some waterslides. They're sturdy and beautiful.
Primer: Duplicolor Filler Primer (first coat); Rust-Oleum Filler Primer (final coat); a coat of Rust-Oleum Painter's Touch 2X Flat White Primer was used on the nose cone before color was applied.
Paint: Krylon ColorMaster Cover Max Gloss White; Rust-Oleum Painter's Touch 2X Gloss Apple Red
SBR Diablo

This short, 4-inch diameter rocket from SBR (Scott Binder Rocketry) was sent to me by Scott to try out. It's a sturdy, easy to assemble high power rocket with a 38mm motor tube. Since it's so short - nearly half its length is the nose cone - it's easy to transport to a launch, even in a small car. That's something you can't say about all high power rockets.
SBR's instruction booklets are possibly the best in the hobby, with full color photographic illustrations of every step. The rocket also comes with a 29mm motor adapter and even a laser cut stand and keychain (an image of the rocket itself). Vinyl decals are included, and with a simple white paint job, it's easy to end up with a good looking rocket. Parachute, long nylon shock cord, motor retention, rail buttons - everything you need is included except for glue, paint, and rocket motors.
While the Diablo isn't currently on the SBR site at the moment, the same holds true for all their other great high power kits, which you can find by clicking HERE.
Paint is Krylon Color Master Gloss White.
The N00b T00b

I don't currently have any other tube fin rockets. I'm a pretty traditional 3/4-fins-and-a-nose-cone kind of rocketeer. But some rocketeers love tube fins, so I thought I'd use up some of these spare parts and do this.
This BT-20 rocket is small - it's minimum diameter, which means it's only wide enough to accommodate a motor. Because of that, it can fly pretty high.
I added a small payload section so I can fly the N00b T00b with a small altimeter, and because I felt the rocket needed to look a little longer. The paint is simple gloss black with a copper, silver, and purple snakeskin effect. That effect is easily achieved by wrapping the black rocket in some fishnet stockings and lightly spraying with the copper and other highlight colors.
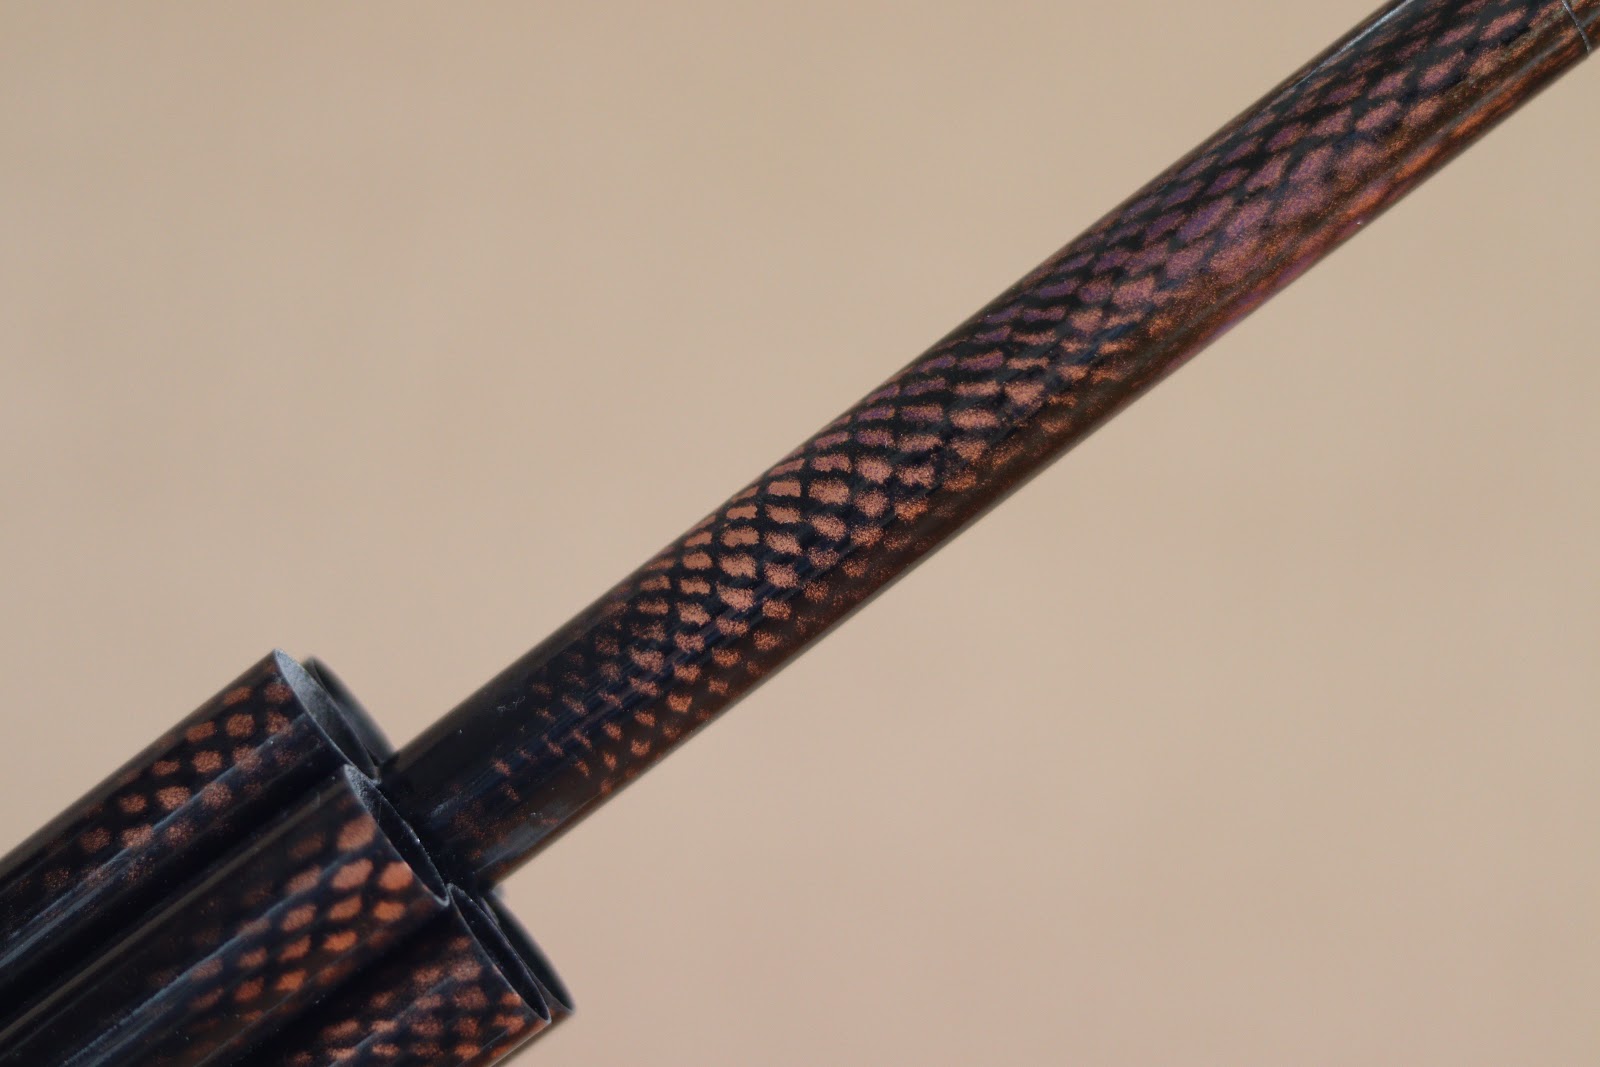
You have to keep your eyes on this rocket, because it might be hard to find in the grass if you lose sight of it. The name N00b T00b was suggested by someone on Instagram.
Big Bertha (from original Estes plans) - "Rough" Bertha

The one pictured here was what I dubbed the "rough" Bertha, because of its fins. I started with some lightweight balsa, and tried to see how nice I could make them. After some effort, the softness of the balsa was making it rather hard to get them perfect looking (so I thought at the time), so I cut another set from some Very Hard Balsa from Sig Manufacturing. The grain in those fins was easy to fill, but the fins were quite dense and heavy.
So then I had two sets of fins. I hate throwing things away, so I decided to build two Berthas - a "good" one that I'd try and make look great, and a "rough" one I would build fast and not worry so much about.
If read this blog regularly, you know I can't really do that. I still tried to make this "rough" Bertha look nice, and mostly succeeded. There are some paint flaws on one side, but mostly I like how this turned out.
This Bertha and the other one can fly on 24mm motors, as opposed to the kit, which only flies on 18mm B and C motors.
This one seems a little cursed. It's flown twice, but flights went badly.

Big Bertha (from original Estes plans) - "Good" Bertha

I'd read about this process in The Handbook of Model Rocketry as well as in an issue of Estes' Model Rocket News from 1967 (download it here).
First flight on this rocket was at NYPower in Geneseo, NY. Wow, what a flight - high and straight up! It landed a mile away in a puddle, and required some repair to fly again after the water damaged the centering rings, but I love this rocket.
Estes U.S. Army Patriot

This is a classic Estes rocket - the kind that it seems every kid has. In fact, I'm pretty sure I caught a glimpse of one in a scene in the movie Boyhood - on the kid's dresser.
I decided to get one, but once I opened it, I wasn't that into it. It just didn't grab me for some reason. The fins were warped, for one - which I managed to fix. But also the decals were self-adhesive, while I prefer waterslide.
Still, I built it, and as always happens, once I get into a build, I fall in love with the rocket and try to make it look as nice as I can. Same with this one.
I really love the way this came out. It'll be a great small field flier on B motors, and go pretty high on C or composite D motors.
I've seen a few Patriot missiles in person, but none were painted in this livery. I'm not sure it's even representative of any paint scheme on a real Patriot, but it's a great looking model rocket.
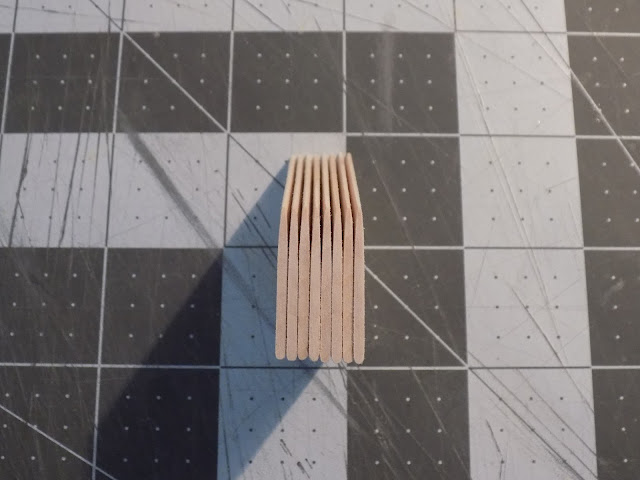
Dr. Zooch Saturn V

This semiscale model by the now-defunct Dr. Zooch was by far my most challenging build yet. A small but detailed model, many of the parts have to be made or formed by the builder - such as the F-1 engine bells, each made of two conical paper parts, some putty made of wood glue, and a bit of thread.


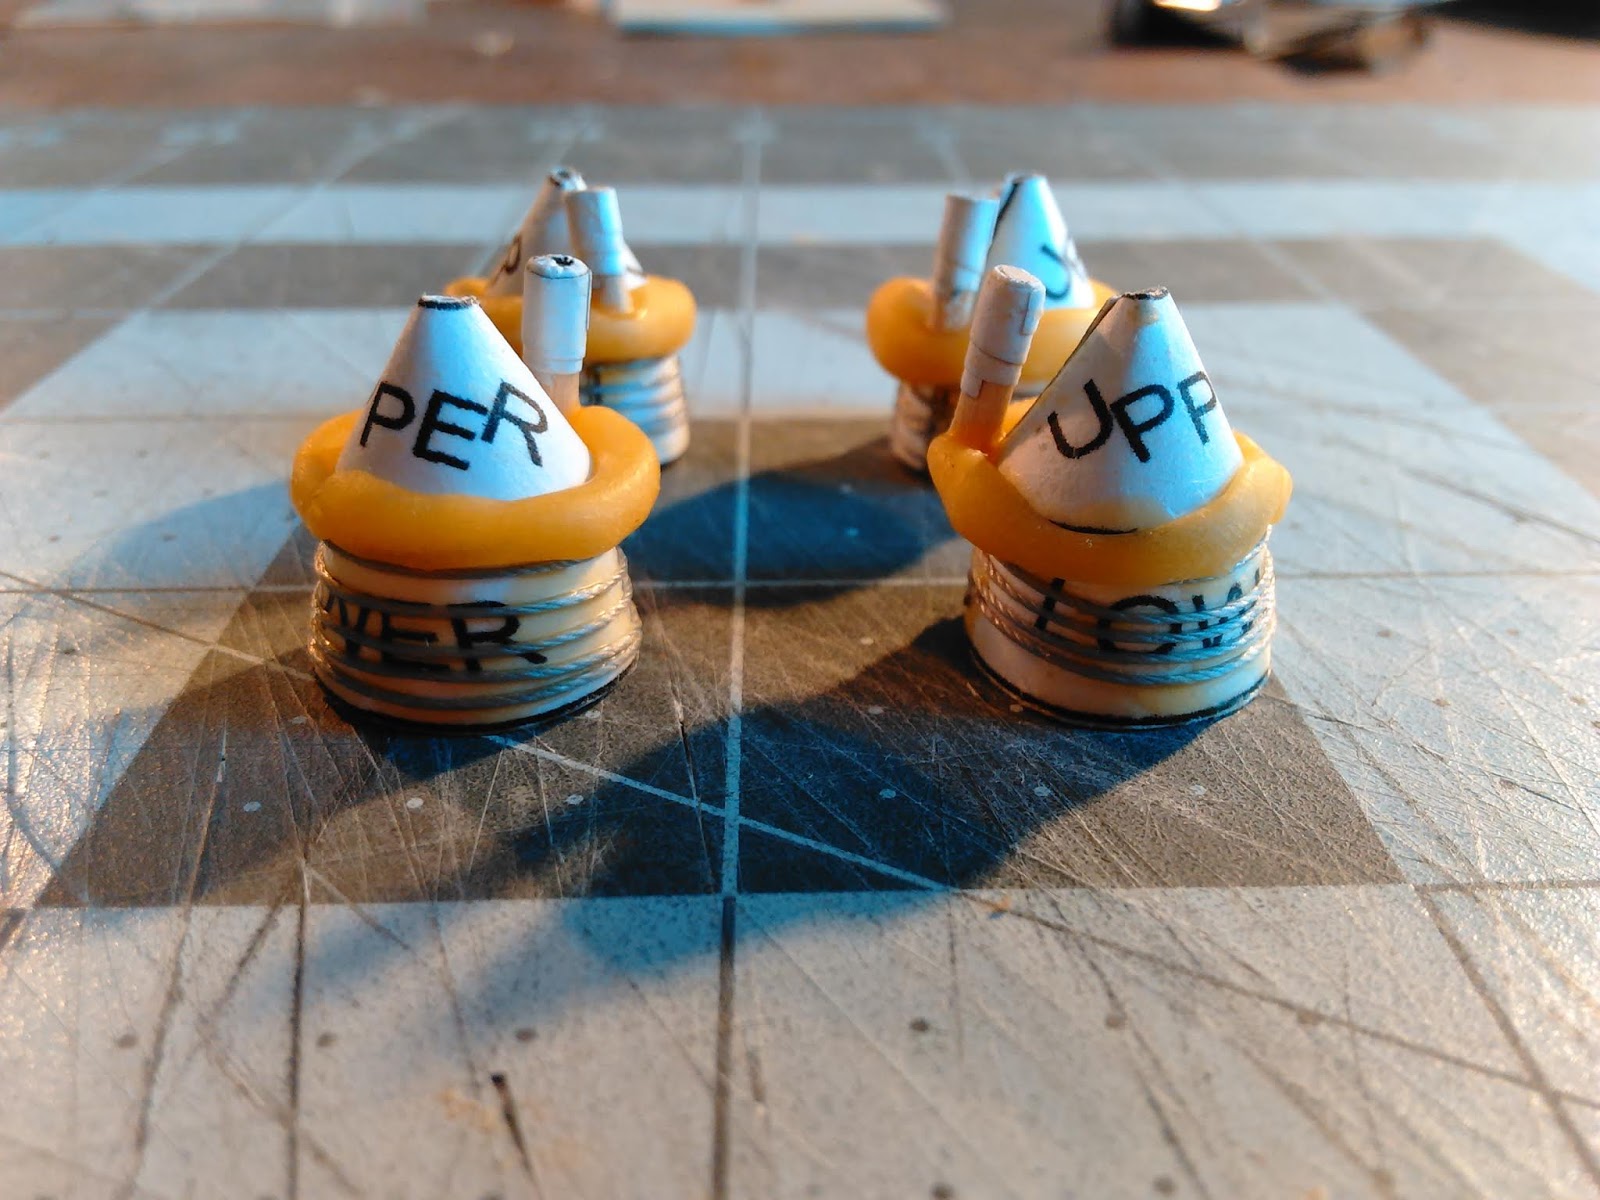
The rocket is mostly decorated by paper wraps. It's pretty intricate - the detail parts really add something to the build. While I found it often frustrating, I like the end results, even if I made some mistakes and left some flaws in the build.


Estes Crossfire ISX with Tail Cone

The Crossfire ISX was one of my earliest rocket builds (see below), and I painted mine in different colors from the stock white and red with black decals. I had another one, and wanted to make it look more like the traditional Crossfire (it was one of the first model rockets I launched with my friend Chad). But I couldn't help tweaking it a little bit.
Since I had a spare Apogee Avion nose cone left over from Rocket Camp, I decided to use that as a drag-reducing tail cone on the Crossfire.


A tail cone is meant to allow the rocket to fly higher. Well, whether it actually does that on this model, I'm not sure. But I did it more for style - and to have something a little different.
Because I changed the design of the kit, and in doing so, moved the motor back about an inch, I needed to do a swing test to verify stability before flight. Shifting the Center of Gravity (CG) aftward must be done with care!

Sky Wolf

This is a special one - a limited edition commemorative rocket kit created by SkyPyrates - Donald Ball and Crazy Jim - for the 2015 National Sport Launch. Only a small run of these was available, and only from JonRocket.com.
The Sky Wolf may look small - in fact, the diameter is only about 1.64 inches - about the same size as a number of rockets on this blog, including the one I keep referencing, Big Bertha.
But while Sky Wolf may be smaller, it's size is deceptive. In fact, it's quite a powerful rocket. The airframe is no ordinary BT-60 body tube. It's a heavy-walled, 38mm tube, the same used for high power motor tube stock. It houses a 29mm diameter motor mount, meaning this rocket can fly on any motor from D through H!
It features beautiful black vinyl decals which really give the rocket a nice look.

As usual, I spent way too much time on this one, but the attention to detail payed off better than I'd hoped.
One thing I maybe should not have done was to sand the fins into airfoil shapes. I usually do that. But the Sky Wolf, with its plywood fins, is designed to whistle as it flies. Instructions say to merely bevel the leading edges of the forward fins. With an airfoil, I may have made the rocket a non-whistler.
No matter - I like the way it looks!
Quest Superbird

Hoo, boy, did this one cause me some headaches! This tall beauty by Quest Aerospace had a few wrong parts, and I had to make a few adjustments while building it. In the end, I upgraded it from a B-C powered rocket to a C-E or even F composite powered rocket, and it came out looking really nice.
The build was documented in video form, and the playlist can be found on my YouTube channel here.
I'm still editing and uploading videos as of the present moment.
Flechette (Prototype)

I was digging through a box of spare parts, and found some leftover BT-20 nose cones. My last BT-20 rocket, the Estes Hi Flier (see below) was lost long ago. BT-20 is just the right diameter to hold a standard A, B or C 18mm model rocket motor, and a rocket which uses that tube as a body tube is known as minimum diameter - it's only as fat as it needs to be to accommodate the motor. Because of that, rockets of this type tend to be much lighter and have less drag, so they can indeed fly very high.
I like big rockets just as much as the next guy, but I felt inspired to use these parts, so I whipped up this design.

Flechette (French for "Dart") is a two-stage rocket that may top 2,300 feet on two C6 motors. That makes it quite a performer for less than six dollars. The finished version will carry a small payload - the Perfectflite FireFly altimeter. For an upcoming project for this blog, I need some vehicles I can build quickly and cheaply, fly repeatedly, and easily replace if they get lost or damaged, and Flechette fits the bill.
The prototype was built with leftover parts and has no payload - it's just a sport model that goes up and (presumably) comes down. I built it a day after making the design, with the intention of testing the method I came up with for coupling the booster to the main stage - or sustainer. Since it was cheap and didn't take ages to build, I'm OK with losing it, as long as it works.
I had to miss the last launch, so as of this writing, Flechette has not flown yet, but I have acquired the parts to build 6-10 of them, including the payloads. Even without a booster stage, the rocket will fly 1,500 feet and still fulfill the purposes of the upcoming project. And I like the little sucker - reminds me of a tiny sounding rocket.
Estes Athena

If you've read this page before, or if you read to the bottom, you'll see that one of the first model rockets I owned - and lost - was the Estes Athena, a simple white and blue Ready-To-Fly rocket, which flies amazingly high on C6 motors.
Before I was really bitten by the rocketry bug, I had flown a few with my friend Chad, and picked up some RTF models on deep discount at Michael's Crafts.
While I really prefer to build rockets these days, I was sad to lose the Athena. Of the various rather similar RTF Estes rockets you can buy, I guess it was a favorite. It's fun and easy - pop in a motor and launch. RTF rockets are also great for doing quick demo launches for kids and non-rocketry friends you're trying to convert to the hobby.
I won a new one after completing an online survey by the MIT Rocket Team, and picked it up when I took a tour of their rocket lab. Other winners - one from Alabama and one from Wales - received MIT Rocket Team mission patches.
Estes Monarch

A simple BT-55 based rocket, the Monarch is larger than it looks in pictures. The kit is made to fly on standard 18mm B and C motors, but with its wide fin span, it can be easily upgraded with a 24mm motor mount for D black powder motors, without adding any nose weight. This turns a rocket which reaches 500-700 feet into one which can top 1,000. I like having the flexibility of a wider choice of motors, as well as the option to fly higher in large fields, so that's what I did.
I also turned the tube coupler into an ejection baffle, which eliminates the need for recovery wadding. You simply fold the parachute, add a motor, and fly.
I decided I needed some variety in the color palette in my fleet, so I painted this in Rust-Oleum 2X Marigold and Colonial Red gloss paints. Once they were on, I decided to skip adding the decals.
I got the Monarch because it was on clearance - around 4 dollars - but I didn't think it was anything too special. Now that it's built, I've decided I like it. I regret not buying more of them, because at that price, it's worth buying extra kits just for the parts, especially the nose cones. This particular nose cone, common in Estes BT-55 rocket kits, isn't available for retail sale alone, but I really like the shape. It's the same cone seen in the Goblin and Cosmic Explorer (see below), as well as numerous other BT-55 kits.


Titus

Titus is one of my own design. I wanted a BT-60 based rocket I could fly on E black powder motors without the rocket simply disappearing. I had a bunch of Estes BT-60 nose cone 3-packs, which include the cone and nozzle set seen on such kits as the QCC Explorer. And I was playing around with designs that looked vaguely similar to the classic Blue Bird Zero.
The end product looks very little like the Blue Bird Zero. The body tube - two 18-inch BT-60s - is about the same length, but with a wider diameter. The fins are smaller. In fact, by sheer accident, the aft fins turned out the exact shape and size as the fins on the Goblin (see below).
The rocket is named for Mrs. N00b's nephew Titus, who's six years old and lives in Germany. At 45 inches tall, the rocket is taller than the kid it's named for. And despite my attempt to build a low-and-slow E motor rocket, simulation flights have it topping 1000 feet.
Estes Ventris (Pro Series II)

Ventris is a big, beautiful design, with a 2-inch diameter airframe and a 2.5-inch diameter payload section. The fins are made of plywood and use through-the-wall (TTW) construction, making the rocket nice and sturdy.
One of Estes' mid-power rockets, Ventris has a 29mm diameter motor mount, meaning it can be flown on motors from E all the way up to H. That means it can fly either as a mid power model rocket or as a high power rocket.
It is a bit heavier than a typical model rocket. When mine is fully loaded with a parachute, altimeter, and Jolly Logic Chute Release, it weighs and even 500 grams. Although Estes sells 29mm black powder motors (E16 and F15), these are generally too low-thrust for most of their Pro Series kits, so Ventris should ideally use higher-thrust Ammonium Perchlorate Composite Propellant (also called "APCP," "AP," or "composite") motors.
Instead of the stock 1/4 inch launch lugs, I opted to use the "mini-buttons" from rail-buttons.com.


This means that the rocket will fly from a metric 2020 launch rail. Most clubs with launch rails have the larger 1010 rail pads. But Bill from Doghouse Rocketry donated some brackets that can be used to attach a 2020 rail directly to a 1010 rail.

It also looks gorgeous!

I went for the stock paint job on this rocket. The black and white roll pattern is shown on the kit face card as a "suggested decal," but decals are not supplied with this kit. I considered painting the roll pattern, but decided to make it easier on myself and try the vinyl decals from Stickershock23.com. They're great, and I think they really make the rocket look nicer. It was my first time using Stickershock's decals, and they're not perfect, but pretty close.
Ventris is also a great flyer!
Estes Nike Smoke (Pro Series II)

The Nike Smoke was an unguided, solid propellant rocket, so in some ways it was much like what we fly today in the hobby of model and high power rocketry.

It has for many years been a popular rocket for scale modelers.
 |
| G. Harry Stine's scale drawings of the Nike Smoke sounding rocket |
The Estes Pro Series II kit is large and sturdy. A 1:5.5 scale kit, it's 3 inches in diameter and nearly 42 inches tall. The motor mount is 29mm in diameter, making it capable of flying on E-H powered composite motors. The fins are made of plastic and come in two parts which must be glued together. They then fit into the airframe and lock into one of the centering rings (through-the-wall), making it a very strong yet lightweight rocket. Because of the way the rocket is constructed, getting the fins on straight is easy.
I substituted white 1010 rail buttons from rail-buttons.com for the stock 1/4 inch launch lugs.
The fins are radially-tapered and beveled according to scale, and since they're made of plastic, they take paint with no wood grain to fill. It makes a very nice-looking rocket.


Here's the footage of the maiden flight on a G40-7 motor.
Estes Leviathan (Pro Series II)


The Leviathan is another big Pro Series II kit, with a 3-inch diameter airframe, TTW plywood fins, and coming in at just over 41 inches tall. It's a favorite of mid power rocketeers, and has a clean, classic look.
Sadly, the Leviathan is now out of production, but as of this writing, some can still be found at various online vendors. Estes also still sells the Estes Scion, which is made entirely of Leviathan parts, so it's quite easy to use the Scion kit to build a Leviathan.
This is the rocket I used for my High Power Rocketry Level 1 certification flight, on September 17, 2016, in Berwick, Maine. It flew fast and high on a Cesaroni H133 motor with a 9-second delay. It was a real thrill to watch.
I wasn't crazy about the suggested stock paint job. I considered several ideas, but ended up with a simple flat black color scheme with two silver bands.
I sanded the fins into airfoils by hand.
Instead of the launch lugs, I used black 1010 rail buttons.

It's a great rocket, and I'm really happy with how it turned out.

Apogee Avion

I built this as the demo model for Rocket Camp in summer of 2016. Then, along with the kids, I built three more of them, so I have four in the fleet right now, one of which has not yet been painted.

The Avion, by Apogee Components, is a great, simple teaching rocket and flies really well. At 0.976 inch in diameter, it's pretty low drag (though the fins are thick - 1/8 inch balsa), and flies anywhere from about 250 feet on an A motor to well over 1,000 feet on a C.
The kit comes with self-adhesive decals (as opposed to waterslide decals, which I prefer, as they are less thick). One drawback is the shock chord. It's made of Kevlar thread, but is very, very short, which could lead to a zipper - a jagged tear through the body of the rocket - if the parachute ejects anywhere but at apogee. Since the instructions have you mount the Kevlar right at the motor tube, you really don't get much of a lead out the top of the rocket. If building this kit, I'd recommend either tying a length of elastic to the end of the Kevlar, or at least mounting the Kevlar chord near the top of the rocket, using the Estes trifold paper style shock chord mount (which kids building for the first time have less trouble with anyway).

The rocket comes with a parachute you must assemble yourself, but the kit is light enough to recover with a long streamer. Considering how high it flies, that's what I usually tend to use. For flights on C motors, I usually make a recovery streamer from paper party streamer.

Ceres B Booster with Hidden Camera Payload

This is a rocket design from the book Make: Rockets: Down-to-Earth Rocket Science by Mike Westerfield (see below for an earlier, simpler version I built). The original design called for a 24mm motor mount with an engine block or thrust ring, plus a traditional motor hook. This limited the selection of motors a bit. It was meant to fly on Estes D or E black powder motors.
I modified the design a bit and strengthened the rocket a bit. Instead of the motor hook and thrust ring, I substituted an Estes Quick Release screw-on motor retainer, and made the motor tube much longer. That means I can fly on any 24mm composite motor, no matter how long. This rocket is now able to fly with anything from D to some smaller G impulse motors. This makes the rocket much more versatile - I can keep the altitude to around 425 feet on smaller fields, or go up to over 3,300 feet if I want to.
The rocket features a payload section which houses an aft-facing hidden camera inside.

The payload tube is held onto the balsa transition with four removable plastic rivets. When the rivets are removed, the payload tube comes off, and the camera slides into place from the top.

The camera is then secured with a bit of masking tape. There's plenty of room left in the payload section for an altimeter or another payload - such as a raw egg, if I so choose.
The fins are built up from three plies, a basswood core with balsa skins. This enabled me to sand the fins to a radial taper, where they get thinner toward the tip. That way, I was able to - freehand - sand the fins into something like a Nike-style fin. The beveled edges get proportionally narrower as the fin gets thinner toward the tip.
I also opted to replace the surface-mounted (merely glued on) fin construction with through-the-wall construction on these fins. That should make them sturdier for higher velocity flights and hard landings. It also means I'm less likely to accidentally break a fin off by dropping the rocket on the floor of my workshop.
I also opted to replace the surface-mounted (merely glued on) fin construction with through-the-wall construction on these fins. That should make them sturdier for higher velocity flights and hard landings. It also means I'm less likely to accidentally break a fin off by dropping the rocket on the floor of my workshop.

I was pretty proud how this rocket turned out, and for a BT-60 based rocket, it's nice and sturdy. As of this writing, it has only flown once, on an Estes E9-6 black powder motor, but it will soon fly again on some E and F composites.
Here's the first flight video, with internal camera, Jolly Logic Altimeter 2 and Chute Release, and some drone footage.

Copperhead started life as a thank-you gift I designed and built for a friend. I liked it so much I made myself one, and added a booster, making it a two-stage rocket.
The payload section is BT-60 based, or 1.637 inches in diameter, and has plenty of space for any model rocket altimeter. The fins are made of 1/16 inch basswood - slightly harder than balsa, with a tighter wood grain which is easier to fill in. Despite their thinness, all fins are airfoil shaped - something I do with most of the rockets I build, whether it helps them to fly higher or not.

There is a short gap between the booster (first stage) and sustainer (upper stage) motors. While some two-stage model rockets have their motors touching each other and taped together, gap-staged model rockets need small ventilation holes in the booster, so that the stages do not separate before the upper stage motor can ignite.
The vent holes in Copperhead can best be seen in this photo of the built but unpainted rocket.

Copperhead was only the third of my own designs I built, but so far, it's my favorite, whether in the one- or two-stage version.

Estes Goblin

The Goblin is a re-release of a classic Estes kit which used to be sent as a free gift with certain orders. It was discontinued, but a clone was released by Semroc. Estes recently re-released the Goblin.
The Goblin is a small rocket which flies on D motors. I had some real trouble building this, due to some rather boneheaded mistakes I made. For example, I broke off the very first fin when the glue was nearly dry!
To cover the damage, I made the fillets with epoxy filled with microballoon filler. This covered the damage, and made some nice, round fillets.


Astron Sprint XL (clone) (Lost In Flight)

The Astron Sprint XL was created in honor of late Estes designer Mike Dorffler. It's a large, BT-60 based rocket which flies on D or E motors. The elliptical fins and tail cone are supposed to help reduce aerodynamic drag, and aid the rocket in reaching higher altitudes.
Unfortunately, I decided to fly the rocket on a windy launch day. The field was enormous, and I used my Jolly Logic Chute Release to prevent the rocket drifting off the field. But the Astron Sprint clone happened to land in the middle of the one area of swamp in the middle of the giant sod farm in Maine where I sometimes fly. I searched for it for 45 minutes, and realized I'd never find it.
Along with the rocket, I lost my Chute Release and an AeroTech re-loadable motor casing on that flight, making it a very expensive loss.
Unfortunately, I decided to fly the rocket on a windy launch day. The field was enormous, and I used my Jolly Logic Chute Release to prevent the rocket drifting off the field. But the Astron Sprint clone happened to land in the middle of the one area of swamp in the middle of the giant sod farm in Maine where I sometimes fly. I searched for it for 45 minutes, and realized I'd never find it.
 |
| Before it's ill-fated final flight |
 |
| Aston Sprint XL Clone's final resting place - somewhere in here. |
Along with the rocket, I lost my Chute Release and an AeroTech re-loadable motor casing on that flight, making it a very expensive loss.
Imperius D (Lost In Flight)

A simple model I designed as a thank-you gift for a fundraiser, I liked the Imperius rocket so much I built myself one, and upgraded it to fly on D motors.
The Imperius used the somewhat uncommon Estes tube size BT-56, just slightly larger in diameter than the BT-55 rockets seen on this page such as the Goblin, Monarch, and Cosmic Explorer. Estes uses the BT-56 for some of its Ready-To-Fly and Easy-To-Assemble rockets (like the Amazon, included in the popular Tandem-X launch set). I like the nose cone shape, so I designed this rocket around that.
Unfortunately, I lost the Imperius D after a beautiful, high flight, when it crossed a busy highway and disappeared in some tall corn.


Estes Reflector

The Reflector was the first rocket I started building after a few months' hiatus to move, and I had some trouble with it. It's a payload-carrying model rocket. The payload section is rather small, but you can enlarge it a little.
 |
| Trimming a little balsa from the transition and nose cone shoulders... |
 |
| ...and drilling a well into the shoulder of the nose cone... |
 |
| ...made just enough space to fit the Jolly Logic Altimeter Two. |
The Reflector is really beat up, having taken some hard landings on the balsa nose cone, and been semi-crushed when I shipped it to myself for use at Rocket Camp.


But it flies surprisingly well, and does not roll at all.


 |
| This kind of indentation is sometimes known as "the Estes smile." It occurs when the rubber shock chord snaps back and causes the nose cone to hit the rocket hard, leaving a curved indentation in the balsa. |
But it flies surprisingly well, and does not roll at all.


Estes Viking

A simple model which I built with my first year Rocket Camp kids. The Viking has card stock fins and can be configured in a number of ways, so you can choose what the rocket looks like. It's small and lightweight, and is minimum-diameter, meaning it's only as large as it has to be to accommodate standard A, B or C motors, and as a result, the rocket flies very high even on an A.
The Viking is a great bulk pack rocket for kids' camps and school activities, but it's not a particular favorite of mine. Consequently, I don't fly it very often, unless I'm curious to see what the wind is doing.
Quest Big Dog

I sanded the fins into a nice airfoil shape, and apart from the color of the nose cone not quite matching the color of the red decal on the body tube, I'm really pleased with how this came out.
Instead of launch lugs, this rocket uses the micro rail buttons available from rail-buttons.com, so that the rocket can be launched from a pad using a MakerBeam rail. The entire build can be read starting with this post.
Estes Cosmic Explorer with E Motor Mount


I love the way my standard Cosmic Explorer (see below) flies so much, I decided to build another one with a more powerful motor. The standard rocket will fly perhaps 600 feet. With an E9-6 motor, this rocket can top 1800!
 |
| On the left, the original Cosmic Explorer, with an 18mm motor mount, for standard B and C motors. The upgrade is on the right, with a 24mm motor mount, suitable for D and E motors. |
This is the second time I've built this rocket with an upgrade. The first one had a beautiful launch, but the wind carried it away on its first flight. So sad.
But I did a much better job on this build - it's perhaps my best work yet. Again, the fins are airfoil-shaped and the rocket uses micro buttons instead of a launch lug.

 |
| The original on the left, and the E version on the right. The newer rocket has epoxy fillets, as opposed to wood glue, and are nice and rounded. |

Ceres B Booster (Simple Version - Lost In Flight)

This was a 3-finned variant on a simple rocket from the book Make: Rockets: Down-to-Earth Rocket Science by Mike Westerfield. It had a removable nose cone, and would have carried the payload section currently seated on the Janus II (see below). It was a simple model rocket with a 24mm motor mount for use with D or E black powder motors, and was over 20 inches tall.
On its first flight, with an E9-6 motor, it flew beautifully and straight, but was lost in a marshy area with tall grasses. Sadly, I didn't even capture the great launch on video, as I'd hit the record button on my camera at the wrong time.
The Estes decal was simply a test - I painted this with flat white paint, and wanted to see how a decal would look on it. Generally, you only apply waterslide decals onto gloss paint, but I liked this flat white. The decal, for the record, looked fine, and added a bit of detail to an otherwise rather plain-looking rocket.
Sounder I (Lost, Presumed Destroyed)

I designed this little guy in about twenty minutes after returning home from a launch at which I lost three rockets. I figured, well, if I'm gonna lose 'em, they better at least go really high. I wanted to see how high I could get a rocket to go on a black powder motor with just a quick and simple design and build.
The fins were airfoiled and papered, and the simulation said the rocket should hit about 2700 feet and hit mach .52 on an E9 motor. This was a minimum diameter rocket. This is the first rocket on which I used micro rail buttons instead of a launch lug.
The rocket flew one time, and had an odd trajectory. Because the rocket was minimum diameter I had to place the micro rail buttons a bit further forward than I normally would have. This may have accounted for the odd trajectory.
The video was hard to follow, so I never uploaded it. The nose cone never ejected, and the rocket came in ballistic over the nearby county fair grounds in three-foot tall grass. Despite the colors, searching for an hour never turned up anything. I don't know if the ejection charge failed to go off, or if the motor ejected, because I was unable to inspect the damage.
The video was hard to follow, so I never uploaded it. The nose cone never ejected, and the rocket came in ballistic over the nearby county fair grounds in three-foot tall grass. Despite the colors, searching for an hour never turned up anything. I don't know if the ejection charge failed to go off, or if the motor ejected, because I was unable to inspect the damage.
Trident 1A (Flight damaged - dismantled for parts)

Painting this rocket was tricky, because I wanted the inner tubes to be red, and the black fins have tabs that go all the way down to fit between the tubes. There were some painting flaws on this rocket, and one of the fins wasn't perfectly straight. But it was a fun rocket to watch, and really impressed the kids at my rocket camp.
On its 8th or 9th flight, in Amesbury, Massachusetts, the shock chord failed. The nose cone drifted far away and the body fell fins first hard to the ground. It was badly enough damaged that I decided not to try to repair it again. I cut it apart to use the tubes for scrap.
Inside, I saw the ejection charge damage, which was something to see.

Quest Quadrunner

This is a beautiful, four-motor cluster rocket by Quest Aerospace. I was nervous about building it, because it was more complicated than any rocket I'd built so far. I had a few setbacks, but it looks great.
As of this writing, I haven't had the chance to launch it yet, but I expect a lot of smoke, noise and thrust!

This tall, two-stage rocket was my second scratch-built rocket, the next generation of the Janus I (see below). It carried a payload bay which has an aft-pointing video camera as well as an altimeter. It was meant to fly on one D booster and one E sustainer (main stage) motor.
Janus II with Camera Payload (Lost In Flight)

On its first flight, I was too nervous to launch it as a two-stage rocket. I took the booster off and flew the rocket on a single Estes E9-6 black powder motor. The rocket and the payload were meant to separate and each recover on its own parachute. With the wind as it was, both sections drifted far away and were lost. Fortunately, I did not include an altimeter on that first and last flight.
The payload section was exactly the same design as for the Ceres B seen higher up on this page.
3D Rocketry Nautilus II (Lost In Flight)

This was the first non-Estes kit I purchased, from 3D Rocketry. I liked the holes in the fins - meant to harken back to 19th century technology, I suppose, or 20,000 Leagues Under the Sea. I liked the flat black look of this.
The fins were going to be painted copper, but I launched this with this paint job, and it had a hard landing, resulting in some major cosmetic fin damage - it will still fly, but isn't worth painting at this point. I'm OK with flat black - it looks bigger that way.
The Nautilus II was lost to a tree on Wednesday, January 28, 2015.
The Nautilus II was lost to a tree on Wednesday, January 28, 2015.
Janus I - Prototype (retired)

This was my very first "scratch-built" rocket - meaning I designed and built it without using a kit or even plans. It's a two-stage rocket that had one flight - successful! I think it topped 1000 feet quite easily. It did have a bit of body damage from the shock cord, but it went much better than I'd hoped it would.
Unfortunately, I got it home, and when attempting to put the stages back together, I broke off one, then two fins.


I did glue them back on, but I also noticed some centering ring damage. This is now on display as my first prototype of my own design. I'm not going to risk flying it again, as I'd like to keep it as a memento.
Quest Magnum Sport Runner

This is my first cluster rocket - a rocket that flies with two or more motors firing at once (in this case, only two). It was supposed to be orange, but I went with yellow.
Actually, I really didn't like this yellow when it came out of the can - it was a lot paler than I'd thought it would be (Rust-Oleum Sun Yellow). But once I had the black on and the decals, I liked it quite a lot. This might be my highest quality build so far!
Oh, and it has a payload section - which can hold two eggs (the egg challenge is a common fragile payload challenge in low power rocketry). I can't wait to try this one out - TWO MOTORS!!
UPDATE: The Magnum has flown several times. The first flight was flawless, and a lot of fun.
Subsequent flights have resulted in some damage to the rocket. The Magnum Sport Loader is now nearly two inches shorter than seen in the above photo, and one fin has been re-attached a couple of times.
UPDATE: The Magnum has flown several times. The first flight was flawless, and a lot of fun.
Subsequent flights have resulted in some damage to the rocket. The Magnum Sport Loader is now nearly two inches shorter than seen in the above photo, and one fin has been re-attached a couple of times.
 |
| The Sport Loader on the pad with an 808 keychain camera taped to the side |
 |
| A nearly two-inch tear after a hard landing had to be cut off. |
 |
| Carefully cutting off the damaged end of the tube |
 |
| Since the rocket was already looking beat, I took the opportunity to drill some static ports - ventilation holes in the payload compartment. This will allow the air pressure to equalize with the outside so an altimeter to get an accurate reading. |
 |
| Shorter, but still a good flier. |
Estes Big Bertha

This is a classic Estes kit. A nice, big, fat rocket with cartoony fins, this is a slow lifting rocket that you can really watch, because it doesn't disappear into the sky in a second. I opted for my own paint scheme on this, because I didn't like the goofy decals it came with. This is my best rocket build to date - I did make a few mistakes, but the fins are nice and smooth, and you can't see the spiral grooves in the body.
[Check out my Big Bertha build beginning with this post]

Estes Star Trooper (Lost In Flight)

I
got this tiny little rocket for 7 bucks. I'm not really into mini
rockets, but I felt like buying something the day I stopped into the
local hobby shop, The Treasure Chest, and a cheap rocket is always nice
for practicing new finishing techniques.
I lost this rocket on launch day at Ivy Tech Rocket Camp. It flew surprisingly high - the stock card said it could go 900 feet. It went up, we lost sight of it, and it never returned - even with the tiny streamer I had attached. We think it's in heliocentric orbit now.
It was so tiny!

Estes Cosmic Explorer

This rocket is sleek-looking and two feet tall. I screwed up the paint job in a couple of places and I tore the decals, but I still love this rocket. It lifts off slowly so you can really watch the thing take off. It's also the first rocket where I managed to put an airfoil on the fins, and they turned out pretty great.


Estes Hi Flier (Lost In Flight)

The Hi Flier goes about 1500 feet in the air, and since it's tiny, it's easy to lose. But it's a cool, zippy flight.
This is one of the rockets I painted differently from the instructions. It's supposed to be red and black, with little silver triangles on the fins. Since Chad already had one of these (he lost it, of course), I painted mine like this. I was thinking of the Blue Angels for the color scheme.
If I had it to do over again, I might've added a ring stripe of gold near the top, to break up all that blue. I didn't want to use the self-adhesive stickers, because I didn't like them.
The Hi Flier was lost on Sunday, March 16, 2015. It fell beyond a line of trees. We searched for it, but never found it.
Estes Mini Honest John (Donated)

I gave this rocket to one of my Ivy Tech Rocket Camp kids. He'd won the kit on launch day, but felt intimidated by building it himself. On the last day of class, he asked if he could have mine, so I let him keep it.
This is a scale model of the first nuclear missile in the US arsenal. It was a truck-launched missile.
I'm not terribly interested in military models - I'm a lover, not a fighter. But this was cute and tiny, and only about 9 bucks. I figured it would be a good "practice rocket" to try some new techniques on. I made a few mistakes, and fixed them, and it turned out pretty good.
Estes Crossfire ISX

Here's another one I painted differently, since Chad already had one (his second, after losing the first. Oh, Chad!). The nose cone was kind of a tricky mask. I asked Chris Michielssen - who is a real craftsman when it comes to rockets - for tips, and he gave me one, but said it would be difficult. When I sent him pictures of my masking process, he posted it on his blog!
I forget how high this is supposed to go... Maybe 1200 feet? Maybe more? Flies great, though.
Estes Der Red Max

This bad mammajamma is my first-born child. This is what got me obsessed with building rockets, which led me to want to understand how rockets work and how to make them better.
Prior to this rocket, I thought I'd just buy a couple ready-mades to launch with Chad from time to time. But when I saw this thing on Amazon, I thought That thing is freaking cool! The catch was that it required assembly - a "Skill Level 1" rocket. Which meant gluing things on straight and painting, and getting decals in place without screwing them up.
But it was only about 15-18 dollars, and at the time, they only had one left in stock. So I got it. I took my time, followed the instructions, and it came out great!
I love this rocket. The launch feels really solid somehow, probably because it's so stocky, and it's really fun to watch fly. And it comes down on a black, skull-and-crossbones parachute. How cool is that!?
The parachute has been burned and melted in a few places, but it's so cool, I'm going to use it until it's in tatters.
Estes Athena (Lost In Flight), Patriarch (Destroyed), and EX-200


I found these rockets on clearance at Michael's Crafts for between 4 and 7 bucks. I thought, Great! Cheap rockets!
Despite being ready-made, I do like these a lot. The Athena flies high and straight. The Patriarch is about a foot and a half tall, and the EX-200 performs well on mini motors. They all have plastic fins, and they all fly really straight.
Estes Silver Arrow (Donated)

This rocket is where I started.
It was part of what's known as a launch set. You get a launch pad, a launch controller (two things you'll need for every launch) and a rocket, all for less than the price of a pad and controller bought separately. This is what's known by Estes as and "E2X" or "easy to assemble" rocket. You just use a bit of plastic cement to glue on the fins and you're done.
I gave the rocket to the son of a friend of mine, when he came to a launch.
Currently building:
- FlisKits Tres (a large, three-motor cluster with canted motor tubes)
- Estes D Region Tomahawk (Out-of-production scale model of a NASA sounding rocket)
Like my Facebook page for blog updates and extra stuff.
Have a question you'd like to see addressed on this blog? Email me at iamtherocketn00b@gmail.com.
Hi Daniel,
ReplyDeleteNice work on the blog!
I see you might be building the Dr. Zooch Saturn V one day soon. I did a build of it on the blog.
that's one of the greatest kits out there, really well engineered and a good flyer.
The other kit to add to your wish list is the Sirius Interrogator. Those two are my favorites and highly recommended.
Thanks for taking the time to do the blog - your work is appreciated.
Chris Michielssen
Yes, I've checked out that build - it looks quite involved, which is why I've put it off for a bit.
DeleteI now have about 20 or so kits to work my way through, plus some scratch builds. I'm going to work the Saturn V in there somehow.
Thanks for the comments!
Daniel,
ReplyDeleteLots of great info and pictures here. I saw Ted 's shout out on the Cantina, and decided to have a look. I wanted to comment on decals over flat. I use Krylon UV-Resistant Acrylic Clears. Avaialble in Matte, and Gloss. So you can "gloss' your flat topcoat, apply decals, and then return the rocket to flat finish by using the Matte clear. I've used this on a number of military rockets, where you typically are using flat paints, like Olive Drab or Dark Earth. But I think even white and black on scale/military rockets looks more realistic if flat. Hobby Lobby catties these clears, so you can get them pretty cheap with a 40% off coupon (or Hobby Lobby app on your smartphone).
Kudos from a BAR who wishes he could build as well as The Rocketn00b! My Red Max is my favorite too, Daniel. After an afternoon of garage cleaning I zipped over to the local park to get some rockets in the air - Max flew twice, on then "wrong" motors, perfectly!
ReplyDeleteI've eye-balling the kits at 3D too, your Nautilis is a sinsister looking ship - love it!
great pictures of your building skills, thanks for posting all this up for us.
ReplyDelete