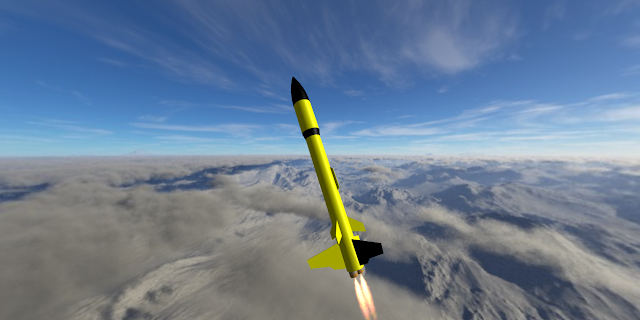
Showing posts with label payload. Show all posts

Monday, December 13, 2021

Super Big Bertha - Prepping the Payload for Altimeters


To fly an altimeter in the payload section of the #estesrockets Super Big Bertha #modelrocket, the payload really should be vented using static ports. This will allow the payload section to depressurize as the rocket ascends, so the altimeter can correctly read the air pressure outside the rocket and determine altitude.

Some people, including some very knowledgable rocketeers with experience in using altimeters for competition rocketry, claim payload sections don't necessarily need venting. There is often leakage of air pressure through places like the nose cone shoulder. But this one is quite airtight - the nose cone pops quite loudly when I pull it off. So I'm going to assume altimeters aren't psychic, and add static ports - it can't hurt.

I usually put three static ports on three-finned rockets and four on four-finned models. I don't know why - I just prefer things to match, I suppose. Longtime readers know I can be a fussy builder. It's your hobby - build it the way you like.

After consulting several static port calculators online, I determined I would need four 1/8 inch static ports on the Bertha. It's best to have them far from the nose cone. The joint between the nose and body tube can increase turbulent airflow over the ports if they are near the nose, and this may affect the accuracy of the reading the altimeter takes. So I drilled them near the bottom, through both the tube and the coupler.

I marked the spots first in pencil, then with a push pin, and finally drilled them out.

The drill will leave some jagged bits around the hole. Static ports should be smooth and round on the outside to reduce turbulence.

To smooth the holes, wick some water thin CA glue into the drill hole. Once it's cured, you can sand the opening smooth and clean up the hole with the drill bit.

After sanding the outside smooth, there's a bit of jagged paper left in the static port.


A second pass of the drill bit should clean up the static port leaving a clean, round hole.

Final smoothing and rounding may happen after primer.

I post a lot of things on Instagram these days. Follow me here.


Like my Facebook page for blog updates and extra stuff.

Have a question you'd like to see addressed on this blog? Email me at iamtherocketn00b@gmail.com.

Wednesday, December 1, 2021

Breaking Super Big Bertha In Two - Payload Section

Super Big Bertha is a very tall model. It's made of two lengths of BT-80 body tube joined by a coupler you glue into both tubes. I decided to turn the upper tube into a payload section, sealing one end of the coupler with a bulkhead and only gluing it into the upper tube.

This would have two practical benefits. First, I could fly a payload, like an altimeter, without worrying about the delicate electronics being fouled up by ejection charges.

Second was transportation. I take most of my rockets to launches in a large box.


A box of rockets large and small. You can lay towels between layers to protect the paint, but if
you don't jostle them too much, it's usually fine to simply lay them in and take them out gently.

It's a long box; you can see my Pro Series Nike Smoke and Ventris in there, as well as my North Coast Rocketry Archer in there. But the Bertha is just a still much too tall to fit in the box in one piece. Having it come apart in the middle makes it much easier to pack away.

I swore I had some BT-80 plywood bulkheads somewhere, but I couldn't find them.


I was taking out the recycling, when it dawned on me - these Madras lentils from Costco are not only cheap, tasty, and healthy, the carton they come in is made of very hard, finely corrugated cardboard, and would be perfect.


First step was to trace around the coupler. Then I cut the shape out with scissors, slightly larger than the finished product would be.


I then sanded the bulkhead round until it fit snugly inside the coupler. 


I reinforced one side with a bit of packing tape and punched two clean holes through the bulkhead.


A good glue bond with fillets on the inside would hold it in place. I ran some Kevlar through the holes and tied it in a loop.


Finally, I plugged the holes with some Titebond Molding and Trim Glue.


Once everything was dry, I glued the bulkhead halfway into the upper payload tube.


The finished product is very solid.

I post a lot of things on Instagram these days. Follow me here.


Like my Facebook page for blog updates and extra stuff.

Have a question you'd like to see addressed on this blog? Email me at iamtherocketn00b@gmail.com.

Monday, April 4, 2016

Playing With the Flight Simulation

Now that we've run a first simulation using Estes C6-5 motors, let's try a couple things. What if I'd built the rocket without streamlining the fins? What might the altitude difference be?
I'll go back to the rocket design and set all the fin cross sections to "square," then run another simulation. With six streamlined fins, the simulation predicts an altitude of 936 feet. What about with six square fins?


According to OpenRocket, the increased drag from square fins over streamlined fins has cost us altitude - we've gone from 936 feet down to 692 feet - a significant difference!

Is this accurate? It's hard to say. Some people claim that rocket simulators overestimate altitude predictions somewhat, or that they overestimate the value of airfoil-shaped fins. I can't make a claim about it without testing it myself. But there will surely be at least some difference in altitude.

OK, let's go back to the simulation which matches the rocket we're using here. With streamlined fins, I should be able to expect an altitude of somewhere over 900 feet on two C6-5 motors. What if I'm flying on a smaller field with trees on the edge, or it's kind of windy? What if I want to fly the rocket, but not go so high?

Simply create another configuration in the Motors & configuration tab. Let's try the three most common 18mm motors - the A8, the B6 and the C6, and compare them.


I can highlight all three simulations and run them at once.


Looks like I can keep the rocket to around 400 feet on the B motors for a small field or windy day, and even lower with the A motors - 140 feet - for an even smaller field, or maybe a simple demonstration of the rocket. Liftoff velocity appears safe enough for all three configurations, and I accurately guessed which delay times I'd need to select for each motor combination.

Let's try one more thing. Let's compare the Estes C6-5 motor, which we've been using for all the simulations up to this point, with the Quest Aerospace C6-5 motor.

As you may have read, the C in this motor designation refers to the total impulse of the motor, between 5.01 Newton-seconds and 10 Newton-seconds. The 6 refers to average thrust, measured in Newtons. So, a C6 motor is supposed to have an average thrust of 6 Newtons, and a total impulse of up to 10 Newton-seconds. Click here for a refresher on motor basics.

However, despite what you may have read, an Estes C6 motor does not have an average thrust of 6 Newtons. Its average thrust is about 4.7 Newtons. The average thrust of the Quest motor is even lower - 3.5 Newtons. Both motors have a total impulse of 8.8 Newton-seconds.

This leads to something very interesting. Since total impulse is approximately equal to average thrust multiplied by burn time of the motor, the lower-thrust Quest motor should burn for a longer time period. And, in fact, it does. The Estes motor burns for 1.9-2ish seconds, while the Quest motor burns for 2.5 seconds - 25% longer! Both motors impart the same amount of force to the rocket - 8.8 Newtons. The higher-thrust Estes motors make the rocket fly faster.

And here's the really interesting part. There are two forces keeping a rocket from flying upwards forever: Gravity and drag. Gravity is a constant. Drag is influenced by a number of things, but especially by the velocity of the rocket. Drag increases as a square of velocity. So, if you double a rocket's velocity, drag increases four times. If you triple the rocket's velocity, drag increases nine times!

With the right combination of optimal mass, lower thrust, and longer burn time, often the lower-thrust motor will take a rocket to a higher altitude than it's higher-thrust counterpart of the same total impulse.

Let's test this out in the simulation.
On the Motors & configuration tab, I'll create two configurations, one for the Quest motors, and one for the Estes. To avoid confusion, I'll click on the Rename configuration button and type in the correct brand name of the motors I'm using for each configuration.


Going back to the Flight simulations page, I run both simulations at the same time. Here are the results:


As you can see, the Quest motors take the rocket higher, breaking 1,000 feet in altitude. Optimum delay for both flights is just over 5.5 seconds, so C6-5 motors will work well regardless of which brand we select.

Let's unpack the information here.

On the Quest motors, the rocket leaves the launch rod traveling at 48.9 mph, 17.7 mph faster than on the Estes motors, with which it leaves the rod at 31.2 mph. At this point, the rocket with Quest motors is experiencing much more drag than the rocket with Estes motors. But the story isn't over - the motors are still burning, and the flight has just begun.

We've already established that the Estes motors have a higher average thrust than the Quest motors, so why is the rocket with the Quest motors traveling so much faster?

The answer lies in the thrust curves* of the individual motors.

Here is the thrust curve for the Estes C6 motor:


As you can see, in under a quarter of a second, the thrust peaks at nearly 12 Newtons, then settles back to a lower-level thrust of under 5 Newtons for the rest of the burn. This initial, peak thrust is pretty common in black powder model rocket motors - a peak early in the burn, followed by a lower thrust for the rest of the burn - and has to do with the surface area of the propellant being burned at a given moment.

For comparison, here's the thrust curve for the Quest motors:


Here, we can see a dramatic difference. The initial thrust peaks at over 22.5 Newtons - much higher initial thrust than that of the Estes motors. After the peak, the thrust reduces to a much lower level, but for a much longer burn time.

We've seen that the rocket with Quest motors leaves the rod at much higher velocity, which means higher drag, and but that the average thrust is much lower. Why does the Quest rocket go higher?

Let's look at the flight simulation plot for both flights from OpenRocket.

The Estes flight plot:


And the Quest flight plot:


We can see the vertical velocity - the blue line - increase until motor burnout occurs, at about 2 seconds for the Estes motor, and for about 2.5 seconds for the Quest motor. By the time motor burnout occurs, the Estes rocket has caught up with and surpassed the velocity of the Quest rocket, by about 9 miles per hour.

But look at where burnout occurs for each rocket - at around 310-325 feet for the Estes rocket, and around 400 feet for the Quest rocket. Once motor burnout occurs, the rocket will only slow down - and the Quest rocket has a head start of about 75 feet when coasting begins!

The Estes rocket is traveling faster, but can't catch up to the Quest rocket. Aerodynamic drag increases as a square of the velocity, so already the Estes rocket is experiencing more drag due to its increased velocity.

And the air gets thinner as altitude increases, so drag decreases as you go upward. How much difference in atmospheric density will the rocket experience in 75 feet? Well, not much, but there is an difference.

So the Quest rocket, while traveling 9 mph more slowly than the Estes rocket at motor burnout has a 75 foot head start at coasting, and experiences less drag due to being higher in the air and traveling more slowly.

Playing around with simulations like this is a good way to see how your rocket can reach higher altitudes. But maybe a difference of 80 feet in altitude isn't such a big deal to you. Well, there's another reason to try Quest motors. Longer burn launches are fun to watch! 2.5 seconds may not seem like a long time, but when it comes to model rocket motor burns, you really do notice a difference.

*Accurate thrust curves are hard to find. There were several thrust curves on Thrustcurve.org for these two motors, and not all of them agreed with one another completely. I selected the two thrust curves to best illustrate the point here.

A Word About Payloads

The Quest Magnum Sport Loader is a payload-carrying rocket. It's specifically designed to loft 1-2 raw eggs. Earlier in this series, I modified the payload bay so I could fly the rocket with a barometric altimeter.

Static ports - tiny air holes drilled into the payload compartment - allow the air pressure inside
the rocket to match the air pressure outside so the altimeter can get an accurate reading.
If you do add a payload to your rocket, whether it's an egg, an altimeter, a camera, or a little toy astronaut, you will add mass. To get an accurate simulation, you'll want to repeat the steps with the payload installed.

The Jolly Logic Altimeter 2 adds 9.9 grams.

This 808 keychain camera - a common
payload - adds 14.4 grams.

This foam rubber padding, which I'll use to hold and protect
the altimeter, adds 2.1 grams.


The rocket with the altimeter and padding now weighs
118.4 grams. I'll need to adjust my sim for greater accuracy.

Eggs in particular are pretty heavy. Even if you're not terribly concerned about the accuracy of the altitude prediction, if you add a heavy payload, you want to run a new simulation with the new mass of the rocket, for safety. I know I can fly the Magnum Sport Loader with one egg on two C6-5 motors. But with two eggs, I might need to select a shorter delay time.

* * *

There's one more feature in OpenRocket I'll show you quickly - the different ways you can view the rocket design.

In the top left-hand corner of the bottom panel, where you see the rocket, you can select View Type.


We've mostly seen the rocket in Side view, which shows you the basic design in a 2-dimensional layout. You can also see the rocket from the back, by selecting Back view.

This feature can help you accurately place launch lugs, odd fins, cluster motor tubes and other items on the rocket, by sighting straight up from the aft end.

There are also three different 3-dimensional ways to view the rocket. 3D Figure and 3D Unfinished both show the rocket as a see-through but 3-dimensional image. The main difference is that in 3D Figure, all the components are color-coded. I suppose this is to help you distinguish individual parts more easily when looking at the rocket.


Finally, 3D finished will show you the completed rocket. The components default to natural colors (tan body tube and balsa fins, white plastic nose cones), but you can change the color to get a final idea of what the paint job might look like.


The 3D views all allow you to rotate the rocket, both vertically an horizontally, so you can get a good look at the whole thing. If you're designing your own rocket, it's good to be able to turn the thing around and look at it from all sides to decide whether you like the looks of it before you start building.


* * *

How accurate are these simulations? Will my rocket actually fly to an altitude close to the 945-odd feet predicted? And if the prediction is inaccurate, how can I improve it?

I don't yet know the answers to those questions, because I haven't tested it out yet. And despite the fact that it's a free, excellent tool for modern rocketeers, there are a few things OpenRocket doesn't take into account: additional drag caused by the static port holes, or the shoddy work I did on my airfoils, for example.

I'll return to this subject when I've had the chance to launch the rocket with an altimeter on board. We'll see how accurate the predicted altitude is, and we'll try to figure out what went wrong if the prediction is totally off. The next launch is scheduled for April 23.

Stay tuned.

Like my Facebook page for blog updates and extra stuff.

Saturday, August 1, 2015

Horrible Error

I've started building my first rocket in months. I decided to take one of the smaller rockets off the build pile - the Estes Reflector.


It's a small, BT-50 (24mm) based rocket with a short payload section. I'm building it with the intention of adding a camera to the payload, following the instructions on this Instructables build, because it's a pretty cool project, and I have yet to successfully launch a camera payload (Janus II had a weird flight and vanished without a trace, and the camera wasn't working anyway. I may post video soon.).

An Estes Reflector with internal, horizontally-
oriented camera, from Instructables.com


Despite having become much more confident in my building skills, sometimes mistakes happen.

Well, first of all, I airfoiled the fins, and one or two came out a little uneven. Not badly, and I hadn't done it in a few months, but the problem was due mainly to rushing the job.

Then, a couple of the fins warped when I brushed on CWF to fill in the wood grain. I pressed them under a heavy book (my trusty Riverside Shakespeare, an invaluable rocket building tool), but there was still a nasty warp on one of the fins. I dunked the bad fins in water, and am re-pressing them. We'll see how that turns out.

The real problem is the motor hook.

Like most Estes low power kits, it comes with a standard motor hook with a little recurved bit on the end as a thumb grip.

From Apogeerockets.com
Some rocketeers religiously remove the thumb grip and smooth off the remaining bit with a file. I actually like the thumb grip - it makes it easier to install the motor. But in some cases, it gets in the way.

A lot of rockets with backward-swept fins will sit nicely on a shelf with no need for a stand or support. Many rockets have fins that don't sweep backwards, so in order to display them on a shelf in a convenient, upright manner, you need to make (or buy, but don't ever buy) a stand of some sort.

The Reflector has swept back fins, but they don't go too far back. On a standard Estes motor hook, the thumb grip is longer than the fins, meaning you cannot simply rest the rocket on its fins. On an old-fashioned, simple motor hook, which is basically just a strip of metal with a bend at the front and a bend at the end, you'd have plenty of space at the bottom - no need for a stand.

Here's a picture from Chris Michielssen's blog with a before and after pic of a modified Estes hook:

The top hook has been modified, and looks more like an old-fashioned
motor hook. This is the kind of hook you get when you order parts online
from vendors such as Jonrocket.
First, I tried cutting the thumb grip off with a pair of wire cutters.


I've had these probably since I was 12. I've used them for trimming guitar strings for 29 years. They didn't work... Didn't even make a dent.

Looking around my Rocket Room...

My Rocket Room in Boston - a couple weeks ago, in progress
...I found a pair of PVC pipe cutters.

This evil parrot-looking thing cuts through 1 inch PVC pipe with little effort.

I figured these would have more power. But instead of cutting the hook, it bent it - backwards. Now there was no more hook to the hook. It wouldn't hold the motor in - but of course, the thumb grip was still attached. AND I dented the end of the airframe, slightly...


I reached for a pair of needle nosed pliers to try to re-bend the hook into shape. What I ended up with looked like this:


It will hold the motor in, and the hook is now definitely short enough to not extend beyond the aft end of the fins, but it looks pretty janky. And the thumb grip now sticks out beyond the diameter of the airframe. This could catch on a two-piece Estes launch rod. Chad had that happen with a bent motor hook on his Estes Crossfire ISX once, and the rod went flying with the rocket! It was terrifying.

Fortunately, I do not use the two-piece rods, and, because of the payload section, the launch lug for this rocket is actually on a stand-off, so it's not likely that the rod will come into contact with the hook.

I could have tossed this whole thing out. I do have plenty of spare parts. It would have been easy for me to cut a 10-inch piece of BT-50 body tube, and make a whole new lower section of this rocket from scratch. But I wanted to go forward, not backward, and as you can see above, I went ahead and started gluing on the fins.

This kind of laziness is not like me - not in rocketry, anyway. I'm usually very meticulous with my rockets (if only I could be that diligent in other areas of life). But it's been so long since I built a rocket, I wanted to move quickly.

If I had it do do over again, I'd have saved the Estes motor hook for another rocket, swapped out a plain hook from Jonrocket, and have saved myself the trouble of all this. Live and learn!

I'm sure I can still make this rocket look pretty good, and when I'm done, the flaw won't be noticeable. Perhaps I'll even find a better cutter to take care of that hook later.

Like my Facebook page for blog updates.

Tuesday, December 30, 2014

5... 4... 3... 2...

I've nearly completed the three rockets I've been working on for a month and a half, just in time for tomorrow's Epic Rocket Launch. Just a bit of paint here, a few stickers there, and a couple knots tied, and we'll be All Systems Go.
Janus II with camera payload bay, Quest Quadrunner 4-motor cluster rocket,
and 3D Rocketry's Nautilus II, the first kit I ever purchased
which wasn't from Estes (which is where most of us start)
All that's needed now is a few details.

The Janus II - which is the big brother of my first ever designed-and-built (or "scratch built") rocket Janus I - will get a touch of black on the fin tips.


Looking at this rocket, with the gray body and fat payload section, it kind of reminds me of a shark - which gave me an idea for a new design I'm going to play with (but which in the end may be unstable and therefore unflyable) called the Hammerhead. Mostly I like names for rockets that don't try too hard to sound "badass," but I might make an exception in this case. Stay tuned.

Here are the two Janus models side by side for comparison.

Janus I and Janus II. Janus I uses standard 18mm (A-C) rocket motors,  while
Janus II is designed for 24mm motors - one D and one E. Both are two-stage rockets.
 
Even without a special payload section, you can see that Janus II is taller than Janus I - this is because since it's made to take larger (and heavier) motors, which sit in the aft end, the rocket needs to be either longer or weighted in the nose in order to be stable without using oversized fins. This has to do with the relationship between the center of gravity and center of pressure, and if you're new to rockets, we'll get to that in another post on the basics of rocket stability.

Also notice that Janus I has four fins on the booster and main body (sustainer) of the rocket, while Janus II has only 3. This reduces drag and increases altitude (and makes building faster - less sanding and fewer fin fillets to apply). My simulation estimates that Janus II will top 1700 feet.

But just to check, I also have an altimeter.

Altimeter Two, from Jolly Logic
This tiny little guy will tell me what the peak altitude reached is, and a number of other flight data points - such as top speed, maximum acceleration up to 23 Gs (!!), altitude at parachute ejection and the velocity at which it descends (with that parachute). It's can go up to 29,500 feet, so I think it'll do the trick.

Here's the camera seated in the Janus II payload bay:

Peekaboo!
So, this rocket will carry two payloads - the camera and the altimeter - it has enough room for both, plus an egg if I wanted to do that (though I'd like to spare my new altimeter the potential humiliation).

The Quadrunner is in pretty good shape, considering the ordeal I blogged about a few days ago. It's not perfect, but once the decals are on, the little flaws may not be noticeable.

The Quest Quadrunner -
tall, powerful, beautiful...

With four C6 motors, this should easily top 2000 feet, although I may add a bit of weight just to slow it down a bit. Four motors can lift a lot of weight. This rocket is not that heavy - and in a recent Youtube video I saw of a launch, the thing took off so fast the camera couldn't keep up. After a month and a half of work, I'd prefer to minimize the risk of my losing this rocket on its maiden voyage.

The Nautilus II by 3D Rocketry will get copper fins and perhaps nose cone, although I'm tempted to leave it this flat black color. It looks imposing like this.


But I got the copper paint, so I feel like I should go through with it. I hope I don't regret that decision! The rocket flies on a D motor, and should go pretty high.

We're also going to attempt to launch Chad's Aspire rocket from Apogee Components. This thing is supposed to top one mile in altitude. Last time we launched, I must have inserted the igniter wrong (it's a composite motor, not black powder, and I'm not used to those yet), because it flashed, and nothing happened. Such a disappointing end! I have four spare igniters for this rocket, so we'll try our best. We'll probably never see it again...

I was going to hold back on a few of my smaller rockets, but I realized, hey, this is the last launch of the year! I should go all out! So I'm launching everything I've got - everything I've built, that is. My pre-made, ready-to-fly models will probably stay at home, or I'll launch one first to check the wind direction and speed.

But here's nearly everything I built myself since I started doing this less than six months ago - the fleet for tomorrow's launch:

Back row: Janus II, Cosmic Explorer (Estes), Nautilus II (3D Rocketry), Aspire (Apogee Components), Magnum Sport
Loader (Quest Aerospace), Big Bertha (Estes), Quadrunner (Quest Aerospace). Middle row: High Flier (Estes),
Crossfire ISX (Estes), Der Red Max (Estes). Front row: Star Trooper (Estes), Mini Honest John (Estes)
Janus I is retired, due to damage, but everything else I've built is going into the sky tomorrow, and I hope to have pictures and video to share - including POV video from the nose of the Janus II!

The weather looks good, so we shouldn't have to scrub the launch like we did Saturday. Honestly, I was glad for a few more days to finish these three rockets, but now it's Go Time.

I've been putting together a video compilation for a few weeks of all my launches - or, at least, all the ones that came out OK, and after tomorrow, I'm going to put a Slo-Mo Supercut on my Youtube channel. Rocket porn, basically. Now that I'm building bigger rockets, I hope to get some good video. Small rockets are really impressive to watch in person - they go so high so fast! But on video, it's hard to convey the exciting nature of the launch. Bigger rockets look better on video.

If I stick with this (I plan on it), I think I'll try to make it an annual tradition of putting out a slo-mo launch supercut of the year on January 1. I've got some bigger rockets to build, so hopefully years to come will see some good video - and who knows, maybe a Level 1 high power rocket certification launch??