So, you've got a rocket that's to be painted multiple colors. You start with the light colors (the undercoat), then move onto the darker colors (the topcoat).
Here's a cute little scratch build I'm working on - Sounder I.
This color is Rust-Oleum 2X Marigold, if you're curious.
I love this color! But I'm putting a black roll pattern - a black checker pattern - on the upper portion of the airframe. Obviously, I want to keep from getting flecks of black paint on the lower portion of the rocket, so I'm going to mask it off.
I'll use tape to mask the lines where the black will go down, but instead of taping up the whole rocket - which takes a long time and uses a lot of tape - I'll do a large section with masking paper.
The lines are masked off with clear Scotch tape. Masking paper
is wrapped around the body of the rocket and taped in place.
Despite what some kit instructions tell you, do not use newspaper. I learned this the hard way. The print will transfer to your paint job, like Silly Putty. Nobody wants to see Marmaduke end up on their rockets. Any plain paper will work fine. Brown masking paper comes in long rolls, and can be bought at hardware stores.
Now, you could take the time to carefully wrap all the fins with tape and paper, but again, this is a lot of work. I prefer to make a masking skirt from a plastic shopping bag.
To do this, you need a plastic bag - and I'm sure you have a whole bag of bags in a cabinet somewhere - a pair of scissors, and tape.
Make sure there are no holes or tears in the bag, or you'll have to tape those up.
Start by cutting a small slit in the middle of the bottom of the bag. You'll probably need a smaller slit than you think.
Open the hole in the bag, and slide the bag down onto the body of the rocket, bottom up.
Tape the skirt in place using a couple of pieces of tape.
Now, twist the skirt around the masked area of the rocket, and tape off any gaps.
Finally, twist the bottom of the bag closed and tape it shut. If you're using a painting rig like mine, where the rocket is held by a stick from below, you can tape the skirt to that. If you're using a paper wand, you can either tape the skirt to the wand (if you have it coming out the bottom or aft end of the rocket) or tape the skirt shut completely (if you have the wand coming out the top or forward end).
Now your fins are masked safely, and you've spent a lot less time.
I'm going to digress from this series for a moment, because this is the point where I needed to make some decisions about how to proceed. In order to make that decision, I had to try a few things.
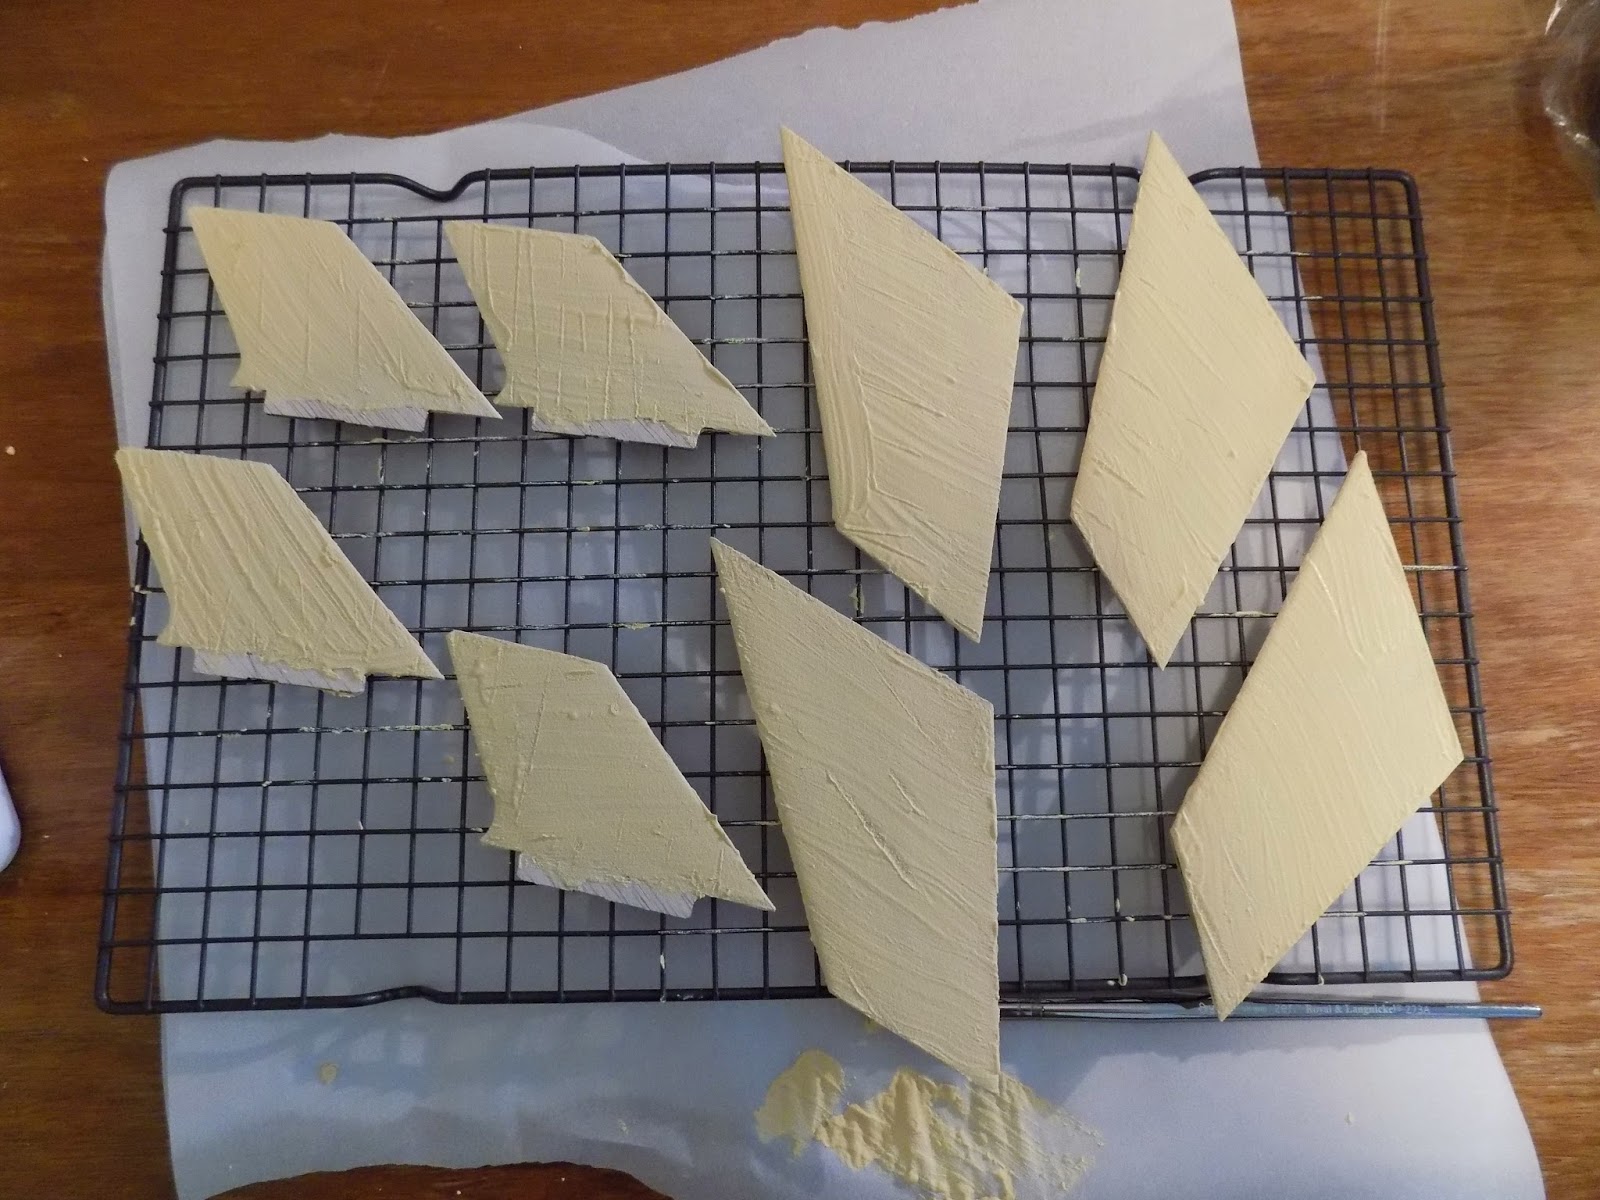
On most of my rockets, I make the fins smooth for painting by filling them with Elmer's Carpenter's Wood Filler, commonly abbreviated CWF.
This works, and it's pretty common among rocketeers looking to hide the wood grain that will show through the paint job. The common way to do this in the old days was to use sanding sealer, which would fill in the pores in the wood, and after several coats and several times sanding, you'd have a smooth, plastic-like finish.
Sanding sealer seems to have fallen out of fashion these days. I don't really know why - I've heard that it smells bad, but so many materials we work with in rocketry smell bad and irritate the eyes (I'm looking at you, cyanoacrylate!). Perhaps it's not as good as CWF, I don't know. I've never tried using it, though I'm considering doing so, just to see what it's like.
CWF works, but it takes time, produces a lot of dust (the sanding produces such a fine dust that it gets all over everything in the spare bathroom where I work), and often requires multiple coats; and, since it's water-based, CWF can warp fins if you're not careful.
A lot of rocketeers "paper" their fins. That is, they cover the fins with paper skins, carefully glued on and flattened out. It takes less time, and can make fins much stronger, as the paper reinforces the balsa fins. With paper skins, you're much more likely to have a fin break off long before you risk snapping one in half.
People have their different methods of papering fins, but here's a basic method by Tim Van Milligan, of Apogee Components:
The quicker build time, less mess and added strength are very appealing to me. And papering fins is supposed to be easy. But I've had a bit of a time with it, so I decided to try it out on the practice fins I airfoiled in the last post.
Now, I've tried papering fins before, with mixed results. Some have turned out well; some have not. I've tried different methods, all of which seem pretty straightforward, using different adhesives, from wood glue to white glue to spray adhesive, and using two skins (one for each face of the fin) and one skin (which wraps around the leading edge of the fin).
I figured if I could get this papering thing down, I'd do that for the kit fins; if I couldn't, I'd stick with the CWF. I'm not willing to risk making a $45 dollar rocket look bad because I decided to try something new.
Well, I get a good result on about 1 out of 4 fins:
The six big fins are practice airfoils for the Big Dog. The bottom right three fins, from left to right, are from
my scratch builds: Sounder I, the Ceres B booster, and the Janus II two-stage rocket
with a camera payload. The upper left is just a scrap I tried papering.
The basic method is to apply some kind of glue to either the surface of the fin itself, or to the paper, wipe off all but a thin layer, then glue it to the fin. Do both sides, allow to dry, and then seal all the edges (except for the root edge) with thin CA (superglue). Once the CA is dried, you sand off any extra paper from the edges.
Some people use spray adhesive, and some people like to wrap one skin around over the leading edge of the fin. I liked this idea, because it means that you have once piece and don't risk showing a seam under the paint job, or having exposed wood grain on the edge. But the trouble with that is that the skin tends to pull away from the wood before its dry, leaving a bubble underneath.
I've tried spray adhesive, and my best fin seems to be with that method.
I was also able to get one skin wrapped around the leading edge. Unfortunately, other fins I attempted to do this way had a gap at the leading edge between the paper and the edge of the fin. And on at least one rocket I've built using the spray adhesive method has a bubble I only noticed when I started painting.
Hard to see, but if you press on the fin on the left, you can feel it give; there's a bubble
under the paper skin where it pulled away from the fin either during papering or afterwards.
OK, so the Trident A fins were done using a weaker spray adhesive than I used on this Big Dog fin. Perhaps spray adhesive would work just fine. But there's also the problem of the leading edge. Even on one fin that didn't have a gap between the edge of the fin and the paper, there was some wrinkling where I folded it over the edge.
Well, that's not going to look good! So I tried curling the paper first, or folding it. Folding it would probably have worked pretty well, if I had gotten the leading edge of the fin in there perfectly. But working with sticky materials is hard - you keep getting your fingers stuck, then the material moves, then you don't get the part placed the way you want to. I ended up with such a bad gap on that one, I ended up cutting it, sealing it down with CA, and treating it as if I had used two skins:
This one might turn out OK - I guess we'll see when I sand off the excess.
Working with white glue and wood glue turn out alright, provided the fin isn't too large.
But the Big Dog fins are quite large, and I kept dropping them while holding them by the edges. This means I get blobs of glue where I don't want them, such as on the paper itself.
And with glue, you have to work fast, so wrapping the fin around the leading edge doesn't seem to be an option for me, at least until I get better at this. Look at this horrible sight!
Ripples and tears, from the paper becoming saturated with the glue. I wasn't able to work fast enough with this fin, and this happened. When you paper fins with glue, it's a good idea to work quickly and then press the fins under a book to prevent them warping. Between sheets of waxed paper, of course - you don't want fins glued to your Shakespeare!
I had one fin turn out reasonably well with glue, except that the leading edge is prying away, despite being sealed down with some CA.
Even with a successfully papered fin, if you're fussy and want to hide all wood grain, you still need to deal with the tip edge, which shows the actual capillaries running through the wood.
This can probably be done with a minimum of CWF or some other sealer. And of course, you won't know how things really turned out until you put on primer and paint - and by then, what's done is done.
All of this is to say that with the Big Dog, I decided in the end to go with CWF. It may not be perfect, but I know I can get good results with it. I'll keep working on papering fins on my own scratch built rockets, until I get comfortable enough with it that I am willing to paper the fins of a kit I've paid money for. Papering fins is probably one of those things that simply take doing until you get less clumsy with it. Once I feel good enough about my ability to paper fins, I'll show you how I end up doing it here on the blog.
As for the three fins that came out reasonably well...
...well, they're not perfect, but they're plenty good enough to be put on a scratch build. It's an E-motor quad cluster which uses the Quest Big Dog fin planform, so until I can come up with a better name for it, I'll call it the Quad Dog.
It'll be a simple, big rocket that should have some awesome flights. And cheap to build!
I've now finished filling the fins, so in the next post, I'll show that part of the build, and attach the fins to the rocket. I'll also decide what size rail buttons I'm going to use. Stay tuned.
This will improve flight performance; the rocket should go much higher with its fins sanded into a teardrop shape, rather than left square. As I've written on this blog before, rather than just going for it, I decided to cut some extra fins from 1/8 inch balsa wood. With these, I'd practice a new airfoiling technique, and also see if I couldn't find a better way to fill the wood grain so the fins would be smooth on the finished rocket.
Six practice fins, airfoiled, sitting on top of the four fins that came with the rocket. The kit fins are still square.
A lot of people don't bother shaping their fins, or at least, they stick with simply rounding the leading and trailing edges. Unless you're doing competition rocketry, you may not notice a difference in performance. But a rounded or airfoiled fin can give you a boost in altitude - sometimes by well over 100 feet.
Airfoils are tricky, but they look cool, so I really wanted to get a good shape on these, and they came out rather well.
I'm actually really proud of these. This was not as hard as I had thought it would be, and I plan to write an upcoming post about how to do it. The basic idea is to mark guide lines parallel to the leading and trailing edges of the fins, and sand evenly from that line down to a pointed edge. The trailing edge has a long taper, while the leading edge should be rounded off. This is much easier to show than to describe, so look for an upcoming post with lots of pictures, and probably a video. It takes some practice, but I think it's doable if you take your time.
Airfoiling the kit fins took a lot longer than the balsa practice fins I made. The kit says the fins are made of balsa, but I'm not sure I believe that. Balsa comes in many different grades, but it's usually a soft wood. These were really tough. If you flicked them with a fingernail, they sounded solid. Perhaps they're a high grade of balsa; perhaps another wood. I keep hearing about "tung" wood, which is sometimes used as a balsa substitute, but I don't know what tung is supposed to be like.
I certainly can't find any sheets of tung for hobby use online. The balsa sheet I get at hobby shops is so flimsy, so soft, I'm not crazy about it. Most kits have balsa fins which are a little tougher, with tighter wood grain. I couldn't even make a slight pencil mark on the balsa sheet without leaving a deep mark in the wood.
The Big Dog kit fins, however, they're something else.
While the balsa practice fins took me perhaps five to ten minutes to airfoil, the kit fins took much longer. I could do several balsa fins at once, but I needed a break from sanding after each Big Dog fin. And my hands started hurting! And I dropped a fin several times, with no damage at all.
Compare that with the damage I did to one of my first rocket fins, the Cosmic Explorer, from mere sanding:
A misshapen gouge taken out with some gentle sanding with fine, 400 grit sandpaper. I was able to repair this later.
All this is to say, these are going to be some tough fins.
I'll save fin filling for next time. We'll also talk about papering fins - a faster, less messy way to get a smooth surface on your fins, and which I'm really bad at doing - but I've at least got some pictures.
Back in October, I raised money for the Bloomington Playwrights Project, offering scratch built rockets as an incentive. This spring, I'll hold a launch for the donors, and they will keep the rockets I build for them.
The Donor's Rocket has been designed.
Now I just need to buy the parts and build the rockets.
I selected an odd size for this rocket. It uses a BT56 - an Estes tube size, just slightly larger in diameter than the BT55 (used in many kits, including the Cosmic Explorer). As far as I can tell, you don't see the BT56 much these days. Only a couple of websites I've found actually carry them, and one is out of stock.
But I like the idea of using a different sized tube, and I really like the nose cones that are available.
It's chilly today, and supposed to rain for the next few days, so I won't be painting anything for a week or so. I'm nearly done with one paint job, but it will have to be put on hold.
So, what else can I work on?
Sounder I
Sounder I is a cute little rocket I designed to go high - 2800 feet on an Estes E9-6 motor. If I add a booster with a D12-0 motor, it could go as high as 3500 feet.
It's not finished, though. This color - Rust-Oleum 2X Marigold - is so pretty, I'm tempted to leave it like this. But a rocket needs some extra detail, and I plan on putting a black roll pattern on the top half of the rocket, stopping at the nose cone.
The first time I tried painting this color on, I got some weird paint problems. There was some discoloration, and worse, the texture was like sandpaper. I don't know how it happened, but I've had this occur two other times in the past - the worst being on my last Cosmic Explorer:
Ugh!
Chad gave me his rockets when he moved out to upstate New York, and a couple of his rockets had this texture. I thought how on Earth did he do this?? Then it happened to me.
I think it was related to temperature or humidity, or to the fact that I wiped the rocket down with rubbing alcohol just prior to painting. This was to remove dust without using water; primer is porous, and water can damage the rocket. But of course, alcohol evaporates quickly, cooling down the surface of whatever it's rubbed on. Perhaps I painted too quickly after the alcohol, and the difference in temperature between the paint and the surface of the rocket caused this.
The only solution was to wet sand the horrible texture off, which causes you to lose some gloss and some color. In any case, I'm not going to risk this happening again until it's warmer outside.
Sounder I will also be my first rocket which uses micro rail buttons instead of a launch lug. This allows you to launch from a Makerbeam rail instead of a rod - a miniature version of the common high power rocket launch platform. I already have the rail, but haven't mounted it to anything. So I guess I need to go to the hardware store and get some stuff to build the launch pad.
Trident A 3-Motor Cluster
Trident A, my 3-motor cluster design, has a couple of issues.
I got a fin on crooked. The fins have tabs on them, which set between the three motor tubes, which are exposed, rather than being hidden inside the rocket. In order to get the fins on right, I had to sand the tabs to a point, which turned out to be trickier than I'd thought. Perhaps that is why I had a fin go on crooked, I'm not sure. But I didn't even notice it until I was painting, when it was suddenly really obvious.
The used motors are in place to keep paint out of the motor tubes.
The open tube is the one that goes onto the painting rig.
And it's a tricky masking job, with the inner tubes being red, the fins (and tabs) being black, and the rest of the rocket being white. I already got some red where I don't want it - on the outer body tube.
And that wasn't even the hard part. The tricky part will be completely covering the red motor tubes and getting black on the fins all the way down to the root.
This rocket may not turn out looking great. But it'll fly, and sometimes a build just doesn't go your way. At least this was my own design, and not an expensive kit.
Had a bit of a whoopsie with this one, too. I'm using filler primer, in hopes of covering some of the flaws in the fins. Filler primer has a build to it, so it can fill in scratches. I usually mask off the motor tube and hook. In this case, I forgot to do that. I got some primer in the little notch where the hook comes out. The notch is to allow you to pull the hook away from the tube so you can get the motor in. I basically primed that notch closed. I had to clear it out with a hobby knife.
Cosmic Explorer with E Motor
A few months ago, I started a series on this blog about upgrading a kit to a larger motor size (mistakenly calling it a "kit bash"), with the Estes Cosmic Explorer. I abandoned that series, because I built the rocket and forgot to take enough pictures, then I lost the rocket on the first flight.
But what a flight!
The rocket went over three times as high as the standard Cosmic Explorer! So, I'm building it again, and I'll have a series about that. I'll also have a post about sanding your fins into airfoil shapes, which I did for the Explorer:
Other Stuff...
I hope to make some progress on the Quest Big Dog in the next couple of days. And I'm slowly chipping away at an upcoming post about rocket stability, for fellow rocket n00bs. That one is taking me a while, because I want to make sure it's a) accurate, b) easy to understand, and c) not a boring pain to read. But it's an important post for this blog, because I have a future series planned on designing your own rocket - which isn't as hard or intimidating as you may think. I'd go so far as to say that it's easy, at least for your basic rockets. But understanding stability is an important prerequisite.
So, that's what I'm up to. I guess I should stop writing and go work on my rockets - I have a ton of sanding to do...
The instructions for the Big Dog suggest using wood glue for installing the motor mount. I decided against this, because I wanted to be able to position the mount exactly where I want it. Sometimes wood glue will seize up at the wrong moment when you install an item inside a tube, and then it's stuck there - sometimes halfway in place.
So I mixed up some 30-minute epoxy.
If you're new to rockets, epoxy is a type of adhesive which comes in two parts - a resin and a hardener. It stays in liquid form until you mix the two parts, then it slowly sets, or "cures." The advantages are added strength, and the ability to reposition the part for a little while - because it stays gooey until it cures. It doesn't simply dry out; the two parts mixed together create a chemical reaction in which long polymer molecules are formed, creating a strong bond.
Usually with epoxy, longer cure time means a stronger joint, and 30 minutes is pretty good. 5 minute epoxy might be too brittle, and with a high thrust motor, might crack.
Now, the shock cord is mounted directly to the motor tube. When I slide the motor mount into the back of the rocket, I need to avoid getting the shock cord stuck in the epoxy inside the tube, and potentially cemented to the inner wall of the rocket. The solution for that is easy - I run the shock cord down through the motor tube and pull it out the back.
Now, the kit instructions don't tell you to do this, but it's a good idea. Even if you use wood glue, it's best to keep the shock cord clean and out of the way of wet glue. When you glue or epoxy the motor mount into the rocket, the shock cord will be hanging out the back, out of the way.
I also covered the threads of the screw-on motor mount with tape, to avoid getting stray epoxy on them.
Epoxy is bad for your skin, so when using it, you really need to wear gloves - the blue, nitrile gloves are the ones I always see recommended, so that's what I use. You can buy them at drug stores and hardware stores.
I mixed up a small batch of epoxy and ran a ring of it around the inside of the aft end of the airframe, then inserted the motor mount.
Then I realized I'd made a wise choice using epoxy. It turned out the centering rings were a little loose on this rocket. Very loose, in fact. I wonder if this was because of the same problem that led to a fin marking guide that was too short - that the body tube diameter is slightly larger than stated on the kit.
Anyway, epoxy is quite strong, and I have more confidence that it will hold such a loose motor mount in place than I would have with wood glue. And it oozes a bit, so it was more likely to fill in the gap between the centering ring and the airframe.
The centering rings were so loose, in fact, that I couldn't tell by feel if I'd gotten any epoxy on them at all - I couldn't feel much resistance by moving the mount in and out of the rocket. I decided to let things set and see what the result was.
Because it was so loose, and would take up to thirty minutes to set, I taped the body upright on a launch rod, then loosely taped the mount in place for support. If I'd simply left it in place, it would have fallen out, and then I'd have epoxy on the carpet!
See the shock cord hanging out the back?
After a few hours, I checked the bond, and it was set and very strong. But I didn't have any epoxy on the aft centering ring - and it was a little loose. I had to fix that.
First, I needed to get the shock cord out of the way, and back inside the rocket where it belonged. So I clipped a clothes pin onto the end, and dropped it back through the motor tube.
As you can see, there's not much space between the motor mount and the airframe. Epoxy is messy, and I needed a way to get a small amount in there around the centering ring, and not anywhere else.
I taped the rocket to the launch rod again, this time upside down. I grabbed a spare medicinal dosage syringe and mixed up some epoxy.
This isn't the same syringe I use for filling tube spirals. You can clean up uncured epoxy with rubbing alcohol (you can see some in the little cup in the photo), but I wasn't sure I wouldn't ruin the syringe.
In any case, I mixed up some more epoxy and drew it up into the syringe. I cleaned off the tip with a paper towel and a little alcohol, then injected the epoxy all the way around the centering ring. A coffee stir stick helped me spread it around so I got it fully around the edges of the ring, creating a good bond with the body tube all the way around its circumference.
When using epoxy, you need to examine everything carefully to make sure you don't have any unwanted drips anywhere, and immediately clean them up with alcohol. I removed the tape from the motor retainer to avoid any drips permanently cementing the tape in place, cleaned up the edges of the body tube, and then flushed the syringe with alcohol. The syringe cleaned up just fine, so I can use it again.
After letting the epoxy set up overnight, the whole thing was really strong.
After this, I moved on to shaping the fins into airfoils.
This is as far as I've gotten with this rocket so far. We'll talk about the fins, and maybe even attach them to the rocket, next time I post on this series.


.jpg)
.jpg)
.jpg)