I'm recording with The Rocketry Show right now. We're chatting with Charlie Savoie, General Manager of AeroTech - who recently merged with Quest AeroSpace.
This show is going to be good - and there will be some exciting stuff coming from both Quest - for model rocketeers - and AeroTech - for mid and high power rocketeers - coming out in the next few months.
The episode will be up some time in the next couple weeks.
Like my Facebook page for blog updates.

Wednesday, December 23, 2015
Sunday, December 20, 2015
Current Projects, #1 - Astron Sprint XL and Clone
I update my Facebook page a lot, but I haven't posted on the blog in a while. I've been working on a post for a bit, but it's taking me some time to finish.
I have created a Current Projects page on the blog - link in the side bar. The Facebook page has a Current Projects album, but I know not everybody does Facebook.
The page will mostly contain tons of pictures of the rocketry projects I'm working on, plus some description, but not as much detailed information as I tend to include in a typical blog post.
I'll post here whenever I update the Current Projects page. New material on the page will be posted at the top, so you can scroll down in reverse chronological order, but don't have to wade through anything you've seen before to get to the new stuff.
In Current Projects #1, the Estes Astron Sprint XL - a kit I've had my eye on for some time. Plus, an Astron Sprint XL clone, which I intend to refine the techniques I'll use to build the final rocket.


Thursday, December 3, 2015
Rocket Trouble
At my last launch, I had a few problems. Most of my flights went poorly - especially my three cluster rockets.
I'm working on a post on figuring out what when wrong when you've had a bad flight, and taking steps to prevent it happening again.
In the meantime, enjoy this video of my launch troubles.
Like my Facebook page for blog updates and extra stuff.
I'm working on a post on figuring out what when wrong when you've had a bad flight, and taking steps to prevent it happening again.
In the meantime, enjoy this video of my launch troubles.
Like my Facebook page for blog updates and extra stuff.
Sunday, November 22, 2015
William Shatner's Model Rocketry Short
This is too good not to share - William Shatner in a 1977 model rocketry short film for Estes.
Like my Facebook page for blog updates, extra features, and more pictures.
Like my Facebook page for blog updates, extra features, and more pictures.
A Message from the National Association of Rocketry - The California Accident
Ted Cochran, president of the National Association of Rocketry, sent out this massage to all NAR members, regarding the recent accident at a launch in California:
Greetings,
As I reported on the NAR Facebook page last Sunday, I regret to have to inform you that a fatal on-field rocketry accident occurred in California last Saturday. I want to bring you up to speed on the status of our investigation.
I'll continue to keep you informed, so that we can learn what we can from this unfortunate accident, and be safer because of it.
Greetings,
As I reported on the NAR Facebook page last Sunday, I regret to have to inform you that a fatal on-field rocketry accident occurred in California last Saturday. I want to bring you up to speed on the status of our investigation.
When I made the first announcement, there were few details available. We
have since been working to understand what happened, so that we may all
learn from it and prevent it from happening again. Our Association has
no standing in the matter except as concerned and experienced
enthusiasts, but I've been in contact with law enforcement and witnesses
and have a preliminary set of facts to share.
First, to the best of our knowledge, no NAR or TRA members were involved in this incident, certainly not directly involved. No kids were involved, except, unfortunately, as witnesses.
The deceased, Mike Bentley, a very experienced adult Scout leader, was
at an annual BSA Council-sponsored rocketry and camping event for
multiple scout troops called Rocket Rave, which has been conducted for
at least several years. During the weekend, scouts complete tasks
required for their Space Exploration merit badge, which requires two
model rocket launches. During the launches, it has also been common for
adults to launch their own, larger rockets.
Around noon on Saturday, Mike engaged in a drag race with a second
adult. Winds were likely within limits, safe distances were at least
close to being met, and both rockets probably met the weight and power
limits defined by the NAR Model Rocket Safety Code. The drag race was
conducted from a dedicated area, to one side of the primary launch pads
for the scouts to use to fly their conventional A through C powered
model rockets, and about two dozen people were in the immediate
vicinity.
Mike's rocket was powered by a small APCP motor; the other rocket was powered by at least one, and possibly more, black powder motors. Both rockets launched; while Mike was watching his rocket, the other rocket arced over and came down ballistically, striking him in the face and causing severe injuries. Despite the best efforts of scouts, law enforcement, and medical professionals both at the scene and afterwards, his injuries were ultimately fatal.
Mike's rocket was powered by a small APCP motor; the other rocket was powered by at least one, and possibly more, black powder motors. Both rockets launched; while Mike was watching his rocket, the other rocket arced over and came down ballistically, striking him in the face and causing severe injuries. Despite the best efforts of scouts, law enforcement, and medical professionals both at the scene and afterwards, his injuries were ultimately fatal.
We know that the rocket that struck Mike was about four feet long and
four inches in diameter. It had a cardboard body tube and a plastic nose
cone. We don't know much else for sure. It is possible that the rocket
was designed to fly on a cluster of motors, but at least one picture of
the flight does not clearly show more than one motor firing. No
parachute was deployed; none was seen at the accident site. At least one
report indicates the rocket was damaged prior to flight. We don't know
what motor(s) were used and whether they all ignited and functioned as
designed. We don't know if applicable local laws were fully observed.
I do know that the investigating law enforcement authority is not
pursuing a criminal investigation at this time. The lack of an
investigation will likely leave questions unanswered for some time. We
don't know if the rocket would have been allowed to fly at a NAR launch;
we can't definitively say whether the NAR safety code was observed or
not. We will continue to gather information to the best of our ability,
and we'll pass on significant new findings to you.
Where does this leave us? We know that rocketry remains orders of
magnitude more safe than any other outdoor activity we can name,
provided the safety codes are followed. But it is not without risks; the safety code is our primary means of mitigating those risks.
Everything in the safety codes is there for a reason, and I urge you to continue to observe-and when prudent, exceed-their recommendations every time you fly.
Everything in the safety codes is there for a reason, and I urge you to continue to observe-and when prudent, exceed-their recommendations every time you fly.
- Do preflight inspections of every rocket. Be especially careful with complex rockets. Pay special attention to the recovery system.
- Tilt your launch guides away from the crowds: Plan to have good flights, but also plan for bad flights to end in safe places.
- Add to the safe distance standards when lots of observers are present.
- Make sure launch controllers and ignition methods are appropriate for the motor(s) being used.
- Have a spotter for every rocket in a drag race, near enough to the RSO to be able to get a warning out if necessary.
- Have people point at malfunctioning rockets if they see them.
- Make sure the crowd can hear the RSO.
- Confirm the stability of untested designs.
- If rockets are flying over spectators, stop and fix the problem.
- Offer to help people and groups who are just starting down the path that we have trod. Set a safe, positive, and helpful example.
Please consider contributing to Mike's memorial fund through his gofundme site.
I'll continue to keep you informed, so that we can learn what we can from this unfortunate accident, and be safer because of it.
Sincerely,
Ted Cochran
President, National Association of Rocketry
I'm glad to hear that the NAR is actively investigating this incident, because we all want to know what happened, and all seek to prevent an accident like this from happening again. But I think it's important to remember that rocketry has had an unparalleled safety record for nearly sixty years.
Follow the safety rules. Use common sense. Learn all you can about rockets before you try to build bigger and go higher. But fly without fear.
Like my Facebook page for blog updates.
Tuesday, November 17, 2015
Special Edition
Just recorded a special edition of The Rocketry Show about the incident in California. We don't have any more information than you folks, but some people did ask us to address it.

In the mean time, you can still give to the family of Michael Bentley.
In the mean time, you can still give to the family of Michael Bentley.
Monday, November 16, 2015
Mike Bentley
Model rocketry has been around for about 58 years, commercially. It has had an amazing safety record. In all that time, due to the materials from which model rockets are made, and due to the NAR Model Rocket Safety Code, injuries from rocketry have been minimal.
When I was a kid, I visited my friend Scott. He had two kid-sized snow mobiles. We spent the day riding around on the huge patch of snowy ground next to his house. It was awesome!
Of course, snowmobiles are dangerous, and I could have been killed. Accidents and deaths are not uncommon in snowmobiling.
In the last 58 years, there has never been a recorded death due to any accident involving a model rocket.
Until this week.
Scout leader Michael Bentley, of California, was struck in the face by a model rocket. He lost sight of the rocket as it flew up, and when it came down, he was hit in the face. He was rushed to the hospital. But, despite surgery, he succumbed to his injuries, and passed away.
I have no doubt that he was operating safely, and that the rocket he built was made correctly. Speculation online has been... Well, one should not speculate based on one news report.
Reports are sketchy, but I want to stress that this was a freak accident. What other recreational activity can you name that has been carried on for nearly sixty years without a single freak accident leading to a death?
Knitting? Your grandma probably knits. But there are two freak accidental knitting deaths per year.
Model rocketry has had a record of 58 years with nobody dying on the field (some have said there have been a few deaths, from rocketeers trying to retrieve a rocket from power lines).
Rocketry is very safe. But sometimes, in life, accidents to happen. Even a paper rocket, with a plastic nose cone, which shouldn't do more than sting if it comes down hard, might do some real damage, once in 58 years.
This is freaking out the rocketry community a little bit. But this is a once in over half a century event.
Still, Mike Bentley was a standup scout leader, trying to teach some kids some cool stuff.
Please consider donating to his family's GoFundMe. It will help defray funeral costs and medical bills accrued.

For more on safety, please see the NAR Model Rocket Safety Code.
When I was a kid, I visited my friend Scott. He had two kid-sized snow mobiles. We spent the day riding around on the huge patch of snowy ground next to his house. It was awesome!
Of course, snowmobiles are dangerous, and I could have been killed. Accidents and deaths are not uncommon in snowmobiling.
In the last 58 years, there has never been a recorded death due to any accident involving a model rocket.
Until this week.
Scout leader Michael Bentley, of California, was struck in the face by a model rocket. He lost sight of the rocket as it flew up, and when it came down, he was hit in the face. He was rushed to the hospital. But, despite surgery, he succumbed to his injuries, and passed away.
I have no doubt that he was operating safely, and that the rocket he built was made correctly. Speculation online has been... Well, one should not speculate based on one news report.
Reports are sketchy, but I want to stress that this was a freak accident. What other recreational activity can you name that has been carried on for nearly sixty years without a single freak accident leading to a death?
Knitting? Your grandma probably knits. But there are two freak accidental knitting deaths per year.
Model rocketry has had a record of 58 years with nobody dying on the field (some have said there have been a few deaths, from rocketeers trying to retrieve a rocket from power lines).
Rocketry is very safe. But sometimes, in life, accidents to happen. Even a paper rocket, with a plastic nose cone, which shouldn't do more than sting if it comes down hard, might do some real damage, once in 58 years.
This is freaking out the rocketry community a little bit. But this is a once in over half a century event.
Still, Mike Bentley was a standup scout leader, trying to teach some kids some cool stuff.
Please consider donating to his family's GoFundMe. It will help defray funeral costs and medical bills accrued.
For more on safety, please see the NAR Model Rocket Safety Code.
Monday, November 2, 2015
Picking Your First Model Rocket
If you are a total n00b to rocketry, wondering What's a good model rocket for an absolute beginner? then welcome, and this post is for you.

First of all, I want to stress that these are just some things to consider. I'm not going to tell you "Don't pick this rocket, pick that rocket." I want to give you some pros, cons, etc. And I don't want to assume that you're "handy," that you've ever made anything with your hands before, or that you know how to use tools - only that you're interested in rocketry - because that was my situation when I started this whole thing.
What I want to give you is some good information, and help you step by step as I build this blog further. I've been writing this blog for more than a year now, and if you go back to some of my older posts, you'll see I use a lot of photographs and really try to spell things out, so if you're an absolute beginner, you won't be scratching your head.
If you have gone out and bought a launch set, such as the one I really like for beginners, the Estes Tandem-X, which provides all the ground support equipment you'll need to get started - a launch pad and launch controller - plus two rockets, at a really reasonable price - then perhaps the decision is made for you.
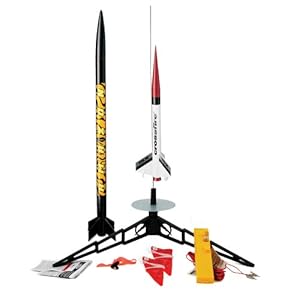
This set has the easy-to-assemble (or "E2X) Amazon rocket, which lifts off nice and slowly and doesn't go too high to see, plus the Skill Level 1 Crossfire ISX rocket, a nice high-performer which flies fast and high.
But maybe you have a launch set, and simply want to start with something else. Maybe you aren't worried about launch equipment - maybe a friend has invited you to launch some rockets, and you just need something to bring. Maybe you just need a rocket.
What do you start with?
There are a lot of companies, large and small, which make model rockets for all skill levels. A lot of these are great, and you have time to explore all of them.
The two biggest companies for model rocketry are Estes and Quest Aerospace (or simply "Quest").
For the purposes of this blog post, I'm going to focus on Estes kits, for a couple of reasons. First of all, Estes is the most prominent (and oldest) model rocket company in existence. Second, a lot of the kits are really basic. I love Quest rockets, but I can tell you from teaching a rocketry camp that some of their Skill Level 1 rockets are actually a little complicated for the absolute beginner.
Rocketry is not merely a children's hobby, but having seen some children struggle a bit with a few of the parts on a basic Quest rocket, I'd say that for a beginner with no construction experience, it might be tricky, if you're unsure of your skills.
Building a rocket is not hard, but it's best to start simple. Model rockets are just the beginning - if you're new to the hobby, you'd be surprised at how large, complicated and high-performing a hobby rocket can get. A lot of adults are into high power rocketry, and building a model rocket is the first step.
That said, Apogee Components also has some great basic beginner's kits. So does Semroc. And FlisKits. And there are plenty of others. It's best to shop around.

Then you must cut a little tab out of the nozzle to clear the way for the motor hook - a small, metal hook which keeps the rocket motor from falling out.

You glue the nozzle into the rocket using plastic cement.
Then, there are the fins. They have some tiny little parts, which the kit calls "stabilizers," which glue into slots on the aft end of the fins. And rather than simply being glued onto the outside of the rocket, as with many model rockets, these fins have little tabs on their root edges.
The tabs go into slots on the body tube. This is called through-the-wall fin construction. It adds strength to the model, and ensures you get the fins on straight, but it does make the build a little more complicated for an absolute beginner.
So, you've got multi-part, through-the-wall fins, plastic parts which must be carefully cut apart, and you need a special adhesive (plastic cement), in addition to the normal white glue or wood glue you would use to build any model rocket. Yet, the Crossfire is considered a Skill Level 1 rocket.
Whereas, building the Goblin couldn't be simpler. It's a basic rocket which you can assemble entirely with one kind of glue (white or wood glue), no extra tiny parts, and no plastic parts to cut.

Why is the Goblin a Skill Level 2 rocket? Well, I'm not sure, but perhaps it is because the Goblin uses larger, D-class rocket motors. Depending on where you live, you may need to be of a certain age to purchase these larger motors. So, if you're a kid, you should be able to build a Goblin with no more trouble than any simple Skill Level 1 rocket - but you may need an adult to actually fly it.
That being said, I'm sure you can build any rocket you choose to, so long as you can follow instructions. If you're curious what the construction of any particular rocket will be like, you can usually find the instructions online before you buy the rocket. The instructions for most Estes kits can be found on the Estes website, on this page. Just look up any rocket you're interested in building to see if there are any complicated parts, special instructions, or special materials needed.

The Big Bertha is another BT60-based rocket. It stands over two feet tall, lifts off slowly, and has nice, large fins. Again, an easy build.
Kits don't generally tell you what BT-size they're based on, but they do give general dimensions, including diameter. BT60 is 1.637 inch in diameter, BT55 is 1.325 inch (see the Goblin, above), and BT50 is 0.976 (see the Alpha, above). These are all decent sizes. If you look at the picture, you can compare the relative sizes of the parts to the airframe, and that will give you a general idea of what you're working with.
They do get bigger as well. There's BT70 at 2.217 inches and BT80 at 2.6 inches in diameter. For a beginner, these are really large.
First time I saw a kit in person with a BT80 tube, it was the Estes Big Daddy.

I thought, that thing is freaking huge! It wasn't tall, but I'd never seen a rocket larger in diameter in person at that point.
But maybe you are handy, used to making things yourself, and if you're ambitious, there's no reason not to start there if you want to. But there's no reason not to start smaller. There area a lot of cool rockets out there, and some of them are quite small.
To start, just pick a rocket you like; follow the instructions. Rocketry is challenging, but not hard. You can do this.
Like my Facebook page for blog updates, pictures, and extra stuff.

First of all, I want to stress that these are just some things to consider. I'm not going to tell you "Don't pick this rocket, pick that rocket." I want to give you some pros, cons, etc. And I don't want to assume that you're "handy," that you've ever made anything with your hands before, or that you know how to use tools - only that you're interested in rocketry - because that was my situation when I started this whole thing.
What I want to give you is some good information, and help you step by step as I build this blog further. I've been writing this blog for more than a year now, and if you go back to some of my older posts, you'll see I use a lot of photographs and really try to spell things out, so if you're an absolute beginner, you won't be scratching your head.
* * *
If you have gone out and bought a launch set, such as the one I really like for beginners, the Estes Tandem-X, which provides all the ground support equipment you'll need to get started - a launch pad and launch controller - plus two rockets, at a really reasonable price - then perhaps the decision is made for you.
This set has the easy-to-assemble (or "E2X) Amazon rocket, which lifts off nice and slowly and doesn't go too high to see, plus the Skill Level 1 Crossfire ISX rocket, a nice high-performer which flies fast and high.
But maybe you have a launch set, and simply want to start with something else. Maybe you aren't worried about launch equipment - maybe a friend has invited you to launch some rockets, and you just need something to bring. Maybe you just need a rocket.
What do you start with?
There are a lot of companies, large and small, which make model rockets for all skill levels. A lot of these are great, and you have time to explore all of them.
The two biggest companies for model rocketry are Estes and Quest Aerospace (or simply "Quest").
For the purposes of this blog post, I'm going to focus on Estes kits, for a couple of reasons. First of all, Estes is the most prominent (and oldest) model rocket company in existence. Second, a lot of the kits are really basic. I love Quest rockets, but I can tell you from teaching a rocketry camp that some of their Skill Level 1 rockets are actually a little complicated for the absolute beginner.
Rocketry is not merely a children's hobby, but having seen some children struggle a bit with a few of the parts on a basic Quest rocket, I'd say that for a beginner with no construction experience, it might be tricky, if you're unsure of your skills.
Building a rocket is not hard, but it's best to start simple. Model rockets are just the beginning - if you're new to the hobby, you'd be surprised at how large, complicated and high-performing a hobby rocket can get. A lot of adults are into high power rocketry, and building a model rocket is the first step.
That said, Apogee Components also has some great basic beginner's kits. So does Semroc. And FlisKits. And there are plenty of others. It's best to shop around.
 |
| The Avion, a Skill Level 1 rocket from Apogee Components |
Three Things to Consider
There are three things to consider when deciding on what rocket to start with.
- Price
- Performance
- Ease of construction
Price
For most Estes Skill Level 1 rockets (and we'll get to what "Skill Level 1" means below), smaller tends to be cheaper. Perhaps you want to test the waters with something less expensive before going for the big, complicated, pricey rockets out there.
Here are a couple of great little rockets I built, for very little money.
 |
| Estes Hi Flier |
 |
| Estes Star Trooper |
The Hi Flier is less than 12 inches tall, and the Star Trooper is just over 6. The Hi Flier is less than 3/4 inch in diameter, and the Star Trooper is just over 1/2 inch in diameter. The Hi Flier cost little more than $8.00. The Star Trooper was just over six bucks!
I won't say too much about price here. You can shop around on the Estes website, or look up "model rockets" on Amazon.com (you'll find a lot of Estes rockets and some others as well) and compare prices. If you're looking for cheap rockets to start with, small and simple are the cheapest.
Performance
I've built a few pretty large model rockets. When I've shown them to people (who were not rocketeers), they've all said the same thing - "I bet that one goes really high!"
Well... Sometimes. It's true - if you want to achieve and altitude of thousands of feet, you'll need a larger rocket, because you'll need to accommodate a larger rocket motor.
But unlike a space rocket, a model rocket is not an empty cylinder full of fuel. It has a disposable (or sometimes re-loadable) motor inside, of a standard diameter and length. For two rockets which take a motor of the same size, the thinner, smaller model often outperforms the larger one.
Look up at the Hi Flier again - a skinny little rocket.
Now look at this rocket - a classic Estes kit called the Big Bertha.

The Big Bertha stands 24 inches tall - twice the height of the Hi Flier. And it's 1.64 inches in diameter - more than twice as large than the Hi Flier. It also weighs much more and has larger fins. Due to its size, the Big Bertha has more aerodynamic drag - or wind resistance - than the Hi Flier.
Both rockets can fly on the same motor, but while the Hi Flier can reach an altitude of nearly 1700 feet, the Big Bertha is restricted to about 500 feet of maximum altitude.
The Sky Trooper, also pictured above, flies on much smaller motors than either the Hi Flier or the Big Bertha, but due to its size and low weight, it can go higher than 900 feet.
So, do you want a high-flying, high-performing rocket for your first one?
Well, if it's cheap, and you're adventurous, perhaps you do! But you need to think about that for a moment.
I still have my Big Bertha. My Hi Flier and Star Trooper both flew so high on every flight, I couldn't see them any more. And while I still have my Big Bertha, I have lost both the Hi Flier and Star Trooper.
The Tandem-X launch kit I mentioned above had two rockets I launched on my first time out to the flying field. Both belonged to my friend Chad. We launched the Crossfire ISX to an altitude of perhaps 1200 feet, and the Amazon to maybe 500 or 600.
The Crossfire was lost on the first time out. I still have Chad's Amazon.
If you have a large field to launch from, a high performing rocket might be for you. But if you're more cautious about your first rocket, consider choosing a rocket which goes to less extreme altitudes. Most companies, including Estes, will give expected performance of each rocket, and you can choose from there.
So far, we've seen that smaller rocket kits tend to be cheaper, and can often go much higher. This can be quite thrilling. That does make them easier to lose, but it's also less costly if you do lose one.
Ease of Construction
For the beginning rocket builder, this might be the most important consideration, especially if, like me, you are not used to putting things together with your hands when you first start out. Most rockets are pretty simple things - basically a hollow tube with some extra parts stuck on - but some rockets are simpler to build than others.
If you are nervous about building your first rocket, there are some good options for you. Estes, and other companies, have pre-made rockets to get you started. In Estes lingo, these are ready-to-fly (RTF), almost-ready-to-fly (ARF), and easy-to-assemble (E2X). The RTF and ARF models are basically built, and require very little prep before launching. They can be ready in minutes.
 |
| The Estes Patriarch. Tall, fat, flies beautifully, and already built for you. |
E2X models are good if you are unsure about your skills with glue, paint, sanding, cutting, getting fins on straight, or any kind of model construction. They fly quite well, can be assembled quickly, and are a good stepping-stone.
 |
| The Alpha III - an E2X kit. The rocket can be built in 15-20 minutes. Once the glue is dry, it's ready to fly. |
But, before long, you'll probably want to build something yourself. It isn't hard.
Most rocket companies, Estes included, attribute different skill levels to their rockets. The levels range from 1 to 4 or 5. What you'll start looking for is a Skill Level 1 rocket. But what does that mean? It's a tricky question.
Tim Van Milligan of Apogee Components wrote an article on this subject in the company's newsletter. It's an interesting read, but what I take away from it is that "skill level" is an ill-defined, arbitrary rating system that varies from company to company, and even from rocket to rocket.
Once you get to higher skill level rockets, building does get more challenging. A beautiful Estes called the QCC Explorer is a Skill Level 4 rocket.

This rocket has a lot of small parts, and as you can see from this series by Chris Michielssen of the Model Rocket Building blog, it is certainly challenging.
But between skill levels 1 and 2, it's a bit fuzzier. There are some Skill Level 1 rockets from Estes which I'd consider more complicated, and some really simple Skill Level 2 rockets. To demonstrate what I mean, let's take a quick look at two rockets - the Skill Level 1 Crossfire ISX, and the Skill Level 2 Goblin.
The Crossfire, which comes with the Tandem-X launch set, is a Skill Level 1 rocket. But it's a little more complicated than some, for an absolute beginner.
If you look at the parts in red, you'll see the nose cone at the top, and a decorative nozzle at the bottom. In the kit, these come attached, as one plastic part.

You have to cut these apart, then cut the ends off the nozzle bit. If, as the directions state, you used a hobby knife, it would take a long time.

If you grew impatient, you'd be tempted to press too hard, and potentially break the hobby knife blade, damage the part, or cut yourself.
I used a borrowed hack saw to cut mine apart.

This meant I had some extra sanding to do.

Most rocket companies, Estes included, attribute different skill levels to their rockets. The levels range from 1 to 4 or 5. What you'll start looking for is a Skill Level 1 rocket. But what does that mean? It's a tricky question.
Tim Van Milligan of Apogee Components wrote an article on this subject in the company's newsletter. It's an interesting read, but what I take away from it is that "skill level" is an ill-defined, arbitrary rating system that varies from company to company, and even from rocket to rocket.
Once you get to higher skill level rockets, building does get more challenging. A beautiful Estes called the QCC Explorer is a Skill Level 4 rocket.
This rocket has a lot of small parts, and as you can see from this series by Chris Michielssen of the Model Rocket Building blog, it is certainly challenging.
But between skill levels 1 and 2, it's a bit fuzzier. There are some Skill Level 1 rockets from Estes which I'd consider more complicated, and some really simple Skill Level 2 rockets. To demonstrate what I mean, let's take a quick look at two rockets - the Skill Level 1 Crossfire ISX, and the Skill Level 2 Goblin.
 |
| Both of these images are from the Estes website. Their relative sizes are not to scale in this picture. |
If you look at the parts in red, you'll see the nose cone at the top, and a decorative nozzle at the bottom. In the kit, these come attached, as one plastic part.

You have to cut these apart, then cut the ends off the nozzle bit. If, as the directions state, you used a hobby knife, it would take a long time.

If you grew impatient, you'd be tempted to press too hard, and potentially break the hobby knife blade, damage the part, or cut yourself.
I used a borrowed hack saw to cut mine apart.

This meant I had some extra sanding to do.

Then you must cut a little tab out of the nozzle to clear the way for the motor hook - a small, metal hook which keeps the rocket motor from falling out.

You glue the nozzle into the rocket using plastic cement.
Then, there are the fins. They have some tiny little parts, which the kit calls "stabilizers," which glue into slots on the aft end of the fins. And rather than simply being glued onto the outside of the rocket, as with many model rockets, these fins have little tabs on their root edges.
 |
| The Crossfire ISX fins, constructed |
The tabs go into slots on the body tube. This is called through-the-wall fin construction. It adds strength to the model, and ensures you get the fins on straight, but it does make the build a little more complicated for an absolute beginner.
So, you've got multi-part, through-the-wall fins, plastic parts which must be carefully cut apart, and you need a special adhesive (plastic cement), in addition to the normal white glue or wood glue you would use to build any model rocket. Yet, the Crossfire is considered a Skill Level 1 rocket.
Whereas, building the Goblin couldn't be simpler. It's a basic rocket which you can assemble entirely with one kind of glue (white or wood glue), no extra tiny parts, and no plastic parts to cut.

Why is the Goblin a Skill Level 2 rocket? Well, I'm not sure, but perhaps it is because the Goblin uses larger, D-class rocket motors. Depending on where you live, you may need to be of a certain age to purchase these larger motors. So, if you're a kid, you should be able to build a Goblin with no more trouble than any simple Skill Level 1 rocket - but you may need an adult to actually fly it.
That being said, I'm sure you can build any rocket you choose to, so long as you can follow instructions. If you're curious what the construction of any particular rocket will be like, you can usually find the instructions online before you buy the rocket. The instructions for most Estes kits can be found on the Estes website, on this page. Just look up any rocket you're interested in building to see if there are any complicated parts, special instructions, or special materials needed.
What About All Three?
A very common first rocket is the Estes Alpha.

Just over 12 inches tall and not quite an inch in diameter, the rocket costs about $15, which is affordable, and it's pretty simple. It's what's commonly called a "Three-Fins-And-A-Nosecone," or 3FNC rocket, meaning it's got all the basic parts, but isn't too distinctive. Many rocket camps choose this rocket to build, because it's basic and affordable, not too big or too small, and they can be purchased in 12-rocket bulk packs for about $108, making them less than ten dollars per kit. For smaller fields, you can keep the altitude down to about 300 feet on an A motor, but with a C motor, you can top 1,000 feet!
I find larger parts easier to work with. Smaller rockets, like the tiny Star Trooper, are much cheaper, and fly really high, but the parts are really tiny.
That's not to say that you can't do it! But I have less trouble working with large parts - whether it's gluing them in place, putting tape on them to mask them for painting, sanding fins to a shape I want, or adding decals.
My first rocket was the Estes Der Red Max, and it was about perfect for a first rocket. It flies on standard A-C motors, wasn't too expensive, has a simple paint job, and has large parts.

It's a BT60-based rocket. BT60 refers to the diameter of the paper body tube of the rocket. A BT60 tube is 1.637 inch in diameter - nice and large. Here's a picture of the Der Red Max in my hand so you get an idea of its size.
It's a classic kit, and not a bad choice for a first rocket builder kit.
One More Thing to Consider
I find larger parts easier to work with. Smaller rockets, like the tiny Star Trooper, are much cheaper, and fly really high, but the parts are really tiny.
That's not to say that you can't do it! But I have less trouble working with large parts - whether it's gluing them in place, putting tape on them to mask them for painting, sanding fins to a shape I want, or adding decals.
My first rocket was the Estes Der Red Max, and it was about perfect for a first rocket. It flies on standard A-C motors, wasn't too expensive, has a simple paint job, and has large parts.

It's a BT60-based rocket. BT60 refers to the diameter of the paper body tube of the rocket. A BT60 tube is 1.637 inch in diameter - nice and large. Here's a picture of the Der Red Max in my hand so you get an idea of its size.
 |
| This is so close to the camera that the fins are slightly distorted - they're not as enormous as they appear here. Still, you can see that the parts on this rocket are nice and large - and, I find, easier to handle. |
It also flies really well, and is a thrill to watch.
The Big Bertha is another BT60-based rocket. It stands over two feet tall, lifts off slowly, and has nice, large fins. Again, an easy build.
Kits don't generally tell you what BT-size they're based on, but they do give general dimensions, including diameter. BT60 is 1.637 inch in diameter, BT55 is 1.325 inch (see the Goblin, above), and BT50 is 0.976 (see the Alpha, above). These are all decent sizes. If you look at the picture, you can compare the relative sizes of the parts to the airframe, and that will give you a general idea of what you're working with.
 |
| The Estes Mini Honest John is BT50-based. It's 0.976 inch in diameter, like the Alpha. But the fins, and especially the decals, are very tiny. This was a more challenging build. That said, it was only my third rocket, and it came out nicely. Small parts doesn't necessarily mean difficult, but large parts are a little easier to work with. |
They do get bigger as well. There's BT70 at 2.217 inches and BT80 at 2.6 inches in diameter. For a beginner, these are really large.
First time I saw a kit in person with a BT80 tube, it was the Estes Big Daddy.
I thought, that thing is freaking huge! It wasn't tall, but I'd never seen a rocket larger in diameter in person at that point.
* * *
But maybe you are handy, used to making things yourself, and if you're ambitious, there's no reason not to start there if you want to. But there's no reason not to start smaller. There area a lot of cool rockets out there, and some of them are quite small.
To start, just pick a rocket you like; follow the instructions. Rocketry is challenging, but not hard. You can do this.
Like my Facebook page for blog updates, pictures, and extra stuff.
Thursday, October 29, 2015
Copperhead First Flight
A year ago, I did a fundraiser for the Bloomington Playwrights Project, called The Playoffs. As an incentive to donors, I offered to design and build rockets for anyone who donated in my name.
Longtime blog readers may remember a rocket I built, originally called "Keith's Rocket," then renamed the Copperhead.
It turned out really nice.
I liked the results so much, I'm now building one for myself.
I gave the rocket to Keith, but then moved to Boston, so I never got to see it fly... until he sent me the video.
So exciting to see one of your own designs get launched!
I designed this rocket with only about six months' experience as a rocketeer. Even if you're a rocket n00b, you can design and build your own rockets, and sometimes you come up with something really cool.
I can't wait to finish mine. I've even decided to add a booster, making it a two-stage rocket.

Like my Facebook page for blog updates, pictures of current projects, and extra stuff.
Longtime blog readers may remember a rocket I built, originally called "Keith's Rocket," then renamed the Copperhead.
It turned out really nice.
 |
| The design |
 |
| The finished rocket |
I gave the rocket to Keith, but then moved to Boston, so I never got to see it fly... until he sent me the video.
So exciting to see one of your own designs get launched!
I designed this rocket with only about six months' experience as a rocketeer. Even if you're a rocket n00b, you can design and build your own rockets, and sometimes you come up with something really cool.
I can't wait to finish mine. I've even decided to add a booster, making it a two-stage rocket.

Like my Facebook page for blog updates, pictures of current projects, and extra stuff.
Friday, October 23, 2015
Current Rocketry Projects
In most of my blog posts, I put a little note with a link to my Facebook page. I'm currently adding lots of photos and stuff to the Facebook page, including a launch photos album and a current projects photos album.
The advantage of this, for me, is that I can put something up quickly. Since I try to keep the blog both entertaining for experienced rocketeers, and informative for rocket n00bs, a blog post can take me more time. Posts are longer and require more writing, editing, and photos. On Facebook, I can post a quick picture or five, a link, or a news item or thought. (There's also a Twitter feed.)
If you "like" the Facebook page, you can get updates on your newsfeed.
Of course, not everybody does Facebook, so I'll eventually add a current projects page to this blog (blogger.com differentiates between blog posts, such as this one, which show up in reverse chronological order, and pages, to which you have to post a link). And build series will still be a part of the blog, as long as they have something informative for n00bs.
For now, though, here are a few of the current rocketry projects I'm working on:
Estes Astron Sprint XL

This nice, big model rocket is one I've had my eye on for some time now, and finally got one. With three, elliptical fins and a conical boat tail, at the aft end, it's meant to be a high-performance design. A boat tail may reduce aerodynamic base drag (if it's fit correctly), and elliptical fins, if properly airfoiled, may also help reduce induced drag, which is caused by the fins correcting the trajectory of the rocket in flight.
But I like it because the shape is different from rockets I've built in the past, and it's a long rocket which takes a long-burning E9 motor.


Filling in the seams on the plastic parts is important for a nice finish.
Long-time blog readers know I like to shape my fins. In particular, I love to sand fins into airfoils. This takes some practice, but isn't too hard to do on most fins, with a straight leading and trailing edge. But on elliptical fins, I was worried it would be impossible to get right. So I cut some copies from scrap balsa, and gave it a go. Turns out not to be so impossible after all, if you've had a little practice shaping things with your sanding block.


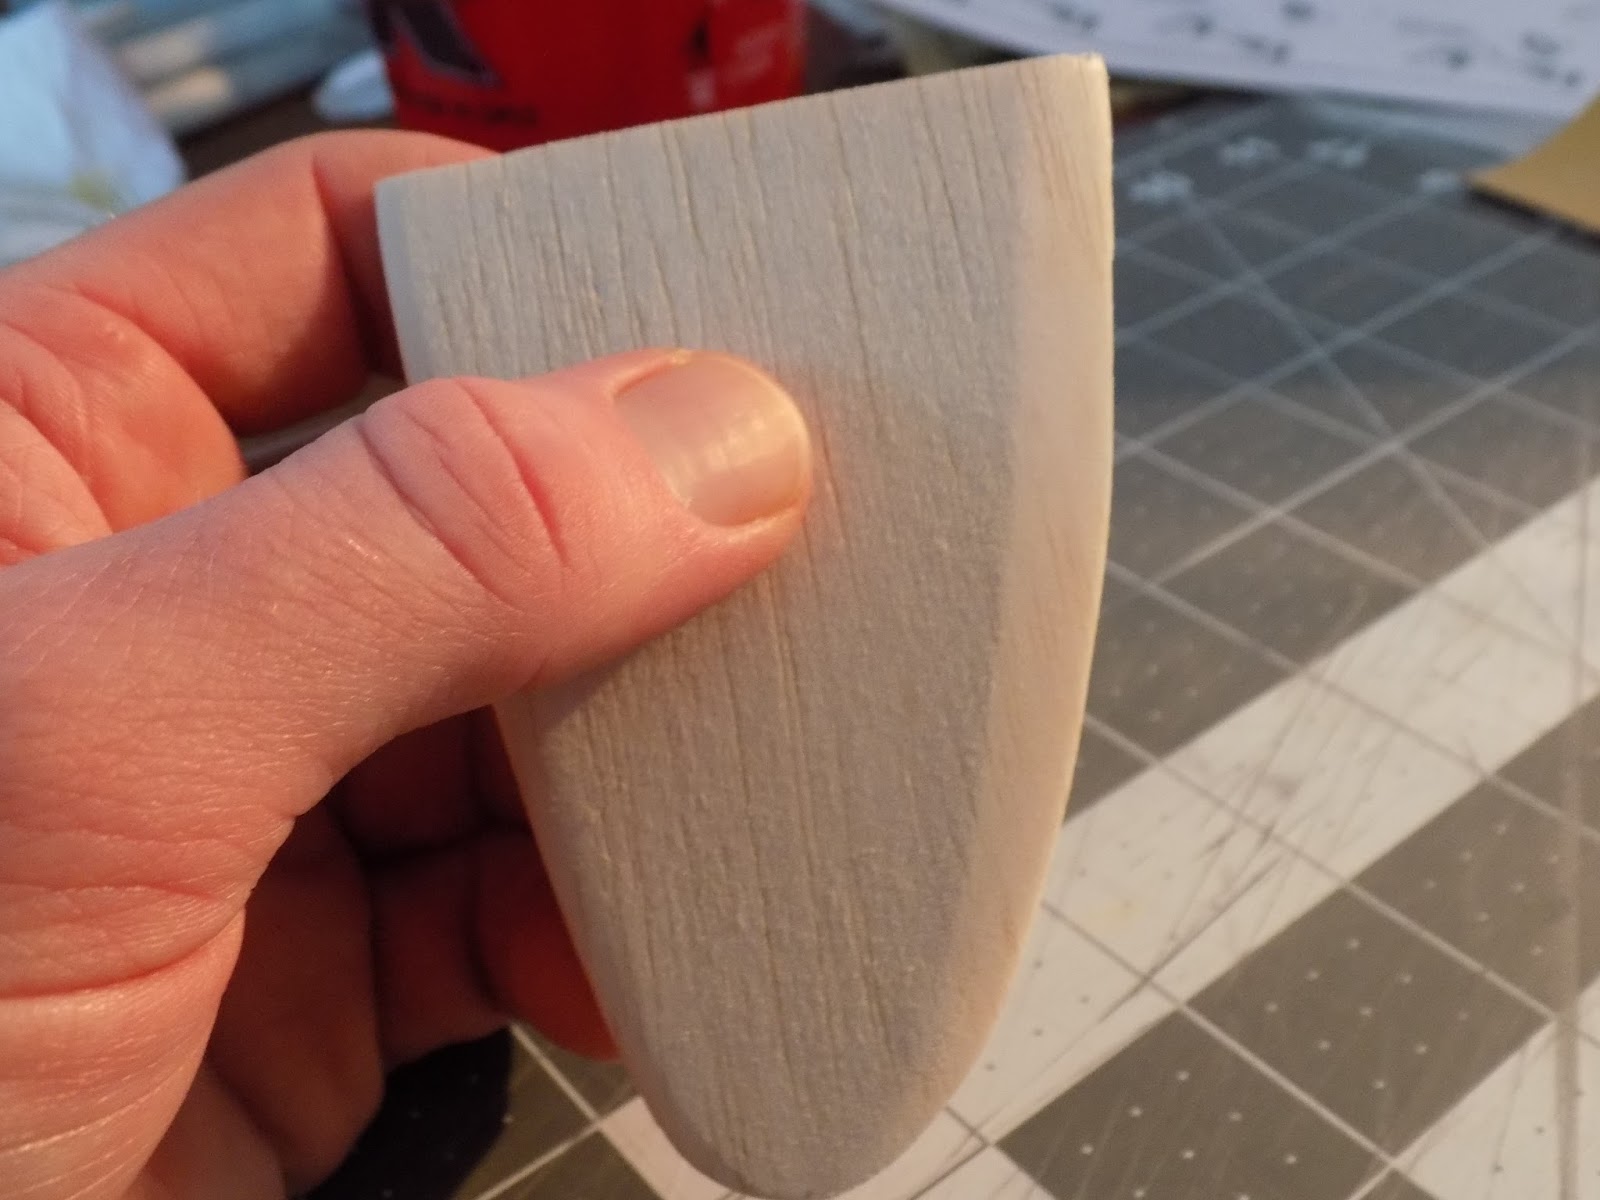

After I cut a few more scrap fins and figure out exactly what I want them to look like, I'll have a go at the kit fins - and use the scrap fins to make a bunch of clones. I have a ton of Astron Sprint XL nose and tail cones, because of a huge purchasing debacle I'll tell you about another time.
Estes Goblin

This is a classic Estes kit which disappeared years ago. Semroc brought out a clone in more recent years, and Estes finally re-released it.
It's smaller than I had imagined, but a cool little rocket which flies on those fat, 24mm D motors - which will take it pretty high!
I did make a boneheaded, n00b mistake on this one...
 |
| Ripped off a fin right after installing it, causing some damage |
But I came up with a decent fix.
Estes Nike Smoke plus a Rocket Cradle

Both of these will become blog posts. A rocket cradle is a useful, easy-to-build tool, and I already started a series on the Estes Pro Series II Nike Smoke, which is nearing completion. I have discovered a few things for the inexperienced builder to watch out for when building this rocket. At least, they're things I wish I had known when I started!
Estes Optima Clone

Today in the mail, I got a large, 2.6 inch diameter nose cone, which fits a BT80-sized tube. This is so that I can build a clone of the Estes Optima, a large Estes model from the early 1990's. I'm excited about this one. It's a simple rocket to clone, but I think it's beautiful. And with a rocket so large, you can put one of those long-burning Estes E9 motors in it, yet it won't go so high you'll lose the rocket!
* * *
More posts for n00bs on the way. Topics shall include basics, such as
- Picking your first rocket
- Building your first rocket (the really basic basics)
- Expanding your toolbox
- Rocket safety
- Part 3 of the rocket stability series (this one will take a while)
Saturday, October 17, 2015
Got Cool Rocket Pics? Submit Them to the Calendar!
The Rocketry Forum is accepting calendar submissions through tomorrow, October 18. If you have some cool rocket pictures, submit them here.
A lot of pictures on this thread are high power pictures, but model rocketry should also be included, so if you have them, submit them!
I submitted two:


Your post must be "seconded" by another user. Get those cool pictures up there and achieve rocket immortality!
Like my Facebook page for blog updates and extra features.
Thursday, October 15, 2015
You Never Forget Your First Launch
I just found a video I love.
This guy gets a launch set with two ready-to-fly rockets. He unboxes them, then goes out to launch.
What an awesome birthday present - and one I'm guessing he wasn't expecting. I love this guy's enthusiasm - and the fact that he follows the directions!
I just love it when someone discovers rocketry for the first time.
Tuesday, October 13, 2015
The Copperhead Rocket - Built from Scratch
This post is about a current project I'm working on. Pictures of current projects will mostly appear on The Rocket N00b Facebook page, so I can focus the blog more on informative stuff for beginning rocketeers. But I think this post has some information for rocket n00bs, so here it is. Check out the Facebook page for more rocket pictures, blog updates, and links to cool stuff.
A few months back, I designed and created a little model rocket as a thank-you for a donor to a fundraiser I was doing for the Bloomington Playwrights Project. It's called The Copperhead.

Once I'd built the rocket, I really loved it, but never got to see it fly. I decided to build one for myself. Last night, while working on about seven other rockets, I just started working on it.
The rocket has forward-swept fins and a small payload section. Look closely at the payload section - the fat upper part of the rocket. There are four tiny holes drilled into the side. That will allow me to use a barometric altimeter in the rocket, so that I can track how high it goes.
While the rocket looks really cool, it's always surprising to see how they come together. The parts alone don't look like much.

A few standard-sized tubes, a sheet of basswood, and a nose cone purchased online look kind of humble when you first begin building a rocket. The parts can come together quickly, though, and before you know it, you have a pretty great-looking rocket.
Much as I like the standard Copperhead, it suddenly hit me how easy it would be to put a booster stage on it, transforming it into a two-stage rocket. Here's what the design file looks like:

The first motor launches the rocket into the air. When the propellant is burned up, it ignites the motor inside the upper stage, and the booster is jettisoned and tumbles back to Earth.
Adding a stage to a rocket can boost its altitude - and its velocity - dramatically. Instead of launching the main part of the rocket - called the sustainer when it's part of a multistage rocket - from the ground, you're basically launching it from high in the air, already moving upwards. The results can be spectacular. Adding a booster to my Copperhead rocket will take its peak altitude of 740 feet up to over 1300 feet - nearly double!
If you understand the basics of rocket stability and model rocket staging, you could probably build a booster for just about any model rocket, adding altitude and speed. Imagine making that fat, heavy Big Bertha into a high-flyer! But beware, this increases the likelihood of losing the rocket! When launching a multistage rocket, you need a larger field, and may need to put less powerful motors in it.
But building a booster requires only a few extra parts, some knowledge of the staging process, and a little modification and care in building the rocket. I'll cover staging here more extensively in the future.
Here are all the parts I'll need to build this rocket with a booster stage, minus a shock cord and parachute:
Still looks like a pretty humble pile of parts, doesn't it?
That's one of the many cool things about rocketry. You start with some simple paper and plastic bits, and end up with an astonishing flying machine.
I like the forward-swept fins on this rocket, and with a booster in place, it will look even better.
I can't wait to do a test flight!
A few months back, I designed and created a little model rocket as a thank-you for a donor to a fundraiser I was doing for the Bloomington Playwrights Project. It's called The Copperhead.

Once I'd built the rocket, I really loved it, but never got to see it fly. I decided to build one for myself. Last night, while working on about seven other rockets, I just started working on it.
The rocket has forward-swept fins and a small payload section. Look closely at the payload section - the fat upper part of the rocket. There are four tiny holes drilled into the side. That will allow me to use a barometric altimeter in the rocket, so that I can track how high it goes.
While the rocket looks really cool, it's always surprising to see how they come together. The parts alone don't look like much.

A few standard-sized tubes, a sheet of basswood, and a nose cone purchased online look kind of humble when you first begin building a rocket. The parts can come together quickly, though, and before you know it, you have a pretty great-looking rocket.
Much as I like the standard Copperhead, it suddenly hit me how easy it would be to put a booster stage on it, transforming it into a two-stage rocket. Here's what the design file looks like:

The first motor launches the rocket into the air. When the propellant is burned up, it ignites the motor inside the upper stage, and the booster is jettisoned and tumbles back to Earth.
Adding a stage to a rocket can boost its altitude - and its velocity - dramatically. Instead of launching the main part of the rocket - called the sustainer when it's part of a multistage rocket - from the ground, you're basically launching it from high in the air, already moving upwards. The results can be spectacular. Adding a booster to my Copperhead rocket will take its peak altitude of 740 feet up to over 1300 feet - nearly double!
If you understand the basics of rocket stability and model rocket staging, you could probably build a booster for just about any model rocket, adding altitude and speed. Imagine making that fat, heavy Big Bertha into a high-flyer! But beware, this increases the likelihood of losing the rocket! When launching a multistage rocket, you need a larger field, and may need to put less powerful motors in it.
But building a booster requires only a few extra parts, some knowledge of the staging process, and a little modification and care in building the rocket. I'll cover staging here more extensively in the future.
Here are all the parts I'll need to build this rocket with a booster stage, minus a shock cord and parachute:
 |
| The brown tube in the right is a tube coupler. I'll only need a 1-inch length of it. The motor mounts are already installed in the main body tube and the booster body tube. |
That's one of the many cool things about rocketry. You start with some simple paper and plastic bits, and end up with an astonishing flying machine.
I like the forward-swept fins on this rocket, and with a booster in place, it will look even better.
 |
| OpenRocket allows you to create a kind of "artist's conception" of what the final rocket will look like in flight. |
Tuesday, October 6, 2015
A Rocketeer's Toolbox for the Absolute Beginner
You have a basic Skill Level 1 rocket kit or two, and want to get started in rocketry.

This is going to be a lot of fun!
But to build rockets, you're going to need a few tools. Where to start? Do you need to go nuts at the hobby shop and hardware store just to build your first rockets?
Of course not. Starting out in rocketry requires relatively little, and you can add more tools as you decide you need them.
So here are some of the tools you'll need. There are the basics, which you'll need for just about any rocket, then a few things that are nice to have. There's probably no limit to the number and assortment of tools which have been applied to rocketry, but you can acquire things as you go, if you get into more advanced building.
Actually, you could probably classify the items in this post into two categories: tools, which you'll use over and over again, and materials, consumable items which you'll use on each rocket, and which you will have to replace.
Some tools you have to buy, but in rocketry, often you see people using improvised tools. Rocket building encourages and rewards creative problem solving!
As you'll see, the tools and materials for the rocketry beginner are very affordable, even if you're on a tight budget.


I held off getting one of these for a while, but I find it very useful. There are several basic rockets which might be easier to build if you have one of these. For example, if you get the Estes Tandem-X launch kit, which has a launch pad, launch controller, and two rockets, one of the rockets you'll have is the Estes Crossfire ISX - a great little high-flying rocket.


This is going to be a lot of fun!
But to build rockets, you're going to need a few tools. Where to start? Do you need to go nuts at the hobby shop and hardware store just to build your first rockets?
Of course not. Starting out in rocketry requires relatively little, and you can add more tools as you decide you need them.
So here are some of the tools you'll need. There are the basics, which you'll need for just about any rocket, then a few things that are nice to have. There's probably no limit to the number and assortment of tools which have been applied to rocketry, but you can acquire things as you go, if you get into more advanced building.
Actually, you could probably classify the items in this post into two categories: tools, which you'll use over and over again, and materials, consumable items which you'll use on each rocket, and which you will have to replace.
Some tools you have to buy, but in rocketry, often you see people using improvised tools. Rocket building encourages and rewards creative problem solving!
 |
| Rocketry encourages and rewards creative problem solving. Here is a simple but ingenious solution to the problem of getting rocket fins on straight, on an Estes Ventris mid power rocket, by rocketeer Brian T. La Rose |
As you'll see, the tools and materials for the rocketry beginner are very affordable, even if you're on a tight budget.
* * *
The Basics - Tools
Here are the indispensible tools and materials you'll need just to begin.
A pencil

You'll use this to make marks on the body of the rocket to help you place the fins on accurately, and to mark off measurements. If you want to start using some more advanced techniques, like, say, sanding rocket fins into a "teardrop" or airfoil shape, you'll use the pencil to make marks on the fins.
Always use a pencil. Never use a pen or marker to make these kinds of marks on a rocket, because the ink will bleed through the paint.
A metal ruler

You can measure things with a wooden or plastic ruler, but often you use the ruler to guide cuts that you make with a hobby knife. The metal ruler won't get marred by the knife.
You should get a ruler with a cork backing. This will help keep the ruler from slipping.

I started with a six-inch ruler, seen in the photo above, but quickly realized I needed a longer one, so I bought the 12-inch ruler. I should have just gotten an 18-inch ruler to start with. Get at least a 12-inch ruler if you can.
A hobby knife

You might know this as an "X-Acto" knife. X-Acto is the Kleenex of hobby knives, in that it's so ubiquitous people often refer to the tool by the brand name. But you can find cheaper ones.
The hobby knife has a chuck into which you can insert a number of disposable blades. The blade you'll use most often is the #11 blade.

I have several hobby knives. One interesting one is from Fiskars.


This is a kind of precision hobby knife, which uses the same blades as a standard hobby knife. The difference is in how you hold it. Instead of holding it like a pencil, you put your index finger through the loop, giving you more control over the knife.

While I like the design of this hobby knife, I have to admit I haven't used it all that much.
Another option for cutting, recommended by Chris Michielssen of the Model Rocket Building blog, is the kind of box cutter with breakable blades. When the blade gets dull, you break off a section and you have a new blade right there. They're pretty economical, and work well for all but the fiddliest, precision cutting.
A cutting mat


My cutting mat is the background to a lot of the pictures on this blog. What many rocketeers use is what's known as a self-healing cutting mat. You can find them at craft stores, hobby stores and fabric stores.
Olfa is a popular, prominent brand, but mine is from Fiskars. They're pretty much the same, except for the color - and the price. A self-healing mat can cost $20-$40. But I got mine for about $14 from Michael's Crafts with a 40% off coupon.
I started out just using newspaper as a cutting mat. If you use a thick pile of newspaper, say, a whole Sunday New York Times, that will work. Just be careful not to cut through it into the table. A cutting mat is a better option.
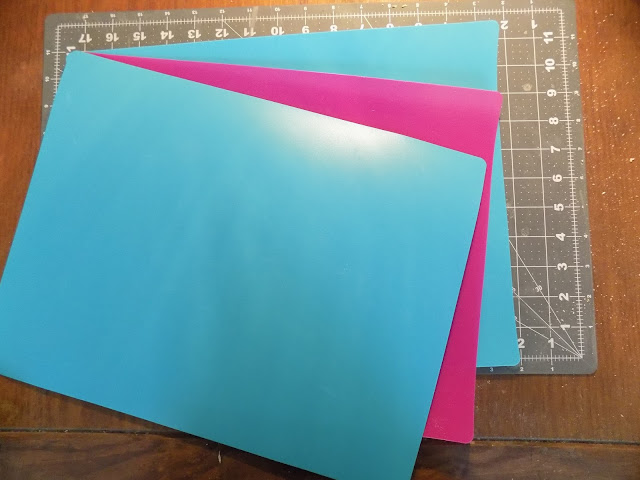
If you're on a budget - or in a hurry - check out the dollar store. When I was about to teach a model rocketry camp this summer, I got a 3-pack of flexible cutting boards for a dollar.

They may not look as fancy or last as long, but they're cheap, and they should do the trick.
A sanding block

You don't have to buy a sanding block. You can simply make one. A short length of 2X4 wood, or anything that's perfectly flat, rectangular, and be easily held in the hand will work. You just wrap a length of sandpaper around it, and you're ready to sand.
Or, you can get a sanding block from a hardware store.
However, I highly recommend the Great Planes hand sander, seen above. Since I first bought one after learning about it from Chris Michielssen's blog, it has become my absolute favorite tool to use.
It's so simple, comfortable to use, lightweight, and perfectly flat. You simply use spray adhesive to attach any grit of sandpaper to its surface, or you can buy sandpaper with an adhesive backing already applied.
 |
| A comfortable handle |
 |
| The sanding surface |
At under $8 on Amazon, I love this tool so much, I've ordered a second one. That way, I can have two different grits of sandpaper ready to go without having to change sheets each time I need a coarser or finer grit.
Dowel rods or craft sticks


I almost didn't include this in the Indispensable Tools for a Beginner section, but they're so useful and cheap, I think you need to have them.
Dowel rods and craft sticks are useful for many applications in rocket building. But the thing that makes them indispensable, even for the beginning rocketeer, is that they're necessary for getting glue into hard to reach locations, such as up inside a rocket body tube or motor tube. For doing that, I prefer skinny dowel rods, about 1/4 or 1/8 inch in diameter.
But dowel rods are useful for so many things. Here's what I'd call "improvised tools," consisting of dowel rods with expended rocket motor casings attached to the ends.

These are painting wands. You insert the expended motor casings into the rocket just as you would a rocket motor. Then you can hold the wand and spray paint the rocket without touching it - very important if you want to get a nice finish on the rocket, and minimize the amount of paint you get on your hands!
Scissors

I'm pretty sure you know what scissors are for...
For an Absolute Beginner Rocket N00b toolbox, that's all you need. There are a lot more things you'll probably want, but that will get the rocket built.
That is, as long as you have...
The Basics - Materials
These are things you'll use on each rocket, but they're not reusable. You will run out and need to replace them.
Things like...
Glue

There are two main types of glue you might use in basic rocket building, and they're frequently referred to as yellow glue and white glue. Yellow glue, which is technically known as aliphatic resin, is more commonly called wood glue or carpenter's glue. You can see my particular brand on the left. White glue, also known as polyvinyl acetate, or PVA, is so called because it's white in color. Either of these works well. I happen to prefer wood glue, but that's just a personal choice.
What you absolutely do not want to use to build rockets is "school glue" or anything washable. Washable glues are not strong enough, and a little moisture can ruin your rocket.
Some beginner's-level rockets require you to glue plastic parts together, or to glue plastic to a paper body tube. In that case, you may need some plastic cement.

This stuff actually melts the plastic so that it bonds with other parts more easily. It's nasty stuff, but sometimes necessary.
Sandpaper

To get started, you'll probably only need two grits of sandpaper. The higher the number, the finer the grit, and the smoother you can sand something. But, of course, sometimes you need a coarse grit of sandpaper if you're trying to remove material and sand something down, rather than just make the surface smooth.
For a beginner, 220 grit and 400 grit will be what you need. You can experiment with coarser and finer grits of sandpaper - say, 100 grit for a tough job that requires sanding something off, or 600 or 800 grit for getting a really smooth surface. But for most applications, these two will work great.
Paint and primer

Technically, these are optional. You can fly your rocket without painting it. But most people choose to pain their rockets, and you probably do too.
You have a lot of options here. The main thing is to make sure your primer is sandable. You can either go with a primer called "sandable primer," or with something called "filler primer," which is not only sandable, but also helps fill in imperfections in the rocket's surface.
Primer is basically "the paint you paint before you paint." It helps the actual paint to adhere to the surface, and using a sandable primer means you can get a really smooth surface for the paint to adhere to. This will help you get a smoother, nicer-looking (and better-performing) rocket.
There are a lot of different spray paints you could go with, but a couple of tips for the beginner: stick with the same brand and line of paint for each color you use (Rust-Oleum 2X enamel paint, for example); start with the lighter color first, and do the darker colors over that; don't mix kinds of paint, e.g. lacquer and enamel.
That's it. That's your beginning rocketry tool box.
* * *
There are a ton of other tools and materials you might use as you get more into rocketry. For the beginner, the following are a few things it's nice to have, but aren't strictly necessary.
Aluminum angle, or "angle iron"


This is one of those improvised tools used by a lot of rocketeers. It's a piece of aluminum that has two sides at a 90 degree angle. You find it in 3 foot long sections in the hardware store, often near the steel rods (which you can use to build launch pads!). I have no idea what they're really supposed to be used for - making doors, maybe? Or windows? But they're used in rocketry a lot.
With a piece of aluminum angle, you can draw a line straight up the side of a body tube, because the angle will sit perfectly on the tube.

 |
| I marked inch lines on this piece of aluminum angle, so that it could double as a rough kind of ruler. |
Traditionally, rocketeers used a door jamb or the edge of a drawer to draw straight lines on a rocket airframe, but this technique has drawbacks.

Those drawbacks include marking up the door frames of your house with pencil, and getting lines on your rocket which are not perfectly straight, due to imperfections in the door frame or drawer edge.
A small, 1/2 inch aluminum angle may serve all your needs. You can get a larger one when you build larger diameter rockets, but a small one may serve as well. They're pretty inexpensive.
Utility knife

For heavier-duty cuts.
Razor saw

Much like a hobby knife, this is a handle with a chuck on the end. The blades are replaceable. It's a very thin saw for cutting things like wood or plastic.
I held off getting one of these for a while, but I find it very useful. There are several basic rockets which might be easier to build if you have one of these. For example, if you get the Estes Tandem-X launch kit, which has a launch pad, launch controller, and two rockets, one of the rockets you'll have is the Estes Crossfire ISX - a great little high-flying rocket.
When you build it, you will have to cut the nose cone into a few pieces - the nose cone itself, plus a "nozzle" for the aft end of the rocket. The kit instructions suggest using a hobby knife for this.

You could use a hobby knife or utility knife, but it would take quite a long time. You might be tempted to press really hard, and risk cutting yourself, or damaging the parts, or breaking the hobby knife blade. You could also use a utility knife, which would take a bit less time, but still require some work. A razor saw makes short work of cutting plastic parts like those.
I used a hacksaw when I built my Crossfire ISX. Overkill, perhaps, but I didn't have the patience to use a hobby knife safely, and didn't have a razor saw in my toolbox yet.


This required lots of sanding, not to mention borrowing a hacksaw, as I didn't have one of those either.
Now that I have a razor saw, I use it all the time. I've even used it to build other tools.
* * *
There are lots of other tools, materials, and techniques you'll adopt as you advance in rocketry. Some of these will be to make your rockets look or fly better, and some of them will be because you'll use sturdier materials as you build bigger, more powerful rockets. But if you're just starting out, this tool box will serve you well, and you'll use all these tools for many rocket builds to come.
In an upcoming post, we'll see some more tools and materials you may want to consider, to make rocket building easier, and to make your rockets look even better.
Like my Facebook page for blog updates and extra features.
Subscribe to:
Posts (Atom)