

Sometimes, you'll open a new rocket kit, examine the parts, and realize that the balsa fin stock is warped. This may be really bad - the whole thing is visibly curved - or it may be subtle. Perhaps you'll only notice it when you cut the fins out and stack them together, because they won't lie flat together.
Or maybe you'll have some balsa sheet you purchased for building from scratch or cutting spare fins, and find when you go to use it that the balsa has developed a warp.
Balsa warps very easily, and it's due to moisture. Balsa wood soaks up water like a sponge, so it doesn't take much for it to bend the wood out of shape. Sometimes the wood will warp if you've kept it lying on a flat surface, and the weather is particularly humid. The wood will soak up some of the moisture from the air, and the side facing upwards will absorb that moisture.
As the cells in the wood take on water, they swell, causing the whole piece of wood to expand on one side, and the fin will warp away from that side, curving in toward the drier side.
Sometimes people will head to an online forum to ask what to do in the case of warped fins, and people will reply with a number of suggestions. When I had a long plank of balsa stock get a little warped recently, I thought it would be a good opportunity to test things out.
Note: I talked about this on a recent episode of The Rocketry Show podcast. I conducted this test several months ago, and... well, I can't find some of the photos I took. Fortunately, I do have the most important ones!
I had purchased some really great "Very Hard Balsa" stock from Sig Manufacturing, a vendor of model aircraft supplies. If you are looking for some good balsa stock for fins, or some square or rectangular balsa or basswood dowels for strakes or other details on a rocket, or if you need a balsa block because you'd like to try making your own nose cones, I highly recommend Sig Manufacturing. The balsa I get from them is always better than some of the stuff I've found in the hobby or craft stores I used to frequent. These days, there are no hobby or craft stores nearby, so I have to order from the Internet. Sig Manufacturing has good stuff.
Storing balsa sheet can be tricky, because the wood is so susceptible to warping. You don't want to stand it up in a corner, or gravity will slowly cause it to sag and curve. It's best to lay it flat, if you can.

My work table has a long brace piece running down the middle between the four legs. I usually store my balsa sheeting in a stack on that. It would probably be a good idea for me to put some weight on it, perhaps with a nice, straight two-by-four I can lay on top of the stack, but at the moment, I just store it open like that.
During a humid summer week, a really nice piece of 3/32 inch thick balsa sitting on top of my stack got pretty badly warped. I cut the plank apart into lengths of about six inches long or so. It's harder to see warping in smaller pieces of balsa, and I wanted to make sure the results would show up in pictures, and I really wanted to put the various de-warping solutions to the test, so I decided to make the warping even worse. I painted one side of each piece of balsa with water. Then I strapped each piece to a dowel rod with two rubber bands.

This would cause the wood to bend, and as the wet side dried out, the warping would set in, and the balsa would turn out really misshapen. The results can be seen in the picture at the top of this post - very badly warped balsa, good for nothing.

I wanted to try several methods of flattening warped balsa. Three of them were water-based methods, and one was a chemical method. The methods I wanted to try were:
- Steam
- Soaking in water
- Merely spritzing with water
- Ammonia-based window cleaner
If you stare at something too hard, trying to tell if it's actually straight (or flat), your eyes can play tricks on you. And I needed something I could photograph to really show whether the method had worked.
My high school yearbooks turned out to be perfect for this. Not only were they perfectly flat, so I could tell if a piece of wood had been fixed, they were also heavy, so I could use them as weight for pressing the wood.

Steam
I started with steam. I'd seen someone recommend using a pair of tongs to hold warped fins over a kettle. This seemed a little inefficient to me, and you'd have to stand there at the stove the whole time. I figured a vegetable steaming basket would be a better idea.

Here are the before pictures of the wood. Look at it on one side, then flip it over to get a better idea of how badly warped it is.


I put about an inch of water in the bottom of the pot and brought it to a boil. When it was well boiling, I placed the balsa in the pot, put on the lid, and let the wood steam for fifteen minutes.


I then pulled the balsa out of the steam and placed it between two of my yearbooks, with pieces of parchment paper under and on top of the wood pieces, to protect my books from moisture.
Often, when pressing wet balsa, people will use waxed paper, but I worried the heat from the steam might melt the wax and leave a residue on the wood. I needn't have worried - the balsa didn't stay hot to the touch for long. But I often prefer to use parchment paper, or switch to parchment from whatever I'm using halfway through the drying process to expedite drying, as you'll see below.
I then piled several heavy books on top of the stack and left the wood to dry completely overnight.
The results were pretty good the next day.


As you can see from the second picture above, while the fin stock is certainly in better condition, it isn't perfect, and this shows why it's important to flip the pieces over and look at them from different sides. The top photo looks almost completely flat.
When in doubt, you can double-check the flatness of your fin stock by pressing on the top near the edges. If the wood is flat, it won't move much. If there is a slight curve on the underside, the piece will rock as you press on it.

The steam method wasn't a 100% cure. Still, this wood was in really bad shape. With most fins you get in a kit, they won't be this bad, so steam might well work just fine. Of course, as you'll see in the next couple of tests, it isn't necessary to boil water.
Water - Soaking
The next piece I decided to soak in water for several minutes, until it became saturated, then pressed it under weight.
On this piece, I lost the photos, so I decided to repeat the experiment for this post.
Here are the before photos:


I placed the balsa in a small tub of water, pressed it down to soak it completely, flipped it over, and repeated the process. I left it in the water for a few minutes to get it completely saturated. In reality, balsa is so porous you won't have to do this for long.

Wipe off excess moisture, lay on a flat book on top of a piece of wax paper. Place another sheet of wax paper on top, place another flat book on top, and stack a few more heavy books on top of that.


Leave the weight on the fin stock at least overnight, and preferably for several days. Make sure the fins are completely dry before you remove them from the press.
The results were quite good.

It's important to note that this is the second time I did this to this piece of wood. In repeating the test for this post, I used one of the original test pieces. That means that this wood was warped, flattened, warped, then flattened again, and still came out nice and flat. Not perfect, but pretty darned close for such a beaten-up piece of wood!

Wipe off excess moisture, lay on a flat book on top of a piece of wax paper. Place another sheet of wax paper on top, place another flat book on top, and stack a few more heavy books on top of that.


Leave the weight on the fin stock at least overnight, and preferably for several days. Make sure the fins are completely dry before you remove them from the press.
The results were quite good.


It's important to note that this is the second time I did this to this piece of wood. In repeating the test for this post, I used one of the original test pieces. That means that this wood was warped, flattened, warped, then flattened again, and still came out nice and flat. Not perfect, but pretty darned close for such a beaten-up piece of wood!
Water - Spritzing
The soaked fins came out pretty well. But what if I just sprayed the surface lightly with water? Would that be sufficient moisture to fix the warp?
Here are the before photos.


I misted both sides of the wood until they were wet to the touch.

The results: again, quite good. Not perfect, but with considering how much I abused these pieces, it's not surprising. Wood that warped naturally would probably have come out completely flat


In fact, either water method should work for less warped fins. The photos look pretty close to perfect. If you press on the fins, though, you will get a clearer idea. Flat fins will stay flat on the book. A slight warp will cause the wood to rock when you press on it.
OK, so with less warping than I was dealing with, it looks like water will do the trick. Did I even need to proceed with the ammonia?
Well, yes, as it turned out. After a few days, some of the warping returned to all of the water-treated pieces. They were badly bent, so I suppose that's not surprising. Much like you cannot make a folded piece of paper look like a new sheet, once a bad warp has set into the wood, that's it's new natural shape. Most likely, using water to flatten your balsa will work just fine, provided you make sure the wood is completely dried out before you use it.
If you have a badly curled or stubborn piece, however, you might want to try something more aggressive - to change the structure of the wood.
If you have a badly curled or stubborn piece, however, you might want to try something more aggressive - to change the structure of the wood.
Window Cleaner

We're talking here about the blue stuff - Windex, or any other blue, ammonia-based window cleaner. It's got the right ratio of ammonia to do the trick, and you don't have to mess with pure ammonia. Plus, you probably already have some.
Here I have to confess I'm not entirely sure what is happening in the wood when you use ammonia, as I've seen a number of explanations, but it is said to break down molecular bonds or maybe cell walls or... something in the fibers of the wood. This makes the wood pliable, and shapable. When the wood dries out, it will be hard again.
How well would it work? I wanted to find out.
The before pictures:


Using window cleaner to fix fins is a bit more involved a process, and in using the technique, I discovered a few things to watch out for. Depending on how much you spray on the fins, it may take more than a day to get good results.
When using window cleaner to clean windows or a stove top, you don't use much, so you may not have noticed how noxious the fumes can be. But when using it to fix balsa stock, you'll want to open a window and get plenty of ventilation, because you will need to saturate the wood. Trust me - I found this out the hard way!
Hold the wood away from yourself with a pair of tongs or while wearing latex or nitrile exam gloves, and spray both sides until the wood is dripping wet with window cleaner.
Then, wrap the balsa in plastic wrap. In this case, you do not want to use waxed paper, because the window cleaner will soak right through it and will destroy your books.
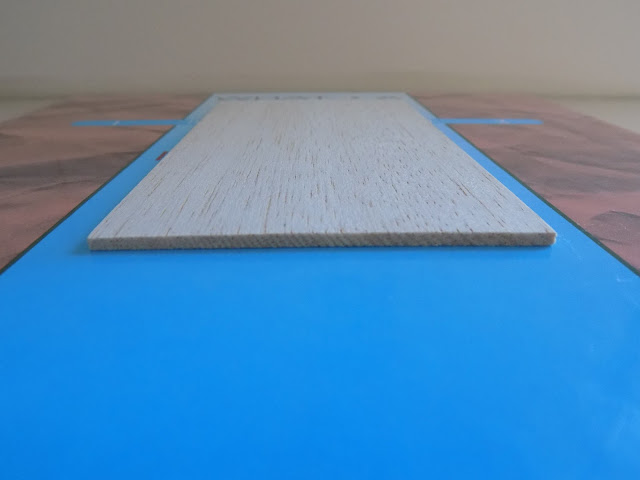
 |
| The fins of my Estes Hi Flier XL needed to be flattened before attachment. I used the window cleaner method. |
Place the fin stock on one flat book and cover with another, then stack a few more heavy books on top. Leave the stack to dry overnight.
The next day, unwrap the fins. They will probably be dry to the touch - but in fact, there is still a lot of moisture inside the wood, especially if you saturated them really well. If they still feel flexible, they are not done.
If you leave the fins out at this point, they may warp again, even worse than before. After I did this experiment, I used the technique on some slightly curled Estes Patriot fins, and when I set them down on the table the next day, I left the room to get a glass of water. When I returned fifteen minutes later, they had curled up like a pile of Fritos!
So, once you've removed the plastic wrap from the fin stock, you will want to press them some more. At this point, you may decide they are dry enough to press them under books with no wax paper or parchment, but in fact, I prefer at this point to expedite the drying process by switching to parchment paper.
Why? Because since parchment paper is not waxed, it wicks moisture away from the wood, allowing it to dry more quickly and thoroughly. You will see evidence of this the next day, when you take the books off the fins, because the parchment will be slightly rippled from the moisture passing through it.


After a day or two, feel the fins. They should feel completely dry and solid. Lay them on a wire rack and check on them frequently for the next half hour to 45 minutes. They will most likely be finished at this point, but if they were to warp, they would do so quickly. You'd still be have time to press them again before they harden.
Once you're done, you can shape, sand and fill the fins as you do normally. There will probably still be a faint ammonia smell, but the warp will be gone. The rocket will look great, and fly much better.


Of the methods I tried out, the most effective seemed to be completely soaking in water and window cleaner. Steam was less effective, and required boiling water and a steamer basket.
What about the dry pressed fins?
Well, they never, ever flattened out. I even tried it on some slightly warped kit fins, the Estes Hi Flier XL. I think I had those fins sitting under heavy books for two months, and they stayed warped. So I hit them with some window cleaner, and fixed them right up.
One other technique I tried, which turned out to be great for flattening - and strengthening fins...
Bonus: Papering Fins

A few months ago, Estes had a clearance sale on their Skill Level 2 Photon Probe model rocket, which had been discontinued.
The Photon Probe was a BT-55 based model, and even if you weren't fond of the Photon Probe itself, at a little over $3 per kit, it was well worth buying if only for the parts. In order to get a large stock of nose cones, body tubes, parachutes, motor hooks, launch lugs, etc. for scratch building, I bought 31 of them.

While most of these would serve as spare parts for scratch builds, I figured I should build at least one Photon Probe - and make it a two-stager, while I was at it.
The problem - every single model had bad balsa. It was warped and soft. It actually seemed old. I considered making new fins from balsa stock, but decided I should try papering the fins.
Papering fins is a technique used both to conceal the wood grain in balsa fins, and to add strength to fins. It involves gluing ordinary printer paper (or sometimes using self-adhesive Avery-type printer labels) to the fins.
I don't normally like papering fins, partly because I like to sand my fins into airfoil shapes, and I find it difficult to get the results I want when adding paper skins. It's not that the technique doesn't work for airfoils - I just find it more frustrating than I want. My earliest attempts were mostly a disaster.
The occasions when I leave the fins square, however, I find papering much easier, and very effective for me. I'm still not great at it, but these fins needed fixing, and I figured it would be a good chance for me to try it again, and perhaps fix the soft, curvy balsa.
There are at least three main ways people paper fins - with wood glue or white glue, with a glue stick, or with self-adhesive Avery labels.
The method which will cure warped wood is the one using wood glue or white glue - spread the glue onto the surface of the fin, then use a finger to wipe off all but the thinnest layer of it. You then apply a piece of paper slightly larger than the fin itself to the glued surface and burnish the paper down with a marker or other smooth object, to squeeze out as much of the excess glue as possible. The process is repeated on the other side of the fin, and the fin is then placed under heavy books to dry thoroughly. After that, the overhanging edges of the paper are often treated with a bit of thin CA - cyanoacrylate or craft grade super glue. This stiffens the paper, and once the CA has dried, the excess can be sanded off with a sanding block, so the paper perfectly fits the outline of the fin.
There are a lot of great tutorials on The Rocketry Forum and other online sites, but here is a video tutorial from Apogee Components.
Wood glue and white glue go on wet. The moisture in the glue will make the wood pliable, and as it dries, it hardens, so if you press the fins under a book, they will come out flat. A glue stick might have a similar effect, though there is less moisture in glue sticks, and the glue doesn't dry as hard.
The Avery label method, while being the easiest way to paper fins, won't actually fix the balsa. The adhesive on these isn't a wet glue which dries and hardens. It's really just a tacky surface meant to adhere a label to paper - say an address label onto an envelope.
I've also had Avery labels peel off wood, even after being painted on, following a hard landing. Or bubble up after a month or so, causing a raised spot, under a paint job.
So, while it is a no-fuss method of papering, if you're trying to fix warped wood, stick with the glue method.
The Photon Probe fins turned out really well, and after building this rocket, I could see why some builders swear by papering. The fins were not only perfectly flat, but very strong!

Follow me on Twitter.
Like my Facebook page for blog updates and extra stuff.
Have a question you'd like to see addressed on this blog? Email me at iamtherocketn00b@gmail.com.


