I moved on to writing up the Estes V2 build and nearly forgot to finish the Super Big Bertha series!
After the fins were assembled and the edges sanded square, I moved on to filling in the wood grain.
Brodak sanding sealer is my favorite way to fill balsa wood grain. Traditionally, you apply sanding sealer after gluing fins on. But I often apply a few coats and sand beforehand. It's easier to sand them smooth without the body tube in the way.
Before anyone chimes in, yes, you do need to take care to keep the sealer off the root edges, as they can impede a good glue bond. But I've literally never had a fin break off because of using this method.
If I accidentally get some sanding sealer on the root edge, I quickly wipe it off with a paper towel and give the edge a quick sanding. And you know what? It's fine.
Furthermore, with these fin tabs, there's no problem. And you can hold the fin by the tab and seal the whole fin at once, without getting sealer on your fingers.
Brodak is expensive, but I find the results worth the price. It's more cost effective to buy a large can, rather than several smaller ones. You can buy it online HERE (Note: Looking at it as I write this, Brodak sanding sealer is a lot more expensive today than it was when I bought two cans two years ago. Inflation is pretty high right now. That said, if I needed some, I would probably still spring for it. That's how much I like the stuff. But there are definitely much cheaper options for balsa filling out there!)
If you're worried about getting a large can, because you've had sanding sealer quickly go bad once you open it if you don't use it all in a short period of time, don't worry. I've had a can open for a year and it's still as fresh as new. This is quality stuff.
I brushed three good coats on, then sanded them smooth before attaching the fins to the rocket.
Once the fins were glued on to the Bertha, fin fillets were applied.
These are wood glue fillets, using Titebond Molding and Trim Glue, 3 layers deep at this point. The molding and trim glue is less prone to sagging and shrinking, and makes a great fillet.
I put an Elmer's pointy cap on the bottle for better fillets and more precise gluing - the bottle necks are identical, and School Glue is always on sale for 99 cents. Not good for rocket building, but the caps are perfect replacements for the wide Titebond caps. I got this tip from Chris Michaels' Model Rocket Building blog, and I wouldn't do otherwise now.
The Bertha will get conformal rail guides instead of the 1/4 inch launch lugs it comes with. Since I almost always fly with a club, a launch rail will almost always be available when I feel like flying this rocket. A 1010 high power rail is less likely to whip when a rocket lifts off, and less likely to get bent.
A friend gave me a tip that I tried. Take a rail guide from Aerospace Specialty Products and cut it in half with a razor saw and miter box. You get 2 for 1 that way. The original rail guide is a couple inches long, and I decided this would be a good rocket to try that with.
It worked, but I probably won't do it again. Holding the guide still while cutting was difficult, because while the rail guide is long, half a rail guide is not. The saw kind of shredded the ends of the 3D printed part, which required a lot of cleanup. And a short segment of this guide is kind of hard to get on the rocket perfectly straight. While the guide does conform to the BT-80 body tube, the curve is very slight, and with a layer of epoxy between the guide and the tube, there's a bit of play, and I had to keep checking to see if I really got it on there straight. A short piece is harder to get on straight than a long piece, and I found lining up the second little bit of guide 11 1/2 inches away more difficult.
Besides, these rail guides from ASP are cheap and lightweight. I'll probably just use full length guides in the future. You can get them HERE.
After I put the rail guides on, my eyes kept playing tricks on me. Were they straight? Were they in alignment with one another?
I got out my camera and backed it as far as I could in the Rocket Room and zoomed in to see if I could better tell. I couldn't really tell what I was looking at, because it was pretty dark.
In this picture, the two guides don't look lined up, but that may be because the camera and rocket were off-center of each other. In the daylight, they look alright.
There is a chance that the upper guide is *slightly* crooked. Like, ever so slightly. I'm hoping it's fine. I guess we'll see when we get it on the pad.
I suppose I should get myself a length of 1010 rail so I can check these things at home.
It's probably fine...
I post a lot of things on Instagram these days. Follow me here.
Recently I realized that I haven't built a new rocket start to finish in well over a year, partly due to this funk I've been in. It's been a hard couple of years. I put the finishing touches on my Estes Mercury Redstone, yes, and slapped together a quick model from spare parts of other rockets, but I haven't started and finished a new model in way too long.
It's time to remedy that. I grabbed the Estes Super Big Bertha off the build pile and started it during my week's vacation from work.
I like the built up fins. I've done multi-ply fins on some scratch builds I've made, and they can make for very strong fins. I don't plan on beefing up anything with plywood on this one. I want to keep it light and be able to fly it on F15 black powder motors. I bet I could even get away with a D12 in this and keep the altitude really low on small fields if I watch the weight. If I want to use something thrustier, maybe I'll make a second one with plywood centering rings.
Surprisingly, this will also be my first BT-80 rocket! I have built other 2.6 inch rockets before, but they all used heavier tubing.
The fins on the Super Big Bertha are really great. 1/8 inch balsa cores and 1/16 inch balsa skins make fins which are about 1/4 inch thick when assembled. Take your time - this part can be tricky.
Instructions suggest CA (cyanoacrylate glue - Super Glue, basically) for this step. I use CA sometimes, but avoid it when I can. And in this case, I think laminating them with wood glue might make for a stronger fin. Not that it's critical - they're not likely to brake. But the wood glue, if properly applied, should soak in and make the fins one solid piece.
I spread the glue on the spars of the core, evenly and thin, then press the skins on. After holding them tight for a minute or so, I press them between waxed paper and heavy, flat books. Only one skin at a time - you want to make sure they don't slide around when you're placing them under the press! After 20-30 minutes of dry time, I flip them over and do the other skin. Then I leave them under the books for AT LEAST a day for them to dry thoroughly. Any residual moisture can still cause the fins to warp after you take them out from under the heavy weight.
The edges may not all line up perfectly when you do this - ideally, the outer skin will be slightly larger. You'll then sand everything even. Just make sure the root edges are even - that would be the hard part to fix.
Don't throw out the sheets the fins are cut from - lots of good scrap balsa there for other projects!
I really like these fins - they're solid!
I post a lot of things on Instagram these days. Follow me here.
The centering rings of the SA-14 Archer fit a little too loosely on the motor tube. The instructions suggested that if that's the case in your kit, you can make the outer diameter of the tube a little larger by wrapping masking tape around it.
The thing is, the centering rings and the fins will be glued to the motor tube, and I have rather cheap, low tack masking tape. I worried that if I did the tape method, it might mean my fins were attached by a rather weak bond.
I'd read this post on Instructables.com on how to make your own Kraft paper tubes. As you probably know, Kraft paper is the material most model rocket body tubes and many mid and high power motor tubes are made of, and it's possible to roll your own. Rocket body and motor tubes are just strips of paper, built up layer by layer and glued in place. Enough layers make the tubes strong enough for a high thrust rocket motor.
I decided to try this technique to add a layer or two of paper to the motor tube, making the walls just a bit thicker. With wood glue, the paper would bond to the tube very strongly, and the new paper surface would simply be part of the tube.
Here's how it went:
And here's the finished motor tube.
You can see how solid it is, and even though there are slight surface imperfections, it's quite smooth. If I'd gone too far with the wall thickness, I could now sand the tube down to get just the right fit.
This turned out really great, and I'm glad I thought to try this. Trying it did make me nervous, but it was really much easier than I thought it would be. On more than one occasion, I've wanted to build up a tube or make it a little stronger. Now I have one more technique I can use should the need arise.
I walked into the Rocket Room today, and it hit me that I hadn't touched anything in there in maybe a week or more. The sun was streaming in through the windows, and it looks like my girlfriend tidied up in there a bit. It looks pretty in the sunlight.
This is much cleaner than it is when I'm working on something.
Time to put it to good use.
I've had a few things holding be back from being as productive a rocketeer as I was a year ago. My job sometimes has me starting at 4:30 in the morning, and sometimes has me quitting at 11:30 at night. This back and forth can be a bit draining. But things are about to get more regular for me, and I should have my Saturdays clear for launches.
So, here are some goals I have for the upcoming year.
1. Blog More Frequently
I was asked to be on The Rocketry Show because of what I had been doing on this blog - writing informative posts for rocket n00bs. But in the last few months, I really haven't written as much as I'd like to.
I have started about 8-10 good blog post topics, but haven't finished any of them. The kind of post I feel most proud of on this blog is a bit long (for a blog), but is clearly spelled out with lots of photos, so any rocket n00b who comes along can understand it. That takes time and energy, and if I'm too tired, I don't write. If there's not enough light, I have to wait on taking photos.
Yet, I'm still getting page views - usually between 25-50 per day. Some of these may be brand new people, but some may be previous readers checking back to see if I have anything new on the blog. I have no idea. Anyway, my first goal for the year is to create more content for rocket n00bs and rocket veterans to have something new to look at. A commitment to a little bit of writing each day might be called for, even if I don't finish a post in one sitting.
The new work schedule should help with that.
2. Figure Out the Painting Situation
Since my move to Boston, I haven't finished a single rocket. Not a single one - in six months. A major roadblock to completing a rocket for me is painting.
Back in Bloomington, I had plenty of outdoor space to paint rockets - and to do so privately.
Estes Big Bertha on a painting stand behind my old apartment
Here in Boston, I have to paint out front, and there's not much space between my apartment and the street. I don't want to get paint on the house. I need to figure out where to paint - especially larger rockets.
One option may be to join a makerspace - also called a hackerspace. These are a sort of co-op, where people get together to share tools and ideas.
I'm also considering building an indoor spray painting booth. But this must be done with care. A spray booth must keep paint inside, but must be properly ventilated. I've seen a few DIY spray booths online, but some of them are potentially dangerous. A box of sealed plastic sheeting is not enough if there's no ventilation. Spray paint fumes can cause brain damage in high concentrations!
A few weeks ago, I did manage to get a few small rockets primed, but that's it so far.
Estes Goblin
Estes Reflector
Imperius D - my own design. This was originally called "Donor's Rocket" on this blog. Mine will hold a D motor.
Astron Sprint XL Clone - this is a clone of an Estes kit. I'm building the kit, but wanted to
practice sanding the eliptical fins into airfoil shapes properly before trying it on the real thing.
3. Improve My Recovery Rate
The first several months I launched rockets, I had great success. Chad lost a ton of his rockets. I managed to keep all mine on the field and recover them with little to no damage.
Then, my first launch of 2015, I had my first loss to a tree.
3D Rocketry Nautilus II - my first tree loss.
The 3D Rocketry Nautilus II got badly tangled on a tiny tree branch very high on a tree on a steep incline. There was no retrieving it. It was still stuck there six months later, when I last launched on that field.
Most of my Bloomington launches went well. Some of them left the field, but I was able to retrieve them. Nonetheless, my record took a few hits.
Since moving to Massachusetts, I've had worse luck. Despite flying on a much bigger field, I have recovered far fewer rockets. Amesbury gets breezy. And I have been trying to fly higher. The higher you fly, the bigger the chance of losing a rocket. I've had several leave the field entirely and disappear in deep scrub, sticker bushes and swampy grassy areas. It has made me nervous to launch anything at all, and I only launch a few of the rockets I take out each time.
Since my first club launch, I'd say I've had recovery failures of over 50% of all my rockets. I look at the fleet in my rocket room, and it looks a lot smaller than I remember it. I need to fix this, and get back to launching with confidence.
This can largely be improved with careful parachute selection. It seems that Estes kits often come with parachutes that are a little larger than they need to be. The Cosmic Explorer has a large, 18 inch parachute which brings the rocket down very slowly. It's beautiful to watch, but it does mean the rocket has more time to drift in the breeze. Replacing the chute with something smaller would bring the rocket down a little faster, and it would still likely land intact.
Some rockets may need to recover on a streamer. I admit I have only done this with rockets which come with a streamer as a kit. Streamers make me nervous otherwise. But my first scratch build, the Janus I two-stage rocket, which flew very, very high, was pretty lightweight.
A nice, big streamer would probably have brought it down closer to the launch site and it would have survived intact despite a faster descent. Instead, I lost it - the first rocket I flew at my very first club launch. Streamer recovery is something I need to experiment with.
Another tactic to improve odds of recovery is to angle the rocket into the wind. For safety's sake, the NAR Model Rocket Safety Code states that you shall not launch at more than 30 degrees from the vertical. But that does give you some leeway. How much angle to tilt the launch rod will require some practice on my part.
Of course, selecting the right motor for the day's wind conditions is also important. But I've seen plenty of rockets at CMASS launches which went much higher than mine, yet which recovered just fine while mine did not.
4. Launch an Electronic Payload
I've had a Jolly Logic altimeter for nearly a year now, but I have never launched it! Consequently, I really have no idea how high any of my flights have been.
Until I can more reliably recover my rockets, however, I'm reluctant to use a $70 altimeter. In the mean time, I'll probably pick up the much less expensive FireFly altimeter and try that out.
The FireFly altimeter, from PerfectFlite
The FireFly, from PerfectFlite Direct, is not as fancy as the Jolly Logic, but it's tiny, and at about $22, it's a good choice.
I also need to successfully launch a camera. I've had a few tries. I've had a few failed cameras, and lost one on a payload section which drifted far from the launch site on the wind. The closest I've gotten to success were a couple of bad flights.
5. Finish Building My Estes Pro Series II Kits
Earlier, I wrote about beginning to build two of the Estes Pro Series II kits - large mid power rockets with 29mm motor mounts. I began with the Nike Smoke, a scale model of a NASA sounding rocket, and the Ventris, a cool-looking rocket with a fat payload section.
Nike Smoke
Ventris
These are great kits, and Estes has been selling many of its Pro Series II kits dirt cheap (there has been much speculation that Estes is getting out of the mid power market. I have a feeling they'll hold on to their E2X kits and maybe the Mega Der Red Max and Nike Smoke, but Ventris, Leviathan, Partizon and Argent will probably all be gone soon.). These are meant to fly mostly on F and G motors, but many people use them to get into high power rocketry, as they will also hold a small H motor. They're big and impressive in person, especially if you've only built small low power model rockets.
I've been chipping away on both the Nike Smoke and Ventris for months. They're nearly ready for primer and paint. I've also quietly been working on the Estes Leviathan, a nice fat model (now discontinued by Estes), and a pretty good choice for a Level 1 high power certification flight, if you choose to use a 29mm rocket for that purpose.
I need to finish these guys. I want to have them ready by April, when CMASS, my NAR section, begins flying again.
6. Find a Nearby Launch Site
Because I live in Boston, I go out of town to launch rockets with CMASS. In the summer, they fly at a smaller field in Acton, MA, which is not terribly far from where I live. In the fall and spring, I have to drive all the way up to Amesbury, which usually takes me much longer than it should - at least an hour and a half, sometimes two hours.
But, unlike when I lived in Bloomington, IN, there's no place for me to go and casually launch a few small rockets. This is a sad state of affairs. If I want to go try out a new design, or if I want to show someone a quick launch (I have a coworker who is also a nanny as a second job, and I told her those kids would love rockets), or if I just need a little inspiration... When I haven't launched in a while, my building slows down, because I forget that feeling of why I'm doing this. Launching a few gets me hyped about building again... Anyway, if I just want to do a casual, non-club launch, by myself or with a few friends, I have nowhere to do it.
It's not that Boston doesn't have parks. It's that I don't want trouble.
Model rocketry is an overwhelmingly safe activity, despite the recent accident in California you may have read about. And model rocketry is legal in all but a few areas which have unfortunately banned it. I don't know for sure, but I'd bet there's nothing on the books banning model rocketry in Boston.
Despite this, I have heard of people having trouble. This guy in particular had the Boston police break up a scout launch, and it sounds like it was kind of a frightening experience!
Part of the problem is that model rocketry has a low public profile. Public familiarity with the hobby of model rocketry was probably much higher in the 1960s and 1970s, even the '80s.
From retroland.com
These days, however, despite the fact that the hobby seems to be growing, it's not as well-known a hobby outside the community of those who pursue it.
And despite the fact that rocketry is very safe,it looks really dangerous to an outsider. I've heard people say "that can't be legal!" People have mistaken model rockets for fireworks, for tiny missiles, etc. And if you're launching in a park and someone sees you and complains to the authorities, they have to respond. Not every officer can be expected to know every statute by heart, I suppose, and if something looks illegal or dangerous, they can shut you down. This is not an experience I want to have.
There is one giant park in a part of Boston I'm unfamiliar with. It's called Millennium Park, and apparently people do occasionally launch there. One local cub scout troop reportedly launches there each year. It's supposedly really big. I'll have to go check that out. Maybe I'll try to make some contacts at MIT - they do a model rocketry camp for kids in the summer. Perhaps they know of a good launch site.
7. High Power Rocketry Level 1 Certification
High power rocketry (HPR) is the big brother to model rocketry. Unlike low and mid power model rocketry, you must obtain a certification to fly, and launches must be conducted using a waiver from the Federal Aviation Administration. There are several criteria which define a rocket as "high power," but a really basic definition is a rocket which uses an H motor or higher.
A "Stretch Leviathan" by Jim Seibyl - Gheem of The Rocketry Show - lifts off
High power rocketry has three certification levels. Level 1 allows you to purchase and launch H and I motors. Level 2 will allow you to purchase and use J, K, and L motors, and a Level 3 certification will allow you to fly M motors and above, and to spend all of your money.
To obtain a high power certification, you must be a member of either the National Association of Rocketry or the Tripoli Rocketry Association. A Level 1 certification can be pretty simple if you do not try to make it complicated.
You have to build and fly a rocket on an H motor (which you may purchase if it is for the certification flight). You have to have one or more witnesses who are NAR or Tripoli certified. The flight must be successful and the rocket must be recovered. The recovered rocket must be judged to be able to fly again without major repair. In other words, minor damage, such as a chip in the paint job, will not disqualify your flight, but a broken fin will.
You can make a Level 1 certification flight more complicated by adding electronic parachute deployment, but you may keep it as simple as a very large model rocket launch.
The idea is that you must prove you are capable of building, launching and recovering a high power rocket safely, because these things are larger and heavier, so the risks are greater. Once you pass your certification flight, you may purchase and use H and I motors.
At one point, I thought I might have obtained my Level 1 by now. Then I realized I was in no hurry. Mid power rockets are quite impressive, and have a lot of the thrill of HPR with less of the cost and no certification requirements. And I haven't launched many MPR rockets yet, so I have that to look forward to still. HPR is costly, so I probably won't launch much. And yet...
And yet, there's a certain pride to be had from having a high power certification. Besides, I have the rockets and casing.
At a CMASS launch this fall, I went to our club vendor, Animal Motor Works - which sells kits and Cesaroni motors. Gloria of AMW had made turkey soup for the occasion. I'd arrived late, so I missed the famous CMASS hot dogs. I went to have some soup and introduce myself to Gloria.
Gloria's a charming lady. We chatted for a bit, and I said I might want to get some F or G motors. After a bit, she said "Why don't you have your Level 1 yet?"
I left with a belly full of soup and a Cesaroni Pro 29 Starter kit, which includes 29mm 3-grain reloadable motor casing, which can hold F, G or H motors. It would be perfect for a Level 1 cert flight. I promised Gloria I'd work on it and do my flight some time up at the large field in Berwick, Maine. What can I say? She talked me into it.
What rocket will I use for the cert flight? I haven't decided yet. Perhaps the Nike Smoke. Perhaps something else. I quite like the LOC Precision Iris, a scale model of another sounding rocket.
The Iris has a 38mm motor mount, which is more versatile than the 29mm, as there is a wide variety of 38mm diameter motors in various impulse classes. And with a motor adapter, you can use a 29mm motor in the 38mm mount.
These are my main goals for the year. I'll keep you all posted on how they're coming along - by sticking with Goal #1.
Like my Facebook page for blog updates and extra features.
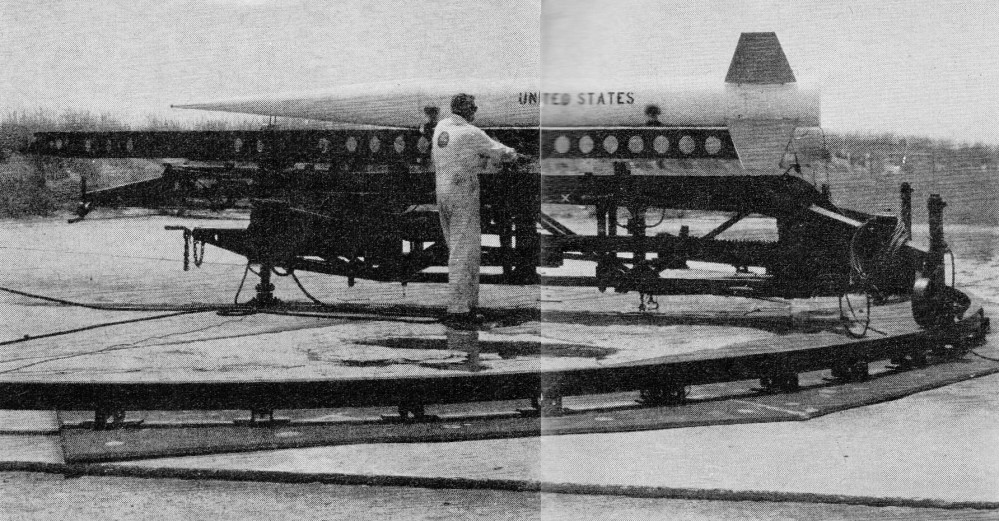
The Nike Smoke rocket was a NASA sounding rocket used during the 1960's.
A Nike Smoke being prepared for launch, 1968
A sounding rocket is one which carries instruments to conduct experiments and take measurements while in suborbital flight. It may be used for meteorological research, radiation levels in the upper atmosphere, microgravity (yes, I'm roughly paraphrasing Wikipedia here), or any number of other experimental applications.
The Nike Smoke rocket, in particular, was used to measure wind shear - the difference in speed and direction of the wind at different altitudes. This was important to space flight, as NASA rockets had to make it safely through the atmosphere on their way to space. It did this using tracking film footage which triangulated the changes of a smoke trail left by a special payload in the nose cone of the rocket. Using trigonometric functions, the cameras could tell the exact position, and direction and speed of movement of different parts of the smoke trail. (Using the same mathematics, model rocketeers can accurately track the altitude of a rocket in flight using two theodolites, as described in this Apogee Components newsletter.)
Here's a short NASA film on the subject, featuring the Nike Smoke rocket.
Because of its historical importance, as well as its iconic look but relatively simple design, it has become a favorite scale model for hobby rocketeers, and there have been several kits on the market throughout the years, as well as many scratch built versions.
High power rocketeer Neil Brown with his Nike Smoke Extreme, a "stretch" version
of the rocket, built for LDRS34 - a high power rocketry event held this July in Potter, NY.
Find his website at high-powered-rocketry.com
The Nike Smoke, like many sounding rockets, also used a solid propellant, as opposed to the liquid fuel propellants used in space vehicles, like the Saturn V rocket. Since we use only solid propellant (or sometimes hybrid fuels - but that's a more advanced topic for another time), that means that a flying replica of a Nike Smoke rocket is, in at least some ways, not too different from the real thing.
The Estes Pro Series II Nike Smoke is a great kit.
With a diameter of three inches, the rocket stands about three feet tall. The distinctive, long conical nose cone is nearly the length of the airframe itself, making this the largest nose cone that I have yet in my collection.
The rocket is pretty simple to build. But, as with Ventris, I still have some decisions to make.
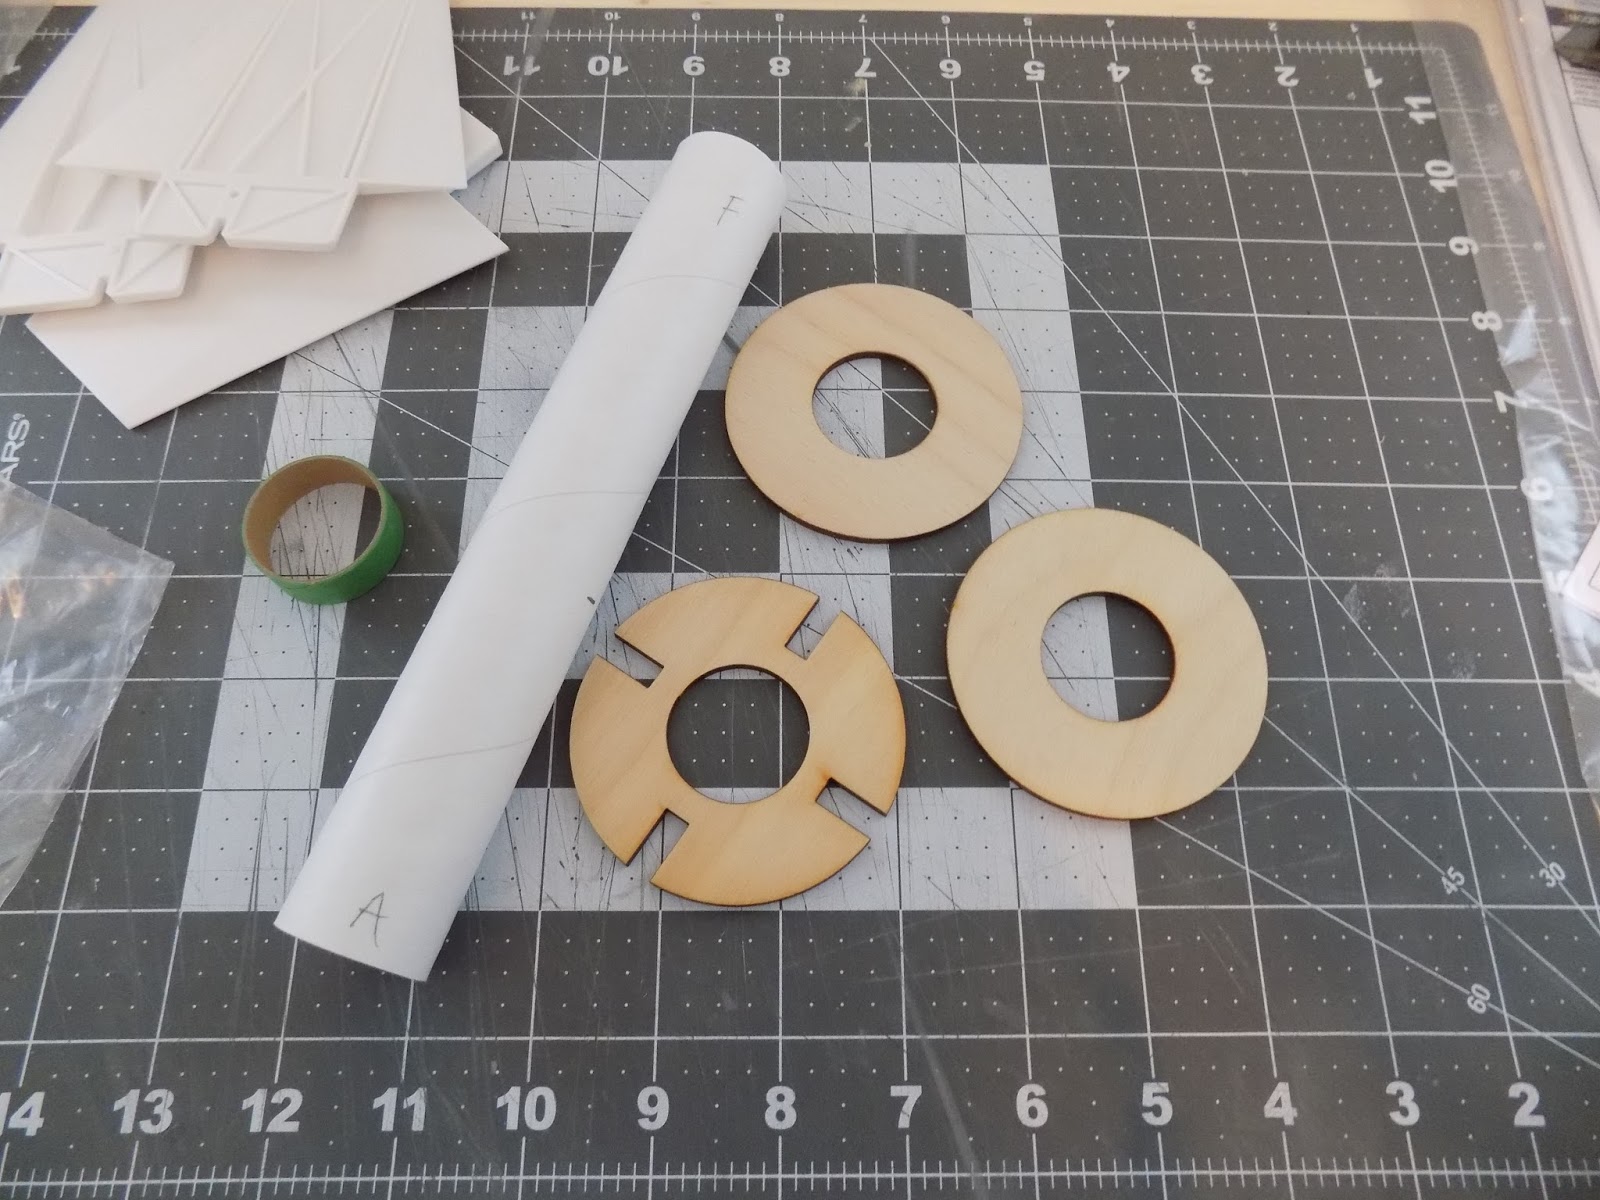
As with all Estes PSII "builder" kits, and many mid and high power rockets, the motor mount uses sturdy plywood centering rings, as opposed to the paper or cardboard rings you find with smaller model rockets. (A builder kit is one that requires a certain level of construction. Estes has several PSII rockets which are considered E2X - Easy to Assemble [or "eXecute"]. A builder kit takes more time and effort to construct. It's more of a challenge.)
In this case, the middle centering ring is special.
Parts for the Nike Smoke motor mount. The ring with the notches goes in the center.
As with all of the PSII builder kits and many other mid and high power rockets, the Estes Nike Smoke has through-the-wall fin construction, meaning the fins extend via a tab through a slot in the airframe, and attach to the motor mount. This makes the attachment much stronger than merely gluing fins on the outside, as one does with a smaller model rocket.
The ring in the center has notches. As you'll see below, this helps you get the fins perfectly aligned. The Nike Smoke shares this design element with the Pro Series II upscale version of the classic Skill Level 1 kit Der Red Max - Der Mega Red Max.
Speaking of the fins, on this kit, they're made of plastic, and come in two parts.
Two-part fins
They have a radial taper, meaning they get thinner by the same proportions they get narrower, and they are beveled at the edges. This makes them look cool and helps them slip through the atmosphere more easily.
Because they're in two parts, they must be glued together.
One fin dry fit together
Which leads me to the first decision I have to make: what to use to adhere the two parts together.
The kit instructions say to use CA - cyanoacrylate, or super glue. But they don't specify what viscosity of CA to use. The thin stuff is way too thin. So, do I use medium or thick CA - or something else? Epoxy is a possibility. CA might be too brittle. I might choose to go with epoxy, which is much stronger over time. Also, when dry fitting the fins together, you find that the edges don't come quite together. There's a bit of a gap, unless you squeeze. When you stop squeezing, the gap comes back.
So the adhesive is important. I need to choose something which will hold the fins together, won't break down, and will keep the edges from coming apart. That might prove tricky. CA will bond immediately, but might be brittle, and also might superglue my fingers to the fins. Epoxy might be stronger, but won't bond immediately, so I'll have to keep the fins squeezed together until the epoxy cures - or, at least, partly cures. And the epoxy could make a mess I won't be able to clean off if both my hands are occupied by squeezing the fins together. Like Indiana Jones in The Last Crusade, I must choose - but I must choose wisely.
I'm writing this in the present tense - "I need to choose..." etc., but in fact, I've already done this part. You'll see what I opted for.
The notched centering ring is great for getting the fins on perfectly straight. Once you get the motor mount into the rocket, the notches in the ring correspond to the notches you can see at the base of the fins.
Spoiler alert! You can see here I've already started assembling the motor mount.
The fin locks into place - perfectly aligned.
Another choice - this time an easy one - is what to use to attach the fins to the motor mount.
The kit again suggests CA, but I don't like this idea. CA can get brittle over time, and it's just not a good adhesive when you need a strong bond that might take some stress. I'll use epoxy for this.
Also, the kit suggests using wood glue for the fin fillets - which seems bizarre to me. Wood glue makes fine fillets on a small model rocket, but it shrinks, and isn't great if you want a nice, rounded fillet. Also, I feel pretty sure that wood glue would have a hard time bonding too well to the plastic. I'll use epoxy here as well.
Finally, I have to choose how I'm going to launch the rocket. As with Ventris, the Nike Smoke comes with two launch lugs.
Notice how these lugs are not simply cardboard tubes. The actual lug is raised slightly. That's because the lip of the nose cone is slightly wider than the airframe.
As with Ventris, replacing the lugs with rail buttons is something to consider, but if I do that, I'll need to make a short standoff for them.
Whether I go with launch lugs or rail buttons - and which size rail buttons - again depends on what kind of launch equipment will be available at my local club, and/or whether I can bring my own launch pad if necessary.
Luckily, I'll be able to attend a club meeting next week! CMASS - the Central Massachusetts Spacemodeling Society - has just begun holding biweekly meetings in Cambridge, just across the Charles River from my little home. Which means that, for the first time since I started this venture into rocketry, I'll be able to meet other actual human beings who are into this hobby! And I'll get the chance to ask some questions which will help me make these important build decisions.
The nice thing about these lugs, as you can see from the picture above, is that they're conformal. They are slightly curved on the bottom so that the entire underside of the lug can attach to the airframe of the rocket without leaving any gaps. Not only does this look better, but it assures a better bond, and reduces the chances of a lug pulling or snapping off at launch.
I'm excited to get this build underway!
Here's a flight of Neil Brown's above Nike Smoke Extreme before he repainted it in the traditional white, red and yellow colors:
Last week, I got a delivery from Estes. They've had sales going on practically all summer, so it's been a good way to pick up some deals.
I had hoped to buy another Leviathan, one of Estes' Pro Series II mid power rockets.
I love the way this rocket looks, and I wanted to have a backup in case I either screw up the build or lose the rocket. Unfortunately, the Leviathan looks like it is now out of production. Sad, really, I think it's a pretty popular rocket, and a solid flyer.
Also, looks like one of my favorite Skill Level 1 kits - the Cosmic Explorer - may also now be out of production.
So I picked up another Ventris - also a PSII kit - and a new rocket called the Sahara.
Estes Ventris - PSII rocket
with payload section
Estes Sahara
The Sahara - like the Scion - is another SPEV - Spare Parts Elimination Vehicle. Scion used Leviathan parts, while the Sahara uses body parts of the Argent, with the fins of the Partizon.
Estes Argent, left, and Partizon, right. Images from Jonrocket.com.
Does this mean Estes is eliminating these other PSII rockets? I'm going to guess they are phasing these out, though I hope I'm wrong about that.
Well, I received my order and did a count - I have 11 unbuilt Pro Series II rockets, plus one mostly-built Partizon, which I wasn't entirely happy with (I managed to get a fin on crooked and some saggy fin fillets).
The built but unpainted Estes Partizon - 56 inches tall!
I think I've held off on building these rockets for a couple of reasons. First, I had to stop building for a while in anticipation of my move to Boston.
But mainly, I think, I've been afraid to screw these rockets up. I like these larger rockets, and I didn't want to do a bad job of them.
Which is ridiculous! Mistakes happen, but at this point, I shouldn't be intimidated by building a rocket. Building smaller rockets is harder in many ways, anyway. A small flaw looks much bigger on a tiny rocket than on a large one, because it takes up comparatively more space.
Plus, I have doubles. So, it's time to start building. I'm going to go slowly, because I have a few decisions to make. But I've started the first steps on building the first two of my PSII rockets - the Ventris and the Nike Smoke.
The Estes Leviathan, a very popular mid power rocket, seems to have disappeared completely from he Estes website.
It was on sale, along with a lot of other rockets, all of July. The July sale has been extended, but the Leviathan is now no longer to be found on the Estes website.
This does not look good...
A few months ago, I mentioned the Estes Scion rocket, which is made up of Leviathan parts with an extended airframe. A while back on The Rocketry Forum, I heard that Estes was getting out of the mid power market. The Leviathan, a beautiful, simple rocket, is now gone. Permanently? I certainly hope not!
I tried to get one more for the build pile at the recent sale, but it was already out of stock.
Now it's time to attach the rail buttons and take care of a few final details.
If you're just tuning in, rail buttons are used instead of launch lugs on a lot of larger rockets. This rocket isn't huge, so rather than the big, 1010-sized rail buttons often used on high power rockets, I'm using the newly-developed micro buttons. With these buttons, you can use an aluminum extrusion of t-slot rail instead of a launch rod. A rail is a lot stiffer, so you can use a rail that's much longer than a rod you'd have to use, and it won't bend, or whip.
Why would you need a longer launch rod or rail? Some rockets lift off slowly. And some rockets are what is known as overstable. Without getting into it too much, I'll just tell you that when an overstable rocket lifts off slowly, it is much more prone to arching into the wind - a phenomenon known as weathercocking, and you won't get a straight flight.
All rockets do this to some extent, but an overstable rocket will do it much more so. You can end up with a rocket flying horizontally, which is undesirable, because once it runs out of propellant, it will take a nose dive at the ground. If the parachute manages to deploy before the rocket impacts, it will likely cause a jagged rip in the side of the rocket, known as a zipper.
From an Apogee Components video - Tim Van Milligan prepares to fix a zippered rocket airframe
You can minimize weathercocking by having a longer launch rod or rail. As a rocket accelerates, it "feels" less of the wind coming from the side, and more of the wind coming straight on. The faster a rocket flies, the less of a problem overstability will be. I have a number of rockets which are technically overstable, but the only one that really suffers from bad weathercocking is the Big Bertha - because it lifts off slowly. Using a longer rod or rail means that the rocket will be going faster when it leaves the launch pad, because it will have more length to accelerate.
The disadvantage of a longer launch rod is that it can sometimes suffer from wire whip. When a rod is too long for its diameter, it can whip back and forth as the rocket moves upward, and can throw a rocket off course. A launch rail won't do that.
The micro buttons are made to fit a couple of miniature t-slot extrusions currently on the market - the MakerBeam and the OpenBeam.
Micro buttons are made of nylon and come in two parts: A small, #2-sized screw, and a sleeve with a flat, washer-like bottom.
The flat part goes against the rocket. All you need to do is thread the screw all the way into the holes you've drilled and make sure the screw is tight enough so that the base is flush with the rocket. If the holes you drilled are a little small, it might be a little tight at first, but that's OK.
If you have a rail button that's a little loose, you can mix up a small amount of epoxy and use a toothpick to apply a tiny ring of it to the inside of the hole. Once the epoxy has set, you're done.
The next step might be to tie the shock cord to the nose cone. But before doing that, I'm going to add something - a parachute protector. This is a square of flame-retardant Nomex fabric, and it helps add insurance against burning holes in the chute when the ejection charge goes off.
Nomex comes in different-sized squares for use in different-diameter airframes.
The shock cord gets threaded through a button hole in one corner of the cloth.
Some people use this in place of recovery wadding, but it's really best used in addition to wadding. Nomex is not burn-proof, and it will get holes in it after a flight or two. But used in conjunction with wadding Nomex can help keep your parachute safe and burn-free.
The first step is to thread the shock cord through the button hole found in the corner of the Nomex cloth.
Many people tie this in place to keep the Nomex square from sliding all the way up and restricting the parachute shroud lines. A simple knot might work, or running the shock cord through the button hole a second time.
Next, tie the nose cone to the shock cord. When I built the Big Bertha, I used a buntline hitch. This would probably be fine, but after reading a tip on both Chris Michielssen's Model Rocket Building blog, as well as Rich's Rockets, I've been using the Uni Knot - also called the Duncan Knot. This is basically a type of noose, and it's easy to tie and pretty secure - once you've got it properly tightened.
I find that the cloth elastic of the Big Dog shock cord makes the Uni Knot easy to secure, and it looks neat. Tie the nose cone on and snip off the excess end of shock cord.
The final step to building the Big Dog - and making sure it's flight-worthy - is to check the center of gravity, often abbreviated as CG. This has to do with stability.
I haven't addressed stability much in this blog yet, but here's a really basic primer.
The center of gravity - CG - is the point on a rocket - or any object - around which the rocket will rotate in space. If you took a model rocket and flipped it end over end, it would rotate around the CG. The CG is also sometimes called the center of mass or the balance point. You can find the CG by balancing the rocket on the back of a chair or any thin object until you find the spot where the rocket balances.
Center of pressure - or CP - is the imaginary point on the rocket where all the aerodynamic forces are in balance, and it has to do with the overall surface area of the rocket. While the center of gravity can differ depending on the relative weight of various components - the nose cone, the density of the fillets, how much glue you had to use to secure the motor mount - as well as the relative position of items - how far forward the shock cord mount is glued, for example - the center of pressure doesn't change with the mass of these objects. It's all about surface area.
Without going into too much detail for now, I'll just say that the basic principle is that the Center of Gravity must be forward of the Center of Pressure, by a distance equal to at least the diameter of the airframe - the ideal caliber stability is between 1-2 times the airframe diameter. Some people find this surprising, and we'll go into this in more detail in a future post, but if you're new to rockets, for now, just trust me - this is a fact.
A simple rocket design. The CG is indicated by the blue and white dot. The CP is the red dot. Note that the
CG is forward of the CP by 1.96 times the diameter of the airframe. That's what "1.96 caliber stability" refers to.
Having a CG more than 2 times the diameter forward of the CP is overstable - and is usually acceptable. Less than 1 diameter is marginal stability, and is generally not good enough.
According to the kit instructions, we need to make sure that the CG is sufficiently forward of the CP for the Big Dog to fly in a stable manner. This is because with a larger 29mm motor mount, we could use one of any number of motors, some of which weigh a lot more than others.
So we have to find the center of gravity - that is, the true center of gravity - for the rocket as it will be on the launch pad. To do that, we have to fully prep the rocket for launch, with the parachute, wadding, and motor installed.
The best practice here is to install the heaviest motor you plan on using. The motor will shift the CG rearward.
I built the Big Dog to hold composite motors, which have thrust rings built into them. I don't have any composite motors on hand, but I do have some 29mm Estes black powder motors, which are pretty heavy - probably heavier than the composites I would use.
The Estes F15 is the heaviest motor I have on hand.
As you can see, the F15 is a simple cylinder. There's no thrust ring. How do we use this in a rocket with no internal thrust ring, and with a screw-on motor retainer, like we've built here?
We'll make a thrust ring, using masking tape. This works quite well. The NAR Model Rocket Safety Code expressly prohibits altering or tampering with a motor, but adding tape to the outside is acceptable.
First, we'll tightly wrap tape around the very aft end of the motor, until we have enough thickness to hold the motor in place. This takes a lot of tape.
This looks messy, but we're going to trim the excess.
With a hobby knife, taking care not to cut into the motor casing itself, trim off the overhanging tape.
Now we have a 1/4 inch thrust ring which is quite secure.
Insert the motor into the rocket and screw the motor retainer in place.
Next, we'll install the wadding, Nomex and parachute.
You could use paper wadding - the kind that looks like toilet paper - as you might with a smaller model rocket. But you'd have to use a ton of that stuff, and it's expensive. I don't use paper wadding on any of my rockets any more. Instead, what a lot of rocketeers use is paper cellulose insulation. This stuff is sold by the baleful at Lowe's and Home Depot, and it's really cheap - and flame retardant. It's meant to be blown into attic spaces for home insulation, but it's great for rockets. Rocketeers commonly refer to this stuff as "dog barf."
Instead of tying the parachute directly to the nose cone - which makes it hard to get untangled after a couple of flights - I always use a fishing snap swivel to hook the parachute to the nose cone. With a larger rocket like this, I decided to get heavier-duty snap swivels.
For heavier rockets, I might switch to something like a quick link, but the Big Dog is still pretty lightweight, so a sturdy snap swivel should do the trick. Thread the shroud lines through the eye of the swivel, creating little loops. Then pass the loops over the snap end and pull them tight. Then all you have to do is attach the snap to the nose cone.
Next I added the wadding. You want a layer of wadding of probably a depth equivalent to twice the diameter of the airframe. With the Nomex, you can probably get by with less, but that's a good depth to shoot for in general.
Some people fold their parachutes in the Nomex chute protector, burrito-style. This Nomex square was a little small for that. Others simply ball the Nomex up and stuff it in the tube, though some people report chute damage doing it that way. I went for a compromise. First, I stuffed the Nomex partly into the tube, flatwise.
Next, I folded the chute as I would do with any rocket. I laid the shock cord into the little pocket created by the Nomex and placed the chute into that basin as well. That way, I had Nomex surrounding the chute on all sides, with only the top exposed. Finally, I put on the nose cone.
To find the CG, you simply need to balance the rocket on something thin. The back of a chair will work just fine, or a ruler - if you can keep it steady. Whatever you use, it's important that it not move. You're going to have to balance the rocket perfectly, which takes some careful adjustment, and if the object on which you're balancing the rocket is moving at all, you may never get it.
I used the edge of a tube cutting jig I made.
Don't mind the mess - I'm building rockets here...
The positions of CG and CP are usually measured as a distance from the tip of the nose cone backwards. But the nose cone is curved, and that can be tricky to measure. To make it easier, the kit instructions say that the center of gravity should be no less than 8 inches from the rear of the airframe. My CG was just at 8 - maybe more, maybe less. To be safe, according to the instructions, I should probably add a little weight to the nose cone to shift the CG forward a little bit.
It's hard to get an accurate measurement and take a picture at the same time with one hand and a metal ruler.
In all honesty, I'm a little skeptical that the CG needs to be that far forward. The Big Dog has huge fins, and 8 inches up the airframe is pretty far forward for the CG, compared to the CG/CP proportions on other rockets I've built.
Sometimes I find it easier to switch to the metric system, and this is one of those times. The units are smaller, and divisible by ten.
So the 24 inch long airframe is 61 centimeters long, and at 1.97 inches in diameter, it's exactly 5 centimeters. If the CG has to be 8 inches from the aft of the airframe, that's 20.32 centimeters.
Look at the free simulation I downloaded from Apogee Components:
The center of pressure on this rocket is 62.5 centimeters from the tip of the nose cone. Subtract the length of the nose cone, and it's 52.66 centimeters back from the forward end of the airframe - or 8.34 centimeters from the back end. That's 3.28 inches from the read end of the vehicle, not counting the fins (remember, the kit has us measuring the CG from the aft of the airframe). To get a minimum of one caliber stability, the center of gravity must be 13.34 cm from the back end. That's 5 cm ahead of the CP. And that's about 5 and a quarter inches from the back end - not 8!
But, as I was writing that last bit, I noticed a little flaw in the sim - the nose cone. Remember, the Big Dog has a tangent ogive nose cone, but it doesn't come straight out of the body tube like that. There's a short cylindrical section which is part of the nose. OpenRocket, and perhaps RockSim as well, doesn't allow you to make a nose cone of that shape, so far as I know. But the rocket in the sim is shorter than the actual Big Dog we've built.
Just to be sure, I made an adjustment. To "fake" the shape of the actual nose cone, I took the sim and inserted a short length of body tube, and designated its material as polystyrene - the same plastic that makes up the nose cone. I used a tape measure and a bit of fiddling to get a simulation that was the accurate length - more or less - of the actual nose cone and whole rocket. I came up with this:
The short body tube section I added to simulate the base of the nose cone is red, like the nose cone itself. The actual airframe - made of a paper wound tube - is white. Now the rocket is the correct length.
With the rocket being slightly longer, the CP does shift forward a little bit. How much? It's now 67.5cm from the tip of the nose cone. That's now 8.84cm from the base of the airframe, or 3.48 inches. The CP needs to be ahead of the CG by a minimum of 1 diameter, or 5 cemtimeters - 13.84cm. That's 5.44 inches.
OK, a lot of numbers and fiddling. It's just to say that a safe margin of stability for this rocket has the center of gravity a lot further back than the instructions tell us.
But... OK, I'm still kind of a n00b at this, and if you are too, it's better safe than sorry. As we saw above, a faster-flying rocket can tolerate overstability better than a slower-flying rocket. The margin on some fast, high power rockets is well over 2 caliber stability. And overstable is better than understable - so long as the rocket is flying fast enough and you're not launching on a really windy day. So, following the instructions is (usually) a better idea than not.
Where my CG is is pretty safe - we've figured that out. But what if we're unsure? And what if we use a heavier motor, and the CG shifts backwards? How do we fix that?
The answer is to add weight to the nose cone. Adding just a little bit of weight to a nose cone will shift the center of gravity forward and make the rocket more stable. It's not always a good idea to add too much nose weight, as you can get a really overstable rocket. But if you're unsure your rocket has basic 1 caliber stability, that's what you'll do.
There are a number of ways of doing this. On a lot of model rockets, it's common to pack a bit of clay into the tip of the nose cone.
Adding nose weight to the Estes Mini Honest John using clay and a dowel
Roll the clay out into a snake
Insert the snake into the base of the nose cone
Use the dowel to stuff the clay into the tip of the nose, then ram it into place
Finished product
The Big Dog - as well as the Quad Runner - suggest something different to add nose weight - the use of a lag screw and fender washer.
From the Quest Quad Runner instructions
This turned out to be necessary with the Quad Runner. Four C motors add a lot of weight to the aft of that rocket.
The Big Dog, however, looks pretty good. To be safe, I added just the lag screw - leaving it halfway out so I could remove it if I want to.
This lag screw looks loose, but it isn't.
This shifted my center of gravity forward, so it was nicely at 9 1/2 inches from the aft of the airframe.
The only other final touch, seen above, is to add a bit of masking tape - if necessary - to the shoulder of the nose cone, so that it fits snugly but not tightly into the airframe. You should be able to turn the rocket upside down without the nose cone falling out, but you should be able to get it out by hand with very little effort. This ensures it will stay on during flight, but eject properly when the motor ejection charge goes off.
I put the nose cone on and slid it onto my rail launcher. The Big Dog is finally finished, and ready to fly.
There are a number of ways of building a micro rail launch pad, or of mounting a rail to an already-existing pad with a rod. We'll talk about that at another time, but you can easily find solutions on The Rocketry Forum or the NAR Facebook page.