Showing posts with label staging. Show all posts

Tuesday, May 2, 2017

Featured Vendor - Aerospace Specialty Products


I needed to stock up on some rocket parts for an upcoming project, and I wasn't sure where to get them. I looked around at various sites, and found pretty much everything I needed, but not necessarily all from the same vendor.

Then, I thought about checking a website I've used once or twice before, and which was great, but which I nonetheless never really thought of mentioning here on the blog.

I went to Aerospace Specialty Products - ASP, for short.

Like a lot of online vendors, ASP sells model rocket kits, parts, building supplies and materials, and recovery devices. But their specialty is scale model rocketry and competition rocketry supplies.

While ASP does sell some of Estes' scale model kits, they have their own line, many of which come in low power and mid power versions.

A good example of this is the D Region Tomahawk, a popular rocket for scale modelers, as it's both striking to look at and relatively simple.

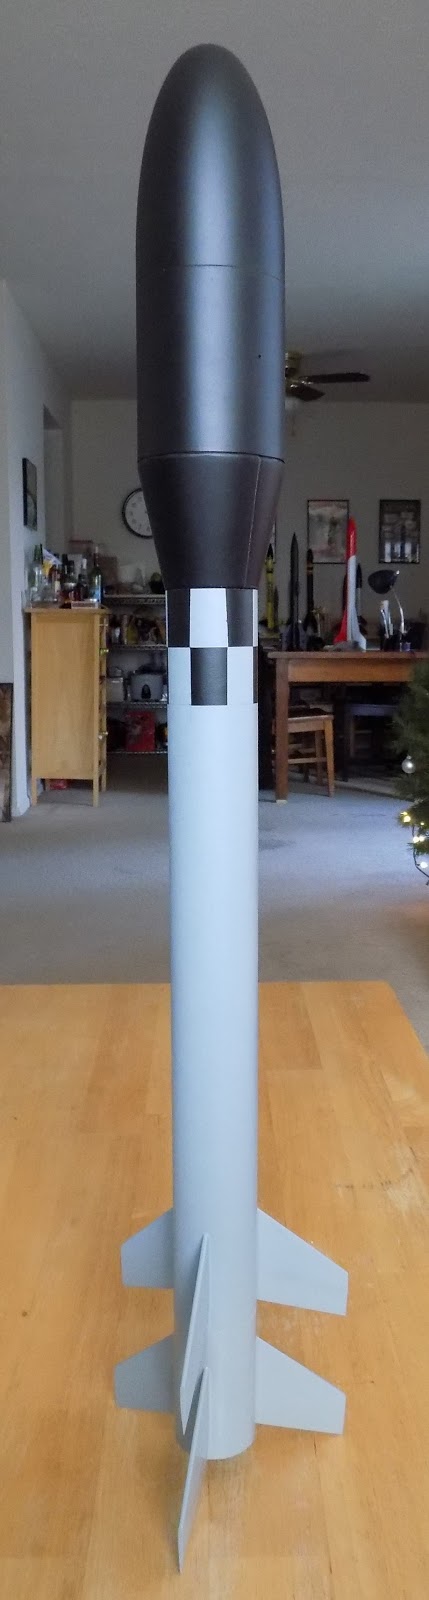
The ASP mid power D Region Tomahawk, over 42 inches tall.
 This is a kit that comes in two versions - a small one one for 13mm mini motors, such as the Estes A3-4T, and one for much larger, 29mm mid and even high power motors.

The mini version of the D Region Tomahawk, just over 11 1/2 inches tall.
A couple of nice features about ASP scale kits is that they are accurate in their proportions, but not heavy on detail. That means that a WAC Corporal or D Region Tomahawk will be shaped like the real thing, but a less experienced modeler won't have to worry about difficult to apply plastic wraps or features. More experienced modelers can add any details they want to - they'll just have to figure out how to do it, something experienced scale modelers enjoy anyway.

ASP sells a few styles of parachutes in nylon and metalized Mylar.

The nylon chutes come in standard rip-stop and "thin mil" varieties, which pack up a lot smaller for fitting into smaller rockets. They're quite colorful.


Mylar "sport chutes" are a bit harder to fold, but they have a couple of advantages. They're very lightweight, and they're so shiny they can help you find a rocket which has gone so high it's out of sight by the time it reaches apogee. The chute will glint in the sun, helping you get your eyes back on the rocket for a successful recovery.

Metalized Mylar "sport chutes" come in silver, red, and purple.
Sport chutes come with everything you need to attach them to a rocket, including a snap swivel, but they do require assembly.

Apart from that, ASP also sells a wide variety of parts, which is what I recently purchased. I needed a lot of stuff to build a small fleet of Flechette rockets for an upcoming project on the blog.


I was also low on centering rings, couplers, and other general rocket building parts. They've got a ton of great stuff, mostly for low and mid power model rocketry, but a few items you might use for high power, such as 38mm motor tubes, plywood centering rings, and even some large cluster centering rings, also made of plywood.


I also have another small payloader project I designed a while ago, and want to get started on, Cassiopeia, for which I needed a balsa transition and some sturdy centering rings.


I placed a large order, and was surprised by how affordable it was. A lot of items on ASP get cheaper if you buy a lot of them.

When you shop around online, you want to consider a number of things. Price is the obvious one, but also shipping. Some vendors will offer free shipping if you order a certain amount of stuff. Others have a flat rate, period. And some calculate the shipping based on the amount of your order, so shipping for a lot of stuff is more expensive.

ASP shipping costs a little more the more you buy, but this is offset by a couple of things - the lower price for buying in bulk I mentioned above, and the fact that the shipping is insured. If you buy things through a site like Amazon.com, whatever you order is guaranteed, meaning even if the post office crushes your package, or delivers it to the wrong address, or if the package gets stolen from your doorstep before you get home, you can get another one or get a refund. Small rocket vendors can't afford to make that guarantee, but the slightly higher cost of shipping means that you some insurance against loss should something happen in transit.

When the box came - only two days after I placed the order - I thought there was a mistake. I had ordered 165 items, but the box was very small.

But I opened it up and realized that everything had been packed with amazing efficiency and care.

I realized after I started unpacking I should have taken a photo, but I couldn't repack this as well as they did.
When you order stuff from a rocketry vendor, the first thing you want to do is unpack everything and verify that everything is there, and that there is no damage. If you do find that something is missing or damaged, don't freak out. Just send an email to the customer service department. You probably got an email confirmation from them about your order, and can reply directly to that email, especially if it's a small vendor like ASP, or JonRocket, or another.

Larger companies, like Estes, have a contact page on their website, and you can contact them through that.

Most model rocket suppliers are small, mom-and-pop operations, and often, the "customer service department" who contacted you is the owner of the company. The rocketry community is a small one, and apart from a few exceptions, you will get excellent service from them. If they make a mistake, just let them know, and they'll often bend over backwards to make it up to you. They will usually ship you a new item, or offer you a refund, or sometimes offer you a credit toward your next purchase, depending on the situation. Once, when I placed a large, many-item order with JonRocket, one or two tubes were missing. It wasn't worth it to me at the time to have them rush ship me a couple of tubes, so they gave me a merchandise credit worth several times the value of the missing items to use on my next purchase.

Here's what I got, neatly packed in layers, from ASP.

Simple payloads for BT-20 rockets.


I ordered four of these for my Flechette project. I need as many as 10 payloads. Some of them I'll make from tubes I already have, but I wanted to take a close look at these and see if I liked them. They include a 2.75 inch red paper tube, a balsa nose block, which is a solid piece acting as a bulkhead between the payload and the inside of the body tube of the rocket, plus a screw eye and snap swivel for attachment of the shock chord and parachute or streamer.

Six more balsa nose blocks or bulkheads.


The original idea was just to purchase these, and use leftover motor tubes from some Estes kits as payload sections. The motor tubes are exactly the same size and diameter as the red tubes in the simple payload kits from ASP, so these should be indistinguishable on the finished rockets.

A BT-55/BT-60 balsa transition.


This is for joining the 1.325 inch diameter airframe of Cassiopeia to the 1.637 inch diameter payload tube (see above design). This is a finely turned piece of balsa, and one of the things that strikes me is the difference between the diameters of the shoulders (the parts that go into the rocket tubes) and the diameters of the two ends of the transition itself. A lot of balsa parts I've used - nose cones and transitions alike - have a much bigger step from the outer diameter of the piece and the diameter of the shoulder. That means that the nose cone or transition is a little too wide for the body tube, so that they don't quite join up. There's a bit of a step from the nose cone or transition onto the body tube, rather than a smooth line. Ideally, for less drag, you want them to match. This transition looks like it should be pretty close, so I won't have much extra sanding to do.

It's lightweight and delicate, and I just love looking at a piece like this one. It always makes me a bit nervous handling a raw piece of turned balsa like this, because it feels so fragile. It feels like it would be so easy to accidentally gouge into it or squeeze it out of shape.

48 1/8 inch launch lugs, 1.25 inches long.


Here, I thought they had made a mistake, but I counted them, and they're all there. I really only need 10 of these for now, for the Flechette project, but they were so cheap when buying in bulk, I decided to get a ton. Now I'm not likely to run out any time soon.

A bunch of centering rings.


40 in total! Some of these will be the thrust rings or engine blocks inside Flechete, most will get used in other projects. I really like the plywood centering rings for BT-50/BT-60. I hadn't seen those before - they're pretty lightweight, but sturdier than fiberboard or card stock rings. Those will get used in something needing a bit more strength - maybe a rebuild of Ceres B.

Ceres B, my hidden camera payload rocket. A sturdy workhorse.
Quick links.


These are for attaching parachutes to mid and high power rockets. You can get them in any hardware store, but most hardware stores in Boston are expensive places with small selection, so I got a few of these through ASP.

Couplers galore!
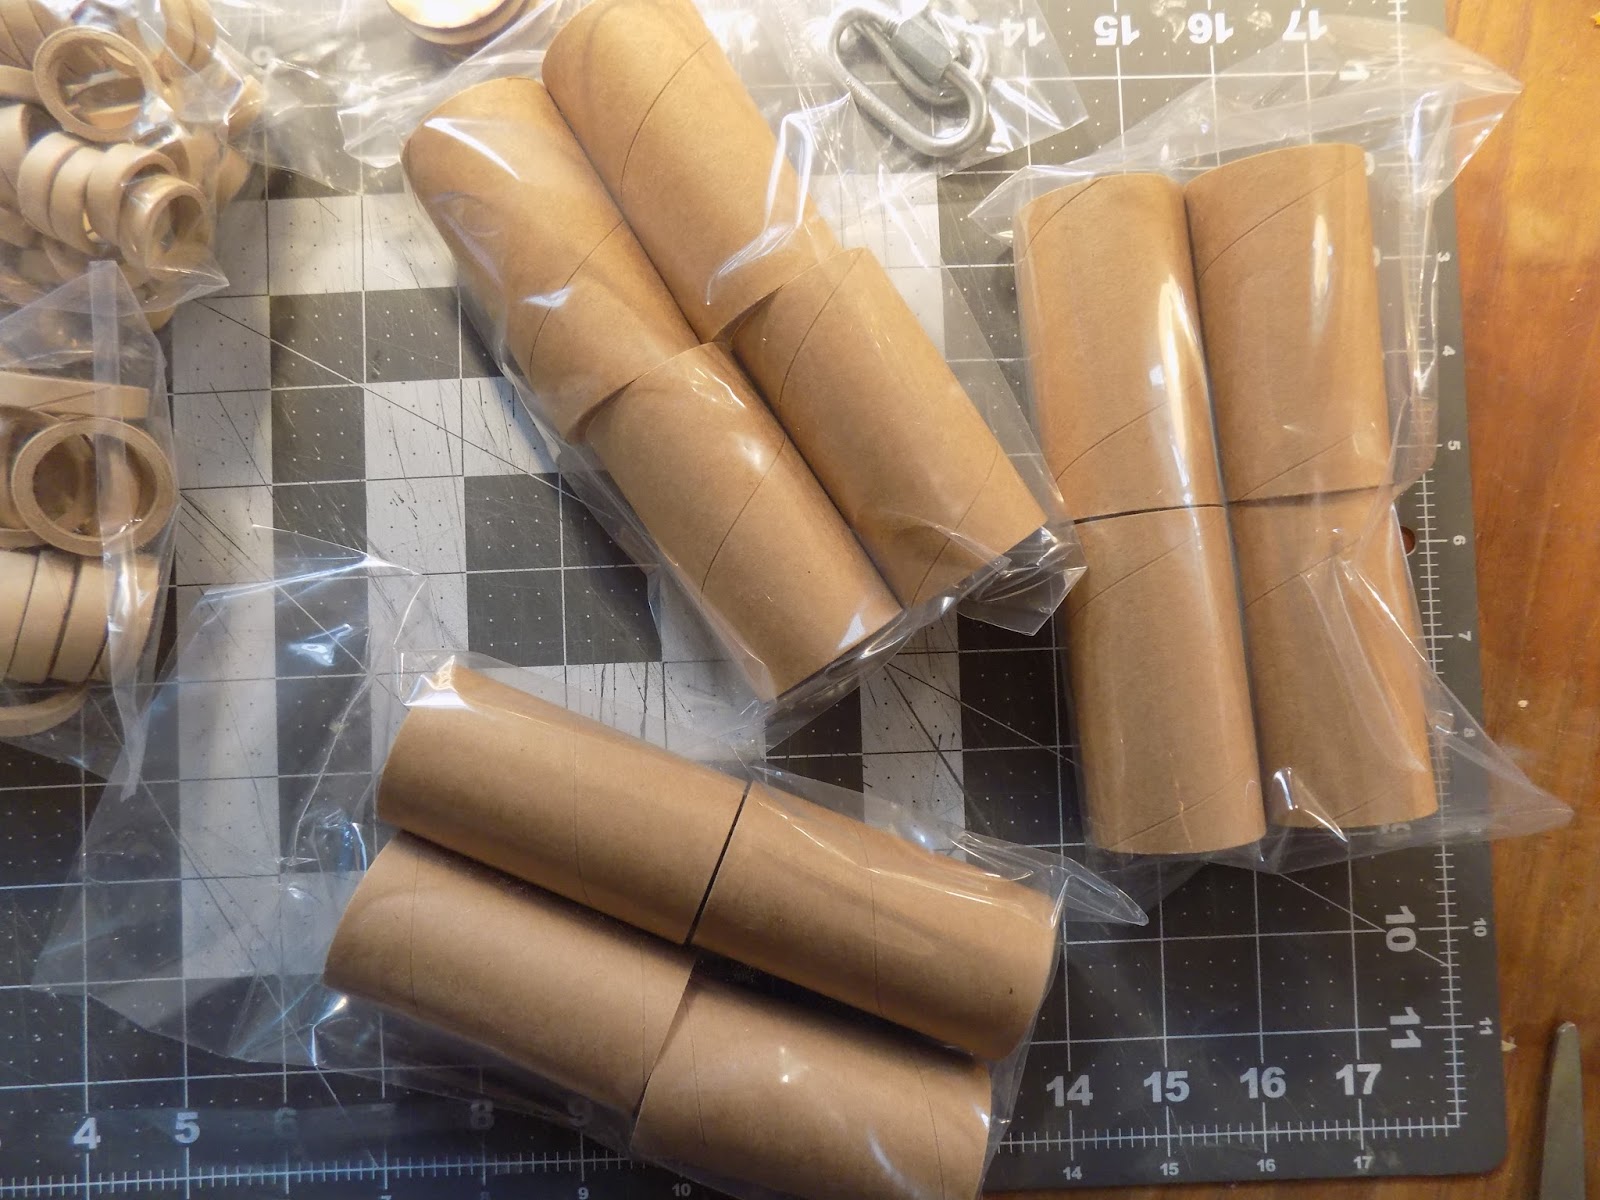

I got multiple tube couplers for all the Estes-standard tube sizes I use most frequently. Couplers are useful for a lot of things - making longer rockets by joining two or more tubes together, making booster sections for turning single-stage rockets into multi-stage rockets (the coupler gets glued into the booster and is how you join the booster to the rocket), strengthening tubes for cutting or drilling into them (slip a coupler inside where you want to cut or drill, and the tube is less likely to get crushed), even masking off parts for painting (couple a scrap of tube to the rocket you're building, and you can keep all paint out of the motor mount area - very important if you want to attach a booster later!).

I was low on couplers, and they were really cheap. Also, they packed them very well, stacking couplers inside couplers - this is why the box was so small!


165 small items, fast shipping, perfect packing, and not a single counting error - pretty darned good!


ASP will definitely be on my short list of go-to suppliers.

Aerospace Specialty Products - website www.asp-rocketry.com

Follow me on Twitter.

Like my Facebook page for blog updates and extra stuff.

Have a question you'd like to see addressed on this blog? Email me at iamtherocketn00b@gmail.com.

Sunday, April 30, 2017

Flechette and (New) Athena - Two New on the Fleet Page

I've added two new small models to my fleet. Details about the whole current and past fleet can be found here.

Flechette (Prototype)

I was digging through a box of spare parts, and found some leftover BT-20 nose cones. My last BT-20 rocket, the Estes Hi Flier (see below) was lost long ago. BT-20 is just the right diameter to hold a standard A, B or C 18mm model rocket motor, and a rocket which uses that tube as a body tube is known as minimum diameter - it's only as fat as it needs to be to accommodate the motor. Because of that, rockets of this type tend to be much lighter and have less drag, so they can indeed fly very high.

I like big rockets just as much as the next guy, but I felt inspired to use these parts, so I whipped up this design.


Flechette (French for "Dart") is a two-stage rocket that may top 2,300 feet on two C6 motors. That makes it quite a performer for less than six dollars. The finished version will carry a small payload - the Perfectflite FireFly altimeter. For an upcoming project for this blog, I need some vehicles I can build quickly and cheaply, fly repeatedly, and easily replace if they get lost or damaged, and Flechette fits the bill.

The prototype was built with leftover parts and has no payload - it's just a sport model that goes up and (presumably) comes down. I built it a day after making the design, with the intention of testing the method I came up with for coupling the booster to the main stage - or sustainer. Since it was cheap and didn't take ages to build, I'm OK with losing it, as long as it works.

I had to miss the last launch, so as of this writing, Flechette has not flown yet, but I have acquired the parts to build 6-10 of them, including the payloads. Even without a booster stage, the rocket will fly 1,500 feet and still fulfill the purposes of the upcoming project. And I like the little sucker - reminds me of a tiny sounding rocket.

Estes Athena


If you've read the My Fleet of Rockets page before, or if you scroll to the bottom, you'll see that one of the first model rockets I owned - and lost - was the Estes Athena, a simple white and blue Ready-To-Fly rocket, which flies amazingly high on C6 motors.

Before I was really bitten by the rocketry bug, I had flown a few with my friend Chad, and picked up some RTF models on deep discount at Michael's Crafts.

While I really prefer to build rockets these days, I was sad to lose the Athena. Of the various rather similar RTF Estes rockets you can buy, I guess it was a favorite. It's fun and easy - pop in a motor and launch. RTF rockets are also great for doing quick demo launches for kids and non-rocketry friends you're trying to convert to the hobby.

I won a new one after completing an online survey by the MIT Rocket Team, and picked it up when I took a tour of their rocket lab. Other winners - one from Alabama and one from Wales - received MIT Rocket Team mission patches.

Follow me on Twitter.

Like my Facebook page for blog updates and extra stuff.

Have a question you'd like to see addressed on this blog? Email me at iamtherocketn00b@gmail.com.

Wednesday, April 26, 2017

Upcoming Featured Vendor Posts and a Personal Note


A couple quick things...

* * *

For a long time, I've had in the back of my mind that I should write a "Where To Buy Rocket Stuff" post, but have never gotten around to it.

Well, there are a lot of places to get stuff. Tons of great online vendors, some brick-and-mortar chain stores which tend to carry rocketry supplies, etc. And a post like that would tend to be 1) very long, and 2) incomplete.

But I think I'll have an occasionally-recurring "Featured Vendor" series. As this blog was, at the beginning, a venue for me to share what I was learning about rocketry as I went along, so that other beginners could pick up some tips, I think as I come across good suppliers, it might be helpful for rocket n00bs if I share that information.

Of course, I love JonRocket, and have talked about them multiple times here. And I turn to them often before looking elsewhere. But every vendor has certain things they really do well, and I've tried some new places when looking for certain things lately, so I think I'm going to start giving shout outs to good suppliers.

Now, this will certainly not be comprehensive. I'll only write about vendors I've had experience with. And I'm not in the business of flaming people online, so I may only mention those I've had positive experiences with.

Actually, apart from a couple eBay sellers and iffy third-party Amazon stores, all the rocketry suppliers I've dealt with so far have been great. It's a small community, and word gets around, so you tend to get really great service.

That said, I want this blog to remain positive, so unless I have such a bad experience I feel I must report on it, I'll only talk about the sellers I've gotten good service from.

Now if you don't see a certain supplier here, it doesn't mean they're bad. Either I haven't purchased from them, or haven't gotten to writing the post, or maybe haven't even heard of them before. I'm pretty sure I had a few stores bookmarked on my old computer, and lost them when I got a new one. I'm always looking for new sources for rocket stuff - if you have a tip for me, shoot me an email!

* * *

It's been a busy winter, and Mrs. N00b and I have had a lot on our plates. Consequently, I haven't had as much time to devote to the blog as I used to. While writing this blog isn't my job, and is something I do for fun, I do feel a sense of responsibility to my regular readers. My daily page views have dropped, and it's not surprising - people only show up if you have something to offer.

If you're a longtime reader who checks back often to see if there's anything new here, well, thank you for your continued interest, and I think things will pick up this spring.

The beginners' series on stability will continue for a few more posts, and in between, I'll have other stuff. Once I'm done with stability, I plan to move on to multistage rockets, clusters (multiple motors side by side - a fun challenge), basic rocket design and building from scratch, and lots of other stuff. But I really need to get through stability before I can move on to that stuff.

I can't wait for staging, though. That's going to be a fun one.

Flechette, a small, high-flying two-stage rocket I designed and built last week
The finished prototype of Flechette. I can't wait to test this one out - and talk about it here.
Follow me on Twitter.

Like my Facebook page for blog updates and extra stuff.

Have a question you'd like to see addressed on this blog? Email me at iamtherocketn00b@gmail.com.

Thursday, October 29, 2015

Copperhead First Flight

A year ago, I did a fundraiser for the Bloomington Playwrights Project, called The Playoffs. As an incentive to donors, I offered to design and build rockets for anyone who donated in my name.

Longtime blog readers may remember a rocket I built, originally called "Keith's Rocket," then renamed the Copperhead.

It turned out really nice.

The design

The finished rocket
I liked the results so much, I'm now building one for myself.

I gave the rocket to Keith, but then moved to Boston, so I never got to see it fly... until he sent me the video.


So exciting to see one of your own designs get launched!

I designed this rocket with only about six months' experience as a rocketeer. Even if you're a rocket n00b, you can design and build your own rockets, and sometimes you come up with something really cool.

I can't wait to finish mine. I've even decided to add a booster, making it a two-stage rocket.


Like my Facebook page for blog updates, pictures of current projects, and extra stuff.

Tuesday, October 13, 2015

The Copperhead Rocket - Built from Scratch

This post is about a current project I'm working on. Pictures of current projects will mostly appear on The Rocket N00b Facebook page, so I can focus the blog more on informative stuff for beginning rocketeers. But I think this post has some information for rocket n00bs, so here it is. Check out the Facebook page for more rocket pictures, blog updates, and links to cool stuff.

A few months back, I designed and created a little model rocket as a thank-you for a donor to a fundraiser I was doing for the Bloomington Playwrights Project. It's called The Copperhead.


Once I'd built the rocket, I really loved it, but never got to see it fly. I decided to build one for myself. Last night, while working on about seven other rockets, I just started working on it.

The rocket has forward-swept fins and a small payload section. Look closely at the payload section - the fat upper part of the rocket. There are four tiny holes drilled into the side. That will allow me to use a barometric altimeter in the rocket, so that I can track how high it goes.

While the rocket looks really cool, it's always surprising to see how they come together. The parts alone don't look like much.


A few standard-sized tubes, a sheet of basswood, and a nose cone purchased online look kind of humble when you first begin building a rocket. The parts can come together quickly, though, and before you know it, you have a pretty great-looking rocket.

Much as I like the standard Copperhead, it suddenly hit me how easy it would be to put a booster stage on it, transforming it into a two-stage rocket. Here's what the design file looks like:


The first motor launches the rocket into the air. When the propellant is burned up, it ignites the motor inside the upper stage, and the booster is jettisoned and tumbles back to Earth.

Adding a stage to a rocket can boost its altitude - and its velocity - dramatically. Instead of launching the main part of the rocket - called the sustainer when it's part of a multistage rocket - from the ground, you're basically launching it from high in the air, already moving upwards. The results can be spectacular. Adding a booster to my Copperhead rocket will take its peak altitude of 740 feet up to over 1300 feet - nearly double!

If you understand the basics of rocket stability and model rocket staging, you could probably build a booster for just about any model rocket, adding altitude and speed. Imagine making that fat, heavy Big Bertha into a high-flyer! But beware, this increases the likelihood of losing the rocket! When launching a multistage rocket, you need a larger field, and may need to put less powerful motors in it.

But building a booster requires only a few extra parts, some knowledge of the staging process, and a little modification and care in building the rocket. I'll cover staging here more extensively in the future.

Here are all the parts I'll need to build this rocket with a booster stage, minus a shock cord and parachute:

The brown tube in the right is a tube coupler. I'll only need a 1-inch length of it.
The motor mounts are already installed in the main body tube and the booster body tube.
 Still looks like a pretty humble pile of parts, doesn't it?

That's one of the many cool things about rocketry. You start with some simple paper and plastic bits, and end up with an astonishing flying machine.

I like the forward-swept fins on this rocket, and with a booster in place, it will look even better.

OpenRocket allows you to create a kind of "artist's conception" of what the final rocket will look like in flight.
I can't wait to do a test flight!

Saturday, September 5, 2015

Fiddling Around

My schedule is all over the place. Sometimes I work late at night; sometimes early, early in the morning. All this back and forth has left me with less time than I'd like for rocket building or blogging. I get maybe two good building days a week, and I work slowly.

Fortunately, I have OpenRocket - free rocket design and simulation software.


As any gamer or couch potato can tell you, even if you're really tired, you can still spend hours fiddling around on your computer.

So, when I don't have the time or energy to build rockets or write about them, I play around with different designs. It's a way of staying an active rocketeer when I'm too busy to be actually building.

Once you know the basic principles of stability and rocket construction, it isn't that hard to design a basic rocket - or at least to get one started. You might need to make revisions, weigh components and change a few things, but you can come up with some cool basic designs in short order. I've even built and flown rockets that took me 20 minutes to conceive, and I only had to make minimal revisions.

Here are some designs I've been working on.

The Circe Series

I started this the other night. I wanted something simple to replace my lost Estes Hi Flier - a small, lightweight, high-flying rocket. It performs so well because it's a minimum diameter rocket - meaning it is only as big around as it needs to be to hold the motor. It has no motor mount - the body tube is the motor mount!
Circe A - a small rocket which will hold a standard 18mm diameter (A-C) motor, and go quite high
Though I am trying to build bigger and bigger rockets (and currently building two of my Estes Pro Series II rockets), I just had the urge to design this little thing.

OpenRocket has a scale function, so you can take a rocket of a particular size and scale everything up or down by the same amount. So while Circe A (pictured above) will only take a C sized motor, Circe B looks exactly the same, but is larger and will take a D or C motor. When you scale things up in OpenRocket, sometimes you have to adjust components, because, for example, the mass of the nose cone might actually end up being much greater than the part you actually have on hand. Other than that, it's pretty simple.

I went up to a BT60 sized rocket with the Circe series before going to bed. BT60 is a 1.637 inch diameter tube, and is the same size as the Big Bertha. The cool thing about the BT60 is that it's just the right size to fit a cluster of 3 standard motors.

Circe C2 - looks much the same, but has a cluster of 3 motors. You'll notice the nose cone is slightly shorter - this is due
to the size of nose cones I have on hand, which are a of slightly different ratio than the BT20 nose cones I have.
If you're an advanced rocketeer and are good at making stuff from scratch, you can make your own parts. All of them - even the body tubes. And, of course, nose cones.

I'm not to that level yet. I don't have access to a wood lathe, and I haven't picked up the skill of designing and making a custom-shaped nose cone. Fortunately, there are a lot of good parts on the market.

So what I do, for now, is look at the parts that are available - either in my parts box, or online, and design around that.

Here's a lovely balsa wood nose cone I picked up from JonRocket months ago.


This shape is a spherically blunted tangent ogive, and the nose cone fits a BT70 tube, which is about 2.2 inches in diameter. This is getting toward the higher end of body tube size you'll find for low power model rockets, and into the mid power range. If you're new to model rockets, this thing will look huge to you - there are not many BT70 kits out there!

I have realized I need to get more of these, or get some other BT70 nose cones, because over the months, I've designed a number of rockets around this very nose cone.

One of the first was called Horus.

The Horus Series

People give rockets all kinds of zany names. A quick look at an Estes catalog gives you some idea - Sizzler, Prospector, HiJinks, etc. A rocket can have any kind of name. But I guess I'm more of a classical kind of guy. I like to name my rockets after Greek, Roman, or sometimes Egyptian gods or mythological characters, or after celestial bodies. Horus is the falcon-headed Egyptian god of the sun.


Seemed like an appropriate name for a rocket.

I wanted to design my own rocket which looked vaguely like the Sirius Rocketry Eradicator - a beautiful rocket which has been on my wish list since I first saw it - but would be simpler to design and construct for a n00b.

The Eradicator, from Sirius Rocketry, available here
(Eradicator - there's an interesting one. I love this rocket, but the name reminds me of this Kids In the Hall sketch)


No offense, Sirius Rocketry - you guys are awesome!

Anyway, I love the two differentiated diameters of the airframe on the Eradicator. I designed this one:


Not too bad, I thought. But in order to get a minimum of 1 caliber stability, I needed to have 5 fins, if they were to be swept forward. I was able to decrease the number of fins to four by adding fin vanes.


This increases the surface area of the fins, moving the center of pressure aftward, without making the fin span inordinately wide.

The Eradicator has a lot of great detail - it looks like a real launch vehicle. That level of design was a bit advanced for me. That's not to say you can't add additional detail to the build, but it's tricky to add it to the OpenRocket design.

FMLV


This is a simple recent design, but one I like and am building now. It's another BT70 design with a 24mm motor mount. Like the Circe rocket, it's got swept back fins, but as you'll notice, the tips are not parallel to the rocket.
I've seen a few designs like this recently, and I like the look of it. Actually, a lot of classic kits have fins like this, but I've only just recently thought of changing the shape of the fins in OpenRocket.

You can select a few basic fin shapes in OpenRocket. I almost always opt for "trapezoidal," and then simply change the dimensions of the root chord, tip chord (chord is the distance from the leading edge to the trailing edge) and height (the distance from the airframe to the tip of the fin).

That means that most of my designs look like this:

Imperius, formerly known as the "Donor's Rocket"

See how the tips of the fins are parallel to the rocket body tube? Nothing wrong with that, of course.

But part of what gives a rocket its character is the shape of the fins. I went with a few designs that had the fins swept forward, like the Horus series above, and the Copperhead (formerly known as "Keith's Rocket").


And I like these designs. But you learn by playing with the tools you have, so I decided to try a different shape. Still simple enough to cut with a ruler and hobby knife, but a little different from what I'd made before.

FMLV stands for First Massachusetts Launch Vehicle, because it's the first scratch design rocket I'm building here in Boston. I'm using a 24mm Estes "quick release" screw-on motor retainer so that I can use my newly-acquired AeroTech 24mm reloadable casing, or an Estes black powder D or E motor.


That gives me a lot of motor options.

It will also be the first rocket I build from scratch which will have through the wall or TTW fin construction. This means that the fins have tabs at the base which will go through slots in the airframe and attach directly to the motor tube. You fins this as pretty standard in mid power and high power kits, and even some Estes low power kits, like the Cosmic Explorer.

Attaching fins to the Cosmic Explorer. In this kit, the slots are already cut for you.
Of course, in a kit, the slots are cut for you. For the FMLV, I'll have to cut my own fin slots for the first time.


BT80 Rockets

Also included in my parts box is a BT80 sized parabolic nose cone.


You may have noticed that this nose cone has a similar profile to the Big Bertha nose cone, but while the Bertha uses a BT60 body tube - 1.637 inches in diameter, the BT80 is 2.6 inches in diameter. For a beginning model rocketeer, that's really big!

Regular readers of the blog may also recognize this nose cone as part of the ICU2 camera payload bay from Make: Rockets: Down-to-Earth Rocket Science by Mike Westerfield, which I used in the design of the Janus II two-stage rocket.

Since I had another one, I played around a little with a few designs.

A really large rocket, called Titus, after my girlfriend's nephew.

Meh... This kid needs to have a cooler looking rocket named after him.

Also played around with a large two-stage rocket.

Could be fun, especially with the two large 24mm diameter motors. But still a little inelegant. It was probably late at night when I did this one.

I might make a larger, not-quite-proportional version of the Copperhead rocket pictured above.

A larger Copperhead design with the BT80 nose cone, and a 29mm motor mount, for E, F or G motors
Of course, the Janus II with its payload bay was lost on first flight, so I may just rebuild that...

Finally, a design I nearly forgot about. This must have been months ago.

Arrowhead

I had this idea when building both Sounder I, a tiny minimum diameter rocket I lost on its first flight, and the Ceres B booster, again from Mike Westerfield's book.

I stacked one on top of the other with a balsa transition I had in the parts box.

 
It reminded me of some of these:


This looks like a two-stage sounding rocket, but it's really just one stage. Not that you couldn't do a two-stager here, but it would require some electronics I haven't worked with just yet.

I haven't discussed staging on the blog yet, but in brief, most model rockets with multiple stages rely on the first motor igniting the second. The first motor has no delay grain or ejection charge, or even clay cap.


From Apogee Components
The propellant is exposed at the forward end of the motor, so when it burns up, hot particles shoot forward into the nozzle of the second motor, igniting the second stage propellant.

An illustration of model rocket motor staging
from the Estes Model Rocketry Technical Manual
Many multi-stage rockets have the motors touching each other. This is known as contact staging. There can be a gap between them, in what is known as gap staging, but the gap can only be so wide - 12 inches is probably the maximum.

This rocket is longer than that, and the two parts are separated by a solid balsa transition, so there would be no way for the hot propellant particles to reach the top portion. You can make hollow paper transitions, but I'm not very good at that yet, and balsa transitions of all sizes are available online.

Again, for a beginning designer, working around available components is the easiest way to get started.

High power rocketeers do multi-stage rockets using altimeters, or sometimes timers, to electronically ignite upper stages in the air. This is known as an air start.

Still, even as a one-stager, I like it.

Like my Facebook page for blog updates.