Showing posts with label motors. Show all posts
Tuesday, January 17, 2017
Quest Composite Motors Teaser!
AeroTech sent us (@TheRocketryShow) a cool tweet - video of a static test of the new Quest Aerospace APCP composite model rocket motors!
Click here to see it.
It's really true!!
Follow me on Twitter.
Like my Facebook page for blog updates and extra stuff.
Have a question you'd like to see addressed on this blog? Email me at iamtherocketn00b@gmail.com.
Sunday, January 18, 2015
Rocket Motor Basics - And Not So Basics (For N00bs)
I've been meaning, for some time, to write an introduction to motor basics for any rocket n00bs who check out this blog, but I've been putting it off. Well, I'm glad I did, because I've learned something new which will affect some of the information in this post.
That said, here are the basic basics of rocket motors for beginners.
Your basic model rocket motor has a solid propellant made of black powder, a combustible material invented in China in about the 9th century C.E., and was used for fireworks and military weapons.
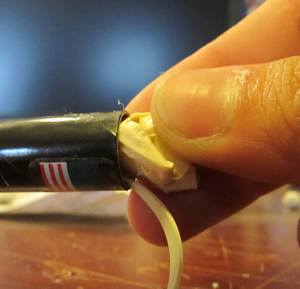
In a model rocket motor, the black powder is formed into a solid and pressed into a thick paper casing. At one end, you see a clay or "ceramic" nozzle - a plug with a little hole in it. At the other, you see a clay cap.
If you read my posts on launching your first rocket, you know that the motor (or "engine" as Estes calls it) is inserted in the base of the rocket with the nozzle pointing out the back. An igniter is inserted into the nozzle and held in place with a plug or some tape, and then you hook up your launch controller and shoot the thing into the sky.
But there are many sizes of rocket motors, and many levels of power.
Newton's Third Law of Motion states that for every action, there must be an equal and opposite reaction. The First Law states that an object at rest will stay at rest, and an object in motion will stay in motion, unless acted upon by an external force.
When the black powder motor is ignited, it combusts (it does not explode!), creating an expanding mass of gas inside the motor, which presses on the walls of the motor. Now, if the motor were a sealed chamber, the pressure would be equal on all sides, and with enough pressure, the motor would explode! But remember, you have a hole - a nozzle - in the rear of the motor. As the expanding gas presses on the interior of the motor, it presses against the forward wall of the motor, and the forward wall presses back. Because the pressure at the nozzle end is lower than at the forward end, the pressure is unbalanced. So the gas escapes out the rear nozzle, and the rocket motor flies forward - carrying the rocket with it!
A lot of sources say that the exhaust shooting out the back of the motor are what propel the rocket forward. This isn't exactly true. It's not the simple act of the rocket exhaust flying backwards which makes the rocket go forward. The reason the rocket goes upward is that the gas inside the motor is pushing forward on it, and the gas flies out the nozzle because the rocket is pushing backward on it. Consider two people on skates, standing together. If one skates off in one direction, the other one will stay put. It's if they push on each other that they go off in opposite directions. This is action and reaction - both skaters are acting, and both are reacting. You could consider one skater the rocket, and the other skater the expanding exhaust gas.
A typical black powder motor has three grains, or charges in it.
The first, of course, is the propellant grain. This makes up most of the mass inside the motor, and as it burns, it creates thrust, propelling the rocket upward. This phase of rocket flight is known as powered flight.
Once the propellant has burned out, the rocket continues coasting very far upward, and this is called the coasting phase of flight. At this time, the second grain, the delay grain or delay charge burns. It's a slow-burning chunk of black powder, which produces almost no thrust at all - certainly not enough to propel the rocket upward. While it creates no appreciable thrust, the delay grain does create a lot of smoke. This helps you to see the rocket (which can go very high and be hard to spot after a couple of seconds - especially a small rocket), so this phase is also sometimes called the tracking phase.
The delay grain burns for several seconds, and when it's done, it ignites the ejection charge. This is a bit of loose black powder contained in the top of the motor just under the clay cap. The ejection charge creates a tiny explosion inside the body of the rocket. This is what causes the nose cone and parachute to eject - the charge creates increased air pressure inside the rocket so that the nose pops off.
The parachute opens, the rocket floats gracefully to Earth, and you get to launch the rocket all over again with a new motor. You just remove the used one, pop a new one in, and do it all over again.
After the motor's thrust cuts out, the rocket will continue to coast upward for quite a ways. In fact, in most rockets, the coasting phase is much longer and gains much more altitude than the powered phase. Just think about throwing a ball straight up in the air - while it's in your hand, that's powered flight. But the ball doesn't stop when it leaves your hand - you can throw it much higher than your head.
You want the parachute to deploy at or near apogee, the highest point in the rocket's flight. At that point, the rocket will have slowed down due to gravity and aerodynamic drag. It will begin to arc over and start falling straight downward.
It's important for the recovery system to deploy when the rocket is going its slowest for two reasons. First, you want to get as much altitude out of a flight as possible. If the chute opens before the rocket is done coasting upward, the rocket will stop ascending and begin to descend, robbing you of altitude.
Second, and perhaps more important, is that if the rocket is going too fast when the chute deploys, the force of the shock cord against the end of the body tube can damage the rocket. It can cause a kink in the tube, or worse - a zipper. A zipper is when the cord rips straight down through the body tube, causing a jagged tear.
I've never had a zipper, but I have had the beginnings of one - on my first scratch built rocket, Janus I.
A rocket motor with a 0 at the end - such as C6-0 - has no delay charge and no ejection charge. There's no clay cap on the end. These are only for the lower booster stages of multistage rockets. When the propellant charge burns through to the top, flaming propellant shoots forward into the nozzle of another motor in the upper stages.
If you were to put a -0 motor into a single-stage rocket, the airframe would pressurize as soon as the propellant burned through, and you could get some severe damage to the rocket. So, save those motors for multistage use.
We'll talk about staging at another time.
Like my Facebook page for blog updates.
That said, here are the basic basics of rocket motors for beginners.
Your basic model rocket motor has a solid propellant made of black powder, a combustible material invented in China in about the 9th century C.E., and was used for fireworks and military weapons.
![]() |
An early Chinese rocket |
The nozzle end |
The clay cap |
But there are many sizes of rocket motors, and many levels of power.
Here's How They Work
Newton's Third Law of Motion states that for every action, there must be an equal and opposite reaction. The First Law states that an object at rest will stay at rest, and an object in motion will stay in motion, unless acted upon by an external force.
When the black powder motor is ignited, it combusts (it does not explode!), creating an expanding mass of gas inside the motor, which presses on the walls of the motor. Now, if the motor were a sealed chamber, the pressure would be equal on all sides, and with enough pressure, the motor would explode! But remember, you have a hole - a nozzle - in the rear of the motor. As the expanding gas presses on the interior of the motor, it presses against the forward wall of the motor, and the forward wall presses back. Because the pressure at the nozzle end is lower than at the forward end, the pressure is unbalanced. So the gas escapes out the rear nozzle, and the rocket motor flies forward - carrying the rocket with it!
![]() |
All rocket motors and engines work this way. |
A lot of sources say that the exhaust shooting out the back of the motor are what propel the rocket forward. This isn't exactly true. It's not the simple act of the rocket exhaust flying backwards which makes the rocket go forward. The reason the rocket goes upward is that the gas inside the motor is pushing forward on it, and the gas flies out the nozzle because the rocket is pushing backward on it. Consider two people on skates, standing together. If one skates off in one direction, the other one will stay put. It's if they push on each other that they go off in opposite directions. This is action and reaction - both skaters are acting, and both are reacting. You could consider one skater the rocket, and the other skater the expanding exhaust gas.
![]() |
"Skaters showing newtons third law" by Benjamin Crowell |
![]() |
From the 2015 Estes Catalog |
The first, of course, is the propellant grain. This makes up most of the mass inside the motor, and as it burns, it creates thrust, propelling the rocket upward. This phase of rocket flight is known as powered flight.
Once the propellant has burned out, the rocket continues coasting very far upward, and this is called the coasting phase of flight. At this time, the second grain, the delay grain or delay charge burns. It's a slow-burning chunk of black powder, which produces almost no thrust at all - certainly not enough to propel the rocket upward. While it creates no appreciable thrust, the delay grain does create a lot of smoke. This helps you to see the rocket (which can go very high and be hard to spot after a couple of seconds - especially a small rocket), so this phase is also sometimes called the tracking phase.
The delay grain burns for several seconds, and when it's done, it ignites the ejection charge. This is a bit of loose black powder contained in the top of the motor just under the clay cap. The ejection charge creates a tiny explosion inside the body of the rocket. This is what causes the nose cone and parachute to eject - the charge creates increased air pressure inside the rocket so that the nose pops off.
The parachute opens, the rocket floats gracefully to Earth, and you get to launch the rocket all over again with a new motor. You just remove the used one, pop a new one in, and do it all over again.
Why Do You Need the Delay Grain?
After the motor's thrust cuts out, the rocket will continue to coast upward for quite a ways. In fact, in most rockets, the coasting phase is much longer and gains much more altitude than the powered phase. Just think about throwing a ball straight up in the air - while it's in your hand, that's powered flight. But the ball doesn't stop when it leaves your hand - you can throw it much higher than your head.
![]() |
An image from JollyLogic.com, a manufacturer of model rocket altimeters. You can see from the illustration just how high a rocket can travel during the coasting phase alone. |
It's important for the recovery system to deploy when the rocket is going its slowest for two reasons. First, you want to get as much altitude out of a flight as possible. If the chute opens before the rocket is done coasting upward, the rocket will stop ascending and begin to descend, robbing you of altitude.
Second, and perhaps more important, is that if the rocket is going too fast when the chute deploys, the force of the shock cord against the end of the body tube can damage the rocket. It can cause a kink in the tube, or worse - a zipper. A zipper is when the cord rips straight down through the body tube, causing a jagged tear.
I've never had a zipper, but I have had the beginnings of one - on my first scratch built rocket, Janus I.
Motor "Designations"
If you get a kit, you'll see listed on the packaging a number of appropriate motors for that rocket. You'll probably see a list like A8-3, B4-4, B6-4 C6-3, C6-5. What does that mean?
Well, this next part is going to get a little technical and a little long. But it's fascinating, and I'd encourage you to read it, but if you're a n00b and your eyes begin to glaze over, just think of it this way:
- Each letter is twice as powerful as the previous letter (and four times as powerful as two letters back)
- The first number is supposed to be the average thrust of the motor (but really isn't)
- The second number is how long the delay lasts, in seconds
Rocket thrust is measured in newtons. A newton is a measure of force roughly equivalent to 0.10197 kilogram, or 0.2248 pound. Put another way, one pound of force is equal to about 4.448 newtons.
Rocket motors are designated with a letter indicating their approximate total impulse, measured in newton-seconds, which could* be stated "newtons per second." This will tell you how much total force the motor will exert on the rocket, which will affect how high and how fast the rocket will fly.
The total impulse is technically everything below the thrust curve. A thrust curve is a graphic illustration of the mathematical data describing the motor's performance.
But a good approximation is to think of total impulse as the average thrust of the motor multiplied by the total burn time of the propellant - the total time the motor is burning and producing thrust. There is a little data in the thrust curve that this calculation won't account for, but it will give us a pretty good approximation, and it's easier to understand.
Let's look at the motor data for the AeroTech F20:
The total impulse (in red) of this motor is 51.8 newton-seconds. The average thrust (in green) is 20.8 newtons. The burn time (in blue) for the motor is 2.5 seconds. If you multiply those, you get a total impulse of 52 newton-seconds - pretty close to the actual total impulse.
Furthermore, if you divide the total impulse by the burn time, you get approximately the average thrust:
*Remember when I said "newton-seconds could be stated as newtons per second?" Well, the reason that's not exactly correct is obvious if you look at the actual thrust curve - it's not even. It's curved. The motor's thrust peaks early, then tapers off. But it does mean that you get about so many newtons over the course of so many seconds, and that's what is meant by "newton-seconds."
The total impulse is technically everything below the thrust curve. A thrust curve is a graphic illustration of the mathematical data describing the motor's performance.
![]() |
A thrust curve for an AeroTech F20 composite motor. Image from ThrustCurve.org. |
Let's look at the motor data for the AeroTech F20:
The total impulse (in red) of this motor is 51.8 newton-seconds. The average thrust (in green) is 20.8 newtons. The burn time (in blue) for the motor is 2.5 seconds. If you multiply those, you get a total impulse of 52 newton-seconds - pretty close to the actual total impulse.
Furthermore, if you divide the total impulse by the burn time, you get approximately the average thrust:
51.8 ÷ 2.5 = 20.72 (approximate average thrust)
*Remember when I said "newton-seconds could be stated as newtons per second?" Well, the reason that's not exactly correct is obvious if you look at the actual thrust curve - it's not even. It's curved. The motor's thrust peaks early, then tapers off. But it does mean that you get about so many newtons over the course of so many seconds, and that's what is meant by "newton-seconds."
The Letter
The classification starts with A (it can go down to 1/2 A and 1/4 A, but let's keep this as simple as we can) and goes up from there.
Each successive letter class has a total impulse of up to twice that of the previous letter.
An A motor has a total impulse of up to 2.5 newton-seconds (or n-s). A B has up to 5 n-s total impulse. A C goes up to 10 n-s, and a D up to 20 n-s. So the quick and dirty way of explaining it is that if you go up a letter class, you get up to twice the power as before.
That's not all - if you have a cluster of two motors, or a multistage rocket, those motors add up - so a cluster of two B motors equal approximately 1 C motor. A multistage rocket with 2 C motors has the total impulse of a D motor.
Model rockets (those not considered "high power" rockets, and therefore not restricted by the Federal Aviation Administration or the National Association of Rocketry) go up to G class (160 n-s of total impulse). Most F and G motors use composite propellant, which we'll discuss once I've had more experience with it.
64 A motors = 32 B = 16 C = 8 D = 4 E = 2 F = 1 G...
Model rockets (those not considered "high power" rockets, and therefore not restricted by the Federal Aviation Administration or the National Association of Rocketry) go up to G class (160 n-s of total impulse). Most F and G motors use composite propellant, which we'll discuss once I've had more experience with it.
So, if you get yourself a pack of C6-5 motors, those motors will have a total impulse of up to 10 n-s.
We'll come back to this point in a bit.
The First Number
OK, this is where it gets tricky, and where the books get it wrong. Stick with me - we'll get through this.
According to the rocketry literature, the letter indicates total impulse, the first number indicates average thrust of the motor, and the second number indicates the delay time. So, a C6-5 motor has a total impulse of 10 newton-seconds, an average thrust of 6 newtons, and a five second delay. Even Estes literature states this.
That's so simple! But it isn't true.
First of all, above I wrote that a C motor has up to 10 n-s of total impulse. It could have anything from 5.01 n-s all the way up to 10. Most of the lower power motors are close to the top of the scale, but probably none of them are right there. This is fine - when you learn about the letter designation of motors, you learn that there is a scale - and when you get up to higher impulse motors - say, E or F and beyond - there's a lot of variation. High power rocketeers talk of flying with a "middle H" or "low K" motor. With a bigger scale comes bigger variation.
So, the problem isn't with the letter. It's that first number.
Fortunately, we have a resource - ThrustCurve.org, created by master rocketeer John Coker. This website has thrust curve analyses of hundreds of motors - even the little black powder motors we as rocket n00bs use most.
If you look up the Estes C6 motor (the delay isn't counted in the thrust curve), you'll see that it has 8.8 n-s of total impulse. Not bad - pretty close to 10.
But if you look at the average thrust - that's where things go off the map. An Estes C6 motor has an average thrust of only 4.7 newtons - not close enough to 6 to say "about six."
Now look at the info on the Quest C6 - 8.8 n-s of total impulse, but an average thrust of only 3.5 newtons! That's just over 50% of what you'd expect!
Because of this, a rocket with an Estes C6 will perform quite differently than with a Quest C6.
When I first learned of all this, I found it a little frustrating, because the "official" meaning of the motor designation is so simple - 6 newtons of thrust. But the motors are in fact all over the map on this, making me wonder what the point of the first number even is.
Look around at other motors on ThrustCurve.org - AeroTech, Cesaroni (CTI), all the other composites. The first number is in fact much closer to the actual average thrust, but none are exactly there. Once you get up into double and triple digits, the margin of error is minor, so I suppose it doesn't matter much. But why doesn't The Handbook address this issue? Why don't Estes and Quest simply use a number which is more reflective of the actual performance of the motor? I have yet to find an answer to these questions. Motor designations seem to be partly informative, and partly a matter of convention.
As John Coker wrote on a thread I posted on The Rocketry Forum, "A motor name like 'C6' is just that; the name." Which makes me wonder why they bother using a number at all, if it doesn't mean anything? Why not CRobert-5? BMelissa-4 and BJames-4?
Now, there is one thing I'd consider to be an advantage to this. If the motor designations were straightforward, then a C6 motor would burn for about 1.666 seconds. In fact, an Estes C6 burns for 1.9 seconds, and a Quest for 2.5. That might seem like not much of a difference, when you're talking fractions of seconds, but powered flight is so quick that you do really notice a longer burn time. And powered flight is my favorite part of a launch. So, as long as the motor is strong enough to get the rocket off the pad safely, a longer flight with lower average thrust might actually be more fun to watch.
Why the discrepancy? I don't know. I think a lot of the higher power motors - your AeroTechs, your Cesaronis - are closer in average thrust to that second number. And perhaps earlier Estes and Quest motors were closer to it, and the motor designation is a holdover from an earlier time.
I want to be clear - I don't mean to disparage Estes or Quest here. I own a lot of Estes rockets and motors, and Quest rockets. And I love them, and will buy more. They work.
It's just that, if you read The Handbook and other sources, you're told that the motor designation means something very specific, but it's not the whole story.
OK, moving on...
According to the rocketry literature, the letter indicates total impulse, the first number indicates average thrust of the motor, and the second number indicates the delay time. So, a C6-5 motor has a total impulse of 10 newton-seconds, an average thrust of 6 newtons, and a five second delay. Even Estes literature states this.
![]() |
From the 2015 Estes Catalog. Note that the first number in the code is supposed to be the average thrust of the motor. But hold on a sec... |
That's so simple! But it isn't true.
First of all, above I wrote that a C motor has up to 10 n-s of total impulse. It could have anything from 5.01 n-s all the way up to 10. Most of the lower power motors are close to the top of the scale, but probably none of them are right there. This is fine - when you learn about the letter designation of motors, you learn that there is a scale - and when you get up to higher impulse motors - say, E or F and beyond - there's a lot of variation. High power rocketeers talk of flying with a "middle H" or "low K" motor. With a bigger scale comes bigger variation.
![]() |
From the 2015 Estes Catalog. OK, this says that a C6 motor has a total impulse of 10 n-s. A bit off the mark, but it's pretty close, as we'll see below. The first number, however, that's different. |
So, the problem isn't with the letter. It's that first number.
Fortunately, we have a resource - ThrustCurve.org, created by master rocketeer John Coker. This website has thrust curve analyses of hundreds of motors - even the little black powder motors we as rocket n00bs use most.
If you look up the Estes C6 motor (the delay isn't counted in the thrust curve), you'll see that it has 8.8 n-s of total impulse. Not bad - pretty close to 10.
But if you look at the average thrust - that's where things go off the map. An Estes C6 motor has an average thrust of only 4.7 newtons - not close enough to 6 to say "about six."
![]() |
4.7 does not equal 6. That's just basic math. |
Now look at the info on the Quest C6 - 8.8 n-s of total impulse, but an average thrust of only 3.5 newtons! That's just over 50% of what you'd expect!
Because of this, a rocket with an Estes C6 will perform quite differently than with a Quest C6.
![]() |
Thrust curves for the Estes and Quest C6 motors, respectively. Even a cursory glance at these shows they're quite different. |
Look around at other motors on ThrustCurve.org - AeroTech, Cesaroni (CTI), all the other composites. The first number is in fact much closer to the actual average thrust, but none are exactly there. Once you get up into double and triple digits, the margin of error is minor, so I suppose it doesn't matter much. But why doesn't The Handbook address this issue? Why don't Estes and Quest simply use a number which is more reflective of the actual performance of the motor? I have yet to find an answer to these questions. Motor designations seem to be partly informative, and partly a matter of convention.
As John Coker wrote on a thread I posted on The Rocketry Forum, "A motor name like 'C6' is just that; the name." Which makes me wonder why they bother using a number at all, if it doesn't mean anything? Why not CRobert-5? BMelissa-4 and BJames-4?
Now, there is one thing I'd consider to be an advantage to this. If the motor designations were straightforward, then a C6 motor would burn for about 1.666 seconds. In fact, an Estes C6 burns for 1.9 seconds, and a Quest for 2.5. That might seem like not much of a difference, when you're talking fractions of seconds, but powered flight is so quick that you do really notice a longer burn time. And powered flight is my favorite part of a launch. So, as long as the motor is strong enough to get the rocket off the pad safely, a longer flight with lower average thrust might actually be more fun to watch.
Why the discrepancy? I don't know. I think a lot of the higher power motors - your AeroTechs, your Cesaronis - are closer in average thrust to that second number. And perhaps earlier Estes and Quest motors were closer to it, and the motor designation is a holdover from an earlier time.
I want to be clear - I don't mean to disparage Estes or Quest here. I own a lot of Estes rockets and motors, and Quest rockets. And I love them, and will buy more. They work.
It's just that, if you read The Handbook and other sources, you're told that the motor designation means something very specific, but it's not the whole story.
OK, moving on...
The Second Number
I alluded to this above, but here it is. The second number (B4-4, C6-5) is the delay time, measured in seconds. This number is more or less accurate - it will vary slightly from motor to motor due to slight irregularities in the black powder mixture, but it's pretty close.
Most BP motors are sold with a number of delay times, and you want to select the ideal one for your rocket. Some rockets need a longer delay time than others, because once powered flight is over, they will coast further and for a longer period before reaching apogee and arcing over.
I fly most of my rockets on a C6-5 motor most of the time, and this works great for most of them. The Big Bertha, on the other hand, is heavier and experiences much more drag than others, so it arcs over quite soon after the propellant burns out. When I put a C6-5 in it, it starts to dive toward the ground before the parachute deploys - it can make you really nervous when that happens. So I've switched over to C6-3 motors for the Bertha. The motor performance is the same as a C6-5, but the parachute deploys closer to apogee.
The Quadrunner, on the other hand, will coast quite far after powered flight - those four C6 motors put a lot of thrust on that rocket! With too short a delay, as we've seen above, the rocket could be damaged - and I put a lot of work into that one, as you may have read in a previous post. With that rocket, I use four C6-7 motors - a nice, 7-second delay. That means the rocket will fly for about 9 full seconds before the parachute deploys - a nice, long ascent!
If you go with a kit, the proper motors with the proper delay times will be listed. If you need to pick one yourself, a rocket simulator such as OpenRocket or RockSim will help you.
![]() |
In my OpenRocket simulation, you can see the recovery device (parachute) deploys right at apogee - perfect! |
![]() |
In the simulation I have an E9-6 (6-second delay) in the upper stage. The Optimum Delay for this flight is 6.12 seconds - that's pretty close to perfect for this rocket! |
What If the Second Number Is Zero?
A rocket motor with a 0 at the end - such as C6-0 - has no delay charge and no ejection charge. There's no clay cap on the end. These are only for the lower booster stages of multistage rockets. When the propellant charge burns through to the top, flaming propellant shoots forward into the nozzle of another motor in the upper stages.
On the left, a C6-0 motor. There's no delay charge and no clay cap, so you can see the black powder propellant inside. On the right is a C6-5 motor, showing the clay cap end. |
We'll talk about staging at another time.
Why Do I Need To Know All This??
Well, if you just by Estes kits and buy the motors recommended on the package, maybe you don't. But it's interesting. Learning new stuff is one of the fun parts of rocketry. And if you want to go further, it pays to know more.
If you get a kit from another vendor, or a more advanced kit - like a mid or high power rocket - or if you decide to design your own, you should know more about motors, because you may have to decide for yourself what motors to put into your rocket.
Looking at thrust curves will also show you what the peak thrust is, and when it happens. Peak thrust is that spike in the curve, and it's much stronger than the rest of the motor's thrust. This is often important for knowing if your rocket will be going fast enough when it leaves the launch pad to fly straight and true.
There are a few ways of determining what motors are appropriate for your rocket. One is to use a rocket simulator, such as OpenRocket or RockSim, and try running simulations with many different motors. Or you can go to ThrustCurve and input information about your rocket, such as diameter, weight, and motor mount size, and ThrustCurve will give you a list of motors that will probably work for your rocket.
Knowledge is power. Many newton-seconds of power.
Note: I really enjoyed writing this post, and it took me quite a long time. It helped me realize just how much I've learned since I started. And it made me brush up on my basic physics.
If any advanced rocketeers read this and notice I've left something out or made a huge mistake, please send me an email so I can edit the post and correct my mistakes!
Like my Facebook page for blog updates.
Saturday, December 13, 2014
Launching Your First Rocket (For N00bs)
Let's assume you've got a rocket. Maybe you built your first Skill Level 1 rocket, like the Big Bertha, or maybe you have a Ready-To-Fly or E2X (Estes' term for "easy to assemble") rocket. In any case, it's time to launch this sucker.
This post will be long, so I'm breaking it into two parts. I don't want you to think it's really complicated, or that launching a rocket takes a long time - it doesn't. But there are some details you need to get right to have a successful, safe, awesome rocket launch, and I don't want to leave anything out.
Here's basically what'll happen. You'll load up the rocket, put it on the launch pad, hook up the launch controller, press the launch button, and it should take off into the sky. The motor (or engine) will burn for a second or two (this phase is known as powered flight), and when it stops burning, the rocket will continue to coast upward. You'll see white smoke coming from the back of the rocket for several seconds as it does; this is the delay charge burning. The delay produces no thrust, but it allows the rocket to coast up to its apogee - the uppermost part of its flight. Then, the motor will fire the ejection charge - a tiny explosion that will push the nose cone off and eject the parachute. The parachute should open, and the rocket will drift back to earth.
Here are the basics:
Well, as I've recommended in the previous post, you might want to get launch kit. You can get a basic Estes kit - or Quest - which will have the launch pad and rod, the launch controller, and a rocket for less than you'd pay for the pad and controller plus no rocket at all, if you'd bought them separately.
A launch pad comes with a metal disk called a "blast deflector," and it's not optional! This will deflect the hot gasses and burning propellant away from the ground, and protect the plastic from melting.
The launch rod is usually about 3 feet long. The purpose of the rod has to do with rocket stability. The only thing keeping the rocket going upward instead of straight at the crowd is the fins. And for the fins to work, the rocket has to be moving upward, so there's wind moving past them. The launch rod keeps the rocket moving straight up until it is going fast enough - at least 30 miles per hour - for the fins to do their job. With model rockets, it takes only a fraction of a second to reach that velocity or much higher, so a 3-foot rod is usually plenty.
The Estes rods are 33 inches - close enough - and come in two parts which you have to push together. There's a narrow, curved bit of metal shoulder material in one half of the rod which you push into a hollow onto the other half. I found I had to crimp mine with pliers to get the halves together.
Tap one end of the rod on a concrete surface to get the pieces completely together - but don't try to hammer them. The rod will bend, and if that happens, you need a new rod!
Estes recommends using sand paper to smooth out the joint between the rods. Don't do this. What happened when I did this was that I scuffed the chrome coating off the rod, making it rougher! You could try some steel wool, but honestly, unless the joint is way off, you'll be fine.
The rod gets inserted into a little hole in the top of the launch pad. There's a little safety cap included which you place on top of the rod when you're not actually launching a rocket - this is to prevent you bending over the rod and gouging your eyes out. I've mentioned that rocketry has a great safety record - I read once that the most dangerous thing about launching rockets is that rod!
The launch controller is a plastic box with a button, a light, and a removable "key" - usually a bit of wire or metal with a plastic button on top of it - and a couple of wires coming out one end with little clips on the ends of them. The controller takes batteries, and it ignites the motors electrically. The key is a safety feature. Once you hook the rocket up, you cannot launch it accidentally by hitting the launch button with your thumb, because you have to put the key in the launch controller and press it down before it will work.
The light is known as a continuity light, and when you hook up the rocket igniters to the launch controller, and put in the key, this will light up. It tells you that electricity is flowing through the system, the batteries are good, and the igniters are not broken.
The launch button... uh, launches the rocket.
***I do have to say something important here, in case you are not going strictly the Estes route for your first rocket launch. Currently, Quest motors and igniters are out of stock, but once Quest motors are back out again, this is very important: You cannot use an Estes launch controller with Quest igniters. Quest makes a very sensitive igniter. They require very little current to flow through them to actually cause them to fire - which is a good thing, for certain applications. But an Estes launch controller doesn't have enough resistance in it, and as soon as you put the safety key into the Estes launch controller, instead of just the continuity light coming on, a Quest igniter will get enough juice to fire prematurely. If there's someone at the launch pad making an adjustment, that can be dangerous!***
A rocket motor is a heavy paper cylinder which encases a solid propellant - in this case, black powder. One end has a little hole in it - the nozzle - and the other end has a clay cap in it.
(If you don't see a clay cap, and instead see the dark black powder in the non-nozzle end, look at the side of the motor. Is the last number a 0? Then you have a special motor used only for the first stage of multistage rockets. Put that away for now - we'll get to those later. For now, it's definitely not what you need!)
Rockets for beginners come in three basic classes - A, B, and C. The basic explanation of this is that each letter class is roughly twice as powerful as the previous one. C is twice as powerful as B, and four times as powerful as A. They are described by a letter and two numbers. The first is average thrust, and the second, after the dash, is the delay time, which is the time between when the motor stops burning propellant and the ejection charge going off. So, a C6-5 motor has an average thrust of 6 Newtons, and a delay time of 5 seconds. A Newton is about 0.225 pounds.
Your first rocket will come with a list of recommended motors to use. Read these. First time I launched the Big Bertha, it was kind of windy, and I didn't want to lose my beautiful new rocket. So, I put an A motor in it.
Problem is, the Bertha is kind of heavy. An A8-3 motor doesn't have enough power to properly lift it. It flew about 30-50 feet into the air, took a nose dive, and straight down for 3 seconds (that was the delay time!). The nose cone ejected about 5 feet from the ground, and the rocket drove itself into the damp earth.
I thought I knew what I was doing, but hadn't realized that the A8-3 is not on the list of recommended motors for this rocket! The weakest motor for the Bertha is a B-something. Oops!
There will be a list of appropriate motors with your rocket. There's usually one with an asterisk (often the least powerful one) that says "first flight." This is so that, if, say, it's windy, you're less likely to lose the rocket when the parachute drifts too far, or if you made some kind of catastrophic error in the construction of your rocket, the damage will be minimal.
The igniter is a little wire thing that comes with the motors. It's usually made of high-resistance nichrome wire. The resistance is important, because when electricity flows through a high-resistance wire, the wire heats up. This happens in an incandescent light bulb, and in the wires of a toaster - which are also made of nichrome. Most Estes igniters are also tipped with a combustible material called pyrogen.
You insert the motor into the back of the rocket with the nozzle end - the little hole - pointing out the back of the rocket. Secure the motor with the motor hook (or sometimes you tape it in, if the kit instructions tell you to do that). The motor hook should lock into place once the motor is all the way in. Tug on the motor gently to make sure that when it moves backward, the hook holds it in firmly by the edge.
Now, pull out the nose cone, parachute and shock cord. You need to protect the parachute from the burning particles of the ejection charge, or it will melt together and won't open. Into the rocket body, you put recovery wadding. Tear off individual sheets, and roll them loosely into little wadded balls of paper - not too tight! The instructions on your kit will tell you how many pieces you'll need for your particular rocket. Put them one by one into the body of the rocket, and if you need to, push them down very gently with a dowel rod.
Next, you need to fold the parachute and insert it and the shock cord into the rocket. There are lots of ways to fold parachutes, but some ways are better than others. Doing it by the instructions in the Estes kits is terrible - mine do not deploy at least 50% of the time when I do it this way. We're going to do it another way.
Plastic parachutes sometimes have problems deploying. This can be due to static electricity, or cold, or bad folding. In any case, you'll help the parachute properly deploy if you give it a few dashes of talcum powder or baby powder.
I prep my rockets before going to the flying field by laying the parachute open on a table.
I sprinkle a bit of baby powder on the underside of the parachute and lightly spread it around so it coats the whole chute.
Next, fold the chute in half, with two of the corners being at the top of the fold. Now you'll have half a hexagon, with four corners showing - two at the top and two at the bottom.
Take one of the top corners and fold it down to the bottom corner on the opposite side. Then do the same for the other top corner. You now have a triangle, with all the shroud lines - the strings on the parachute - coming off the two corners at the bottom.
Fold the parachute in half so that all the shroud lines are together. Now, you'll have a scalene triangle, with all the shroud lines coming out the bottom.
Take most of the extra slack that leads from the parachute to the nose cone and gently lay it on top of the parachute.
Fold that outside corner over the shroud lines, then fold the top corner down about a third of the way, then fold what you have down again.
Next, roll the whole thing up into a little packet and gently wrap whatever is left of the shroud lines around the parachute into a helical shape, making sure you don't cross over what you've already rolled.
Once this is done, you stuff the parachute and shock cord into the rocket. Some say you should put the shock cord in first - which is probably better. Some say the shock cord goes on top. It probably doesn't matter a ton, and in some small-diameter rockets, it's hard to get that shock cord in there - it's just rubbery enough that it doesn't want to go in on its own unless you're pushing it, and that's hard to do when you've got your rocket in one hand and a perfectly-rolled parachute in another. If I can't get the cord in first, I stuff in the chute, then pack the cord on top. I've rarely had a deployment problem with this.
Put the nose cone on top, and make sure it's snug, but not tight. You should be able to easily pull it out with your hand, but it shouldn't be so loose it falls out if you turn the rocket over and give a little shake. If it's too loose, add a little strip of masking tape to the shoulder. If it's too tight, sand the shoulder down a little bit.
You then insert the igniter into the nozzle of the motor, making sure it touches the propellant inside. It doesn't have to go very far, and you don't need to force it. Just set the tip of the igniter gently into the nozzle until it stops.
Next, you'll secure the igniter into the nozzle with either a little plastic plug that comes with the motor (in the case of Estes motors), or with a piece of masking tape. Either way, this will bend the igniter's leads into a 90 degree angle. Make sure the two wires leading into the nozzle don't touch each other - this creates a short circuit, which means that when you press the launch button, nothing will happen.
Now, you'll bend the ends of the igniter wires away from each other. You can bend them into little rabbit-ear loops, or simply bend them away from each other at a wide angle. The rabbit ears are easier to connect to the clips, but as long as the two wire leads aren't near each other, you'll be fine.
The rocket is now prepped for flight.
In Part 2, we'll launch the sucker!
[Click here for Part 2]
This post will be long, so I'm breaking it into two parts. I don't want you to think it's really complicated, or that launching a rocket takes a long time - it doesn't. But there are some details you need to get right to have a successful, safe, awesome rocket launch, and I don't want to leave anything out.
Rocket Flight
Here's basically what'll happen. You'll load up the rocket, put it on the launch pad, hook up the launch controller, press the launch button, and it should take off into the sky. The motor (or engine) will burn for a second or two (this phase is known as powered flight), and when it stops burning, the rocket will continue to coast upward. You'll see white smoke coming from the back of the rocket for several seconds as it does; this is the delay charge burning. The delay produces no thrust, but it allows the rocket to coast up to its apogee - the uppermost part of its flight. Then, the motor will fire the ejection charge - a tiny explosion that will push the nose cone off and eject the parachute. The parachute should open, and the rocket will drift back to earth.
What are you going to need?
Here are the basics:
- A rocket
- A launch pad - with a launch rod
- A launch controller
- Some rocket motors - or, as Estes and many people call them, engines
- Some igniters - these usually come with motors or engines, so you shouldn't need to buy any
- Some recovery wadding
- Something to carry all this stuff
Well, as I've recommended in the previous post, you might want to get launch kit. You can get a basic Estes kit - or Quest - which will have the launch pad and rod, the launch controller, and a rocket for less than you'd pay for the pad and controller plus no rocket at all, if you'd bought them separately.
![]() |
An Estes launch pad - with a round metal blast deflector and a 33-inch launch rod. The cap at the top of the rod comes off - it's to prevent you gouging your eyes out when prepping the rocket! |
A launch pad comes with a metal disk called a "blast deflector," and it's not optional! This will deflect the hot gasses and burning propellant away from the ground, and protect the plastic from melting.
The launch rod is usually about 3 feet long. The purpose of the rod has to do with rocket stability. The only thing keeping the rocket going upward instead of straight at the crowd is the fins. And for the fins to work, the rocket has to be moving upward, so there's wind moving past them. The launch rod keeps the rocket moving straight up until it is going fast enough - at least 30 miles per hour - for the fins to do their job. With model rockets, it takes only a fraction of a second to reach that velocity or much higher, so a 3-foot rod is usually plenty.
The Estes rods are 33 inches - close enough - and come in two parts which you have to push together. There's a narrow, curved bit of metal shoulder material in one half of the rod which you push into a hollow onto the other half. I found I had to crimp mine with pliers to get the halves together.
Tap one end of the rod on a concrete surface to get the pieces completely together - but don't try to hammer them. The rod will bend, and if that happens, you need a new rod!
Estes recommends using sand paper to smooth out the joint between the rods. Don't do this. What happened when I did this was that I scuffed the chrome coating off the rod, making it rougher! You could try some steel wool, but honestly, unless the joint is way off, you'll be fine.
The rod gets inserted into a little hole in the top of the launch pad. There's a little safety cap included which you place on top of the rod when you're not actually launching a rocket - this is to prevent you bending over the rod and gouging your eyes out. I've mentioned that rocketry has a great safety record - I read once that the most dangerous thing about launching rockets is that rod!
![]() |
Arr! Don't be the guy who loses an eye launching rockets! |
The launch controller is a plastic box with a button, a light, and a removable "key" - usually a bit of wire or metal with a plastic button on top of it - and a couple of wires coming out one end with little clips on the ends of them. The controller takes batteries, and it ignites the motors electrically. The key is a safety feature. Once you hook the rocket up, you cannot launch it accidentally by hitting the launch button with your thumb, because you have to put the key in the launch controller and press it down before it will work.
The light is known as a continuity light, and when you hook up the rocket igniters to the launch controller, and put in the key, this will light up. It tells you that electricity is flowing through the system, the batteries are good, and the igniters are not broken.
![]() |
Typical Estes launch controller, from Chris Michielssen's modelrocketbuilding.blogspot.com. If you haven't seen his blog, you need to check it out! |
The launch button... uh, launches the rocket.
***I do have to say something important here, in case you are not going strictly the Estes route for your first rocket launch. Currently, Quest motors and igniters are out of stock, but once Quest motors are back out again, this is very important: You cannot use an Estes launch controller with Quest igniters. Quest makes a very sensitive igniter. They require very little current to flow through them to actually cause them to fire - which is a good thing, for certain applications. But an Estes launch controller doesn't have enough resistance in it, and as soon as you put the safety key into the Estes launch controller, instead of just the continuity light coming on, a Quest igniter will get enough juice to fire prematurely. If there's someone at the launch pad making an adjustment, that can be dangerous!***
A rocket motor is a heavy paper cylinder which encases a solid propellant - in this case, black powder. One end has a little hole in it - the nozzle - and the other end has a clay cap in it.
A typical 3-pack of black powder motors - in this case, Estes B6-4. That's an average thrust of 6 Newtons and a delay of 4 seconds. |
The nozzle end - this sticks out the back of the rocket. |
The clay cap end - goes into the rocket pointed toward the nose cone. In A and B motors, this is further recessed into the motor, because there's less propellant inside. |
The motor on the left has no clay cap - you can see the black powder propellant. This is only for multistage rockets. Put that one away for now. We'll do staging later! |
Your first rocket will come with a list of recommended motors to use. Read these. First time I launched the Big Bertha, it was kind of windy, and I didn't want to lose my beautiful new rocket. So, I put an A motor in it.
Problem is, the Bertha is kind of heavy. An A8-3 motor doesn't have enough power to properly lift it. It flew about 30-50 feet into the air, took a nose dive, and straight down for 3 seconds (that was the delay time!). The nose cone ejected about 5 feet from the ground, and the rocket drove itself into the damp earth.
![]() | |
The fancy, homemade launch controller makes me look like an "expert," but the crash landing goes to show that I'm still kind of a n00b. |
There will be a list of appropriate motors with your rocket. There's usually one with an asterisk (often the least powerful one) that says "first flight." This is so that, if, say, it's windy, you're less likely to lose the rocket when the parachute drifts too far, or if you made some kind of catastrophic error in the construction of your rocket, the damage will be minimal.
The igniter is a little wire thing that comes with the motors. It's usually made of high-resistance nichrome wire. The resistance is important, because when electricity flows through a high-resistance wire, the wire heats up. This happens in an incandescent light bulb, and in the wires of a toaster - which are also made of nichrome. Most Estes igniters are also tipped with a combustible material called pyrogen.
To igniters - you snip these apart before using them. |
Motor packs include tiny plastic plugs for securing igniters into the nozzle of the motor. |
You insert the motor into the back of the rocket with the nozzle end - the little hole - pointing out the back of the rocket. Secure the motor with the motor hook (or sometimes you tape it in, if the kit instructions tell you to do that). The motor hook should lock into place once the motor is all the way in. Tug on the motor gently to make sure that when it moves backward, the hook holds it in firmly by the edge.
Now, pull out the nose cone, parachute and shock cord. You need to protect the parachute from the burning particles of the ejection charge, or it will melt together and won't open. Into the rocket body, you put recovery wadding. Tear off individual sheets, and roll them loosely into little wadded balls of paper - not too tight! The instructions on your kit will tell you how many pieces you'll need for your particular rocket. Put them one by one into the body of the rocket, and if you need to, push them down very gently with a dowel rod.
![]() |
Picture from stormthecastle.com |
Next, you need to fold the parachute and insert it and the shock cord into the rocket. There are lots of ways to fold parachutes, but some ways are better than others. Doing it by the instructions in the Estes kits is terrible - mine do not deploy at least 50% of the time when I do it this way. We're going to do it another way.
![]() |
The Estes "fold over and roll both ends to the center" technique - terrible. The shroud lines get tangled, and the chutes often fail to deploy. |
Plastic parachutes sometimes have problems deploying. This can be due to static electricity, or cold, or bad folding. In any case, you'll help the parachute properly deploy if you give it a few dashes of talcum powder or baby powder.
I prep my rockets before going to the flying field by laying the parachute open on a table.
The Big Bertha 18-inch parachute ready for prep |
Sprinkle a little baby powder or talcum on the chute to aid deployment |
Next, fold the chute in half, with two of the corners being at the top of the fold. Now you'll have half a hexagon, with four corners showing - two at the top and two at the bottom.
Take one of the top corners and fold it down to the bottom corner on the opposite side. Then do the same for the other top corner. You now have a triangle, with all the shroud lines - the strings on the parachute - coming off the two corners at the bottom.
Fold one of the top corners down to the opposite bottom corner - in this case, top right to bottom left. |
Then do the same for the opposite top corner - here, top left to bottom right. You now have a triangle with shroud lines coming from the bottom two corners. |
Take most of the extra slack that leads from the parachute to the nose cone and gently lay it on top of the parachute.
Gently lay the slack from the shroud lines on top of the folded parachute. |
Fold that outside corner over the shroud lines, then fold the top corner down about a third of the way, then fold what you have down again.
Fold that outside corner over the shroud lines |
Fold the top third of the parachute down. |
Fold that down over the bottom third. |
Next, roll the whole thing up into a little packet and gently wrap whatever is left of the shroud lines around the parachute into a helical shape, making sure you don't cross over what you've already rolled.
Roll the folded chute down into a sausage shape |
Wrap the shroud lines in one bundle around the chute, moving from one end to another, in a helix. Don't cross lines back over what you've already rolled! |
The shock cord in a larger rocket like the Big Bertha goes in quite easily - put that in first. |
Put the nose cone on top, and make sure it's snug, but not tight. You should be able to easily pull it out with your hand, but it shouldn't be so loose it falls out if you turn the rocket over and give a little shake. If it's too loose, add a little strip of masking tape to the shoulder. If it's too tight, sand the shoulder down a little bit.
The nose cone of my Cosmic Explorer is just a little too loose. A few bits of masking tape makes it snug enough to fly. |
You then insert the igniter into the nozzle of the motor, making sure it touches the propellant inside. It doesn't have to go very far, and you don't need to force it. Just set the tip of the igniter gently into the nozzle until it stops.
Don't insert the igniter until it's in the rocket and at the launch pad!I'm just doing it on the table here for the purpose of taking pictures. |
Next, you'll secure the igniter into the nozzle with either a little plastic plug that comes with the motor (in the case of Estes motors), or with a piece of masking tape. Either way, this will bend the igniter's leads into a 90 degree angle. Make sure the two wires leading into the nozzle don't touch each other - this creates a short circuit, which means that when you press the launch button, nothing will happen.
Now, you'll bend the ends of the igniter wires away from each other. You can bend them into little rabbit-ear loops, or simply bend them away from each other at a wide angle. The rabbit ears are easier to connect to the clips, but as long as the two wire leads aren't near each other, you'll be fine.
The rocket is now prepped for flight.
In Part 2, we'll launch the sucker!
[Click here for Part 2]
Subscribe to:
Comments (Atom)