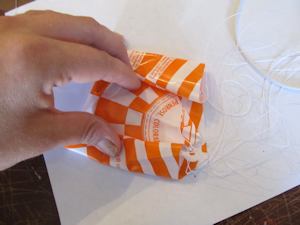
I'll get back to the Super Big Bertha in the next post. For now, here's more progress on the Estes V2.
The forward centering ring has a slit for the rubber shock cord to pass through. You're meant to push one end of the shock cord through and knot the other end to secure it to the rocket. There's no tri-fold "tea bag" mount included in this kit.
The advantage of Estes rubber shock cords is that the cord is much less likely to damage the end of the body tube if your parachute ejection doesn't happen right at apogee. This can be because you have the wrong delay for your flight, or the delay grain has a flaw, causing it to burn too long or short. Or, if you have to launch at an angle due to wind, sometimes the rocket doesn't slow down as much at apogee.
If the chute opens when the rocket is coasting, it can pull the cord against the opening of the body tube. This can pull hard on the shock cord, and a stiff Kevlar cord can sometimes damage your rocket when this happens. It can be minor damage, like a small nick in the tube, or a long rip, called a zipper.
This rocket has a very long Kevlar shock cord. Even with all textbook flights, it has had some damage.
While I do like a shock cord with some elasticity, I rarely use the ones supplied with the kit. I usually make a long shock cord made of two parts - a length of Kevlar thread to secure it to the rocket, and a very long piece of sewing elastic.
With a short rubber cord, sometimes the nose cone can snap back and hit the rocket, damaging the paint. A long cord gets the NC and chute away from the rocket and helps reduce the risk of damage.
Some rocketeers just use very long Kevlar thread for shock cords, and I've done so as well, but Kevlar is inflexible, and I've had some damage to the ends of body tubes even with very long shock cords. I like having a loop of Kevlar which ends just inside the body tube.
The Kevlar comes from emmakites.com, a kite supply website, and is meant to be for flying large kites. Their prices are good, and shipping is fast and free, and they have some very heavy duty stuff suitable for larger rockets. They even list some of their product now as "for rocketry." It seems they've caught on that we like their Kevlar.
For the V-2, I mounted it right to the motor mount.
The first step was to punch a hole through the forward centering ring. I cut a length of Kevlar longer than I would need, and tied a loop in one end.
I passed the free end through the loop, forming a kind of lasso, which I wrapped around the motor tube just behind the forward centering ring. The free end was threaded through the hole in the centering ring and the lasso was secured in place with a fillet of wood glue.
Once the glue was dry, I slid the motor mount into the rocket at the correct depth to see how long the Kevlar lead should be. I then removed the motor mount and tied a simple loop.
After a couple of tries, I had the perfect length.
Having access to the Kevlar loop means I can attach a long piece of heavy sewing elastic, and I can replace it when the elastic gets brittle.
I post a lot of things on Instagram these days. Follow me here.
The ducted ejection motor mount system for the Semroc Bandit can be seen above. This is apparently a re-creation of the original Estes baffle system in the 1971 Bandit. The parts fit together well, and it's pretty neat - although it does add significant weight. If you went with a simple motor mount and just used recovery wadding as per usual, you'd probably get the Bandit to fly a lot higher.
But part of the pleasure of flying the Bandit is watching the whole flight. It's a pretty bird.
The end of the motor tube is plugged with a balsa bulkhead or nose block. Into that bulkhead, you attach one of the supplied screw eyes to anchor the shock cord.
The shock cord which comes with the kit is a thin piece of sewing elastic. I decided against using it here for a couple reasons.
First, it's a little short for my taste. While I do use sewing elastic in my low power model rockets - a lot - I like to make my shock cords very long (more on this in a future post).
Second, despite the ejection baffle, I worry that the elastic will wear out over time after repeated ejections. Not from the heat, but from the chemistry. The caustic vapors from black powder charges have a negative effect on the latex in the elastic, making it brittle and prone to snapping. If I mounted an elastic shock cord that far down into the rocket, when it broke, I wouldn't be able to replace it.
I prefer to attach my elastic cords to something less prone to wearing out - Kevlar kite string.
While Kevlar will burn through after so many charges if it's right by the ejection site, with the baffle system, it will probably be just fine here.
I replaced the elastic cord with a Kevlar string, which I attached to the bulkhead on one end. On the other, I tied a loop. The Kevlar cord is just long enough that you can see it at the end of the body tube.
This will allow me to attach an elastic cord, which I can cut off and replace when it becomes brittle.
With the elastic attaching to the Kevlar inside the body tube, the shock cord is less likely to damage the tube should the parachute come out while the rocket is moving at high velocity. If the Kevlar extended beyond the end of the tube, there's a chance that the cord could cut into the end of the tube, possibly causing a jagged tear down the side of the rocket, known as a zipper.
I sanded the fins into airfoil shapes, which I often do. I like the finished look it gives to a model rocket.
While these aren't perfect, they turned out better than this picture implies. Sometimes a closeup can distort things in a photo. They look pretty even in real life, and once on the rocket, you won't be able to see the imperfections without close examination. I could have taken a second crack at them and probably gotten better airfoils, since I have a spare set of fins (see Part 1), but I decided I was happy enough with these.
I sealed the balsa nose cone and even the fins with thin CA - cyanoacrylate or Super Glue - and sanded them smooth. On the fins, I left the bottom 1/4 inch unsealed. If you get CA on the root edge, wood glue won't bond to it as well, and a fin could easily pop off.
I used the Guillotine Fin Jig to glue the fins on. I made a couple layers of glue fin fillets and then treated the root edges of the fins with CA, then sanded again.
The whole kit looks pretty nice.
You'll notice that I did not fill in the spiral grooves on the main body tube, but I did on the white upper payload tube. That's because the lower tube didn't really have grooves as such. The spirals were more of a tight overlap, so there was nothing to fill in. My hope here is that a good few coats of filler primer will hide those overlaps.
You can fill in spiral grooves with heavy coats of filler primer, too, but I prefer carpenter's wood filler. Filling grooves in with primer alone takes a lot more primer, which is more expensive than wood filler. I like hiding the grooves, and I like getting more than one rocket out of a can of primer, so I usually use the wood filler method. You don't have to fill spirals if you don't want to, but I like doing it, and I have a pretty hassle-free (i.e. not much sanding involved) method.
Now that your Skill Level 1 rocket is painted (and completely dry), it's time to finish building it - then you get to fly the thing!
If you've been following my posts here, you may get the impression that these things take forever to build. Actually, you can complete a Skill Level 1 rocket in a day or two - sometimes in as little as just a few hours (most of that is waiting for glue to dry). But I wanted to give you the details on how I build a rocket. I approach even easy rockets with care, so mine sometimes do take weeks, but that's only because I'm fussy and want a really nice end product. If you skip all the extras and just follow the instructions in the kit, you'll be done rather quickly, something you should probably do for your first rocket, so you don't get frustrated and quit before you see how awesome this hobby is.
OK, let's finish this baby up by adding the recovery system - this is how we get the rocket back safe and sound to fly again. All we have to do is attach the shock cord and parachute, and we're done!
First, we're going to attach the shock cord - that's often a long, flat, rubber band-looking thing (or sometimes a thick, yellow Kevlar thread). We'll assume you're probably doing an Estes kit, like the Big Bertha, because that's what most people do. So, the rubber bandy thing.
Your instruction sheet will have an elongated trapezoidal shape divided into three numbered sections. That is the shock cord mount - you'll have to cut that out with scissors. Fold the two sides inward along the fold lines, so they'll crease easily when you glue the shock cord in.
Put a dot of wood glue in the middle area, and place one end of the shock cord in it, with the other end running out through the fat end. Fold the skinny end of the shock cord mount over the center part and press it so the glue spreads throughout it. Hold that in place a moment until the glue starts to set.
Next, place some glue onto the fat end of the shock cord mount where the cord itself is trailing out, and fold the middle/skinny ends over that. Press until excess glue squishes out the sides, and hold that until the glue starts to set.
Now you'll have a long shock cord secured into a tiny trapezoid of paper. Allow this to dry a little bit (I've moved too quickly here and the whole thing came apart because the glue hadn't properly set), but you don't need it to dry completely to move on.
You now have what's sometimes called a "tea bag mount," because if you
hold the shock cord with the mount hanging down, it kind of looks like a
tea bag.
This finished mount is smaller - because it's from the Estes Star Trooper - a tiny rocket. Again, I got
engrossed in finishing the Big Bertha and neglected to photograph the finished shock cord mount.
But it looks the same, aside from the size.
The final step here is to place some glue into the body tube. Get a good dab of glue on the pad of your finger and spread it in one squarish spot on the inside of the body tube, about 1 1/2 to 2 inches from the top - no less. You need to make sure the shock cord mount is far enough into the rocket body to keep it from touching the nose cone when you insert it, or the cord might get in the way, and you won't get the nose cone on, because the fat shock cord won't leave enough space!
Wipe the excess glue off your fingers and place the shock cord mount down onto the glue, with the side the shock cord comes out facing the opening at the top of the rocket. Press this down and rub it around a little to make sure the glue spreads evenly and thinly under the paper shock cord mount. Hold it there a few moments until the glue begins to set, then let go.
Set the rocket on its side and allow the glue to dry for at least probably 20-30 minutes. Then, for good measure, use your finger to apply a thin layer of wood glue over the top of the shock cord mount to make sure you've got it good and sealed to the inside of the rocket.
Boom. Shock cord is now done. With the other end, you'll tie it to the loop of plastic in the base of the nose cone. Tie it well - a buntline hitch works, or just a simple double knot - and then you might put a dab of glue onto the knot to keep it in place.
Tying a buntline hitch
Let the shock cord mount and the nose cone glue (if you used it) dry completely, with the rocket lying on its side, and the nose cone lying separately - don't put the nose cone into the rocket at this point, or you might glue it on permanently, and you don't want that!
Once the glue is dry, it's time to attach the parachute. Probably the majority of basic kits use a parachute for recovery. Smaller rockets might use a simple streamer - a ribbon of plastic or paper which slows the rocket's descent enough that it won't be damaged. The streamer is pretty simple; you just tape one end of it to the shock cord. Other rockets might use some other form of recovery - tumble recovery, say, where the rocket comes apart and is so light it just falls to the ground in two pieces, and doesn't tend to get damaged.
But let's assume you have a parachute for now, like the Big Bertha has.
Skill Level 1 kits come with the parachute already assembled - you get a hexagonal chute with three shroud lines, each line attached to two corners of the chute.
The easy way to attach it to the nose cone is to hold the three lines together, form a little loop at the end, and thread this through the same loop of plastic in the nose cone to which you attached the shock cord. Pull the loop through, open it up with the shroud lines halfway through. Then you're going to pull the chute tight and pass it through the big loop and pull that tight - the chute will be attached to the nose cone.
This parachute is tied directly to the nose cone - you can see how the shroud lines get tangled after a few flights.
However, you might want to be able to remove the parachute between flights, and if you tie the chute right to the nose, you won't really be able to do that. It will quickly become tangled, and you won't get it untied. Parachute lines become tangled in ways that almost seem impossible to me. The lines are attached to the chute at one end and the nose cone at another, and yet, sometimes, I look at a parachute after a flight and ask How did those lines get tangled?? They crossed over each other! What is this sorcery??
Also, it's good for the chute to be stored separately from a rocket, hanging upside down, like from a pin in a cork board. The chute will be less likely to become permanently folded, so you're less likely to have it fail to open. A good way to attach a parachute is with a snap swivel. You get these where you find fishing equipment.
I love this aspect of rocketry - you find useful tools and materials where you wouldn't expect them to be, and you hack or adapt them to your purposes.
Just attach the chute to the closed loop of the snap swivel like you would to the nose cone, and when you want to attach everything to the nose cone, you just open the snap swivel and attach that to the nose cone.
All you do now is fold up your parachute, stuff it and the shock cord into the body of the rocket, and put the nose cone on top.
There are a number of ways to fold the parachute - some better than others. The instructions for the Estes kits aren't great - when I fold a chute like that for flying, they fail to open about half the time.
Estes has you fold the top of the chute over and roll the sides in - not
ideal for launching, as they don't open half the time (in my experience).
We'll discuss parachute folding - with pictures - when we talk about launching. For now, you can roll the chute up like it says in the kit instructions.
Put the nose cone on, and look at your handiwork:
The completed Estes Big Bertha rocket - tall and beautiful!
YOU HAVE FINISHED YOUR ROCKET!
I hope any rocket n00bs out there have gotten some useful information from this Skill Level 1 tutorial series. This is just the beginning. There are a lot of cool tools and techniques, more advanced kits, higher skill levels, more powerful rocketry options and cool add-ons for rockets (payloads, multistage boosters, etc.). We'll get to all these on this blog, I hope. For now, build yourself a kit, fly it, and see if you like it. If you do, build a few more kits. When you get confident with your skills as a basic rocket builder, you're ready for something more challenging.
I've been doing this for only a little over three months now, and I've learned so much. There's a lot of fun stuff to do in rocketry, and things that seem way too complicated when you first start out are actually achievable. If you develop a passion for this, like I have, you can advance your skills and do things that will surprise you.
Take it slow. It's not a race. Have fun.
But here's a preview of something you might not yet think you can do - I certainly didn't when I started. This is a rocket I designed and built myself - and it's a two-stage rocket on top of that! I'll make a post soon about designing and building your own - something very satisfying, and not as complicated as you might think - it just takes a little time, the right tools, and some thought.
For now, though, here's a video of the first launch of my first "scratch-built" rocket, Janus I - named for the two-faced Roman god of beginnings and change. I hope you enjoy.