The Big Dog kit comes with a launch lug for a 3/16 inch diameter launch rod, but I scavenged that for my previous Estes Cosmic Explorer build in which I adapted that rocket to hold an E-sized motor (24mm instead of 18mm). But I wasn't worried about not having the right launch lug for the Big Dog, because I decided a while ago that, for this rocket, I would use launch rail buttons.
Most rocket kits, even high power kits, come with a traditional launch lug. Larger high power kits can have a huge launch lug, and require a really thick, long launch rod. But a lot of high power rocketeers have abandoned the lug-and-rod system in favor of launch rails - long metal extrusions with a t-shaped slot running its length.
A launch "button" is a small piece of plastic material shaped like a little spool. The thin middle part fits into the slot on the rail. With two (or more, for bigger rockets) buttons attached to the rocket, you slide the whole thing onto the rail, and that keeps the rocket pointed straight up at launch.
Launch rails are sturdier than rods, and less likely to "whip" back and forth due to wind and the weight of a rocket and the force of its taking off. And people say that launch buttons produce less aerodynamic drag than lugs. I don't know if that's been confirmed scientifically, but a small button is less obtrusive than a huge lug. So it may reduce drag, and in any case, it looks better.
The standard rail size for high power rockets is called 1010. The 1010 rail is 1 inch wide. Some really heavy rockets use a rail size called 1515 - 1.5 inch wide.
But, like a lot of things in rocketry, the t-slot rail was never intended for use on rockets. It's an industrial product you can use to make all kinds of stuff - furniture, kiosks, machining equipment... Whatever. It's like an industrial Erector Set. Rocketeers adopted the rail and came up with the rail button. So, there are other sizes of t-slot extrusion. They come in metric as well as English sizes.
For a while, the 1010 and 1515 rails were the only option if you wanted to use buttons. Hypothetically, you could put a 1010 rail button on any rocket, but for smaller model rockets, they're a bit too large to be practical. A small launch lug looks better, and produces less drag.
However, there is a company which now sells smaller sized rail buttons for use with lighter rockets, and teeny-tiny ones for use with small low power model rockets. Rail-buttons.com sells a mini button, which fits the metric sized t-slot rail, and even a micro button. With the micro button, you can make a launch rail system using one of a couple of smaller t-slot rails now available. The Makerbeam and the OpenBeam, both of which are used to make smaller, lightweight industrial stuff (a lot of people use them to make frames for 3D printers), can now be used to launch rockets.
A 1010 button would work fine on the Big Dog. But I don't currently have a 1010 rail, and a button of that size is larger than I need. In my opinion, as long as it works, smaller is better.
Mini button on the lower left; 1010 button on the upper right
I do have a metric rail and some mini buttons. I used those when I built my Estes Partizon (as was recommended by Randy of rail-buttons.com).
But even those looked a little larger than necessary for this rocket. The Big Dog is pretty light, so I have decided to go with the really tiny micro buttons, and launch the rocket from my Makerbeam rail, which is 1500mm long - about five feet.
The micro button - even smaller than I'd imagined
The first step is to drill holes for the buttons to screw into. I'd marked my rail button line back in Part 2 of this build series, and it was time to decide where exactly to place the buttons on that line. While the kit comes with one launch lug, you always need a minimum of two buttons. The kit instructions say to place rear end of the lug 10 inches from the bottom of the body tube, so that's where I put my forward button. But where to place the other one?
Well, as long as you have two buttons, you can hypothetically place them pretty close together. With a rocket kit with, say, a 3-inch lug, you could place the buttons 3 inches apart, exactly where the ends of the lug would go. But, I don't have a drill press, just a hand drill. What if I get the buttons slightly out of line with one another? If the buttons were close together, that would mean that the rocket would be pointed at an angle to the launch rod, rather than straight up. The further apart the buttons, the less extreme that angle would be.
Off-center rail buttons are less of a problem when they're far apart.
Many rocketeers like to place one button far aft, and one about the center of gravity. Or the center of pressure. Or wherever - there's a lot of discussion. I placed my aft button about 2 1/4 inch from the back - enough so that I wouldn't interfere with the centering rings. I chose the spot where the rail button line crossed an inner seam - just to have a nice mark to use.
I wish I could tell you what size drill bit I used, but I threw the packaging away. It might be 1/16 of an inch, but I think it's a little smaller. In any case, it's smaller than the diameter of the screw.
I drilled the holes for both buttons, then wicked a little thin CA (cyanoacrylate - hobby super glue) into the hole, and wiped away the excess.
The CA makes the hole harder, so you'll be able to thread the button screw in once it's dry. It will also allow you to sand off the burrs that come up from the body tube from the drill. I threaded the screws into the holes and then removed them. As it happens, I got the holes lined up pretty well, so I don't think there will be any issue with aligning the rocket on the launch rail.
I'll leave the buttons off until the very end of building the rocket, after it's painted. I could add them now, but leaving them off saves me from having to mask the buttons off while painting - and potentially leaving a bald spot in the paint job from masking tape.
Next up, I'll put on the fins and do some nice fin fillets - with epoxy, instead of my usual wood glue. This will add strength and give them a nice shape.
It's chilly today, and supposed to rain for the next few days, so I won't be painting anything for a week or so. I'm nearly done with one paint job, but it will have to be put on hold.
So, what else can I work on?
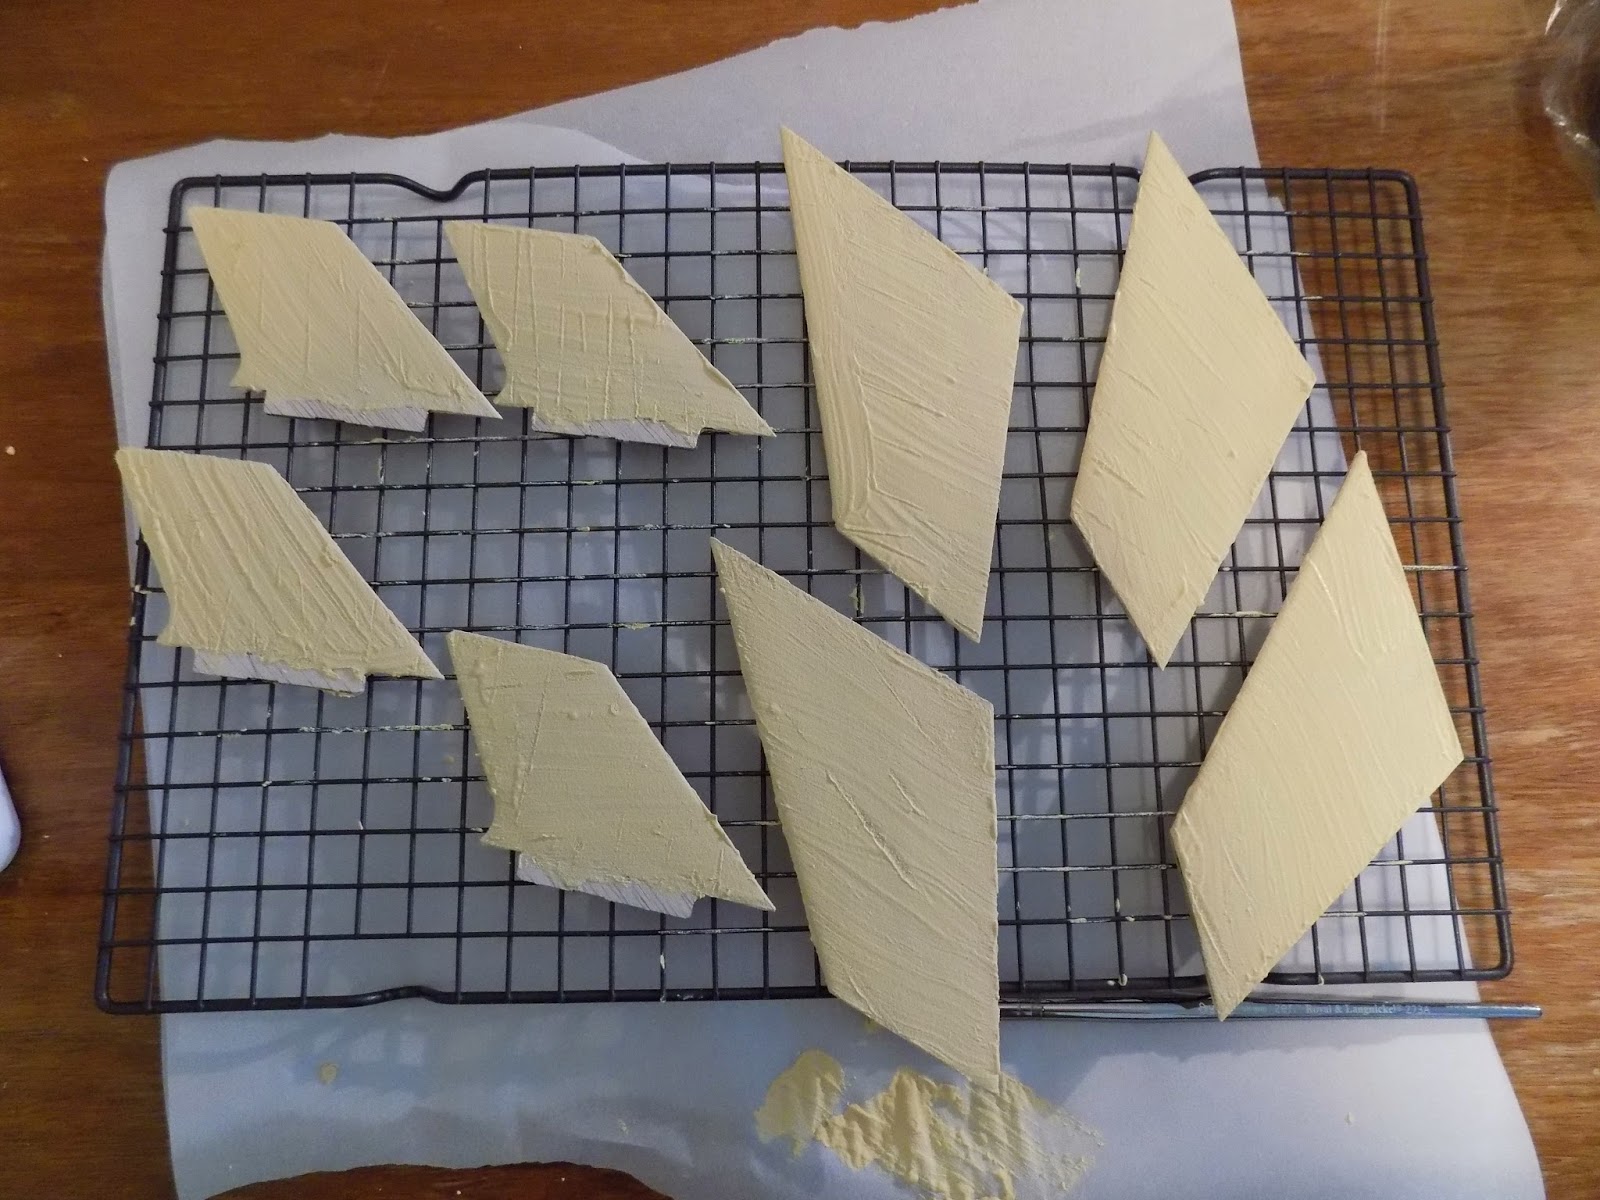
Sounder I
Sounder I is a cute little rocket I designed to go high - 2800 feet on an Estes E9-6 motor. If I add a booster with a D12-0 motor, it could go as high as 3500 feet.
It's not finished, though. This color - Rust-Oleum 2X Marigold - is so pretty, I'm tempted to leave it like this. But a rocket needs some extra detail, and I plan on putting a black roll pattern on the top half of the rocket, stopping at the nose cone.
The first time I tried painting this color on, I got some weird paint problems. There was some discoloration, and worse, the texture was like sandpaper. I don't know how it happened, but I've had this occur two other times in the past - the worst being on my last Cosmic Explorer:
Ugh!
Chad gave me his rockets when he moved out to upstate New York, and a couple of his rockets had this texture. I thought how on Earth did he do this?? Then it happened to me.
I think it was related to temperature or humidity, or to the fact that I wiped the rocket down with rubbing alcohol just prior to painting. This was to remove dust without using water; primer is porous, and water can damage the rocket. But of course, alcohol evaporates quickly, cooling down the surface of whatever it's rubbed on. Perhaps I painted too quickly after the alcohol, and the difference in temperature between the paint and the surface of the rocket caused this.
The only solution was to wet sand the horrible texture off, which causes you to lose some gloss and some color. In any case, I'm not going to risk this happening again until it's warmer outside.
Sounder I will also be my first rocket which uses micro rail buttons instead of a launch lug. This allows you to launch from a Makerbeam rail instead of a rod - a miniature version of the common high power rocket launch platform. I already have the rail, but haven't mounted it to anything. So I guess I need to go to the hardware store and get some stuff to build the launch pad.
Trident A 3-Motor Cluster
Trident A, my 3-motor cluster design, has a couple of issues.
I got a fin on crooked. The fins have tabs on them, which set between the three motor tubes, which are exposed, rather than being hidden inside the rocket. In order to get the fins on right, I had to sand the tabs to a point, which turned out to be trickier than I'd thought. Perhaps that is why I had a fin go on crooked, I'm not sure. But I didn't even notice it until I was painting, when it was suddenly really obvious.
The used motors are in place to keep paint out of the motor tubes.
The open tube is the one that goes onto the painting rig.
And it's a tricky masking job, with the inner tubes being red, the fins (and tabs) being black, and the rest of the rocket being white. I already got some red where I don't want it - on the outer body tube.
And that wasn't even the hard part. The tricky part will be completely covering the red motor tubes and getting black on the fins all the way down to the root.
This rocket may not turn out looking great. But it'll fly, and sometimes a build just doesn't go your way. At least this was my own design, and not an expensive kit.
Had a bit of a whoopsie with this one, too. I'm using filler primer, in hopes of covering some of the flaws in the fins. Filler primer has a build to it, so it can fill in scratches. I usually mask off the motor tube and hook. In this case, I forgot to do that. I got some primer in the little notch where the hook comes out. The notch is to allow you to pull the hook away from the tube so you can get the motor in. I basically primed that notch closed. I had to clear it out with a hobby knife.
Cosmic Explorer with E Motor
A few months ago, I started a series on this blog about upgrading a kit to a larger motor size (mistakenly calling it a "kit bash"), with the Estes Cosmic Explorer. I abandoned that series, because I built the rocket and forgot to take enough pictures, then I lost the rocket on the first flight.
But what a flight!
The rocket went over three times as high as the standard Cosmic Explorer! So, I'm building it again, and I'll have a series about that. I'll also have a post about sanding your fins into airfoil shapes, which I did for the Explorer:
Other Stuff...
I hope to make some progress on the Quest Big Dog in the next couple of days. And I'm slowly chipping away at an upcoming post about rocket stability, for fellow rocket n00bs. That one is taking me a while, because I want to make sure it's a) accurate, b) easy to understand, and c) not a boring pain to read. But it's an important post for this blog, because I have a future series planned on designing your own rocket - which isn't as hard or intimidating as you may think. I'd go so far as to say that it's easy, at least for your basic rockets. But understanding stability is an important prerequisite.
So, that's what I'm up to. I guess I should stop writing and go work on my rockets - I have a ton of sanding to do...
Back to building the Big Dog, from Quest Aerospace...
After assembling the motor mount, I next decided to mark fin lines and a launch lug line - though I'll be using mini or micro rail buttons for this rocket.
If you're new to rockets, here's what I mean. Launch lugs were the standard for all hobby rockets until not too long ago. But in the last - I don't know for sure - decade or so, a lot of rocketeers have switched over to rail buttons. Instead of a thin, wobbly launch rod, which can suffer from wire whip if it gets too long for its diameter, mid and high power rocketeers often use something called t-slot rail to keep a rocket upright on the launch pad.
One of the most common rails used is a square aluminum extrusion, used to build all kinds of modular industrial things, with a cross-section that looks like this:
Instead of launch lugs, two (or sometimes more for really big rockets) small buttons are attached to the rocket, and they slide down into the slots in the rail. The result is a really sturdy launch platform.
Launch button (bottom) fitting into a rail slot.
Image from CoastRocketry.com
Sorry to digress. Back to the subject at hand.
I cut out the paper fin guide from the instructions, I carefully lined it up around the tube and taped it in place. There was a slight gap between the fourth fin line and the edge of the paper guide, which I figured was intentional. I marked each fin line with a little pencil dot.
As always, I decided which end I wanted to be the forward and which end the aft, and marked them so as not to
forget. I don't remember how I chose on this rocket, but it may have had to do with how the centering rings fit.
Estes fin guides have an additional line, the launch lug line, exactly between two of the fin lines. The Quest guide didn't have that. In order to get the launch lug line exactly spaced between two fins, I folded the guide over and matched up to of the fin lines, then put a pencil mark on the fold.
Then I attempted to match up the fin lines with the little pencil dots on the airframe, and that's when I noticed a flaw in the kit - the dots didn't line up with the lines. I can only have noticed this because I must have laid the guide down between the first and fourth fins. I double-checked the lines with the other dot, and they all matched up. Something was off here!
A few months ago, I bought a digital caliper, because it was inexpensive, and because I figured I'd use it for... well, something. In any case, I like having precise measuring tools.
I got out the caliper and measured the diameter of the body tube. The box claimed the airframe was 1.92 inches. The caliper told a different story - 1.97 inches!
I knew this thing would come in handy!
I opened the free RockSim file for the Big Dog, available from Apogee Components. I don't have RockSim, but OpenRocket will open those files. I saw that, according the the sim file, the rocket should have an outer diameter of 1.97 inches. That's not much of a difference, but if the paper fin guide was made with a smaller diameter in mind, you'd get fins that are ever so slightly unevenly placed - all too close together, except for the first and fourth fin, which would be slightly too far apart. You might not even notice the difference unless you looked closely, but I look closely. It would have bothered me.
So, I used OpenRocket to print off a new fin guide - with an additional advantage that this one would already have a launch lug line marked.
I taped this guide to the rocket, and everything matched up correctly, so I marked all the lines.
Finally, I grabbed a length of aluminum angle and extended all the lines.
Normally, I extend the launch lug line all the way down the body tube, so I can sight along it and verify that I have the lug on straight. I keep the fin lines rather short. But, due to probably a little sloppiness on my part, I've gotten a few fins on not quite perfectly straight when using the Guillotine fin jig lately. The Guillotine is a great tool, but like all tools, you must use it with care.
Just to be sure I'm getting the fins on true, I extended the fin lines most of the way down the body tube. That way, I can check the fins are on the same vertical line on both ends of the fin jig before gluing them down.
You can see that before I did all this, I marked the tube spirals with a pencil so I could see the lines clearly when I filled them in.
The spiral groove on this rocket is really tight, and I had trouble in spots keeping the pencil tip in them. In spots, I couldn't even feel the groove with my fingernail. It's possible I could get away with just priming the rocket with a good coat of filler primer, but I don't want to get to the end of the build and see grooves. So I filled them in.
I've written on this blog about Mike Westerfield's book Make: Rockets: Down-to-Earth Rocket Sciencebefore. It came out a few months ago, and it has been a great help to me. Without it, I doubt I would have had the courage to design and build my own first rocket.
The book starts you out building rockets from components right away - in other words, you get the components and follow instructions to build one of the author's designs, but you're not using a kit. So you cut tubes to size, cut out your own fins, etc. It helps you get away from the mindset that you need a kit to build a rocket. Doing that, with the knowledge I gained about rocket stability and standard sizes of component parts, gave me the freedom to design and build one of my own.
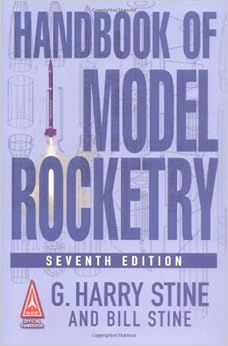
It doesn't stop there, of course. Since it comes from a maker movement publisher, the book gives a lot of details on how you can make all your own ground support equipment - launch controllers, launch pads - as well as tracking devices to find a rocket's altitude, and a lot of technical information about how to determine things like what size parachute you need, what kind of motor you'll want to put in your rocket... It's pretty great, and I found it very helpful - it filled in some of the "how-to" gaps I felt after reading The Handbook of Model Rocketryby G. Harry Stine and Bill Stine.
Required reading and a great book, but it left
me wanting to know more - specifically, how-to.
In the book, Westerfield mentions another, forthcoming book, Make: High Power Rockets, due out "some time in 2015." Having read and re-read Make: Rockets..., I really want to get my hands on this book, because I want to see his take on certain things.
On Friday, I emailed MakerMedia, the book's publisher, to ask if they had an expected publication date. MakerMedia also publishes Make magazine, a publication aimed at the DIY maker's movement with an emphasis on craft, electronics, at-home science and engineering, and they run Maker Faire.
I told them how much I liked the book, and attached a link to my video of Janus I - the two-stage rocket I designed and built myself, just for their interest.
What happened then was most unexpected. I heard back from several enthusiastic people at MakerMedia, including one person from the magazine who asked if they could post my video on their Facebook page. "Of course!" I said. What a cool birthday present!
High power rocketry is a large subject, so the news is that the book will probably be out some time early next year, 2016.
I hope it's sooner, but there's a lot of information to put into a high power book. Not only information - any book from MakerMedia is about making stuff, so there's surely a lot of things to design and try out before it ends up in the book.
The new book will cover both mid power and high power rocketry, as the first book only focused on models that used up to an E sized engine.
The first book gives some elegant designs for low power stuff, so I would like to see Westerfield's take on certain things for mid to high power:
1. Through-the-wall fins (also known as TTW)
This is where fins have a tab at the root, which gets inserted into a slot in the rocket body tube and attached to the motor mount.
The tab at the root of the fin (upper left)...
This goes through a slot in the body tube and is
glued directly to the motor mount tube.
This adds strength, as the fins aren't merely glued to the surface where they can easily snap off at landing.
TTW fins are mentioned in Make: Rockets, but the author says that these are less common to find in low power rockets. They're much more common - in fact, necessary - in mid and high power rockets.
While that's true, I do have a few kits with TTW fins - the Cosmic Explorer, pictured above, and the Crossfire ISX, both low power, Skill Level 1 kits.
Fins for the Crossfire ISX
I'm far less worried about these fins breaking off at landing.
In a kit, the fin slots are usually pre-cut, so you don't have to worry about getting them straight. When you build your own design, you have to cut your own tabs - something I haven't tried yet.
Here's a video from Tim Van Milligan at Apogee Components about slotting your own tubes for TTW fins:
If I had opted for TTW fins for my Janus I, I would probably not have snapped two of them off at home after the first flight.
Perhaps the Tim Van Milligan method is the one everyone uses. But what I like about Westerfield's first book is that he gives lots of explicit instructions and explanations, so I'm looking forward to seeing his take on this in the next book.
2. Launch rail construction
As I mentioned here, I think I want to build a launch rail for my larger rockets. There are a lot of designs out there on the web, but some of them can be hard to decipher for a n00b. What are these parts? How do I "shim" that thing in there? John Coker gives a great design for a launcher base, but I don't know where to get the parts, or how to cut them, or if I need to learn to weld... etc. I'm just not experienced enough at making some things.
In the previous book, Westerfield has a really elegant design for a low power launch pad. It's sturdy, and you can swivel it to any angle, and it uses a drill chuck to hold the rod, so you can put any size rod in it you want, up to a 1/4 inch or more.
I actually went for an easier option for mine - my camera tripod broke, so I can no longer raise the head. So I got the Odd'l Rockets Adeptor, which screws right onto the tripod camera shoe. I made a blast deflector from a steel box cover, and it works great.
The Adeptor from Chris Michielssen at oddlrockets.com...
...transforms a camera tripod into a launch pad. Just add a blast deflector.
My blast deflector is a steel electric box cover with a hole drilled in the middle. I can lay
the lead wires from the launch controller into the slots and hold them still with the
binder clips. This gives some slack to the wires so the initer doesn't pull out.
But Westerfield gives great instructions - and since this is a Maker publication, there is no assumption you know how to work with the parts you need. You get a complete parts list, and instructions on how to cut what where, etc. You can vary the design if you know what you're doing, but if you don't, all the instructions are in there, clearly spelled out.
So I'd like to see his rail launch pad design.
3. Launch relay system
For high power rockets, you need to be far away from the launch pad, for safety. Because of this, you might need very long wires from the launch controller out to the pad. But the longer the wires, the more resistance you have in the system, so by the time the wires reach the pad, there may not be enough current running through them to reliably fire the igniter.
A relay is basically a remote switch hooked up to a battery. The launch controller merely tells the switch to close, while the battery running power to the igniter itself is right there, near the pad. So the igniter gets all the current it needs - the igniter gets the power directly from the relay battery, not from the batteries in the launch controller.
But a relay isn't useful only for high power rockets. It's also useful for cluster rockets - where the rocket has multiple motors side by side.
The Quest Quadrunner - a four-motor cluster rocket
When you have current flowing through multiple igniters, the current through each igniter is less.
The current gets divided up among the igniters. Which means that it can
take a split second longer for each igniter to get hot enough to start
the motor. If, say, two out of three or four motors start before the
others get ignited, and the rocket leaves the pad, the igniters will
fall out the back of the unlit motor(s), and you'll get an uneven or
less powerful flight.
A view of the motor mount during construction. All four motors mustignite simultaneously, or the rocket won't fly right.
Reliable, simultaneous ignition is the main problem with a cluster launch, so having a relay with the battery right by the pad using only a short section of wire makes this less of a problem - each igniter gets as much juice as it can, simultaneously.
Now, just as with launch pads, there are a lot of plans online for relay systems. One guy on The Rocketry Forum even sent me a very detailed schematic for his relay system, and it's clear and understandable. But, I'm not very experienced with electronics - in fact, I've only built one electronics project: the launch controller from Westerfield's previous book, Make: Rockets...
The "Mono Launch Controller" from Make: Rockets..
I'd been wanting to make my own launch controller. In fact, there are lots of plans online - the National Association of Rocketry website has instructions for a very simple one. But I wanted something more versatile. I looked at lots of schematics, and thought of designing my own.
I understood how the controller should work. But, being such a n00b at electronics, I was too nervous to do it. I had no experience building anything electrical, and I thought what if I get the wrong switch or resistor or something, and I don't have enough amps or ohms or watts or whatever??
Again, Westerfield gives a detailed parts list, and explains the hows and whys of launch controllers. Included in the book are tables of the various igniters you find out there, and the minimum amperage needed to ignite them all - including how many of each igniter can reliably be used with his launch controller design. He also gives a detailed, mathematical explanation of resistance and amperage, which you are free to skip if it's over your head - you can merely follow the instructions and build the controller if you want to.
I built this thing, following the very detailed instructions, and it works beautifully.
A phono jack serves as the launch safety key
The lead wires connect to the controller with banana jacks -
you can remove them for easy transport and storage.
The controller has internal batteries, but you can connect a
12v external battery through a cigarette lighter-style jack.
But, of course, it does have a 35 foot lead wire out to the launch pad, and the external 12 volt battery is right by the launch controller.
Perhaps you've heard that one of the best igniters on the market for clusters - the Quest Q2G2 - has been off the market for many months, and will continue to be until they can bring them back. When they do, they are likely to have a different form of pyrogen on them, the substance which flares up to aid motor ignition when the wires get hot enough. They may continue to be great, but they may be slower.
Anyway, for now, I need to use Estes igniters on my cluster rockets, and I want to make sure they light reliably. A relay would be very helpful with this. Given the detailed nature of the previous book, I am eager to read Westerfield's instructions on relay systems.
I'm not into high power yet, but I am about to transition into mid power. There is a lot of information which crosses over, and I like to do my homework before I embark on a new rocketry project. 2016 seems a long time away when I think about rockets, but it's something to look forward to.
There is already a handbook on high power rockets - Modern High Power Rocketry by Mark Canepa. But it is already ten years old. Some things change - including technology and legal issues - and besides, it's always good to have more than one resource for information on a subject. I look forward to seeing what information Mike Westerfield will bring us.
As I mentioned yesterday, I have a build pile of 17 rockets, and I'm not sure where to begin.
Truth is, I have a few rocket kits (8 of them) which require a little
thought and planning before I begin. All the Estes Pro Series II and
the Quest Big Dog (the whole front row, above) are considered mid power
rockets. They all take 29mm rocket motors, which can be much more
powerful. I want to transition into high power rocketry, and these
bigger mid power ones are the key. The construction is not dissimilar
from the low power stuff I've been building and featuring on this blog,
but it's sturdier and with thicker materials. So this is where I learn.
But
I have to decide, among other things, how I'm going to launch them, and
therefore how I might alter the kits. These all come with traditional
launch lugs for launching from traditional launch rods. But many mid
power rockets and most high power rockets tend to use a launch rail these
days - a slotted metal rail six feet long or longer, onto which the
rocket slides, guided not by a straw-shaped lug, but by a launch button
or conformal rail guide.
Cross-section of a T-slot rail and a rail button.
Photo from the CDI Model Rocketry website.
The Quest Big Dog is where
I'd like to start, and before I do, I definitely need to make a
decision, and figure out how to build it.
The Big Dog has a lanch lug
which is sized for a rod no bigger than 3/16 inch, which is a pretty
thin rod when you go up to an F or G composite motor. But rail buttons
are best attached by screwing them through the airframe into a
supporting piece of wood - often right into a centering ring, which in larger rockets are usually made of plywood. But the centering rings for the Big Dog are made of thin black fiber, so that's not an option. I'd need attach a small piece of wood on the inside of the body tube to act as an anchor. The airframe for this rocket is 1.92 inch in
diameter, and I can't get my hand inside that, so I don't know how I'd
get anything inside there.
Then there's the issue of making a launch rail. Most
rocketeers seem to favor something called 10/10 slotted rail from an
Indiana-based company called 80/20. They do, however, have thinner,
metric rail, and there's a company which makes mini-buttons to fit a
rail of that size. Now, I like the idea of smaller buttons and a thinner
rail - I probably won't need anything huge for quite some time. But I
don't know how common mini-buttons are, or when you'd need to upsize to a
larger button and rail. If I only build a couple smaller rockets, is it
worth building a mini-button rail, or do I need to go for the bigger
ones?
So, there's that - what size rail do I want to use? Apart from that issue, there's also the question of building a rail launch pad. I've seen a few instructions online for simple pads - this one from the Apogee Components newsletter is pretty simple and cheap, but only points straight upward - you cant tilt it downward to load the rocket or to adjust your launch angle to compensate for the wind. Here's another good, cheap one which looks great - relatively simple and cheap to build, but the instructions are hard to follow for a n00b like me, and I had to Google a few things to figure out what the parts mentioned were. Metal nipple?? What is THAT?? I think it's a plumbing thing...
In the book I've mentioned many times, Make: Rockets: Down-to-Earth Rocket Scienceby Mike Westerfield, there's a low power launch pad which uses a drill chuck to hold a rod. It's adjustable, and takes whatever size rod you want to put in it. I think I could modify that to take a heavier load. If you look at that picture above of the rail, you see it has a hole down the middle. I think this can take a metal rod, but I have no idea what size - the manufacturer's website doesn't have that information - at least not where I could find it.
I really want to start building those mid power rockets - especially the Estes Leviathan, a huge, fat rocket (by my standards). And especially the Estes Ventris. And the Partizon... OK, I want to build all of them.
But I do have other rockets to build, which I guess I could start in the mean time. First, there's the Cosmic Explorer. I love this rocket - it flies so straight!
I got three more of them at the Estes holiday sales, and want to hack or bash the kit to take a larger, E-sized motor. But I'm procrastinating on that one. It has through-the-wall or TTW fins, and I'll need to trim them a bit to make them fit properly.
At less than 5 bucks a pop, how can you not get three??
I have a couple of simple, Skill Level 1 rockets I probably wouldn't have bothered with if they weren't so cheap - the Estes Monarch and Hornet. Now that I have them, I have to admit, they are cute. These simple rockets might be a good next step, just to keep me working. But I want to build something bigger or more interesting.
Next, the Reflector.
This is a payload-capable rocket, and the one used in this Instructables on adding a camera. I have the rocket and the keychain camera, but now that I have it, I'm nervous about taking the camera apart.
Then there's the MIRV.
This is a very strange rocket, not only because of its shape. It's a two-stager. The first stage flies on one single motor, as you'd expect. But the upper stage splits into three separate rockets each flying on their own motors!
This is why I wish Chad were around more often. He's the only friend who I think would find this truly fascinating. Unfortunately for me, he's now splitting his time between Bloomington and a theater company in the Adirondacks.
Finally, there are a couple of rockets I'm excited about, but intimidated by.
The Dr. Zooch Saturn V.
This "ant-scale" model is pretty complicated. Chris Michielssen does a beautiful job with his, but it requires some real finesse and dexterity to make it look nice. And that's the only reason I'd want to build this one. I'm nearly there, but... Making those "engines" is gonna take some patience and skill.
Finally, there's something special - the Red River Rocketry Blue Shift.
The Blue Shift, from Red River Rocketry - the last of its kind?
What's special about this rocket is that it's no longer in production - and this one right here might very well be the last one of its kind.
I first saw the rocket on Apogee, and thought it looked cool, and put it on my wishlist. But soon I discovered that Red River Rocketry no longer makes kits. I scoured the web to find one, and found two - from eRockets, through Amazon. I bought the second to last one - and it was lost by the postal service. I had to file for a refund through Amazon, and ordered the very last one.
This is just another rocket, but it's nice looking, has a few features I haven't built yet - and it's the very last one! I want to do this rocket justice, and not screw it up, which is why I haven't started on it yet.
I'm tempted to build it and not fly it - tempted, but of course, I will launch it. That's what rockets are for!
Still, somewhere out there, either in the back of a truck, in some other person's apartment, in a landfill (let's hope not), or in some postman's house is one more of these. Let's hope it's OK.


.jpg)
.jpg)
.jpg)