Showing posts with label Homer Hickam. Show all posts

Tuesday, April 18, 2017

Stability - or - What Happened to Homer's Rocket? (Part 4) - Finding the CP: Method 1 Continued


This is a continuation of a series on model rocket stability for beginners. Click here to go go the beginning of the series. Click here to read the last post.

Last time, we discussed the earliest method of finding the Center of Pressure (CP) on a model rocket - the cutout method. This simple method ensured stable flights on every model in the early days of model rocketry. Finding the CP is a crucial problem to solve, because in order for stable rocket flight, the CP must be behind the Center of Gravity (CG).

But, of course, the cutout method had drawbacks. Rocketeers had to be reasonably skilled at drawing an accurate representation of the rocket on stiff paper or cardboard, with all the parts in correct proportion. In other words, in order for the cutout method to work the drawing had to look just like the real thing.

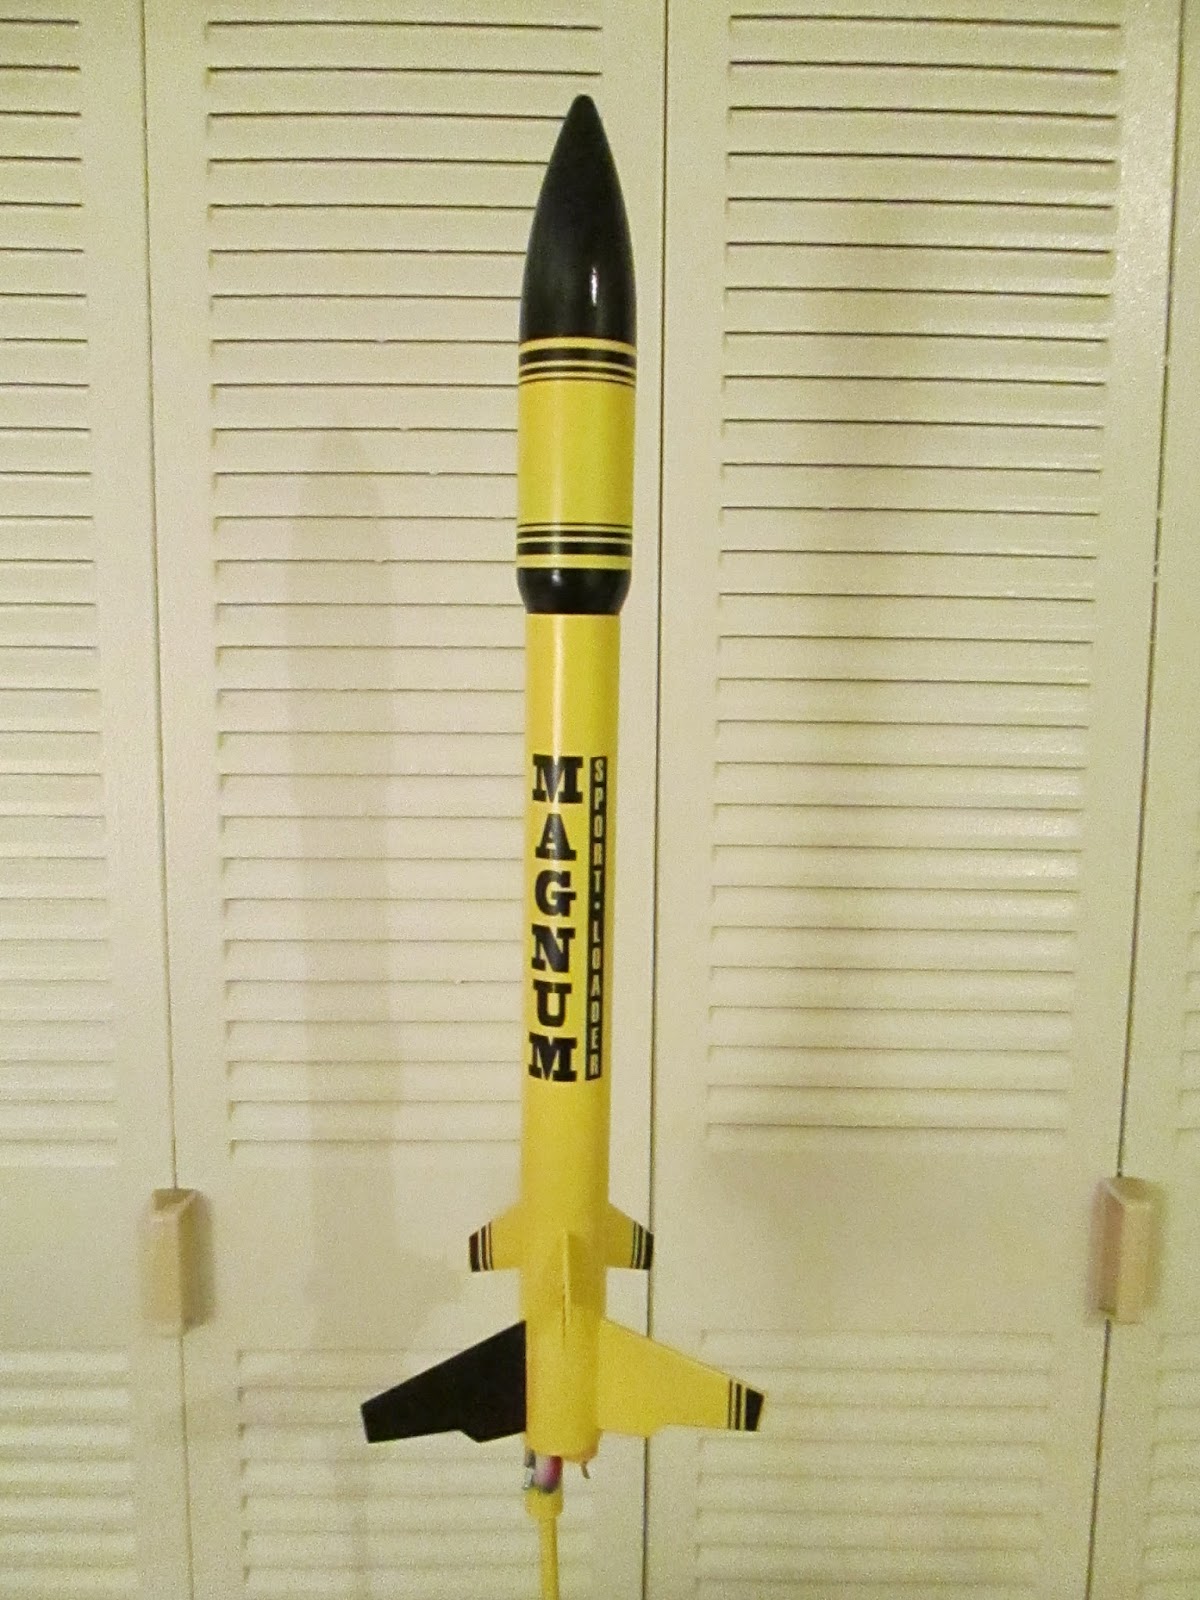
Since I'm not a skilled draftsman, I cheated a little. I illustrated the cutout method with a design I'd created in OpenRocket - Sounder IB - which I printed on heavy card stock, cut out, and balanced on a piece of aluminum angle.


This showed us another drawback of the cutout method - accuracy. While balancing the two-dimensional cutout of Sounder IB did find the center of area for the rocket, that point was far forward of the red CP mark on the drawing itself. In other words, OpenRocket told me that the CP was in one spot, but the cutout method indicated that the CP was a good two inches further forward. So far, in fact, that the CP as determined by the cutout method was in front of the CG, as calculated by OpenRocket.


So, while the OpenRocket design showed the rocket to be perfectly stable, the cutout method showed me a dangerously unstable rocket - one which would flip violently around if it were launched!

So, does the cutout method represent the Center of Pressure at all? Or were rocketeers merely fooling themselves? And how do we - how does OpenRocket - know where the CP actually is? Who's right, who's wrong, and why?

The answer is that they're both right - kind of.

In the cutout method, we're balancing a 2D representation of the rocket - on its side. The cutout is resting on its balance point, so as the force of gravity pulls on it, the force is equally distributed in front of and behind the aluminum angle. This force - gravity - is acting a substitute for another force - air pressure - in the real rocket. So, for the cutout method to represent reality, the air pressure would have to be hitting the rocket directly from the side. The cutout method shows you were the CP would be if the rocket were flying sideways!

In this case, that means that all the air is hitting the rocket from the side - at an angle of 90 degrees. The angle the wind is hitting a rocket is known as angle of attack.

Alpha represents the angle of attack. Image from Centuri TIR-30, by James Barrowman.


In The Handbook of Model Rocketry, a 90-degree angle of attack is described as "the worst possible flying condition." In fact, it's an imaginary flying condition, because rockets do not fly sideways. They fly pointy end first!

Under normal flying conditions, with the proper motor (providing enough thrust for the weight of the rocket), model rockets fly at or near zero degrees angle of attack. While the ambient wind tends to blow horizontally along the ground, the rocket flies fast enough upward that the effect of the wind is minimized. If the wind on launch day is, say, 8 miles per hour, and the rocket is flying upward at, say, 200 miles per hour, the rocket will barely notice the wind coming from the side.

Under those conditions, the determination of the Center of Pressure is dominated much more by the fins and nose cone than by the surface area of the body of the rocket. As the rocket wobbles during flight - totally normal for a model rocket - the angle of attack will swing back and forth between zero and a few degrees. As this happens, the fins, which stick out from the body of the rocket, use the oncoming air pressure to correct the rocket's path, causing the back end to rotate away from the wind.

The pressure on the body tube at or near zero degrees angle of attach is much lower, and has much less effect on the CP.

But if the angle of attack were to suddenly increase significantly, then the air pressure on the nose cone and body tube becomes much more significant. The effect is that, at high angle of attack, the Center of Pressure moves forward. If, due to some (imaginary) catastrophic event in flight, the rocket were to fly sideways, then the CP would move forward enough that it would be where we see it when we do the cutout method.

As angle of attack increases, the influence of the nose cone and body tube increase -
the CP moves forward! Image from Centuri TIR-30, by James Barrowman


There are only two situations I know of when a normal rocket experiences these conditions. The first is when the rocket is sitting on the launch pad, and the breeze is blowing across the field. But when the rocket is sitting still on the pad, it's not flying, so this doesn't count.

The other is a rare, pretty strange event, which I've seen twice - recovery.

Once in a while, a rocket will launch, fly to apogee, and then due either to an ejection charge failure or a nose cone which is stuck on too tight, the nose cone doesn't eject. The rocket stays intact, the parachute does not come out, and the rocket begins to fall back to Earth.

Normally, when this happens, it's pretty frightening. Because the rocket is stable, with its CG in front of its CP, it will tend to fly nose first. So a rocket which has an ejection failure usually comes in ballistic - taking a nose dive straight at the ground with increasing speed. This usually destroys the rocket.

Sometimes, very rarely, an odd thing will happen. The rocket will go up, tip over at apogee, and begin falling back down. In rare instances, the CP at 90 degrees angle of attack will be the same spot as the rocket's CG. The rocket is then neutrally stable. The forces of gravity and air pressure are both centered on the same spot. The rocket descends sideways. Since the Center of Gravity is the point of rotation, and the Center of Pressure is the balance point of the force of the air of the rocket, the whole thing is in balance - just like a balanced scale.

If she weighs the same as a duck...

Both times this happened, the rocket fell very slowly, and came to a soft landing. Both times, I was filming, but both times, I was so stunned, I missed getting the slowly descending sideways rocket in frame. But it was pretty cool - and certainly a relief not to have the rocket come in ballistic.


I should mention that you shouldn't try to replicate this, by gluing on a nose cone or something. It's a chance event when it happens, and the same rocket might not do it twice - a slight difference in Center of Gravity could change everything, and the rocket would come in ballistic. But if you do see it, it's kind of amazing.

* * *

The fact that the CP can shift forward is really important. It means that the CG and CP could be too close together for the rocket to remain stable. If the angle of attack suddenly increases, due to a gust of wind, or off-center thrust of the motor, or any number of things, having the CG too close to the CP means that under certain circumstances, the CP could move forward of the CG! If these two switch position, you now have a dangerous, unstable rocket.

This brings us to the question How far forward of the CP chould the CG be? I was going to save this for a later part of this series, but I think it makes sense to mention it here.

In general, the rule of thumb is that the CG should be at least one body tube diameter ahead of the CP. That means that if the rocket is, say, 1 inch in diameter, the CG must be at least 1 inch forward of the CP. This margin is known as caliber, and refers to the diameter of the rocket.

Sounder 1B is 0.976 inches or 24.8 millimeters in diameter. If the CG is exactly 0.976 inches or 24.8 mm ahead of the CP, we say the rocket has a stability margin (sometimes called the static margin) of 1 caliber. If the CG and CP are 1.952 inches or 49.6mm apart - twice the diameter of the body tube - the margin is 2 caliber.

As you see, Sounder 1B has a static margin of 1.63 caliber. The CG is 40 millimeters forward of the CP. Since the minimum static margin is 1 caliber stability, this is fine. The ideal, especially if you want to fly as high as you can, is a static margin between 1 and 2 caliber. More is usually OK, up to a point. Less is generally not enough for safety, except in the case of some short, stubby rockets.

For most model rockets, however, the minimum safe static margin is 1 caliber. Having a static margin of 1 caliber or more ensures that, even if the rocket encounters a high-degree angle of attack for a moment, the CP isn't likely to shift forward of the CG. The rocket should remain stable.

* * *

To be clear, the cutout method does work to make stable rockets. But it's what we could call overly conservative with its CP location. A rocket designed using the cutout method would certainly be stable and safe, but it errs so far on the safe side, that you may end up building rockets which are far heavier in the nose cone than they need to be, or with more fins or larger fins than you need. That means you may rob yourself of performance, or you may shy away from building a rocket which is perfectly safe and stable, because you worry it might not be.

A better, more accurate method of finding the Center of Pressure was called for. We'll discuss that method in the next post.

Click here for Part 5.

Follow me on Twitter.

Like my Facebook page for blog updates and extra stuff.

Have a question you'd like to see addressed on this blog? Email me at iamtherocketn00b@gmail.com.

Saturday, March 18, 2017

Stability - or - What Happened to Homer's Rocket? (Part 3) - Finding the CP: Method 1


This is the continuation of an older series of posts on model rocket stability for beginners - rocket n00bs. Click here to return to Part 1, and here for Part 2.

In the previous posts on model rocket stability, we talked about Center of Gravity (CG) and Center of Pressure (CP) on a rocket, and where the two should be in relation to one another (CG ahead of CP). We learned that the purpose of fins is twofold: to move the CP aftward - behind the CG - and to correct a rocket's trajectory and dampen the back-and-forth oscillation you naturally get in rocket flight through the air.

But how do we know where the Center of Pressure is? How far behind the Center of Gravity should it be - can the CP be too close or too far from the CG? And what can we do to fix an unstable or understable rocket?

We're going to devote the next few posts to different ways of finding the Center of Pressure, then move on to other questions on stability. This is exciting stuff, because once you understand the basics of model rocket stability, you can do some interesting things. You can design and build your own rockets, knowing they'll fly safely. Even if you mainly prefer to build kits, understanding stability will enable you to modify those kits - such as building them to fly with larger, more powerful motors, or converting single-stage rockets to high-flying multistage rockets by adding a booster section.

An upcoming project - an Estes Photon Probe* kit with a booster - now a two-stage rocket!


* * *

First, finding the Center of Gravity - also known as the Center of Mass - is simple enough. All you have to do is balance the rocket on its side. You can do this on a finger, the back of a chair, or the edge of a ruler (if you can get it to stay still). I like to use a piece of string with a loop tied in the end. Balancing a model rocket on a chair back, which I have done, you run the risk of it falling off and breaking. With a string, I don't worry about the rocket falling to the floor.

Finding the CG on an Apogee Avion rocket
When locating the CG for checking stability, it's important to have the rocket prepped to fly. In other words, you need to install a motor, recovery wadding, and the parachute.

Once you've located the point where the rocket balances without tipping one way or another, you've found the Center of Gravity. The CG is the rocket's balance point, and as it flies, the rocket will rotate back and forth around this point as the fins keep the rocket pointed upward.

Well, the Center of Pressure is another kind of balance point, but rather than being a balance point of all the mass or weight of the parts of the rocket, it's an aerodynamic balance point. It's the theoretical point on the rocket where the sum of all the aerodynamic pressure is in balance. It has to do with surface area rather than the relative weight of the rocket's parts.

So, while a heavier nose cone might change the CG, its weight has no bearing on the CP. It has to do with the shapes and sizes of all the external parts of the rocket. How on earth do you figure out where that point is?

That question plagued rocketeers in the early days of model rocketry. They knew what the CP was, and knew it had to be behind the CG, but how were you supposed to know where the CP would be on a given rocket design?

There are three basic methods. Today, we'll look at the earliest and most basic one.

The Cutout Method

From Estes' The Classic Collection

In the early days of model rocketry, people knew that the CP had to do with surface area, and needed to find a simple way of locating the center of the surface area of their rockets. Specifically, the center of lateral area - the center of the area of the rocket as viewed from the side. It would be easy to find the center of area looking at the rocket from straight on - it's the tip of the nose cone.

How do you find the center of lateral area of a 3-dimensional rocket-shaped object? The answer is to simplify things a bit.

It's actually simple to find the center of area of an oddly-shaped two-dimensional object. You balance it. If we had a two-dimensional representation of our rocket, we could find its geometric center or centroid.

Using the plumb line method to
find the centroid of an odd shape

The cutout method involved making an accurate drawing of a rocket on a stiff material such as card stock or cardboard, cutting the drawing out, and balancing it. Since the card stock is of uniform thickness and density throughout, its Center of Gravity and Center of Area are the same thing!

Here's a cutout of a simple model rocket - Sounder IB - balanced on a piece of aluminum angle.


Once we've found the center of lateral area for our rocket design, we know that as wind hits that object, it should be balanced at the geometric center. Because the air pressure would be equal on all sides of that point, that's our CP. If you were to balance the rocket at that point and hold it in the fast moving air of a fan, you could point the rocket sideways, but it wouldn't pivot - the air pressure would be equal in front of and behind the CP.

As long as when we build the rocket, we make sure that the CG is ahead of that point, we should have a stable rocket.

From Centuri technical report TIR-30, by James Barrowman

Of course, the cutout method has some drawbacks, a couple of which can be deduced from the photo above.

The first is that it requires that you be able to draw an accurate representation of your rocket design, with all parts correctly proportional and in exactly the place they will be on the finished model. Not everyone is terribly gifted at drawing these days, so you'd have to be able to draft an accurate design with tools - rulers, curves, maybe a compass, etc. (Since am not skilled at drafting, I used a printout from an OpenRocket design just to show you the cutout method above. And since I have OpenRocket, I really don't need to use the cutout method - but I wanted to show it, and since I can't draw, I cheated here.)

Another drawback is this: Drawing a two-dimensional representation of your three-dimensional rocket may not tell the whole story. A rocket seen only in silhouette is not the same as the real, 3D thing.

As an illustration, here are three very similar - but significantly different - model rocket designs.


Sounder IB is a four-finned rocket, so it's simple to create a symmetrical, reasonably accurate drawing of it.

The three rockets above - which I haven't named - are all the same design. They have 18-inch long body tubes, a 4-inch plastic nose cone, and trapezoidal fins. The only difference is the number of fins - three, four, and eight.

Let's start with the four-finned rocket, since that's symmetrical in multiple directions. Here's what the drawing we would make of it on cardboard would be shaped like.


Pretty simple.

For the moment, ignore the blue and white CG marking and the red and white CP marking. We'll get to those in a bit. Also, ignore that I've done this drawing using model rocket design software. Let's pretend - just for now - that we're looking at a good drawing done by hand.

If we cut out along all the lines of our drawing, we can see that the end of our two-dimensional cardboard cutout with the fins on it will be heavier, and that the CP of the rocket will be closer to that end than to the nose cone end. As we look at the design, we see two of the fins directly from the side - in other words, we can see their full outline straight on.

Of course, if we turn the rocket 45 degrees, then our two-dimensional drawing looks a little bit different.


The fins of the rocket are the same size as they were before, but in our two-dimensional representation, they look smaller. That means that, if we were to use this drawing to find our CP, it would seem like it was further forward than if we used the first drawing. But, of course, the actual CP on the rocket isn't dependent on which way you look at the rocket.

Of course, most likely nobody would have drawn their rocket like this to find the CP, so this might seem a bit silly. But it does begin to give an idea of the limitations of the cutout method.

So, let's look at a three-finned model.


Now, with this drawing, we're looking at two of three fins, which would be 120 degrees apart on a rocket. Since we're seeing one fin directly face on, we're seeing another one at an angle, and so in this drawing, the fins are lopsided. That's OK, of course, because we're not trying to balance our cutout along the rocket's vertical axis - from nose tip through the motor nozzle. And, of course, we could rotate the view of the rocket by 30 degrees and see it like this:


Now we're seeing two fins at an angle, so they're smaller than they would look face on. The third fin is on the opposite side of the rocket, pointed directly away from us.

Because the fins in this drawing look smaller, a cutout of this balanced on a ruler would indicate that the CP is further forward than on the four-finned rocket - which would be correct. If you add more fins, there is more surface area on the back of the rocket, and the CP moves aftward.

So, which way should you draw your rocket if it has three fins? Well, it might not matter. Perhaps you'd find that both drawings have the same area, and the balance point of the cutout would be the same. But, in fact, I've found no explicit instructions about what to do for a three-finned rocket when using the cutout method. Again, either one will work, and if you build your rocket with the CG forward where the balance point is on the two-dimensional cutout, the rocket will be stable.

Since we've established that adding more fins moves the CP toward the rear of the rocket, let's go in the opposite direction. Instead of three or four fins, let's build a rocket with eight.

If you draw a two-dimensional outline of the four-finned rocket seen above, you get this:


Because you're creating a two-dimensional outline of this rocket, the four-finned version and the eight-finned version look exactly the same, which means that the cutout method suggests that these two rockets have the same Center of Pressure, despite one having twice the fins of the other!

Now, of course, you may well already know that, in OpenRocket or RockSim, the Center of Pressure is indicated by the red circle with the red dot in the middle, seen above in all the designs. And the CP on the cutout of Sounder is far behind the spot where it is balancing on the aluminum angle.

You probably also know that the CG is indicated with the blue and white checkerboard circle. The CG in these designs is an estimate, calculated based on what I've told the software each of the component parts weighs. You'll notice that, regardless of what the rocket looks like in silhouette, as I add more fins, the CP moves aftward.


You can see that all of these rocket designs have the CG well ahead of the CP, and are stable. That includes Sounder - even though the blue CG mark is behind the spot where my cutout balances on the aluminum angle! In order to make Sounder stable, according to the cutout method, it looks like I'd have to make the front end of the rocket much heavier, to move the CG further forward.

So, what gives? Can the cutout method be said to represent the CP of a rocket at all?

Well, the answer is yes - but only in certain circumstances. We'll talk about that in the next post.

Click here for Part 4.

*Original OpenRocket file by Jim Parsons - a.k.a. K'Tesh. His OpenRocket work can be found on The Rocketry Forum in this thread. It's helpful to have these, because you can take them and tweak them, which is a lot of fun.

Follow me on Twitter.

Like my Facebook page for blog updates and extra stuff.

Have a question you'd like to see addressed on this blog? Email me at iamtherocketn00b@gmail.com.

Sunday, August 9, 2015

Stability - or - What Happened to Homer's Rocket (Part 2)

Click here for Part 1

When I was a kid, I found this strange book in a library - I forget the title. It was written in the 1960's, and was a kind of activity book with various crafts you could do to pretend you were living in the stone age. One of these crafts was to make a spear from a broom handle. You used colored tape to decorate it, and there you go, kid. You're a caveman!

Problem is, I could never through the darned thing straight. I thought paleolithic man must have had some secret spear-throwing technique this book didn't cover. It wasn't until I started building rockets that I thought back to that book and realized what the problem was.

. . .

There are three types of stability you may encounter in rocketry: positive stability, neutral stability, and negative stability.

Positive Stability

In the first post, I mentioned the concepts of center of gravity (CG) and center of pressure (CP). These are both central points, of sorts, on a rocket. The CG is the balance point of the rocket (or of any object). It is an imaginary point at the center of all mass on the rocket. The rocket (or any object flying or falling through space) will rotate around this point, always, 100% of the time. The CP is the center of all aerodynamic pressure on a rocket, and is where it is due to the surface area of the rocket.

Although gravity acts on all points of a rocket equally (the motor hook is pulled toward the Earth with as much force as the nose cone), we say that gravity acts through the center of gravity. If you balance an object on your finger, at its center of gravity, it won't fall. Although gravity is pulling on the ends of the object just as much as it's pulling on the center of gravity or mass, you can hold it up just by balancing it at that point.

Similarly, although the air acts on all points of a rocket, we say that it acts through the center of pressure.

I also briefly mentioned the proper relationship between the CG and CP - that the center of gravity must be ahead of the center of pressure. If the rocket is built this way, it will fly straight up, in the direction intended. It may oscillate - wobble back and forth - a bit as it does so, the fins correcting its trajectory as it flies upward. As the fins dampen the oscillation and the rocket accelerates, it will oscillate less and less. A rocket built this way is what is known as positively stable, or, simply, stable.

In this slo-mo supercut, you can best see the slight oscillation in the Der Red Max launches. It's not very prominent, but you can see it in the smoke trail.


Negative Stability

If a rocket is built with its center of pressure ahead of its center of gravity, it will not fly straight. It will fly erratically, flipping and flopping around the sky, and probably crashing to the ground in the process. This can be dangerous, with a larger, heavier rocket. In this case, the rocket is called negatively stable, or just unstable.

In this great video from KQED Public Television, at about 3:40, you can see what some unstable rocket flights really look like.


Neutral Stability

A neutrally stable rocket is one in which the CG and CP are at roughly the same point. A neutrally stable rocket can have a very strange flight. It won't necessarily flop around in flight, but neither will it necessarily fly straight. In fact, it will go in any direction it is pointing. That might sound like it will fly straight up as desired, but in fact, any small gust of wind, or anything which disturbs its straight flight, will change its direction. A neutrally stable rocket cannot correct its trajectory, as a stable rocket will.

An illustration of the three types of stability: positive, neutral, and negative. From Centuri Technical
Information Report 30: Stability of a Model Rocket In Flight
, by Jim Barrowman, 1970. We'll discuss
Barrowman and his contribution to the understanding of rocket stability in the next post in this series.
The oscillation depicted in the stable rocket illustration is exaggerated.
But neutral stability is interesting, because with it, we can do a little experiment to show us how we make a rocket stable. The key ingredient: fins. The fins on a rocket have two purposes.

An Experiment in Stability


Take a foot long dowel rod and balance it on your finger. The point where it balances is its center of gravity - it's the center of all its mass. The mass on one side of your finger is equal to the mass on the other side of your finger.

If you flip the dowel rod in the air, it will rotate around that balance point exactly. If you try to force it to rotate around some point closer to one end, it simply won't work.

Now try throwing the dowel like a spear straight across the room, and see if you can get the front end to stay at the front. Perhaps you can do it, but most times, it will simply point wherever. It probably won't spin fast, but it will end up turning sideways, maybe backwards. The dowel rod is neutrally stable. Can you throw it straight? Maybe, but not reliably. Because the point at which the surface area is equal is also the point at which the mass is equal on all sides, the center of gravity and center of pressure are in the same spot.

This is why I could never throw my broomstick spear straight! The center of pressure and center of gravity were essentially the same, so the spear (like a rocket) was neutrally stable!

Now take three bits of masking tape, a couple of inches long. Tape one to an end of the dowel rod, making a T shape. Then fasten the other bits of tape on the same way, so that the three pieces of tape come in contact with both the dowel rod and the sticky parts of each other. You've now made fins. They're a bit janky, but they'll do the trick.


If you re-balance the dowel rod, you may notice that the center of gravity has moved rearward just a little bit, due to the mass of the tape being added to one end. But you've also moved the center of pressure rearward, and by much more than the center of gravity. That is the first purpose of the fins - to move the center of pressure rearward.

If you now throw the dowel across the room, it will go straight, with the pointy end forward and the fins aft. The dowel is now stable!

If I'd added a bit of weight - like a clay spearhead - to the tip of my pretend spear, moving the center of gravity forward, or if I'd added some kind of fletching to the rear, moving the center of pressure aftward, or a little of both, I could have thrown the broomstick spear with no trouble.

Now, this is not because the fins are merely guiding the rocket. If that were the case, the fins could be anywhere. If you try to throw the dowel with the fins first, you cannot do it. The dowel will flip around in flight and fly fins last. If the part with the fins were your "nose cone," you'd have an unstable dowel rocket, because the CP would be ahead of the CG. This is why we do not put the fins at the front of the rocket. If we did that, we'd have a terribly unstable rocket, which would try to fly backwards.

Of course, a rocket cannot fly backwards, because it has the continual thrust of the motor coming out the back, trying to push the rocket forward. The result is that the rocket flips around all over the place, constantly trying to "correct" itself and fly with the CG ahead of the CP, but the thrust keeps pushing it in different directions.

If the fins were merely guiding the rocket, it might seem like having fins all the way up the side of the rocket would make it go straighter. Let's take a look at why that's not such a good idea.

Here's a simple design of a 4-finned rocket.

Click the pictures to enlarge.

You can see that the CG is ahead of the CP, and that the stability is positive - in this case, 1.35 caliber. We'll get more into caliber next time. For now, you can see that this is a stable rocket, and will perhaps fly over 800 feet on a C6-5 motor.

Now, what happens if we add some fins to the front end as well - in an attempt to make the rocket fly even straighter.


The rocket is now negatively stable. It's stability is -0.915 caliber. The simulation also tells us that the rocket may hit 98 feet. But it won't be pretty.

Why is this?

Let's illustrate the CG/CP relationship. Here we see a cardboard cutout of a simple rocket design - Sounder IB.


As I mentioned in Part 1, the center of gravity is indicated by the blue and white circle (really tiny in this image), and the center of pressure is the red circle with the red dot in the middle. Note that the CG is ahead of the CP.

As the rocket flies straight, assuming there's no wind coming from the side, the rocket experiences the wind coming at it straight on, flying past the body and fins at an angle of 0 degrees. This angle is known as angle of attack, and we'll talk more about it later.

For now, though, just imagine the pencil as indicating the airflow past the rocket. The thumbtack is on the center of gravity, because a free-floating object in space can only rotate around its center of gravity.

Now imagine that something disturbs the rocket in flight. It could be a gust of wind, an odd bump of plastic on the nose cone - anything. The rocket will turn slightly, so that the apparent wind is coming at it at an increased angle (of attack). The rocket is still flying upwards - how does it correct itself?


Well, as mentioned before, the air pressure acts on all parts of the rocket. But the center of pressure is the point the air pressure acts through. It is as though the air pushes right on that spot.


Because the air pressure is essentially pushing on the CP, it will cause the rocket to rotate around the CG, making it fly straight forward again. When a rocket is flying at an angle of attack above 0 degrees, the airflow over the fins creates high pressure on one side and low pressure on the other side. This creates an aerodynamic force called lift, which we'll talk about in more depth later, and straightens the rocket out. The rocket corrects its trajectory. This is the second purpose of the fins - to correct a rocket's trajectory in flight.

It may overcorrect, and flip the other direction. In that case, the air pressure once again causes the rocket to rotate around its CG, in the other direction. This is the oscillation you may notice in rocket flight.


Eventually, the fins dampen out the oscillation and it becomes less and less, until the rocket flies more or less straight up. That's a stable rocket.

But what happens if the CG is behind the CP? Using the same cutout (because it took me a lot of effort to cut it cleanly and reinforce it), let's imagine that scenario.

Maybe this is because we have a really heavy motor, or really tiny fins, or we thought it would be a good idea to put a second set of fins near the front of the rocket to provide "more guidance."

Here, I've moved the imaginary CG behind the CP.


As the rocket flies, the air pressure, acting through the CP, rotates the rocket around it's CG - this time, flipping the rocket around so that it's trying to fly backwards!


Of course, with the thrust coming out the motor, the rocket continually tries to fly forward, so the apparent wind continually changes direction, and the rocket flips and flops around in the air until it crashes.

A neutrally-stable rocket has its CG and CP at roughly the same spot. The fins cannot correct its trajectory, so it's free to fly wherever it happens to be pointing.


"Whatever... I do what I want."

Just remember: G comes before P - in the alphabet, and in your rockets.

How do you know where the CP is? And does it matter how far behind the CG you put the CP? And what if you have an unstable rocket design - what are some things you can do to fix it without throwing the whole thing out?

Well, we'll talk about that in the next couple posts in this series.

But why do we need to know this, if kits are designed to be stable in the first place?

Because I want to show you how easy it is to design your own rockets. But in order to do that, you need to understand the basics of stability. And of all the different aspects of rocketry, stability might be my favorite subject.

Click here for Part 3.

. . .

When I put the first part of this series on Twitter, Homer Hickam himself posted it on his Facebook page, and even commented on the blog post itself. You can imagine how thrilled I was at that!

He mentioned a couple of things which he thought might be other explanations for the lack of stability in that early flight - including non-vertical launch, poorly mixed propellant, or a poorly-machined throat nozzle. I might talk a little about those in a future post in this series - especially the non-vertical launch possibility (something he corrected in later launches, if you read the book, which I highly recommend).

Of course, this series isn't meant to be an analysis of his rockets per se - that would be nearly impossible to do for a rocket launch which took place nearly 60 years ago and was not filmed!

I mention Mr. Hickam's book (and the movie), because once you gain some understanding of the basic principles of rocketry, you can make an educated guess as to what happened when you get a weird flight. And I think that makes reading the book more fun - you can understand and appreciate some of the technical aspects of what he's talking about.


. . .

Like my Facebook page for blog updates.

Friday, July 17, 2015

Rocket Stability - or - What Happened To Homer's Rocket? (Part 1)

A few months ago, because of a recommendation from Chad, I read Homer Hickam's book Rocket Boys. This was adapted into the film October Sky, starring Jake Gyllenhaal.

In 1957, after the launch of Sputnik, Hickam became obsessed with building his own rockets. But model rocketry hadn't really been invented yet - in fact, the hobby got its start that same year - and a lot of kids tried building their own rockets at home, sometimes with tragic consequences. Cooking up propellant isn't something kids should do in the kitchen. Nobody should do it, unless they really know what they're doing, and most people don't.

If you've read the book, or seen the movie, you know Homer's first few rocket flights didn't go well. The first "flight" blew up his mother's fence. The second didn't blow up - but it flew out of control.


Since his rockets were made of metal, he was really lucky he didn't kill anybody. This is why we make model rockets out of paper, balsa and plastic. Their destructibility is a safety feature, in case something goes wrong in flight.

But what happened to Homer's rocket? Why did it fly all over the place, rather than straight up?

Reading the book was fascinating, and since I'd been studying rocketry for several months, it was fun to see how Hickam came up with a lot of innovations that we see in modern model rocketry today - electric ignition systems, tracking altitude from the ground, using a launch rod and launch lugs - all on his own. Model rocketry was invented in 1957, and it didn't get really popular until the 1960s, so a lot of young rocketeers did not have the benefit of its innovations or safety features, but many of them discovered better practices along the way.

I'd seen the movie years ago. But when I read the book, I thought, I bet I know why that happened. Actually, the reason why could have been one of several things.

There are a number of things to consider when designing, building and launching a rocket to ensure a stable flight. If you are merely building a kit, you probably don't have to worry about it that much. Most model rocket kits are well designed, and designed to be stable.

But if you'd like to design your own rockets - and it isn't that hard, as long as you understand a few simple concepts - it is very important to know something about stability. Also, sometimes we like to hack a rocket kit so it will take a larger, more powerful motor than the kit was designed for. I did this with the Estes Cosmic Explorer, because I love the way the rocket flies with standard motors so much, and I wanted to see it go higher.

My two Estes Cosmic Explorers - the stock kit build on the left, which accepts up to a
C motor and flies to about 600 feet, and the upgrade on the right, which accepts a much
more powerful E motor, and can top 1800 feet.

A larger motor is heavier, and so stability issues come into play - this is another time it's important to understand the basics of rocket stability. I was able to upgrade the Cosmic Explorer with confidence, knowing that it would have a stable flight, because I understood the basics of rocket stability.

Stability is covered in depth in G. Harry Stine's Handbook of Model Rocketry, which I highly recommend reading.


But I want to cover some of the basics here.

What keeps a rocket stable in flight? The answer might seem obvious: the fins. But simply slapping a set of fins on a rocket is not enough. You need to understand why the fins work, and what might prevent them from working.

The two most important concepts to understand with regard to rocket stability are the following: Center of gravity and center of pressure.

Center of Gravity

Every object has a center of gravity. This is also sometimes called the center of mass. It's a theoretical point somewhere on, inside, (or sometimes outside) the body of the object around which the mass is equal in any direction. This is also known as its balance point, because if you can balance an object - a stick, for example - on your finger or the back of a chair (or whatever), you've found its approximate center of gravity.

Any object in space, whether it's in the vacuum of outer space, or tumbling through the atmosphere, will rotate around its center of gravity. If you flip a stick in the air, it will rotate exactly around its balance point. A gymnast doing a somersault rotates around his or her center of gravity.

Remember how I said that sometimes the center of gravity is located outside the body of an object? That's how a boomerang operates. It rotates around its center of gravity, which is located somewhere in the air between its two arms.

A rocket will also rotate around its center of gravity. Keeping that rotation under control is what stability is all about. Although gravity is pulling equally on all parts of a rocket, from the tip of the nose cone to the end of the motor hook, it acts through the center of gravity.


In rocketry, the center of gravity is often abbreviated CG.

Center of Pressure

 The center of pressure is the average location of pressure variation on an object. It's another theoretical point on a rocket - this time, the theoretical center of all the aerodynamic forces operating on the rocket. It is determined by the total surface area of the rocket, and in a way, it's similar to the center of gravity; it's the point where all the aerodynamic forces are in balance. The surface area in front of the center of pressure is equal to that of the surface area behind the center of pressure. Much like the center of gravity, air pressure acts on all parts of a rocket equally, but because the forces are balanced before and behind the center of pressure, we say that aerodynamic forces act through the center of pressure.

But the center of pressure is tricky, because while the center of gravity of an object mostly stays put*, the center of pressure can move around, as we'll see.

In rocketry, the center of pressure is often abbreviated CP. CG and CP are very important concepts, so keep them in your mind.

*(On a model rocket, the center of gravity does move forward slightly during flight. More below.)

The center of gravity is usually indicated with a blue and white checked circle, and the center of pressure is indicated with a red dot, often with a red circle around it, as in the picture below. Notice where the CG and CP are in relation to one another.


Click here for Part 2.

Like my Facebook page for blog updates.

Wednesday, October 29, 2014

Preparing for the Spooknik Rocket Launch

It's been a busy day of rockets, guys. Oh, plus, you know, going to work.

I like to name our rocket launches. When I say "our" launches, I mean "my" launches, as I am the only person I know who does rockets, besides Chad. And Chad has recently moved to upstate New York, to the Adirondacks, for most of the year - but he's coming back!

On October 4, I scheduled a rocket launch in honor of the anniversary of Sputnik, which I called the October Sky Rocket Launch - after the film based on the book Rocket Boys by Homer Hickam. Chad immediately messaged me that he would have gone to New York by then. I asked "When are you coming back?" He said the 29th.

So, I replied, "No problem. You'll be just in time for Spooknik."

So Thursday is our Spooknik Rocket Launch. I've promised anybody who comes in costume gets to press the launch button, and we might have some kids - which will be good. We need a new crop of rocket nerds I can talk shop with some day, because non-rocket nerds have no idea what I'm talking about or why I'm into this.

Anyway, I've been so busy preparing. Today alone, I finished building Chad's Apogee Aspire rocket - a 33-inch tall rocket capable of going over a mile high. And I painted the first color - white - on my very first scratchbuilt rocket - and first two-stage rocket (that's two firsts for me in one go) - which I call the Janus I.

Janus I is in pieces at the moment, but here's an OpenRocket rendering of what it looks like:

After I'm done with the Big Bertha build, I'll take you through designing and building your own rocket, and give you details on this one I've designed and built - which has taken me remarkably little time. It's much less daunting than you might think.

On top of that, I put finishing touches on my first cluster and payload rocket, the Quest Magnum Sport Loader - a two-motor cluster capable of carrying a payload of two raw eggs (the point is to launch something fragile and not break it).

On top of that, I took a motorcycle battery I just bought to be charged - this will be used for launching cluster rockets and bigger rockets - and built the connector to hook that battery up to the launch controller I built a few weeks ago.

And I bought a steel rod for launching, and feel like I did six or seven other things as well.

All of this is stuff I hope to get to on this blog - DIY stuff, design stuff, more complicated stuff for beginners. I'm here to share my knowledge and mistakes with other people just getting into rocketry.

But it's been a long day, and I'm tired. I will probably have to save the very end of the Big Bertha Skill Level 1 series until after Thursday - too much to do tomorrow! But I hope to have video to share with you.

Alright. Bed time for Bonzo.

(Just realized I should probably buy candy for Thursday. One more thing for the To Do list...)