Tuesday, March 29, 2016

Estes Goblin - Finished!


The Goblin is a classic Estes kit. I believe they used to send it as a free gift when people ordered a certain amount of stuff. The Goblin had been out of production for years, and was brought back as a clone by Semroc.

Due probably to the popularity of the Goblin, Estes re-released their kit, so now you have a choice. Both rockets look pretty much the same, and are the same size. The main difference is the nose cone - the Semroc version uses balsa wood, while the current Estes kit features a plastic nose.

The Goblin flies on 24mm D motors. It's a very simple rocket, but this build gave me a lot of trouble! I made so many mistakes, starting with gluing the fins on. I accidentally tore the very first fin off while the glue was nearly, but not quite, dry. I had to cut it off and sand the root of the fin, but there was some tearing of the body tube.


Well, I didn't want to accept this flaw, and needed a way of covering it up. So I elected to do the fin fillets with epoxy, filled with microballoons - microscopic spheres of glass.


 This makes epoxy thicker and easier to sand if you need to. It also allowed me to get some nicely smooth, curved fillets.

Epoxy fillets make the rocket heavier, and it's probably overkill for most small rockets. But it makes a larger footprint, which successfully covered the torn paper airframe.


When sanding the primer, I sanded through and actually cut into the paper body tube, raising fibers. This would have created some hairy spots on the final paint job. So I soaked the spots with thin CA - cyanoacrylate or Super Glue - and sanded the fibers off. After re-priming, the surface looked fine.

Then I had issues with the paint! I often use Rust-Oleum 2X enamel paint, which I did here. It's a pretty good paint, but some cans of it turn out not so great. I got a really rough texture, with part of the rocket looking like sandpaper, and part of it looking like dried out earth - dark cracks all over the fins. I didn't take a picture of that, unfortunately.

I used wet/dry sandpaper to sand the rough paint off. This took a long time.

I got a new can of Rust-Oleum Marigold paint - one of my favorite shades of yellow from Rusto.

The new paint went on fine, and apart from a little flaw around the edges of the black on one fin, I'm satisfied with it.

Despite all the trouble it gave me, the Goblin turned out quite nice. I did have to leave off one waterslide decal - the Estes logo, which is supposed to go just below the black band around the rocket. Unfortunately, I cut part of the decal off when I was trimming it from the decal sheet.

Oh, well...


Like my Facebook page for blog updates and extra stuff.

Follow me on Twitter.

Monday, March 28, 2016

Repairing and Enhancing the Quest Magnum Sport Loader - Part 5: Finishing the Sim

Click here for Part 1 of the series

Click here to start with Part A of the rocket simulation part of the series

A Few More Details

We found the true weight and Center of Gravity (CG) of our rocket in the last part, and input that information into our simulation. I just have a few more details to change, then we can run a simulation.

The fins that came with your rocket were most likely balsa, and were cut from a flat sheet. As a result, the edges of the fins will be squared, as you may have noticed.


However, it is possible to shape these fins by hand so that they have a more streamlined profile. The main purpose of doing this is to reduce aerodynamic drag (or wind resistance) so that the rocket can reach a higher altitude. There are a few ways to shape fins to reduce drag, but the main two you will see rocketeers use are either to simply round the forward and leading edges, or to sand the whole fin into a symmetrical airfoil shape.

The fins from the Quest Big Dog. The four fins on the bottom are from the kit, and are square. The fin on top is one I
cut from a sheet of balsa in order to practice sanding the fins to an airfoil shape before trying it on the kit's fins.
Streamlining your fins will affect the rocket's altitude. How much is somewhat unclear. The Handbook of Model Rocketry states that you may double your altitude with airfoiled fins. I find that rather unlikely. But sometimes you will encounter some people on various online rocketry forums who claim that it makes no difference, or "no significant" difference. That leads to the question "what does a 'significant' increase in altitude mean?" More than 10 feet? More than 10 percent? More than 25 percent?

Some classic Estes publications put the question to scientific testing. I have a feeling that a good airfoil with a good, smooth finish, may help you increase your altitude by a significant, but not miraculous, amount. How much of an increase, I'm not prepared to say without testing it out myself, so I have assigned myself the project of doing comparison testing and publishing the results on this blog. In my 40's, I have found the perfect 7th grade science project. If only I had started building rockets earlier!

Anyway, a well-streamlined fin certainly makes at least some difference in altitude, and OpenRocket takes that into account. When you first create a simulation, the default fin cross section is square. If you leave the fins on your rockets square, then you're basically done.

The Quest Magnum Sport Loader has two sets of fins. On the forward set, I sanded an airfoil shape, and on the aft set, I simply rounded the leading and trailing edges.

The forward fin set - airfoiled

The aft fin set - rounded
Now these fins - especially those airfoils - are not my best work. They were an early attempt. A couple of them are a little lopsided. But, OK, it's technically an airfoil shape, so I'm going to put that information into my simulation.

Click on a fin set, select Edit, and change your fin cross section to whichever it is on the rocket.


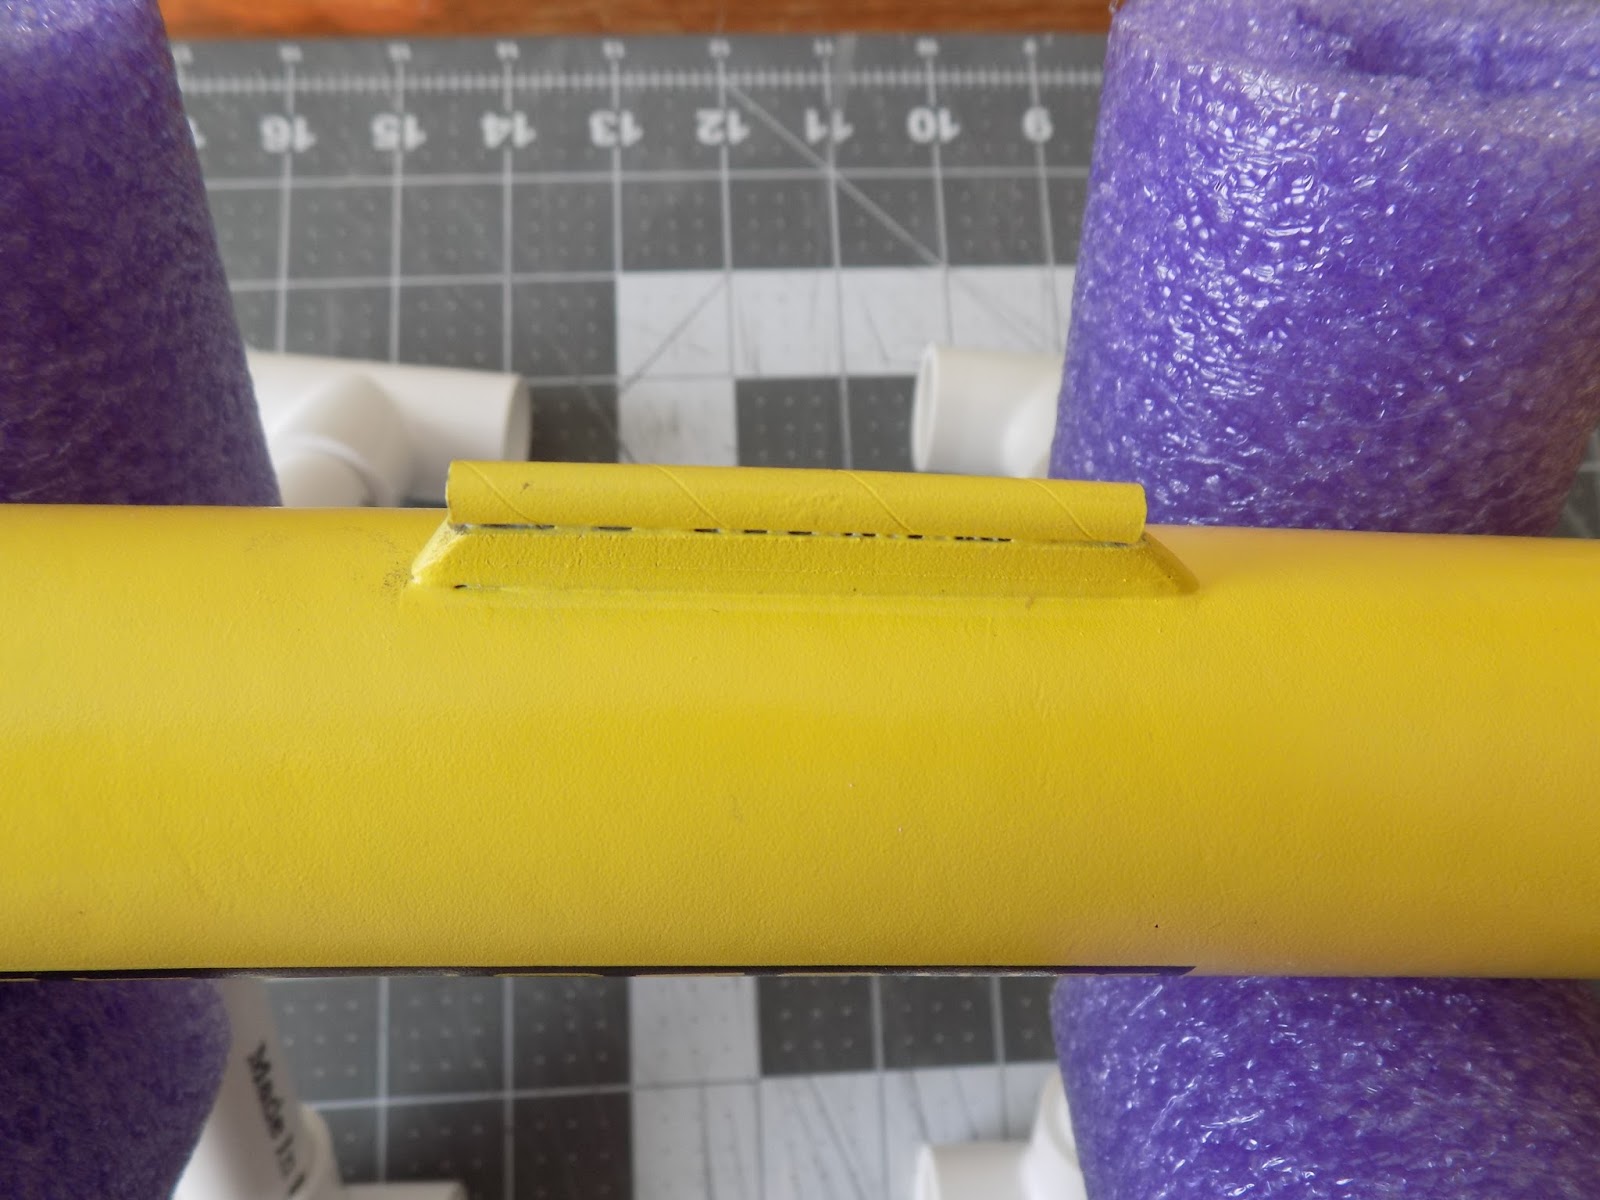
This rocket also has a launch lug standoff so that the launch rod will not hit the payload section. I've rounded that too, so I'm going to select that component (which, in OpenRocket, is simulated by creating a single fin) and change the cross section to Rounded.

Again, not my best work, but whatever.
Finally, I'll change the finish on the rocket. Do you have a really slick, polished surface, or is the paint job a little rough? You can change that in your simulation. Click on each component and select Component finish, then use the drop down box to select the finish which best approximates your paint job.


There's one other thing I want to do, just for curiosity's sake. I'm about to run a simulation with motors installed. I have the CG in the right spot on the simulation. When I "install" motors, it will shift the CG aftward. I want to see how accurately it will do that.

I install two real Estes C6-5 motors into the real rocket, then find the new CG, as I did in the last post. Then I'll mark that spot with tape and measure it.


With two C6-5 motors installed, it looks as though the CG is now at 36.7cm from the tip of the nose cone. The original CG was at 29cm. So the CG has moved aftward by 7.7cm. We'll come back to this in a bit.

Running a Simulation

We've done all the tedious detail work of making sure our simulated rocket matches the real thing, as closely as we can. Now comes the fun part - finding out how high we can expect different motors to take the rocket.

We're looking for three important pieces of information from a simulation. 1) How high the rocket should go, 2) how fast the rocket will be traveling when it leaves the launch rod, and 3) what the ideal delay time is.
Near the top left of the screen, you'll see three tabs. We've been working in the design tab so far. To get started with a simulation, we need to add a motor or motors. Click on the Motors & Configuration tab.


You will see the following screen.


Here you see three columns. One is called Configuration, and the others are Yellow Motor Tube 1 and Yellow Motor Tube 2. Because I have a cluster rocket, I have two motor tubes, and I have to select a motor for each tube. It would be the same if I had a two-stage rocket - I would need to select a motor for each stage. If you have just a single-motor rocket, you will only have one motor tube. It might be called "Motor tube" or "Inner tube" or even "Body tube," whatever the person who made the simulation decided to call it. But it's to the right of the column called "Configuration."

Above this is a button labeled New Configuration. Click on it.


Now you have a table. The column on the left is the configuration name and the column or columns on the right tell you what specific motor is in each tube.

Below the grid are a few buttons, two of which are labeled Select motor and Remove motor.

Click on Select motor.


A box pops up with a huge list of commercially available rocket motors, from tiny little 1/2 A motors to monster-sized, Level 3 high power O motors with as much total impulse as a Sidewinder missile!

For now, let's see what those Estes C6 motors will do. I'll scroll down until I find the Estes C6 motor, then select a delay. I'll try 5 seconds, since I've got a ton of those C6-5 motors.

Click on the motor you want, then use the drop box to select a delay time from the ones available, then click OK. Because I have two motor tubes, I have to do this twice.

Then, this happens:


The Configuration name is now 2xC6-5. Each motor tube has a motor installed. The CG has shifted aftward. And down in the left-hand corner, we now see an altitude prediction - 945 feet (your units may be in meters or feet. You can change your preferences as you like) - as well as maximum acceleration (169 meters per second squared - or 17.3 Gs!) and maximum velocity (87.6 meters per second, or about 198 miles her hour!).

Let's get back to the real rocket for a moment. With real motors in the real rocket, the real CG has shifted aftward to about 36.7cm from the tip of the nose. In our simulation, the CG is calculated to be at 35.9cm from the nose. Pretty close - it's a difference of only 8mm. Still, with over half a centimeter difference between simulation and reality, it's a good argument for always checking your stability when you build your own design or alter a kit.

Next to the Motors & Configuration tab is the Flight Simulations tab. Click on it.


A page appears, and on it are five buttons and a table with the configuration you just entered on the Motors & Configuration tab. None of the information is filled in the table yet.

You can highlight Simulation 1 and simply press Run simulations, but let's try Edit simulation first.


A box pops up with lots of information - variables you can play with. For now, though, let's just worry about the Launch rod length.

Let's assume you're using an Estes launch pad, which a lot of beginners start with. The launch rod is 33 inches in length. Maybe your launch lug is not at the base of the rocket, though. Maybe, like on my rocket, it's a few inches forward of the aft. And maybe you want to use a standoff to lift the rocket up an inch or two off the blast deflector so you have room to hook up igniters.

I'm going to click on "mm" and change the units to inches (because I know what 33 inches is without having to look it up), and change it to 25 inches. That's pretty short, but we'll see if it's OK.

Once you've edited the simulation to your liking, hit Close. Then, with Simulation 1 highlighted, press Run simulations.

The table will fill in with flight information.


The green dot means that we have a current simulation. If I change anything in the rocket design, the dot will turn red, and we will have to re-run the simulation for OpenRocket to verify that it is an up-to-date, valid simulation.

The red check mark is a warning. There's some issue of concern. If you hover over the check mark, you can see what the problem is.

In this case, I know it's no big deal. Discontinuity in rocket body diameter is a warning you get when you have components, such as a body tube and a transition, which do not match. There are times when you have a real mismatch, but in general, if the rocket is built correctly, you don't have to worry about it.

Warnings to look out for are things such as Velocity too low off launch rod or Recovery device deployed at high speed.

Let's look at the other information here.

Velocity off rod: 29.7mph

A rocket needs to be traveling fast enough for the fins to do their job of keeping the rocket stable. In this simulation, our rocket has gone from 0 to 29.7 miles per hour in a mere 25 inches!

Is this fast enough, though?

You may encounter several figures about rocket velocity off a launch pad. Some sources say "at least 30 miles per hour" (such as Mike Westerfield's book Make: Rockets: Down-to-Earth Rocket Science). Thrustcurve.org recommends at least 15 meters per second or 50 feet per second. This is a bit faster than 30 miles per hour. I've even heard that recommended minimum liftoff velocity can be as low as 20 mph, but only on a nearly windless day.

A good base rule of thumb is that the rocket should be traveling at least five times the speed of the wind. So, on a day with light, 5 mph winds, 25mph might be fast enough. Faster is often better, though some rockets are specifically designed to lift off slowly, so you can see them better. Low and slow is a term you might hear - the rocket doesn't zip out of sight, and doesn't go too high.

However, there is such a thing as too slow, and anything below 20mph should probably be avoided entirely. Slow lifters are fine on calm days, but shouldn't be flown on windy days.

Still, faster is better. If your liftoff speed is too slow, you have a couple options: Pick a higher thrust motor, or a longer launch rod. I don't actually use Estes launch rods. I buy steel rods from the hardware store, which are at least 36 inches long.

Let's see what happens if we add just three inches to the launch rod. I'll go back and edit the simulation, then run it again.


Now the rocket is leaving the pad at over 30 mph. Sometimes, just using a slightly longer launch rod is the answer.

Apogee: 936 feet

Pretty self-explanatory. It differs slightly from the 945 foot apogee prediction in the design window. I'm not sure why this is, but it may have to do with the 5-second delay used. And sometimes, when you close an OpenRocket file, then re-open it later, the apogee prediction is slightly different. Again, I'm not sure why. But it's always in the ballpark.

Velocity at deployment: 16.2mph

This is the speed of the rocket when the recovery system - parachute, in this case - deploys. The object is to deploy the recovery system as close to apogee - and as close to 0mph/mps as possible. Here, the rocket is moving about 16 miles per hour. Which leads us to the next piece of information in our simulation.

Optimum delay: 5.67 s

Estes C6 motors come with three different delay times* - 3 seconds, 5 seconds or 7 seconds. The C6-5 motors we selected have a 5-second delay. The optimum delay would be 5.67 seconds. What we have to do is to select the delay that gets us closer to that number.

Because the optimum delay is slightly longer than the actual delay of the motors we are using, the rocket is still traveling upwards when the ejection charges fire. But it's pretty close to apogee, and the rocket is flying acceptably slowly at that point.

Sometimes you will have an optimum delay which falls somewhere between two available delay times for a particular motor. In that case, you need to make a decision. I usually select the delay which is closest to the optimum.

Of course, you may select a different delay. If I were to use C6-7 motors, for example, the rocket would have the chance to coast all the way to its highest possible apogee, where it would arc over and begin to descend, and a moment later, the recovery system would deploy.

Here, I've run simulations on three different configurations at once - trying all three delays available with the Estes C6 motors.


Note the Velocity at deployment speeds, as well as the apogees. With a C6-3 motor, the flight gets stopped short by the ejection charge, only reaching 838 feet, and the warning tells us that the recovery system deployed at high velocity - nearly 64 miles per hour! That could rip the rocket apart when the parachute attempts to deploy.

The rocket does go slightly higher with the longer delay. The deployment velocity is a little faster, as the rocket is now falling, but I don't get a warning about high speed deployment - just the rocket body diameter warning as before. This motor would probably be OK. But I'd play it on the safe side in this case, and stick with the C6-5 motors.

Max velocity and Max acceleration, we've already noted above, so let's skip to...

Time to apogee: 7.27 s

From launch to apogee in this simulation takes just over 7 seconds. If you break down what we know about this motor, it makes sense.

According to Thrustcurve.org, this motor burns from about 1.9-2 seconds. The actual burn time will vary slightly from motor to motor. The delay grain is 5 seconds long. Again, there will be some slight variation in motor quality and performance. So, a motor that burns for about 2 seconds, with a delay grain of about 5 seconds, plus a split second delay from the ejection charge firing to the rocket body tube pressurizing and the nose cone popping off give us a little over 7 seconds of upward flight.

This number - 7.27 s - is more precise than what it would be in reality. The variation of motor performance will change this time ever so slightly, and in fact, if you run the simulation again, you'll probably get a different number. I'm not sure why that is, but it is.

Flight time: 65.2 s

This is the time from motor ignition to touchdown. Our flight lasts over a minute long.

Ground hit velocity: 11.1 mph

This is the speed at which the rocket lands under parachute, and it's about 16.28 feet per second.

That's actually pretty slow, and will provide us with a nice, soft landing. But it also means the rocket may drift far from the launch pad on a breezy day. I'm using a 15 inch parachute in this simulation. I might try running a simulation with a 12-inch parachute, and seeing if that's still safe.

Plotting the Simulation Data

 We can also plot the simulation on a graph. The right-hand button on the Simulations tab says "Plot / export." Click on it. The following dialog box pops up:


You can plot lots of information from the simulation on a graph. The X axis defaults to represent time, in seconds. The three default pieces of information on the Y axis are altitude, vertical velocity, and vertical acceleration. You can add or remove information to plot, either by clicking on the New Y axis plot type button to add information, or by clicking the red X button next to a Y axis type to remove information. You can also change units - say, by plotting the altitude in feet or meters, or electing to see vertical acceleration in meters per second squared, feet per second squared, or G forces, for example.

To make things simpler and cleaner for this post, I'll remove vertical acceleration, and simply plot the altitude and vertical velocity over time.

Once you have decided what data to plot, simply click the Plot button in the lower right of the dialog box.

A small graph will pop up. You can enlarge it by clicking on one edge and dragging it.


Here, we see a number of events, starting with motor ignition, at T-0.

The blue line, representing vertical velocity, shoots upward, as the rocket accelerates through the burn of the motor. The red line represents altitude. Then, at just around 2 - 2.1 seconds, we see a line representing motor burnout. The rocket enters the coasting phase of flight at this point. The altitude continues to increase,  while the vertical velocity starts to go down, as gravity and aerodynamic drag slow the rocket down.

Between about 7 and 7.5 seconds, we see the recovery device deployment and apogee - the highest point in the rocket's flight. With the parachute deployed, the red altitude line descends slowly to 0 feet above ground level, at just after 65 seconds.

Cool, huh?

Now that we've covered the basics of running a flight simulation, we'll break here. In the next post in this series, we'll try different motors, talk briefly about flying payloads, and tinker with a couple other things.

Click here for the final installment

Like my Facebook page for blog updates and extra stuff.

Follow me on Twitter.

Thursday, March 24, 2016

CTI Fire


There was apparently an explosion and fire at the Cesaroni Technology, Inc. plant in Gormley, Ontario.

Cesaroni is one of the major manufacturers of composite mid- and high power rocket motors.

A couple of injuries were reported, and one person was airlifted to a hospital in Toronto. Hopefully that person will recover. No fatalities were reported.

Brief news article here.

Saturday, March 19, 2016

Astron Sprint XL (Clone) - Finished!

I'm taking a break from my series on repairs, simulations, etc. - all the good stuff I got from the failed flight of the Quest Magnum Sport Loader - to show off my new rocket.

After months of working in tiny increments on a bunch of rockets, I finally finished one - the Estes Astron Sprint XL.


This BT-60 (1.374 inch diameter) rocket features a long elliptical nose cone, a tail cone or boat tail, which helps to reduce aerodynamic base drag, and elliptical fins - which are said to reduce induced drag - more on this another time.

Part of what held me back for so long was being unable to paint. Finally, I built a small spray painting booth, in about an hour, for next to nothing, from a cardboard box. It works really well, and I'll write up the build soon.


This is actually a clone of the Estes kit. I had started the kit itself about a week before I started this one. But since this was my first time building a rocket with elliptical fins, rather than straight-edged fins, and since I like to sand most of my fins into airfoil shapes, I decided I needed a practice run before I built the kit.

I simply used the balsa sheet from which the kit fins came to trace some "practice fins" onto some scrap balsa.


This has convinced me that it's a good idea to save the balsa sheet from some of your kits - if you need to make a new fin, you have a template already made. This is especially helpful if you have a rocket with unusually-shaped fins.

Turned out that sanding an airfoil into an elliptical fin requires a little practice, but isn't that hard once you've had a couple tries at it.

The leading edges of the fins are rounded, and the trailing edges tapered. When I build the
kit, I will probably have the sharp, tapered edge extend all the way to the tips of the fins.
Since I'd made a few good fins, I decided not to waste them. Why not build the whole rocket and try to make it as nice as possible? Flying on an E9-6 motor, the rocket may go very high - well over 1,000 feet. And considering the luck I've had with keeping my rockets on the field lately, I figured it might be nice to be able to lose one and still have another at home.

Luckily, the nose cone/tail cone combination is part of the new Estes BT-60 nose cone pack you can buy. I accidentally bought six packs of these - I was trying to buy a pack of nose cones which recently went out of production, and most vendors I ordered from simply hadn't updated the photos on their websites. Rather than raise a fuss or have to mail anything back, I just kept the nose cones I received, knowing I'd use them eventually.

Since this was a clone of a kit I was already building, I tested out a few techniques. Rather than filling the wood grain on the fins with carpenter's wood filler (CWF), as I often do, I tried an old-fashioned model rocketry solution: sanding sealer.

I get a little frustrated with CWF sometimes. I often get warped fins or pock marks from air bubbles in the filler, which I only notice after I've painted the rocket.

The sanding sealer was pretty good, and there is barely any wood grain showing on the final rocket.

The tail cone is plastic, and as such, there is a seam where it joins the body tube.


I sanded the overlap of the plastic until it was an exact match for the airframe tube. But once I applied primer to the rocket, I could still see the joint. I thought about how I might conceal that joint, and decided to try medium thick CA (cyanoacrylate - a super glue which comes in different viscocities for modelers). I ran a bead along the seam and wiped off the excess with a paper towel. Then I sanded it as smooth as I could. It was hard to tell if it had worked after sanding it. But once I did a second coat of primer, it was clear it had worked really well. Primer helps you see the imperfections before you paint.

You can't see the joint.


I was really pleased it worked.

The Astron Sprint XL is such an attractive rocket! I spent a lot of time on it, and managed to get it very smooth, going so far as to sand off tiny imperfections in the paint, then polish and wax the rocket before adding decals.

The decals actually came from a damaged kit. I ordered the Astron Sprint XL a while back, and when I opened it, the kit was half smashed. The vendor kindly replaced it for me, and I sent the damaged kit back for return to Estes - but I must have forgotten to put the decals back in the package, since I found them in the Rocket Room recently. I decided to put them to good use.

It's good to have finally finished a project. I'll soon have finished the Estes Goblin as well. Then, it'll be time to prime and paint my larger Estes Pro Series II rockets - in time to make an attempt at a Level 1 high power rocketry certification flight attempt.

For that, I'll have to build a bigger booth.

Like my Facebook page for blog updates.

Follow me on Twitter.

Friday, March 18, 2016

Repairing and Enhancing the Quest Magnum Sport Loader - Part 4: Fixing the Sim Part B

Click here for Part 1

In the last post, we removed all the Center of Gravity (CG) and mass or weight overrides on the simulation of our rocket.


Now we have to find the CG and total weight of the actual model, so we can get a more accurate simulation to use. This will help us figure out what motors we want to use the in the rocket on a given launch day, so that we can reach a maximum altitude on nice calm days, and keep the altitude lower on windier days, to lessen the chance we'll lose our awesome rocket.

An accurate simulation will also tell us how long a delay grain we need for those motors. For example, do you want to use C6-3 (3-second delay), C6-5 (5-seconds) or C6-7 (7 seconds) motors? The difference is important.

Even though I've been focusing these posts on my particular rocket - the Quest Magnum Sport Loader, which I recently had to shorten to cut off some damage - these principles can be applied to any model rocket.

We'll need the following things for this last step:
  • The rocket, including the recovery system (parachute, streamer, etc.)
  • A length of string, or something on which to balance the rocket, such as the back of a chair
  • A digital scale
  • Recovery wadding
  • A tape measure
  • A pencil or pieces of masking tape to mark locations on the rocket


You'll also need your OpenRocket or Rocksim simulation open on your computer.

Once we've found the true weight of the built rocket, and the true CG, we will override those elements in our simulation. Then we'll get an accurate representation not only of its caliber of stability, but we'll be able to run flight simulations with a reasonable degree of accuracy, which will aid us in picking the right motors for a particular flight.

First, we'll weigh the rocket to find the true mass or weight of the finished model. Our simulation says the rocket weighs 101 grams without motors. That is the sum of all the parts in the OpenRocket design file. OpenRocket will insert these automatically when you build a design file. It takes an assumed density for a particular material - say, balsa fins - and will calculate a mass or weight based on the part's dimensions.

In reality, the density and weight of items like balsa fins and other parts will vary. Fins, especially, will vary in density and final weight. There are dense balsa woods and soft, lightweight balsa woods, and different rocket kits will have different qualities of balsa. Even the weight of the individual fins in a single kit will vary slightly.

But even if all the parts in our design file were accurate, OpenRocket doesn't take a couple of important things in rocket construction into account - glue and paint. Those things do add mass, and will change the final weight of the built rocket.

So, to get an accurate simulation, we do need a digital scale. It doesn't have to be fancy or expensive - a decent digital kitchen scale will do. And even though I'm working with the metric system here, you can also work with the Imperial scale (pounds and ounces) if you happen to have a scale which uses that system. The main thing is that the scale be accurate and sensitive enough to detect small changes in mass.

I have two digital scales, and they both work really well. Both of them were very reasonably priced.


The scale above left is a small metric scale which can measure to an accuracy of 0.1 gram. That's very sensitive, and perfect for small rockets and parts. It has a maximum capacity of 600 grams, a little over 1.3 pound. It cost less than $10 on Amazon.com.

The scale to the right can weigh in Imperial units, detecting pounds, ounces and tenths of ounces, or in metric units, accurate down to a single gram. It has a capacity of 110 pounds and a larger plate, meaning it can be used for larger rockets - which is great when you graduate to building and flying high power rockets. And it was only about $25 on Amazon. I was surprised to find such a good scale for such a reasonable price!

Since I'm going for maximum accuracy and working with a small enough rocket, I'm going to use the small metric scale.

What we need to find is the weight of the rocket itself, without the motors. Once we add motors to our simulation, the weight in OpenRocket will change, as will the CG, as we will see below.

You do need the parachute installed in the rocket, and, though it might surprise you, you should also install the recovery wadding. Why, you might ask? Aren't we trying to find the empty weight of the rocket?

Well, yes. But when running simulations, OpenRocket also doesn't take recovery wadding into account. You will always fly with the stuff (unless you are using a rocket with an ejection baffle, a device permanently installed in the rocket which protects the recovery system from the heat of injection charges), so you should assume it's part of the simulation.

Recovery wadding doesn't weigh much, so if you forget to install it, it probably won't make a big difference. But, for accuracy's sake, it's a best practice to consider wadding a part of the recovery system, and weigh it with the rocket.

Turn on the scale, let it boot up, and when it reads "0.0," carefully place the rocket on the scale.


The Magnum Sport Loader weighs 106.6 grams. The simulation of the rocket states that it's 101 grams. That's pretty close. Does that mean that the glue and spray paint on this rocket weigh 6.6 grams? Hard to say, since I didn't weigh the individual parts of the rocket as I was building it, as I tend to do now.

At any rate, I need to change the weight of the rocket in the simulation, so we'll turn to our design in OpenRocket.

Up near the top left of the screen, in the design elements window, select Stage.


Double-click on Stage, or press the Edit button to the right. The following dialog box will pop up.


Check the Override mass box, and type in the weight of your rocket.


And now, as I write this, I learn something new: OpenRocket will not allow me to enter a mass of 106.6 grams. It rounds up to 107 grams. If I were to enter 106.4g, it would round down. So it's accurate to within a half a gram, but no closer. This will do just fine.

Now that we have an accurate weight for the rocket, it's time to find the true Center of Gravity. You can leave the Stage configuration dialog box open for now.

A quick and easy way to find the approximate CG for your rocket is to balance it on your finger. That's fine for flying out in the field - say, if you're trying a new, heavier motor and you just want to make sure the CG doesn't move too far back when you install it in the rocket. But I want to mark the CG on the rocket, so I'm going to balance mine. You can use the back of a chair or some other sturdy object with a straight thin edge. But I found it helpful to use a loop of string.

Here, I have the rocket balanced on the tube cutting jig you saw in Part 1 of this series.


Problem is, it took me a lot of adjusting the rocket back and forth by tiny increments to get it to balance like this, and it tried to roll off. Then, when I went to mark the CG, it fell off the jig.

With a loop of string, the rocket won't roll around, and once you find the CG, you can keep the string in the same spot on the rocket until you grab a pencil or piece of tape to mark the spot.

Make a simple loop in the string - here, I'm using a piece of Kevlar shock cord - and slip it over the rocket. Again, you need everything installed in the rocket except the motors. This includes the parachute and recovery wadding.

Find the spot where the rocket balances.


This is the CG of your unloaded rocket. You can mark the spot with a pencil or piece of tape. Since I didn't want to put a pencil mark on the paint, used low-tack painter's tape.

I grab the loop of Kevlar string to hold it in place on the rocket...

...and carefully line a piece of tape up with the Kevlar. The nose cone is to the left of the frame
of this picture, so the leading edge of the tape represents the CG of the unloaded rocket.
Now that we have the CG marked on the rocket airframe, how do we measure its position?

CG and CP are measured as a distance from the tip of the nose cone. You might just grab a cloth tape measure and place it at the tip of the rocket and then measure from there.


But this is a little like measuring your height by placing a tape measure on top of your head, and measuring around the curvature of your head down to the ground - it's going to make you seem taller than you actually are. If you measure along the curvature of the nose cone, you're going to get a false measurement.

You need to measure straight back. The way I do this is by placing the nose cone against a flat, vertical surface, such as a wall, and measuring from there back to the place.

Here, I have the rocket sitting on a cradle, to keep it horizontal to the table, and placed against a metal file box.


Then, I place the tip of a metal tape measure flush against the metal box and measure straight back to my CG mark on the rocket. As mentioned in a previous post, I always switch to the metric system when doing measurements like this, because it's simpler - everything is divisible by 10.


The CG of my rocket is 29cm (or 290mm) from the tip of the nose cone.

For comparison's sake, here's the measurement I got by measuring along the curvature of the nose cone with the cloth tape measure:

The blue tape is holding the tape measure in place just so I can take a picture.
With this method, I get a CG location of 29.5cm - a half centimeter difference.

Is this a big deal? Will it make much difference? Am I being too fussy here?

Well, maybe it won't make much difference how you measure the CG and CP locations on many rockets. But for the simulation, I'm trying to be as accurate as I can. And if you're measuring the rocket to check its stability margin, you want to measure as accurately as possible. Remember that the minimum margin of stability is 1 caliber - the diameter of the rocket itself. The CG needs to be forward of the CP by at least 1 caliber. If you have a rocket which is right at that 1-caliber margin, you want to make sure you get a good measurement. It might make the difference between having to add weight to the nose cone or not.

Alright, so we have our real-life CG location - 29cm, in my case. Let's put that into the sim. Go back to the Stage configuration dialog box in OpenRocket. Click the check box marked Override center of gravity, and input the actual CG location.


Now the blue and white CG symbol on the rocket design will move. In the case of the Magnum Sport Loader, it moves from here:


To here:


The bulk of the work is now completed. We just have a few more minor details to adjust, then we can run some simulations.

Click here for Part 5

Like my Facebook page for blog updates and extra stuff!

Follow me on Twitter @rocketn00b.