Friday, July 8, 2016

Rocket Camp - Going Deep


Click here for Part 1

When I was a kid, I had a number of science-related and educational toys and kits.

I had a chemistry set. I mixed a few of the chemicals in test tubes a few times. Sometimes they changed color, sometimes not.

Eventually, I stopped playing with the chemistry set. I still know very little about chemistry.

I had a microscope, too. I pulled some hairs from my head, put them on a slide, and looked at how huge they were. I might have even seen some bacteria once or twice. It was pretty cool.

Eventually, I set the microscope aside, and hadn't learned that much about microbiology.

I also had a telescope, through which I couldn't figure out how to find any stars or planets. I think I managed to focus on the moon a couple times.

Not to mention my toy piano and my keyboard. I still can't play the piano.

And my model rocket kit? Well, I never built that, because I didn't think I was any good at making things with my hands.

It is often said that model rocketry is a good hobby for kids, because rocketry is educational. It certainly can be, but I would argue that it can just as easily not be. For every Lifelong Rocketeer or Born Again Rocketeer ("BAR") or aerospace engineer who started with a model rocket as a child, there are dozens or hundreds of people who got a model rocket at the age of 11 or 12, had fun launching it for a summer or two, and then got bored just seeing it go up and come down. Their rockets went into a closet or out with a garage sale, and they forgot all about them.

For these kids, it was fun for a while, but like me with the chemistry set, microscope and telescope, they never learned what made the rocket do what it did, or what the forces were that acted on the rocket, why some rockets perform better and fly higher than others, what interesting things can be done with model rockets, how to design their own rockets, or how their model rockets related to real space launch vehicles. In what ways are they similar to real rockets? How are they different? To a lot of kids, a model rocket is a fun toy that goes up and comes down, and that's about it.

Many kids probably never even learned the basics of the Model Rocket Safety Code, despite the fact that it comes with every kit and every pack of model rocket engines sold. Think of all the appliances you've bought as an adult, where you've opened the box, plugged it in, and thrown everything else out without bothering to read the manual.

Educational toys and hobbies are great for kids, but sometimes a little guidance is needed. Some kids are pretty motivated to learn more, but some don't know that there's more to learn or do. Sometimes, a little extra instruction can open eyes to wider possibilities. You can build rockets that fly higher. You can build rockets that carry interesting payloads. You can design your own and you can make them look cool.

And there's a little math, too. Think math is boring, kid? A little math can help you figure out how high that rocket flew! It isn't that hard, and it's more fun than just sending it up and watching it come down.


My second year of teaching rocket camp is finally done, and I'm back home in Boston. Now it's time to share my experience on this blog.

I'm going to try to break this down into bite-sized chunks, over the course of several blog posts, before getting back to writing stuff for total rocket n00bs. This is both for me and for you.

A lot happened during the three one-week classes I taught. I got several messages from readers who were looking forward to my stories from rocket camp last year. Immediately after finishing, I moved across the country, and as time passed, I kept thinking I need to write that rocket camp stuff. The more I felt like I needed to do it, the less I wanted to do it, and I never finished the series.

Also, as long-time blog readers are aware, I tend to write really long posts. Breaking this down will keep the writing more manageable for me and more readable for you. I'm going to try to keep each post focused on one thing.

And it's been a long time since I've written an informative post for rocketry beginners, which is what this blog is intended to be. In between rocket camp posts, there will probably be stuff for rocket n00bs, as well as updates on The Rocketry Show and whatever relevant news items happen to crop up.

We'll talk about things I did last year and things I did this year, what worked, what didn't, and how I illustrated certain tricky concepts of rocketry to middle schoolers. I hope you'll find something useful here that you can adapt if you get to teach rocketry to kids, whether it's a one-day demonstration or something longer, like in a week long summer camp or science class unit.

* * *

Last year, the weather was stormy all week, with a few minor breaks. Ideally, we'd build rockets all week, then go out for a big launch on Friday. That would probably not work, if the weather forecast was to be accurate (which it turned out to be). We would have to try to sneak in a launch when the weather broke, which meant Wednesday or Thursday. It also meant that we couldn't simply go out and launch every day. I would need to fill the 15 hours with some substance.

A teacher friend of mine advised me to have more material than I'd think I would need, because if I ran out of stuff to show or talk about, I would struggle to fill the time. The kids would get bored, some of them might act up, and the camp would be not much fun for them or me.

Though I tried to "keep it simple" the first week, while still teaching the kids some basics, I realized I needed more material.

So, what did I do?

Over the weekend, I went chapter by chapter in The Handbook of Model Rocketry, and used the headings as a kind of outline. I decided I'd teach the kids everything I knew - or whatever I had time for.


If time is limited to one day or less, you may decide to focus only on what makes rockets work (i.e., Newton's Laws of Motion) and safety, and then do a launch. If you have the kind of time I had, though, I say go for it.

Here's how class started. I went to collect the kids from the drop off point and brought them down to the class. I wore my NASA shirt with my name badge, and hanging from a lanyard around my neck, I had the bright red safety key for my home-built launch controller.

In the classroom, I had a number of my rockets set up on display on the front line of tables, and asked the kids to find a seat. I had the luxury last year of being able to bring all my best-looking, largest rockets. I also had a launch pad set up on the table with a rocket in place. There were a few launch controllers - some from Estes and my own.

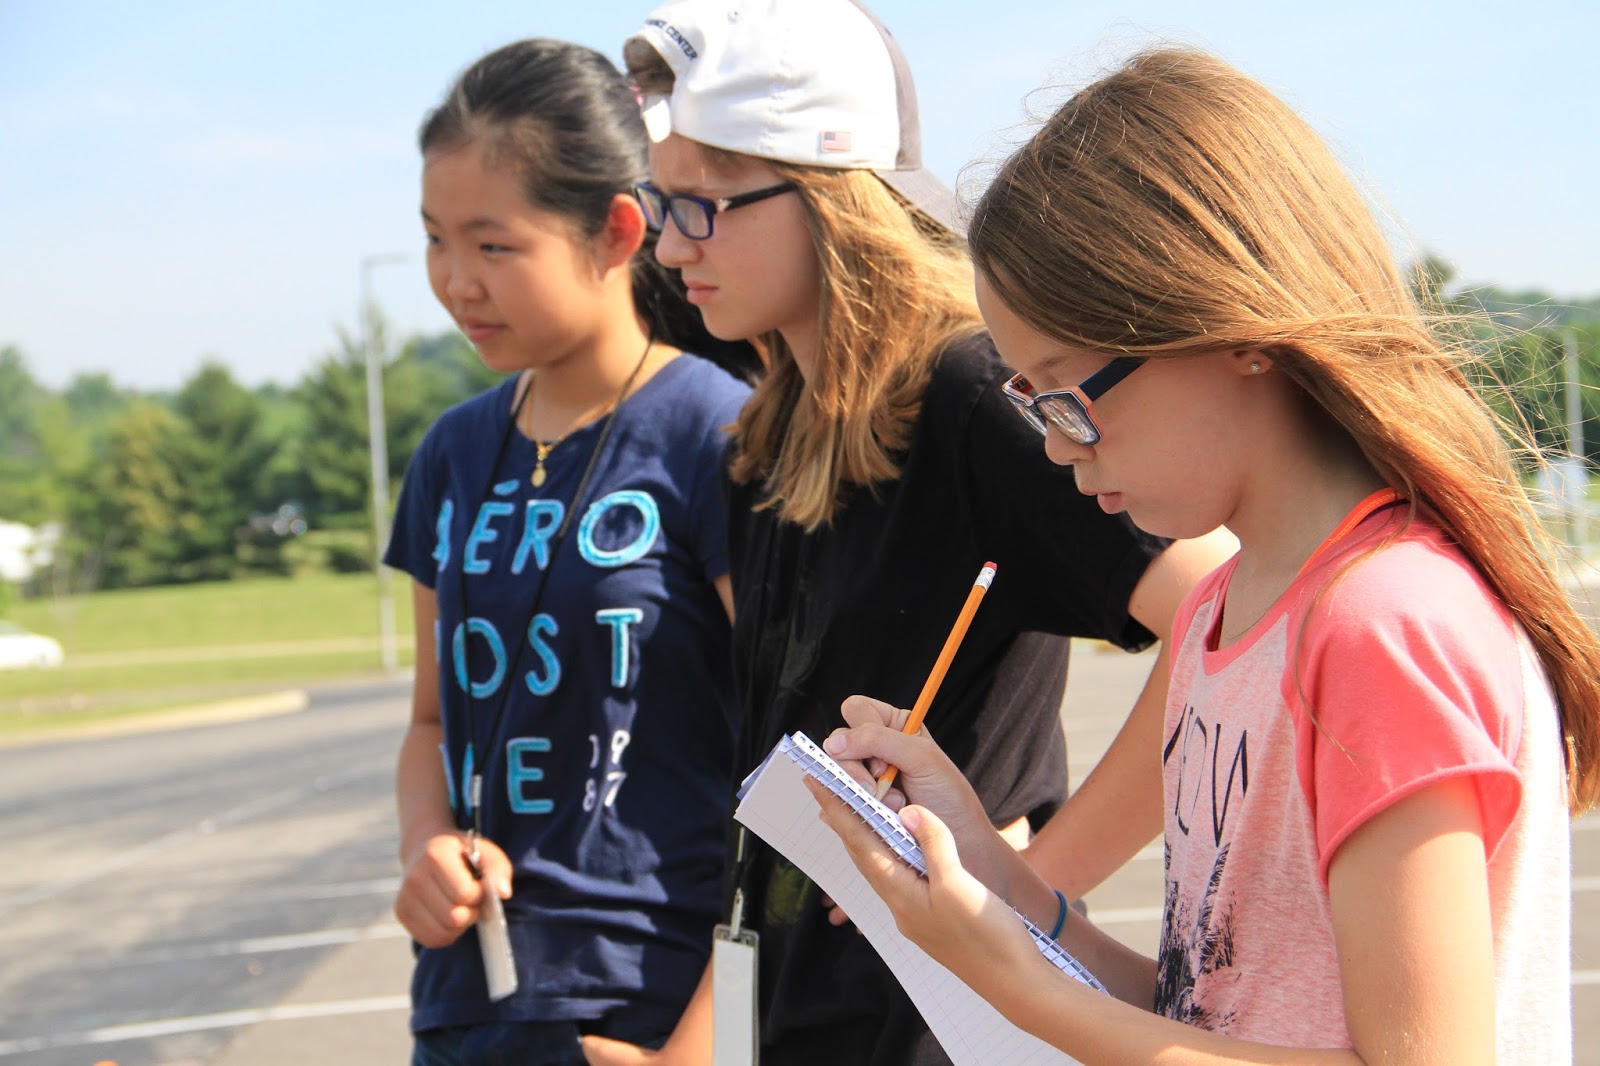
I introduced myself, told them how long I'd been building rockets (not long), and then went around the room. I asked each kid his or her name and age, and if he or she had ever built or launched rockets before. The answer is often no, but some kids do have some experience. If they've built or launched before, I ask what rockets they'd flown. A lot of Estes kits are mentioned, and some I-don't-knows, and there are inevitably a few kids who mention that they've launched some bottle rockets or other fireworks.

The mention of fireworks can raise the hackles of some experienced, safety-minded hobby rocketeers, but I'd advise not to overreact when it comes up. I simply say, "OK, so you've launched some fireworks? Well, here we're going to be building and launching model rockets, which are a little different." Then move on.

The subject of fireworks will return when we discuss safety. You certainly don't want to mix the two in a model rocket class, but you'll probably have to have the conversation.

After introductions, I briefly show all the parts of a model rocket. There are some visual materials you can download from Apogee Components and other sources to show as slides or print off, but I prefer to pick up one of my real rockets and show each part. Interacting with the kids is key. "This little tube on the side of the rocket is called the launch lug," I said, and then pointed to one kid and asked, "What do you think this is for?"

From the Apogee Components Rocketry Education Pack, link above

After going over the parts of the rocket, it was time to kick things off with some excitement. "You guys ready to go see a rocket launch??" The answer is always a resounding Yes.

If you have a week-long class like this one, I think doing a launch first thing is important. It kicks things off nicely. The kids get excited and motivated to build something of their own, and you may refer to the flight when talking about this or that. And some kids will be very surprised by it. One of my kids last year remarked that she thought the rocket would only fly "about as high as the (street) lamp." Seeing something jump a few hundred feet in the air is a good motivator.

We all grab some stuff - a rocket, prepped and ready, launch pad, launch controller - and head outside to our designated area. In my case, we were in a parking lot which had been coned off for me by school security. The launch area wasn't huge.

A cheap, small, ready-to-fly rocket is perfect for a first day demo launch. If a fin breaks, your heart won't. No need to overdo it on the power of the motor - most of these kids have never done this before, and launching on an A motor will still thrill them all. You might be surprised that it thrills even you. Even if you are a High Power Rocketeer, the kids' excitement at liftoff is infectious.

For me, my go-to first day demo rocket is the Estes Hi Jinks, given to me by my friend Chad when he moved away. It's nearly identical to an Alpha or Alpha III, with plastic fins and a longer nose cone. It can fly very high on a C motor, but does a great job of demonstrating the phases of rocket flight on an A motor.


I show the kids every aspect of prepping the rocket at the pad - inserting a motor, installing an igniter and the little plastic plug that holds it in place, hooking up the launch controller. By the end of the week, I'll have them all do this for themselves with their own rockets. I tell them all, "We all need to scoot back fifteen feet!" and we all stand back.

"Look over at the flag," I say. "The wind is blowing this way. Which way do you think the rocket will fly?"

The kids will invariably indicate that the wind will fly with the wind, in the same direction that the flag is waving.

"Alright, let's find out!" I say.

At this point, I lift up the safety key hanging from my neck. "This is my launch controller safety key. This ensures I can't launch the rocket while I'm hooking up the igniters. See, pressing the launch button won't do anything if the key isn't in the launch controller," I say, pressing the launch button.

"OK, I'm going to insert the safety key into the launch controller." I put the key in, and the bright red LED continuity light comes on. "OK, my continuity light is on. That means we've got a good connection. We're going to do a countdown from 5! Ready?"

We all count down 5! 4! 3! 2! 1! Launch! and the rocket zips off the pad. The kids go bananas. So do I.

Near apogee, the rocket arcs over into the wind in the opposite direction from what the kids predicted. The parachute comes out, and the kids go chase down the rocket as it lands. That's the great thing about launching with kids - they recover your rockets for you.

We go back inside, and the kids have a seat. "So, did you see which way the rocket flew? It turned into the wind, right? We all thought it was going to go the other way, didn't we? We're going to talk about why that happened this week."

I said, "This week, we're going to build our own rockets, and we're going to launch them. I'm also going to teach you guys some stuff about rockets, so you can do this on your own. Here's what I am going to show you guys this week."

I went to the white board, and told them I'd teach them the following:
  • How a rocket works
  • Model rocket safety
  • How to build a rocket
  • All about model rocket motors - what do the letters and numbers mean, how to pick the right ones, what happens inside, etc.
  • What ground support equipment you'll need - launch pads, launch controllers, etc
  • Rocket stability - what makes the rocket fly straight up?
  • Recovery systems (parachutes, streamers, etc.)
  • Ignition systems - how does a launch controller work, and why do you need one?
  • Rocket aerodynamics - what makes a rocket fly higher and better
  • Payloads - what can you put inside a model rocket
  • Altitude tracking - how do you know how high the rocket flew
  • Clusters and multistage rockets - rockets with more than one motor or engine
  • How to design your own rockets - because you don't need to just build a kit someone buys you. If you understand rocket stability and know where to get the right parts you need, you can make a rocket of your own
  • Where to go from here - an introduction to High Power Rocketry
Now, some people may think this is crazy, especially considering that these are first-time rocketeers, aged 11-14. This is too much. This is too complicated. You need to keep it simple. And what about that thing about High Power Rocketry? These are kids! They can't do that stuff yet!

Let me address that last concern first. I want them to know that you don't have to stop flying rockets when you turn 14 or 15. There's more to look forward to. You can build larger rockets, and eventually fly something really powerful if you want to. Also, some of the class time would include waiting for glue to dry, and sometimes we'd be watching videos. HPR videos are pretty cool, and the kids love them.

But that's pretty much most of the stuff you'll find in The Handbook. Did I teach it all?

No, of course not. I would teach as much as I could, starting with the basics. If the kids seemed to be particularly interested in one topic or another, we'd focus on that. If they seemed not too attentive or not absorbing, we'd stick mainly to a few basics, including safety, and focus on building the rockets and watch some interesting rocket videos. I don't know that I ever got through all of this stuff. But I got through most of it, and I knew I wouldn't run out of material.

Besides, kids have been doing this for decades, and they're capable of a lot. The fact that this year's TARC winners were 8th graders was an added bonus - something to shoot for.

The Odle Middle School Space Potatoes won TARC this year. TARC teams design and build their own rockets.
The prize was $20,000 and a trip to the International Finals in London, England. They are in 8th grade.

Honestly, I didn't care if these kids became lifelong model rocketeers. But I wanted them to have fun, and to learn a few things. I wanted them to learn a little science - something that would come back when they reached high school physics. I wanted them to learn that maybe doing their math homework wasn't such a bad idea, since there is some fun stuff you can use it for (It may seem like a lofty goal, but I was hoping that in my small way I could contribute to them being better prepared for finding a good job when they're older). I wanted them to learn that they are capable of making things with their own hands. And I wanted them to learn that sometimes there's more than meets the eye - more, for example, to rocketry than simply watching something go up and come down.

Click here for the next Rocket Camp post.

Like my Facebook page for blog updates and extra stuff.

Follow me on Twitter.

Thursday, July 7, 2016

Rocket Camp Teaser


Rocket camp is done. Weather was great, launches were awesome.

I'm working on the posts about the whole thing right now. I'm going to break it down into small chunks, because a lot happened, and I tend to write posts that are too long.

Look for the first one in about a day or two.

Like my Facebook page for blog updates and extra stuff.

Follow me on Twitter.

Thursday, June 30, 2016

Model Rocketry in Brazil?


 Alright, guys, this is a long shot, but I gotta ask.

I'm teaching rocket camp. One of my 12-year-olds is from Brazil, and he and his family are going back this weekend. He keeps asking me where to get rocket stuff. Other than "hobby shops," or "online," I'm not sure what to tell him. I found the Brazilian version of Amazon.com, but they don't seem to have any Estes stuff.

According to my stats, some of the audience for this blog is in Brazil. Is there any model rocketry in Brazil? Where can I point his kid to to find stuff? He wants to buy some rockets to take home with him, but he certainly won't be able to transport any motors.

If you know where I can help this kid, please email me at iamtherocketn00b@gmail.com.

Like my Facebook page for blog updates

Follow me on Twitter.

Tuesday, June 28, 2016

Tantalizing Tweet from Jolly Logic

This morning on Twitter...


In case you're unfamiliar, the Chute Release is a rocket recovery device. Using a rubber band, it holds your parachute in a tight bundle. When the nose cone and parachute are ejected from the rocket at apogee, the Chute Release prevents the parachute from opening right away.

You select a specified altitude at which the Chute Release lets go of the parachute. That means, if your rocket flies to, say 1500 feet, you can have the parachute open at, say 500 feet. The rocket tumbles to the set altitude and the chute opens.

Which means you have to walk much less far to retrieve your rocket. It can even prevent your losing a rocket, because a chute opening high up can drift so far, it may leave the field.

It allows you to do something similar to high power rocketry's dual deployment, where a small, drogue parachute is deployed at apogee, and a large main chute deploys lower down. Dual deployment is more complicated and uses black powder charges that some people don't want to mess with. It's often not used in mid- or low-power rockets (though there are some exceptions), and you have to build the rocket a little differently.

The current Chute Release fits a BT-60 sized body tube (1.637 inch in diameter). I've got lots of BT-55 rockets I'd love to recover with a Chute Release.

In other words, I hope this happens!

Like my Facebook page for blog updates.

Follow me on Twitter.

Sunday, June 26, 2016

Rocket Camp Last Year - What I Learned

Launch last Friday - it never fails to blow their minds

Week Two of rocket camp ended with a launch on Friday. Tomorrow begins the final session of the summer.

My last post on this blog was two weeks ago, yet I still get regular page views each day. I certainly don't mean to leave you hanging, but I've been busy!

Teaching rocket camp has certainly been challenging, but quite rewarding. Week One this year, the camp was overbooked, and wrangling that many kids can be tough. But launch day makes the whole week worthwhile.

Sam preps his rocket.

* * *

Before I get into this year's report on Rocket Camp, let me talk about last summer's experience.

Last year was the first time I'd ever done this. The first time I'd taught anything, the first time I'd worked with kids, and the first time I'd had to come up with some kind of plan for a week's worth of group activities.

A lot of rocketeers have had some kind of opportunity to share rocketry with students. Some get asked to come in for an hour and give a quick talk on the subject. Some hold a small demo launch at a local middle school or high school. Some help Cub Scout or Boy Scout troops or 4-H clubs with build nights.

But I think I got a really rare opportunity here. I would teach three classes, each one week long, three hours per day for five days. That's 15 hours to focus on rocketry - a lot of time to fill! The fact that the day camp was run by a local community college meant that they had a pretty good budget, so I could submit a purchasing list and have all the rocket kits, motors, paint, etc. that I thought we'd need.

We would be in a large classroom with a white board, a computer, and a projector, and lots of electrical outlets, so I'd be able to do a lot of stuff - show videos and slide shows, demonstrate stability, design, and simulations with OpenRocket.

There was also a robot arm.

With as many hours as the class would last, it looked like it might be possible for me to really go into depth on the subject of rocketry. A lot of people would say - and some even advised me, when I asked questions in online forums - that you need to keep it simple! But I decided I'd have the time to challenge these students, and see what I could teach them. Kids can surprise you with what they are able to learn, especially if you make the subject fun and find interesting ways to explain or illustrate ideas. How simple or complicated you decide to get with your rocketry curriculum will depend on a lot of things, especially how much time you have.

A teacher friend of mine advised me to have more material than I thought I'd need for each day. If I ran out of time and didn't get to everything, I could drop some of the less important stuff or push something off to the next day. But if I ran out of stuff for the day, then I'd be struggling to fill the time. I came up with a plan for the first day, plotting out each activity we'd work on and how long I thought each thing would take, with a couple of optional things if we got through it faster than I'd anticipated. I walked in on Day One feeling pretty confident. By the end of Day One, I knew I'd need to revise my plan...

I learned a lot from the experience, not the least of which is that people who run camps like this will not necessarily know anything about rocketry. You must be very specific about what you need, and check and double-check that the tools and materials you're provided with are the correct ones. Ivy Tech College for Kids includes classes on cooking, magic, computer animation and several other subjects. The camp directors don't actually know that much about what I'm teaching.

Here's an example: I provided an exhaustively spelled-out shopping list last year, but failed to double-check on what items had actually been purchased. First decision I had to make was obviously what rocket kits we'd be building, and at what skill level.

I looked at several of the educational bulk packs of rocket kits available. Because of all the time, I decided I needed a Skill Level 1 rocket. If you have less time to build, an E2X or Easy-to-Assemble kit would be a better choice. But the point of this class was mainly "learn to build and fly rockets," and with all the time we'd have, I decided we'd need something that takes a little time to assemble.

I selected the Estes Alpha bulk pack, a classic "first rocket" kit used in a lot of rocketry camps. We'd have three weeks, with a possibility of 10 kids per week, so I asked for three bulk packs to be purchased.

Estes Alpha - a Skill Level 1 kit with balsa fins

When I arrived on the first day of class, I found that we only had one bulk pack - of the Estes Alpha III. I was pretty careful to spell this out, but you can see how the confusion happened - "Estes Alpha - 3 packs" got interpreted as "Estes Alpha III pack."

Obviously, this wouldn't be enough rockets for the whole three weeks, but the main problem that I had here is that while the Alpha is a Skill Level 1 kit which requires a little sanding, a little gluing, and a little time to build, the Alpha III is an E2X kit which takes only about 20 minutes. I built one in 10. The fins come in a single plastic unit, and gluing is minimal.

Estes Alpha III - similar to the Alpha, but much simpler to build


Oh, no! I thought. How am I going to fill the time? I should also mention here that the weather was supposed to be rainy most of the week, so it's not like we could go out launching every day.

An E2X kit is great if you don't have much time, and need something you can build quickly so you can get out there flying in a few hours. All you have to do is wait for the glue to dry, and you're ready.

For my purposes, though, I needed something which took some time. And I didn't want to merely go launch some rockets with these kids. I was trying to inspire them.

One reason I never built the model rocket kit I had as a kid was that I didn't believe I could. I'm no good with my hands, I told myself. I'll only mess this up. I want these kids to realize that they can build something with their own two hands that will fly at 200 miles per hour up into the sky, and it's safe and legal, and not that hard. We needed something which required just a bit more effort to assemble. That way, when they were done with the camp, perhaps they'd feel like they could do this on their own without me there to help.

The second major misinterpretation of the shopping list was the glue. While I'd asked for wood glue, specifying Titebond II (not because it's the "best glue," but because it's what I use at home and I'm familiar with it), what had been purchased was Elmer's Wood Glue Max.


I have no idea what this stuff is supposed to be used for, but model rockets ain't it! It's gritty and weird, and I couldn't get it to stick to anything! Perhaps it's great for wood projects if you press the pieces together in a vise or something. Fortunately, I had brought my tool kit with me, and happened to have a bottle of glue.

I also discovered on the first day that the Alpha had been built at the camp the year before, and a couple of the kids were not too keen on building the same rocket. They wanted to try something new.

I talked to the camp director and told him about the kit problem. At my suggestion, he ran to a local hobby shop and bought out every Estes Skill Level 1 rocket kit they had in stock. I had to buy time on Day One by starting assembly on the three left-over kits from a previous year, as a group project. There was a Wizard and a couple of Alphas. Eight kids working on three rockets together do not have much fun. It was a rough start.

The "Janky Wizard," one of the rockets we started together on Day One. One fin was damaged while sanding, so
I called it "janky." One of the kids decided he wanted this to be his rocket, so on Day Two he
completed the construction. Despite the janky fin, the rocket still flew well.

On Day Two, a bunch of different rockets had arrived. This was great, because now the kids had a choice. But it had an unforeseen consequence.

My intention was that we'd build together, step by step, allowing glue to dry while we learned something about rocketry, then move on to the next step. But because each kid had a different kit, all with slightly different instructions, I had to run from person to person helping with this or that, and couldn't build with them. Consequently, rather than, say, gluing centering rings onto a motor tube then waiting for the glue to dry, they'd look at the directions and move on to the next step.

The result was that all the rockets were finished way too quickly. Fins were a bit wonky, glue was everywhere, and despite starting the morning a day behind on our building, by the time the rockets were built, suddenly I had even more time to fill, and not enough stuff to do for the day. I was trying to figure out what else I could teach that day and ended up frantically searching YouTube for some good rocket videos to get us to the end of the day without everyone getting too bored.

On Wednesday, the camp director resigned. Week One was not going the way I'd imagined.

We went into the paint shop to spray primer on the rockets. Due to the weather, we had to sneak the launch in on Thursday rather than Friday, as it was threatening to storm. We'd have to fly the rockets in primer only, and would paint on Friday.

Some of Week One's rockets - Hi Flier, Yankee, Baby Bertha, Hi Flier, Crossfire ISX. Unfinished Alpha in front.
By the end of Week One, I'd gotten a handle on things. I did manage to teach the kids some interesting stuff, which, to my surprise, they did absorb. Some of the parents told me they were surprised at how much physics the kids learned.

I came back for Week Two with a much better plan in mind. We'd all have the same kit - the Estes Viking. We'd skip the primer, as it took too much time. And completely forget "keeping it simple" - we were going to go deep.

Click here for the next part of this series.

Like my Facebook page for blog updates and more stuff.

Follow me on Twitter.

Sunday, June 12, 2016

Rocket Camp Week One Prep


Just a quickie post about the next three weeks' camp...

Tomorrow, I start teaching the first week of the Ivy Tech College for Kids model rocketry camp. Unlike last year, when I was actually living here in Bloomington, I had to make sure I brought or shipped myself anything I might need from home, which means I can't decide one morning to take a special tool or larger rocket to show off. I'll have fewer toys and props to play with, but I think I can still make a pretty good camp out of the minimum of tools.

One activity I tried last year was to do with altitude tracking. It can be hard to tell, from close to the launch pad on the ground, how high your rocket flew, especially if you are new or inexperienced. The kids are always surprised by how high the rockets actually fly (one girl said she thought it would only go about as high as the top of a street lamp). When you ask "How high do you think that went?" the kids will guess anywhere between 100 and 1,000 feet.

So, the package I sent to myself included an Estes Altitrak altitude tracking device, a Jolly Logic 2 altimeter, and a rocket with a payload section - the Estes Reflector.


Everything arrived more or less intact, except the Reflector.


Despite being well-packed, in the middle of the package, something crushed the body tube, causing a kink in the airframe and tearing the decal. It'll still fly, and I brought this particular rocket because it didn't exactly turn out as I'd hoped, so I was anticipating some damage. I just thought the damage would be from flight and landing, not shipping.

Week one is overbooked. The class was supposed to be capped at 10 kids. I'll have 14 the first week. I think it's great we have such interest this year, but 14 kids can be a lot to handle! On top of which, not everything on my shopping list was purchased, and we're going to run out of rockets.

Last year, I tried to get the Estes Alpha. It's a long story as to why that didn't happen, but I discovered that some kids had already built this rocket the previous year. The Alpha is a great educational first rocket, but I decided to go with something kids are less likely to have built - the Avion, from Apogee Components.


The Avion is also a great first rocket for classroom use, but there were a few things I hadn't realized. The first is that the nose cone comes in two parts and must be glued together with plastic cement, so I went out and bought a tube of that.

The shock cord - made of Kevlar rather than the typical Estes rubber shock cord - is a bit short.

The display model. I'll lengthen this
shock cord with an elastic leader.

Because Kevlar is less flexible than rubber, a short shock cord made of Kevlar can cause a jagged tear or zipper down the body tube of the rocket. This can happen when the delay of the motor is a little too long or two short, so that when ejection happens, the rocket is traveling too fast. The force of the parachute opening can cause the shock cord to rip down the body tube.

This shock cord is also attached to the motor mount. One of last year's rockets, the Quest Astra, had the same construction. Some kids had a hard time with this. So we'll be building this rocket using a paper mount. With the shock cord mounted near the top, the Kevlar will be much longer, and even if there's a zipper, it won't go any further than the paper mount. If you use elastic instead of Kevlar, you lessen the risk of a zipper even more.

Some people don't like the paper mount, and hate using sewing elastic. But a paper mount is easy for kids to construct, and most first rockets don't last long enough for it to be a problem.

Construction in class will be simple - bare balsa fins, paint but no primer. Still, I wanted to make a nice-looking display model.


And because I'm so fussy, I shaped the fins into airfoil shapes.


I did them quickly, so they're not perfect, but they're pretty good. The fins are 1/8 inch thick, pretty clunky for a rocket this size, so I figured it would be worth it. A simple rounding of the leading and trailing edges would have been easier and quicker. For most first model rocket camps, people avoid any fin shaping. But I've got these kids for a whole week, so we have lots of time to fill. Last year's kids liked rounding the fins "for higher altitudes." It used to be pretty standard practice in kit instructions to streamline fins, so it's not too hard for first-time builders to give it a go.

I tried finding some sanding sealer, but the local hobby shop didn't have any, and hardware stores only sell huge cans of the stuff. I tried using filler primer to fill in the wood grain, but with no sealer, the primer seems to have simply soaked in. So, my fins won't be as smooth as I like them. I used a whole can of Dupli-Color filler primer on this rocket, and I've still got wood grain.


I try to make this class inspiring. I want the kids to get something more than just launching a few rockets out of it.

Fortunately, this year's TARC winners were in about the age group of my kids. A $20,000 prize is pretty inspiring! The message is Do your math and science homework, and you may never have to pay for college!


I'm staying in an empty apartment this week, far from campus. Class starts at 8:30 tomorrow morning, and I have over a one-hour bus commute to get there. Lots left to prepare, so I'm going to leave it here for now.

Like my Facebook page for blog updates and extra stuff.

Follow me on Twitter.

Saturday, June 4, 2016

Rocket Camp 2016


I'll be back in Bloomington, Indiana next Friday, to tech the Ivy Tech College for Kids model rocketry class again.

Launch day!

Last year was a lot of fun, and went much better than I think people were expecting. A number of parents told me they were surprised how much their kids learned during the class.

I was happy, but I knew the kids could learn a lot in one week. Each session lasts five days, at three hours and ten minutes per day, and it was rainy. So I had a lot of time to fill, and was able to teach a surprising amount of the basic principles of rocketry.

Demonstrating a cluster rocket - the three-motor Trident
I started to blog about the experience, but I had to move across country, got really busy, and I never finished the series. The more I thought "I have to finish writing about this," the more it felt like a chore, so I never got around to it. This blog is part of my enjoyment of this hobby, and if I feel like I "have to" do something, I often don't do it.

Occasionally, I would ask a question on The Rocketry Forum about this or that, but because I was teaching a kid's rocket camp, most people kept saying "You've got to keep it simple!"

Demonstrating use of the Estes Altitrak
I understand what people are saying, but I respectfully disagree. Yes, you must keep your rocket curriculum simple if you only have a couple of hours, or one day. But this class was nearly 16 hours, spread over the course of a week. And kids are smart. Give them a challenge, and they can rise to it. If you can come up with a good, fun way of demonstrating the principles you're talking about - total impulse, Newton's laws of motion, center of gravity and center of pressure, altitude tracking, even angle of attack - kids will not only understand it, they'll remember it. Believe it or not, these kids learned all of this stuff, and I hope to show in a future post some of the fun ways I got them to grasp the concepts.

Claire writes down the elevation angle data from each flight
Even if they don't completely understand everything, or if they forget it six months later, some of these things will come back in school. When they take physics and learn about Newton's laws of motion, for example, they will have that feeling that this is familiar. Learning is partly about repetition of information, and there's a cumulative effect to these things.


They really can surprise you. I occasionally asked a question of these kids about something I was explaining a day or two before - how total impulse was measured, for example - because I wanted to see if they were absorbing the information. Was I actually going over their heads, I wondered. But the kids were able to answer the question - often, the kid who knew the answer was one I didn't think had been paying attention!


Tracking station

I'm going to try to keep this blog updated throughout the three weeks of this year's rocket camp, because the experience was valuable to me, and I think it may benefit some of you out there. For the rocket n00bs who read this blog, there may be a thing or two that you might learn from it, or if you're an old hand at rocketry, but a n00b to teaching rockets, maybe you'll get a couple ideas. We'll see.


In any case, it'll be fun to spend three weeks building and flying rockets with a very enthusiastic group - kids. Seeing a rocket launch can blow the mind of even the coolest 13-year-old. And if you built that rocket yourself, it's even more amazing.


Like my Facebook page for blog updates and extra stuff.

Follow me on Twitter.