
Click here for Ventris
The Nike Smoke rocket was a NASA sounding rocket used during the 1960's.
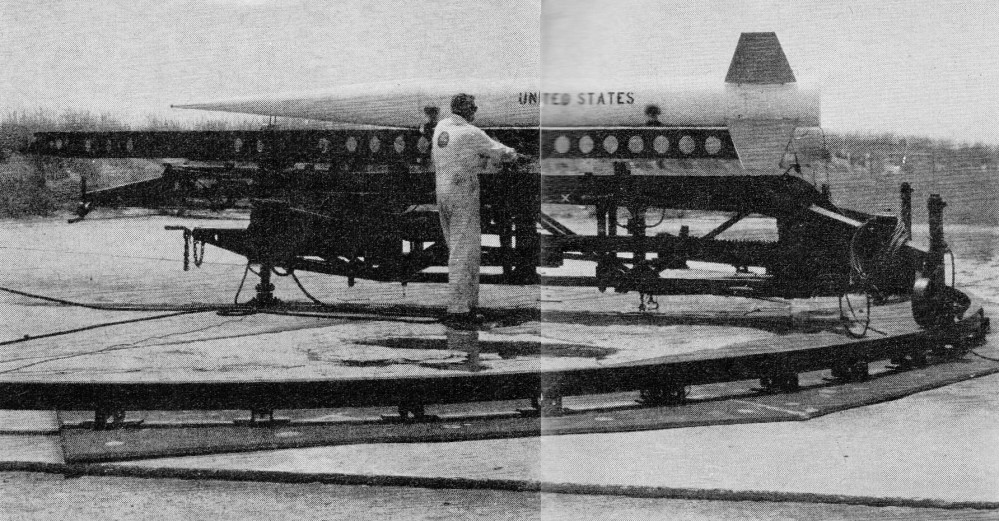 |
| A Nike Smoke being prepared for launch, 1968 |
A sounding rocket is one which carries instruments to conduct experiments and take measurements while in suborbital flight. It may be used for meteorological research, radiation levels in the upper atmosphere, microgravity (yes, I'm roughly paraphrasing Wikipedia here), or any number of other experimental applications.
The Nike Smoke rocket, in particular, was used to measure wind shear - the difference in speed and direction of the wind at different altitudes. This was important to space flight, as NASA rockets had to make it safely through the atmosphere on their way to space. It did this using tracking film footage which triangulated the changes of a smoke trail left by a special payload in the nose cone of the rocket. Using trigonometric functions, the cameras could tell the exact position, and direction and speed of movement of different parts of the smoke trail. (Using the same mathematics, model rocketeers can accurately track the altitude of a rocket in flight using two theodolites, as described in this Apogee Components newsletter.)
Here's a short NASA film on the subject, featuring the Nike Smoke rocket.
Because of its historical importance, as well as its iconic look but relatively simple design, it has become a favorite scale model for hobby rocketeers, and there have been several kits on the market throughout the years, as well as many scratch built versions.
 |
| High power rocketeer Neil Brown with his Nike Smoke Extreme, a "stretch" version of the rocket, built for LDRS34 - a high power rocketry event held this July in Potter, NY. Find his website at high-powered-rocketry.com |
The Nike Smoke, like many sounding rockets, also used a solid propellant, as opposed to the liquid fuel propellants used in space vehicles, like the Saturn V rocket. Since we use only solid propellant (or sometimes hybrid fuels - but that's a more advanced topic for another time), that means that a flying replica of a Nike Smoke rocket is, in at least some ways, not too different from the real thing.
The Estes Pro Series II Nike Smoke is a great kit.

With a diameter of three inches, the rocket stands about three feet tall. The distinctive, long conical nose cone is nearly the length of the airframe itself, making this the largest nose cone that I have yet in my collection.
The rocket is pretty simple to build. But, as with Ventris, I still have some decisions to make.
As with all Estes PSII "builder" kits, and many mid and high power rockets, the motor mount uses sturdy plywood centering rings, as opposed to the paper or cardboard rings you find with smaller model rockets. (A builder kit is one that requires a certain level of construction. Estes has several PSII rockets which are considered E2X - Easy to Assemble [or "eXecute"]. A builder kit takes more time and effort to construct. It's more of a challenge.)
In this case, the middle centering ring is special.
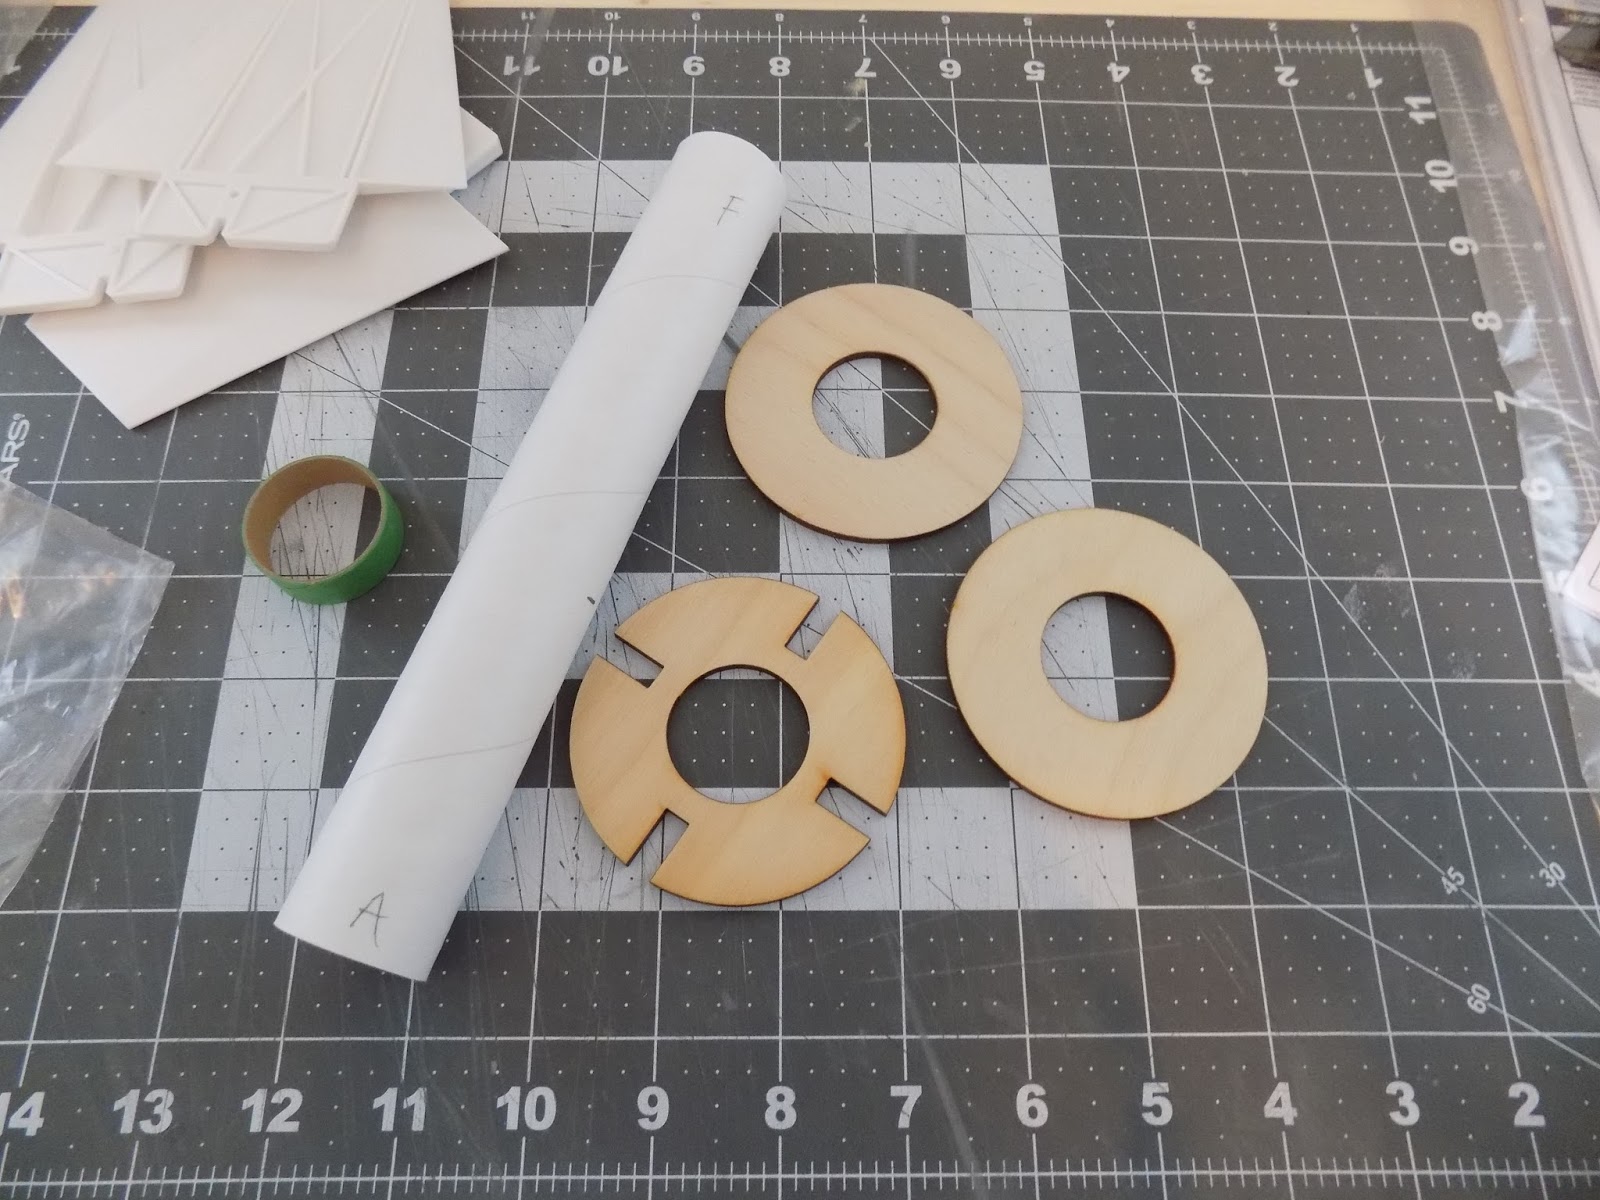 |
| Parts for the Nike Smoke motor mount. The ring with the notches goes in the center. |
The ring in the center has notches. As you'll see below, this helps you get the fins perfectly aligned. The Nike Smoke shares this design element with the Pro Series II upscale version of the classic Skill Level 1 kit Der Red Max - Der Mega Red Max.
Speaking of the fins, on this kit, they're made of plastic, and come in two parts.
 |
| Two-part fins |
Because they're in two parts, they must be glued together.
 |
| One fin dry fit together |
The kit instructions say to use CA - cyanoacrylate, or super glue. But they don't specify what viscosity of CA to use. The thin stuff is way too thin. So, do I use medium or thick CA - or something else? Epoxy is a possibility. CA might be too brittle. I might choose to go with epoxy, which is much stronger over time. Also, when dry fitting the fins together, you find that the edges don't come quite together. There's a bit of a gap, unless you squeeze. When you stop squeezing, the gap comes back.
So the adhesive is important. I need to choose something which will hold the fins together, won't break down, and will keep the edges from coming apart. That might prove tricky. CA will bond immediately, but might be brittle, and also might superglue my fingers to the fins. Epoxy might be stronger, but won't bond immediately, so I'll have to keep the fins squeezed together until the epoxy cures - or, at least, partly cures. And the epoxy could make a mess I won't be able to clean off if both my hands are occupied by squeezing the fins together.
Like Indiana Jones in The Last Crusade, I must choose - but I must choose wisely.
I'm writing this in the present tense - "I need to choose..." etc., but in fact, I've already done this part. You'll see what I opted for.
The notched centering ring is great for getting the fins on perfectly straight. Once you get the motor mount into the rocket, the notches in the ring correspond to the notches you can see at the base of the fins.
 |
| Spoiler alert! You can see here I've already started assembling the motor mount. |
 |
| The fin locks into place - perfectly aligned. |
The kit again suggests CA, but I don't like this idea. CA can get brittle over time, and it's just not a good adhesive when you need a strong bond that might take some stress. I'll use epoxy for this.
Also, the kit suggests using wood glue for the fin fillets - which seems bizarre to me. Wood glue makes fine fillets on a small model rocket, but it shrinks, and isn't great if you want a nice, rounded fillet. Also, I feel pretty sure that wood glue would have a hard time bonding too well to the plastic. I'll use epoxy here as well.
Finally, I have to choose how I'm going to launch the rocket. As with Ventris, the Nike Smoke comes with two launch lugs.

Notice how these lugs are not simply cardboard tubes. The actual lug is raised slightly. That's because the lip of the nose cone is slightly wider than the airframe.
As with Ventris, replacing the lugs with rail buttons is something to consider, but if I do that, I'll need to make a short standoff for them.
Whether I go with launch lugs or rail buttons - and which size rail buttons - again depends on what kind of launch equipment will be available at my local club, and/or whether I can bring my own launch pad if necessary.
Luckily, I'll be able to attend a club meeting next week! CMASS - the Central Massachusetts Spacemodeling Society - has just begun holding biweekly meetings in Cambridge, just across the Charles River from my little home. Which means that, for the first time since I started this venture into rocketry, I'll be able to meet other actual human beings who are into this hobby! And I'll get the chance to ask some questions which will help me make these important build decisions.
The nice thing about these lugs, as you can see from the picture above, is that they're conformal. They are slightly curved on the bottom so that the entire underside of the lug can attach to the airframe of the rocket without leaving any gaps. Not only does this look better, but it assures a better bond, and reduces the chances of a lug pulling or snapping off at launch.
I'm excited to get this build underway!
Here's a flight of Neil Brown's above Nike Smoke Extreme before he repainted it in the traditional white, red and yellow colors:
Thanks to Neil for permission to use his image!
Like my Facebook page for blog updates.
You can just use stacked washers as standoffs if you want to use rail buttons.
ReplyDelete