

I often build model rockets out of order.
The Handbook of Model Rocketry emphasizes time and again "Always read the instructions!" And while this is good advice, after you've built a number of rockets, you might find it helpful to deviate slightly from those instructions from time to time. Here's an example.
Estes' instructions usually have the build order go as such:
- Prep fins
- Assemble engine mount
- Mark the body tube for fin placement
- Glue the fins on
- Glue on the launch lug
- Glue the engine mount into the body tube
Et cetera...


I don't like doing it this way! You'll notice numbers 3-6 in the above list are italicized. That's because I always, always do those steps out of sequence when building a model. I do this for a few reasons.
I want the launch lug to line up with the engine hook. Many models have the motor tube flush with the base of the body tube, which means I'll often use a tool, such as my sanding block, to push the engine mount flush with the back of the rocket. I like to give the motor mount a twist when installing it, to ensure there's a nice bead of glue all the way around the centering rings for a good bond. And, because I'm a fussy builder, I often use a tool to make sure my launch lug is on perfectly straight.
Now, I find it easy to forget to pay attention to the marks on the outside of the body tube when installing the motor mount. Some models, especially those like the Big Bertha, have fins that are far swept back, meaning it can be hard to get a tool up to the base of the rocket if the fins are already glued on. And if the glue catches when the motor mount is only partway in, you may have to give a bit of a push - I don't want to break any fins off while installing the motor mount! Sometimes far swept fins can make it tricky to get even your fingers up in there to do some adjusting. And the fins would usually be in the way if I wanted to use a piece of aluminum angle to check the alignment of the launch lug.
The order I usually do the steps above is: 6, 3, 5, 4. I build and install the motor mount before anything else.
Before I make any marks at all on the body tube, I install the motor mount. Once it is glued in place, and the glue is holding (so that the mount won't slide in or out or rotate in place), I will mark the launch lug line.
I line up an aluminum angle with the engine hook and make a line all the way up the tube.

Now I know that the launch lug will be in line with the engine hook. I'm not going to accidentally forget to turn the motor mount so the hook is lined up with a launch lug I've already marked and glued on.
There are two reasons it's best to put the hook and the launch lug on the same side. First, it's neater. The launch lug is essentially the back side of the rocket. With the rocket on the launch pad - or on display - you won't see a hook sticking out the bottom if it's on the back.
But the second reason is more critical. If the launch control clips touch the hook, they'll create a short circuit. Electrons are lazy - they take the easiest route. Since a metal hook has less resistance than the bridge wire of a starter (or igniter), the current will flow from clip to hook to clip again, and back to the launch controller without passing through the starter. The rocket motor won't ignite!
Keeping the engine hook on the back side makes it less likely you'll get a short.
So, I glue in the motor mount, not worrying one bit about aligning things. Then I mark the launch lug line. And then I wrap the fin marking guide around the rocket. I line up the marks for the launch lug with the line I've already made, then mark the fin line locations with a small pencil mark.

Then I remove the fin marking guide and draw the fin lines up the tube. You can use a door jamb for this, or a drawer's edge - either of which you might find in the instructions. But I prefer to use a piece of aluminum angle.
Cheap, and widely available at home improvement stores and online, aluminum angle is a great tool for model rocket builders.

Because of its shape, it sits perfectly on a tube, giving you a nice straight edge. It's like a ruler which won't move when placed on cylindrical stock.

Aluminum angle is thin and makes a sharper, straighter line than a door jamb. It comes in 3 foot lengths or more, so you can mark all the way up the body tube.

Some instructions suggest making a mark only a few inches long, but I always prefer to make my fin lines and launch lug line all the way up the length of the tube.
Someone at a club meeting recently asked me why I do this.
The reason is that it's easier to make sure things are on straight if you have a reference line going all the way up. You can sight through the launch lug and over the tips of your fins once their glued on, but before the glue has dried. This will help you determine if things are truly in line, or if they just look like they're straight.

So, my tip for you is to mark the whole length of the tube.
In the case of some kits, such as the Estes Nike-X, the instructions actually tell you to do this, because you're going to glue on some forward fins and some canards up near the top end of the rocket. But I recommend it for every build. It's just a helpful way to check your work.
Next, I usually glue on the launch lug. I do this before gluing fins on, because it enables me to use a piece of aluminum angle to ensure the launch lug is perfectly straight. I glue the lug on, and while the glue is still somewhat wet, I gently slide the aluminum angle in place next to the lug, and I can adjust the straightness of the lug using the angle as a straightedge.

If the fins were already glued on, this wouldn't really be possible, because they'd get in the way of the aluminum angle.
Now, I don't find this step too critical. It's not hard to get a launch lug on straight by siting up the line through the lug. But, as I said above, I'm a fussy builder, so I like the added assurance I've got the lug on nice and straight. And in the case of rockets with two lugs, I always do this.
I glue the first lug on, making sure it's straight with the aluminum angle. Once the glue has dried, I glue the other one on, pressing the angle gently against the dried lug, and using it to guide placement of the second lug. This ensures that the two lugs are perfectly in line.
If you don't want to bother with that, or don't have an aluminum angle, my tip of drawing the fin and launch lug lines all the way up the rocket will help you, because you can sight up the rocket through the launch lug, to make sure it's nice and straight.

When everything is lined up, I finally glue on the fins.
Follow me on Twitter.
Like my Facebook page for blog updates and extra stuff.
Have a question you'd like to see addressed on this blog? Email me at iamtherocketn00b@gmail.com.
I want the launch lug to line up with the engine hook. Many models have the motor tube flush with the base of the body tube, which means I'll often use a tool, such as my sanding block, to push the engine mount flush with the back of the rocket. I like to give the motor mount a twist when installing it, to ensure there's a nice bead of glue all the way around the centering rings for a good bond. And, because I'm a fussy builder, I often use a tool to make sure my launch lug is on perfectly straight.
Now, I find it easy to forget to pay attention to the marks on the outside of the body tube when installing the motor mount. Some models, especially those like the Big Bertha, have fins that are far swept back, meaning it can be hard to get a tool up to the base of the rocket if the fins are already glued on. And if the glue catches when the motor mount is only partway in, you may have to give a bit of a push - I don't want to break any fins off while installing the motor mount! Sometimes far swept fins can make it tricky to get even your fingers up in there to do some adjusting. And the fins would usually be in the way if I wanted to use a piece of aluminum angle to check the alignment of the launch lug.
The order I usually do the steps above is: 6, 3, 5, 4. I build and install the motor mount before anything else.
Before I make any marks at all on the body tube, I install the motor mount. Once it is glued in place, and the glue is holding (so that the mount won't slide in or out or rotate in place), I will mark the launch lug line.
I line up an aluminum angle with the engine hook and make a line all the way up the tube.
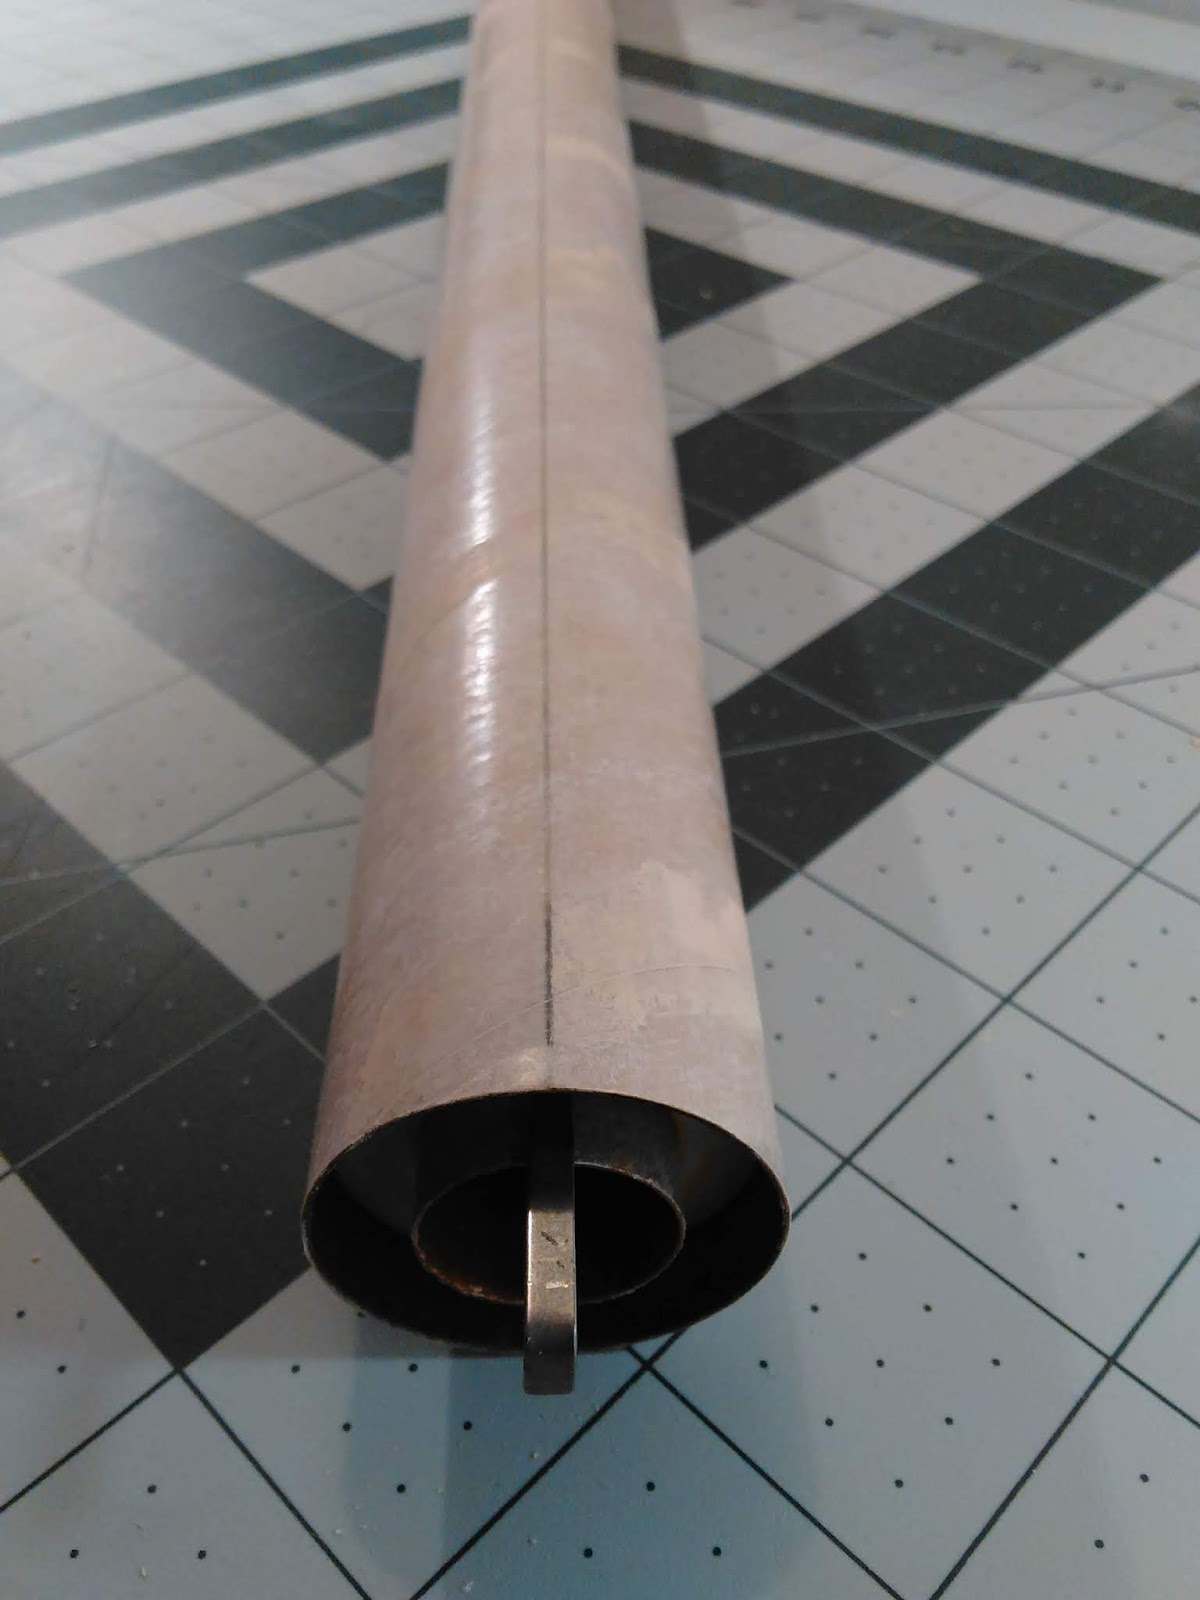
Now I know that the launch lug will be in line with the engine hook. I'm not going to accidentally forget to turn the motor mount so the hook is lined up with a launch lug I've already marked and glued on.
There are two reasons it's best to put the hook and the launch lug on the same side. First, it's neater. The launch lug is essentially the back side of the rocket. With the rocket on the launch pad - or on display - you won't see a hook sticking out the bottom if it's on the back.
But the second reason is more critical. If the launch control clips touch the hook, they'll create a short circuit. Electrons are lazy - they take the easiest route. Since a metal hook has less resistance than the bridge wire of a starter (or igniter), the current will flow from clip to hook to clip again, and back to the launch controller without passing through the starter. The rocket motor won't ignite!
Keeping the engine hook on the back side makes it less likely you'll get a short.
So, I glue in the motor mount, not worrying one bit about aligning things. Then I mark the launch lug line. And then I wrap the fin marking guide around the rocket. I line up the marks for the launch lug with the line I've already made, then mark the fin line locations with a small pencil mark.

Then I remove the fin marking guide and draw the fin lines up the tube. You can use a door jamb for this, or a drawer's edge - either of which you might find in the instructions. But I prefer to use a piece of aluminum angle.
Cheap, and widely available at home improvement stores and online, aluminum angle is a great tool for model rocket builders.

Because of its shape, it sits perfectly on a tube, giving you a nice straight edge. It's like a ruler which won't move when placed on cylindrical stock.

Aluminum angle is thin and makes a sharper, straighter line than a door jamb. It comes in 3 foot lengths or more, so you can mark all the way up the body tube.

Some instructions suggest making a mark only a few inches long, but I always prefer to make my fin lines and launch lug line all the way up the length of the tube.
Someone at a club meeting recently asked me why I do this.
The reason is that it's easier to make sure things are on straight if you have a reference line going all the way up. You can sight through the launch lug and over the tips of your fins once their glued on, but before the glue has dried. This will help you determine if things are truly in line, or if they just look like they're straight.

So, my tip for you is to mark the whole length of the tube.
In the case of some kits, such as the Estes Nike-X, the instructions actually tell you to do this, because you're going to glue on some forward fins and some canards up near the top end of the rocket. But I recommend it for every build. It's just a helpful way to check your work.
Next, I usually glue on the launch lug. I do this before gluing fins on, because it enables me to use a piece of aluminum angle to ensure the launch lug is perfectly straight. I glue the lug on, and while the glue is still somewhat wet, I gently slide the aluminum angle in place next to the lug, and I can adjust the straightness of the lug using the angle as a straightedge.

If the fins were already glued on, this wouldn't really be possible, because they'd get in the way of the aluminum angle.
Now, I don't find this step too critical. It's not hard to get a launch lug on straight by siting up the line through the lug. But, as I said above, I'm a fussy builder, so I like the added assurance I've got the lug on nice and straight. And in the case of rockets with two lugs, I always do this.
I glue the first lug on, making sure it's straight with the aluminum angle. Once the glue has dried, I glue the other one on, pressing the angle gently against the dried lug, and using it to guide placement of the second lug. This ensures that the two lugs are perfectly in line.
If you don't want to bother with that, or don't have an aluminum angle, my tip of drawing the fin and launch lug lines all the way up the rocket will help you, because you can sight up the rocket through the launch lug, to make sure it's nice and straight.

When everything is lined up, I finally glue on the fins.
Follow me on Twitter.
Like my Facebook page for blog updates and extra stuff.
Have a question you'd like to see addressed on this blog? Email me at iamtherocketn00b@gmail.com.
SO glad to learn there is someone else who deviates from the instructions too. I felt like a fool when I screwed up my last build by trying to rush too much, too fast. (Does it really make any difference if you start the motor mount first, to allow it to be drying while you move onto the fins? This is my thinking.)
ReplyDelete