Two Days Left until I move to Boston. All the rockets are packed, as well as the parts, unbuilt kits, tools, launch equipment... Oh, and records and books and blankets and clothes and stuff.
All my spare rocket parts are finally neatly organized, after many months of being strewn about the apartment.
I managed to get my Donor's Rockets complete just in time. The former Keith's Rocket, I named Copperhead, after someone's suggestion on The Rocketry Forum, and the Donor's Rocket is now named Imperius.
Turns out that in the world of Diablo (a game or something, I guess), Imperius is the archangel of valor. So, not a bad name for a rocket.
I had to take this picture before handing out the rockets on Friday, so the light is not too good. You can't see how brilliant the red and green are. But I was pretty proud of these.
Bill over at the Rocketeer's Corner has created a new, old-fashioned rocket design contest, that he's calling ORC - the Old Rocketeer's Contest.
The first contest is called Delivering the Mail.
The idea is to design and build a rocket which flies on one or more 18mm motors (that's A through C standard sized motors, for any rocket n00bs reading this), which "must include as part of its structure some object used in the shipping
of letters or parcels by the Post Office - mailing tube, shipping box,
envelope, etc."
The contest ends August 12, and there are prizes available: a $60 eRockets gift certificate, an Estes Ventris (so cool!!), an Estes altimeter, a Semroc Centaur and a Squirrel Works Red Baron. I'm not sure if these are the prizes for the top five rockets, or whether it's winner take all, or winner select one, but these are some cool prizes.
To get all the details, head over to Bill's site and read the post here.
I feel guilty for not blogging much recently. Between teaching rocket camp, my day job, and preparing to move to Boston a week from Tuesday, I don't have much free time.
But camp has been going well. Several parents have told me that their kids have learned a lot. Which is great - and sort of surprising. These kids have absorbed a lot of technical information. Sometimes I've mentioned something once on one day, and half the kids don't look like they're even listening, and two days later, I'll ask a question, thinking I'll need to re-teach the information - but the kids know it! Concepts like total impulse and center of pressure are not easy to grasp at first, but these are some smart kids.
Anyway, rather than writing up each week in separate posts, I'll take what I've learned about teaching rocketry when I'm all done, after Friday. While this blog is partly for people who are n00bs to rocketry, maybe there are a few more experienced rocketeers who are n00bs to teaching rocketry, and maybe my experience will help you prepare.
In any case, I was able to get a little painting done. Ivy Tech has a really nice spray painting booth, and I was able to get Keith's Rocket painted. I'm pretty proud of it.
I'd originally bought the copper paint for the fins on the 3D Rocketry Nautilus II, but that rocket was lost before it was finished. Still, it looks great! I'm going to have to build one of these for myself.
The rocket has a payload compartment. Four small holes - known as static ports - allow you to fly with a barometric altimeter, such as the Jolly Logic. An altimeter needs to breathe to function, so you put static ports in your rocket to allow the payload compartment to equalize in pressure with the air outside the rocket.
I have four more Donor's Rockets to finish painting. I hope to launch these next week - after rocket school!
Here, the Ivy Tech Rocket Kids launch one of Chad's rockets:
It is Day 3 of my first of three weeks teaching model rocketry to 11-14-year-olds at the Ivy Tech College for Kids camp. The second and third days went much smoother than the first, and I'm really impressed with these kids!
Report, impressions and what I've learned to follow later this week - what worked, what didn't, and what I'm going to do differently next week.
The model rocketry College for Kids camp I'm teaching starts Monday. For the first week-long session, I have five kids. I'm still finalizing my plan for the week's schedule, and I need to figure out what to do if it rains on Friday and we can't launch - that would be a huge disappointment!
Donor's Rockets
These are coming along great.
I'm building a fifth one for myself, with a D motor mount, but it's still in pieces.
These rockets need a cool name, though. "Donor's Rocket" doesn't have much of a ring to it.
New Book
I just acquired a copy of Mark Canepa's book Modern High Power Rocketry 2.
I'm not in a rush to get a high power certification, but I like having another book on hobby rocketry (side note: I don't like that term, "hobby rocketry." Something about the word "hobby" - like, a hobby horse is a child's fake wooden horse, not a real horse. Model rockets and high power rockets actually fly! But you know what I mean...). And I'm sure that some of the stuff in this book can be applied to mid power rockets as well. If I learn something from this book that I think my fellow rocket n00bs might find useful, I'll certainly incorporate that knowledge into this blog.
I start teaching the Ivy Tech College for Kids rocketry camp in two weeks. I just have to finalize the schedule - figuring out what all we're going to do besides build a rocket - and make any last minute purchasing requests (by tomorrow!)
I decided on the Estes Alpha kit for the rocket - a classic, basic first kit for kids to build, which comes in educator bulk packs.
Tomorrow, I begin building the wind tunnel. This is going to be a lot of fun.
Now it's time to attach the rail buttons and take care of a few final details.
If you're just tuning in, rail buttons are used instead of launch lugs on a lot of larger rockets. This rocket isn't huge, so rather than the big, 1010-sized rail buttons often used on high power rockets, I'm using the newly-developed micro buttons. With these buttons, you can use an aluminum extrusion of t-slot rail instead of a launch rod. A rail is a lot stiffer, so you can use a rail that's much longer than a rod you'd have to use, and it won't bend, or whip.
Why would you need a longer launch rod or rail? Some rockets lift off slowly. And some rockets are what is known as overstable. Without getting into it too much, I'll just tell you that when an overstable rocket lifts off slowly, it is much more prone to arching into the wind - a phenomenon known as weathercocking, and you won't get a straight flight.
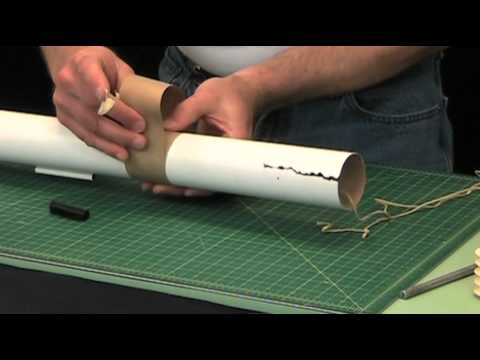
All rockets do this to some extent, but an overstable rocket will do it much more so. You can end up with a rocket flying horizontally, which is undesirable, because once it runs out of propellant, it will take a nose dive at the ground. If the parachute manages to deploy before the rocket impacts, it will likely cause a jagged rip in the side of the rocket, known as a zipper.
From an Apogee Components video - Tim Van Milligan prepares to fix a zippered rocket airframe
You can minimize weathercocking by having a longer launch rod or rail. As a rocket accelerates, it "feels" less of the wind coming from the side, and more of the wind coming straight on. The faster a rocket flies, the less of a problem overstability will be. I have a number of rockets which are technically overstable, but the only one that really suffers from bad weathercocking is the Big Bertha - because it lifts off slowly. Using a longer rod or rail means that the rocket will be going faster when it leaves the launch pad, because it will have more length to accelerate.
The disadvantage of a longer launch rod is that it can sometimes suffer from wire whip. When a rod is too long for its diameter, it can whip back and forth as the rocket moves upward, and can throw a rocket off course. A launch rail won't do that.
The micro buttons are made to fit a couple of miniature t-slot extrusions currently on the market - the MakerBeam and the OpenBeam.
Micro buttons are made of nylon and come in two parts: A small, #2-sized screw, and a sleeve with a flat, washer-like bottom.
The flat part goes against the rocket. All you need to do is thread the screw all the way into the holes you've drilled and make sure the screw is tight enough so that the base is flush with the rocket. If the holes you drilled are a little small, it might be a little tight at first, but that's OK.
If you have a rail button that's a little loose, you can mix up a small amount of epoxy and use a toothpick to apply a tiny ring of it to the inside of the hole. Once the epoxy has set, you're done.
The next step might be to tie the shock cord to the nose cone. But before doing that, I'm going to add something - a parachute protector. This is a square of flame-retardant Nomex fabric, and it helps add insurance against burning holes in the chute when the ejection charge goes off.
Nomex comes in different-sized squares for use in different-diameter airframes.
The shock cord gets threaded through a button hole in one corner of the cloth.
Some people use this in place of recovery wadding, but it's really best used in addition to wadding. Nomex is not burn-proof, and it will get holes in it after a flight or two. But used in conjunction with wadding Nomex can help keep your parachute safe and burn-free.
The first step is to thread the shock cord through the button hole found in the corner of the Nomex cloth.
Many people tie this in place to keep the Nomex square from sliding all the way up and restricting the parachute shroud lines. A simple knot might work, or running the shock cord through the button hole a second time.
Next, tie the nose cone to the shock cord. When I built the Big Bertha, I used a buntline hitch. This would probably be fine, but after reading a tip on both Chris Michielssen's Model Rocket Building blog, as well as Rich's Rockets, I've been using the Uni Knot - also called the Duncan Knot. This is basically a type of noose, and it's easy to tie and pretty secure - once you've got it properly tightened.
I find that the cloth elastic of the Big Dog shock cord makes the Uni Knot easy to secure, and it looks neat. Tie the nose cone on and snip off the excess end of shock cord.
The final step to building the Big Dog - and making sure it's flight-worthy - is to check the center of gravity, often abbreviated as CG. This has to do with stability.
I haven't addressed stability much in this blog yet, but here's a really basic primer.
The center of gravity - CG - is the point on a rocket - or any object - around which the rocket will rotate in space. If you took a model rocket and flipped it end over end, it would rotate around the CG. The CG is also sometimes called the center of mass or the balance point. You can find the CG by balancing the rocket on the back of a chair or any thin object until you find the spot where the rocket balances.
Center of pressure - or CP - is the imaginary point on the rocket where all the aerodynamic forces are in balance, and it has to do with the overall surface area of the rocket. While the center of gravity can differ depending on the relative weight of various components - the nose cone, the density of the fillets, how much glue you had to use to secure the motor mount - as well as the relative position of items - how far forward the shock cord mount is glued, for example - the center of pressure doesn't change with the mass of these objects. It's all about surface area.
Without going into too much detail for now, I'll just say that the basic principle is that the Center of Gravity must be forward of the Center of Pressure, by a distance equal to at least the diameter of the airframe - the ideal caliber stability is between 1-2 times the airframe diameter. Some people find this surprising, and we'll go into this in more detail in a future post, but if you're new to rockets, for now, just trust me - this is a fact.
A simple rocket design. The CG is indicated by the blue and white dot. The CP is the red dot. Note that the
CG is forward of the CP by 1.96 times the diameter of the airframe. That's what "1.96 caliber stability" refers to.
Having a CG more than 2 times the diameter forward of the CP is overstable - and is usually acceptable. Less than 1 diameter is marginal stability, and is generally not good enough.
According to the kit instructions, we need to make sure that the CG is sufficiently forward of the CP for the Big Dog to fly in a stable manner. This is because with a larger 29mm motor mount, we could use one of any number of motors, some of which weigh a lot more than others.
So we have to find the center of gravity - that is, the true center of gravity - for the rocket as it will be on the launch pad. To do that, we have to fully prep the rocket for launch, with the parachute, wadding, and motor installed.
The best practice here is to install the heaviest motor you plan on using. The motor will shift the CG rearward.
I built the Big Dog to hold composite motors, which have thrust rings built into them. I don't have any composite motors on hand, but I do have some 29mm Estes black powder motors, which are pretty heavy - probably heavier than the composites I would use.
The Estes F15 is the heaviest motor I have on hand.
As you can see, the F15 is a simple cylinder. There's no thrust ring. How do we use this in a rocket with no internal thrust ring, and with a screw-on motor retainer, like we've built here?
We'll make a thrust ring, using masking tape. This works quite well. The NAR Model Rocket Safety Code expressly prohibits altering or tampering with a motor, but adding tape to the outside is acceptable.
First, we'll tightly wrap tape around the very aft end of the motor, until we have enough thickness to hold the motor in place. This takes a lot of tape.
This looks messy, but we're going to trim the excess.
With a hobby knife, taking care not to cut into the motor casing itself, trim off the overhanging tape.
Now we have a 1/4 inch thrust ring which is quite secure.
Insert the motor into the rocket and screw the motor retainer in place.
Next, we'll install the wadding, Nomex and parachute.
You could use paper wadding - the kind that looks like toilet paper - as you might with a smaller model rocket. But you'd have to use a ton of that stuff, and it's expensive. I don't use paper wadding on any of my rockets any more. Instead, what a lot of rocketeers use is paper cellulose insulation. This stuff is sold by the baleful at Lowe's and Home Depot, and it's really cheap - and flame retardant. It's meant to be blown into attic spaces for home insulation, but it's great for rockets. Rocketeers commonly refer to this stuff as "dog barf."
Instead of tying the parachute directly to the nose cone - which makes it hard to get untangled after a couple of flights - I always use a fishing snap swivel to hook the parachute to the nose cone. With a larger rocket like this, I decided to get heavier-duty snap swivels.
For heavier rockets, I might switch to something like a quick link, but the Big Dog is still pretty lightweight, so a sturdy snap swivel should do the trick. Thread the shroud lines through the eye of the swivel, creating little loops. Then pass the loops over the snap end and pull them tight. Then all you have to do is attach the snap to the nose cone.
Next I added the wadding. You want a layer of wadding of probably a depth equivalent to twice the diameter of the airframe. With the Nomex, you can probably get by with less, but that's a good depth to shoot for in general.
Some people fold their parachutes in the Nomex chute protector, burrito-style. This Nomex square was a little small for that. Others simply ball the Nomex up and stuff it in the tube, though some people report chute damage doing it that way. I went for a compromise. First, I stuffed the Nomex partly into the tube, flatwise.
Next, I folded the chute as I would do with any rocket. I laid the shock cord into the little pocket created by the Nomex and placed the chute into that basin as well. That way, I had Nomex surrounding the chute on all sides, with only the top exposed. Finally, I put on the nose cone.
To find the CG, you simply need to balance the rocket on something thin. The back of a chair will work just fine, or a ruler - if you can keep it steady. Whatever you use, it's important that it not move. You're going to have to balance the rocket perfectly, which takes some careful adjustment, and if the object on which you're balancing the rocket is moving at all, you may never get it.
I used the edge of a tube cutting jig I made.
Don't mind the mess - I'm building rockets here...
The positions of CG and CP are usually measured as a distance from the tip of the nose cone backwards. But the nose cone is curved, and that can be tricky to measure. To make it easier, the kit instructions say that the center of gravity should be no less than 8 inches from the rear of the airframe. My CG was just at 8 - maybe more, maybe less. To be safe, according to the instructions, I should probably add a little weight to the nose cone to shift the CG forward a little bit.
It's hard to get an accurate measurement and take a picture at the same time with one hand and a metal ruler.
In all honesty, I'm a little skeptical that the CG needs to be that far forward. The Big Dog has huge fins, and 8 inches up the airframe is pretty far forward for the CG, compared to the CG/CP proportions on other rockets I've built.
Sometimes I find it easier to switch to the metric system, and this is one of those times. The units are smaller, and divisible by ten.
So the 24 inch long airframe is 61 centimeters long, and at 1.97 inches in diameter, it's exactly 5 centimeters. If the CG has to be 8 inches from the aft of the airframe, that's 20.32 centimeters.
Look at the free simulation I downloaded from Apogee Components:
The center of pressure on this rocket is 62.5 centimeters from the tip of the nose cone. Subtract the length of the nose cone, and it's 52.66 centimeters back from the forward end of the airframe - or 8.34 centimeters from the back end. That's 3.28 inches from the read end of the vehicle, not counting the fins (remember, the kit has us measuring the CG from the aft of the airframe). To get a minimum of one caliber stability, the center of gravity must be 13.34 cm from the back end. That's 5 cm ahead of the CP. And that's about 5 and a quarter inches from the back end - not 8!
But, as I was writing that last bit, I noticed a little flaw in the sim - the nose cone. Remember, the Big Dog has a tangent ogive nose cone, but it doesn't come straight out of the body tube like that. There's a short cylindrical section which is part of the nose. OpenRocket, and perhaps RockSim as well, doesn't allow you to make a nose cone of that shape, so far as I know. But the rocket in the sim is shorter than the actual Big Dog we've built.
Just to be sure, I made an adjustment. To "fake" the shape of the actual nose cone, I took the sim and inserted a short length of body tube, and designated its material as polystyrene - the same plastic that makes up the nose cone. I used a tape measure and a bit of fiddling to get a simulation that was the accurate length - more or less - of the actual nose cone and whole rocket. I came up with this:
The short body tube section I added to simulate the base of the nose cone is red, like the nose cone itself. The actual airframe - made of a paper wound tube - is white. Now the rocket is the correct length.
With the rocket being slightly longer, the CP does shift forward a little bit. How much? It's now 67.5cm from the tip of the nose cone. That's now 8.84cm from the base of the airframe, or 3.48 inches. The CP needs to be ahead of the CG by a minimum of 1 diameter, or 5 cemtimeters - 13.84cm. That's 5.44 inches.
OK, a lot of numbers and fiddling. It's just to say that a safe margin of stability for this rocket has the center of gravity a lot further back than the instructions tell us.
But... OK, I'm still kind of a n00b at this, and if you are too, it's better safe than sorry. As we saw above, a faster-flying rocket can tolerate overstability better than a slower-flying rocket. The margin on some fast, high power rockets is well over 2 caliber stability. And overstable is better than understable - so long as the rocket is flying fast enough and you're not launching on a really windy day. So, following the instructions is (usually) a better idea than not.
Where my CG is is pretty safe - we've figured that out. But what if we're unsure? And what if we use a heavier motor, and the CG shifts backwards? How do we fix that?
The answer is to add weight to the nose cone. Adding just a little bit of weight to a nose cone will shift the center of gravity forward and make the rocket more stable. It's not always a good idea to add too much nose weight, as you can get a really overstable rocket. But if you're unsure your rocket has basic 1 caliber stability, that's what you'll do.
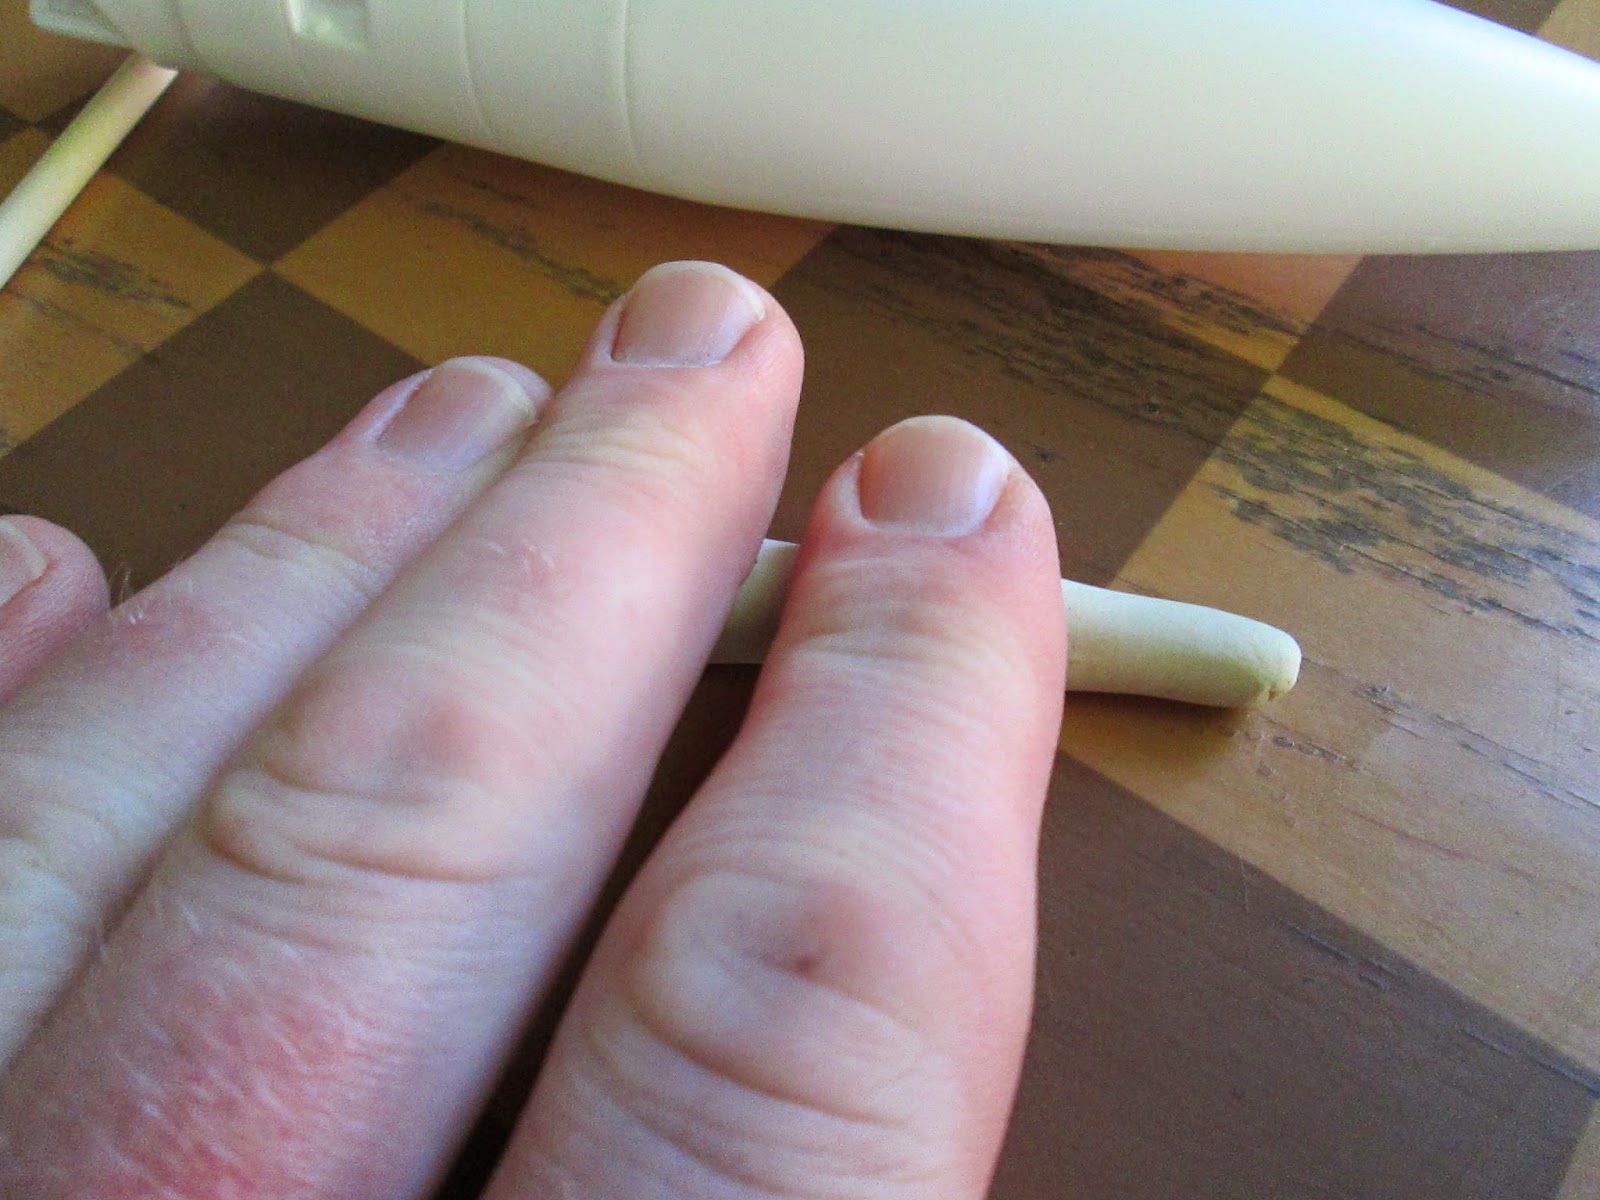
There are a number of ways of doing this. On a lot of model rockets, it's common to pack a bit of clay into the tip of the nose cone.
Adding nose weight to the Estes Mini Honest John using clay and a dowel
Roll the clay out into a snake
Insert the snake into the base of the nose cone
Use the dowel to stuff the clay into the tip of the nose, then ram it into place
Finished product
The Big Dog - as well as the Quad Runner - suggest something different to add nose weight - the use of a lag screw and fender washer.
From the Quest Quad Runner instructions
This turned out to be necessary with the Quad Runner. Four C motors add a lot of weight to the aft of that rocket.
The Big Dog, however, looks pretty good. To be safe, I added just the lag screw - leaving it halfway out so I could remove it if I want to.
This lag screw looks loose, but it isn't.
This shifted my center of gravity forward, so it was nicely at 9 1/2 inches from the aft of the airframe.
The only other final touch, seen above, is to add a bit of masking tape - if necessary - to the shoulder of the nose cone, so that it fits snugly but not tightly into the airframe. You should be able to turn the rocket upside down without the nose cone falling out, but you should be able to get it out by hand with very little effort. This ensures it will stay on during flight, but eject properly when the motor ejection charge goes off.
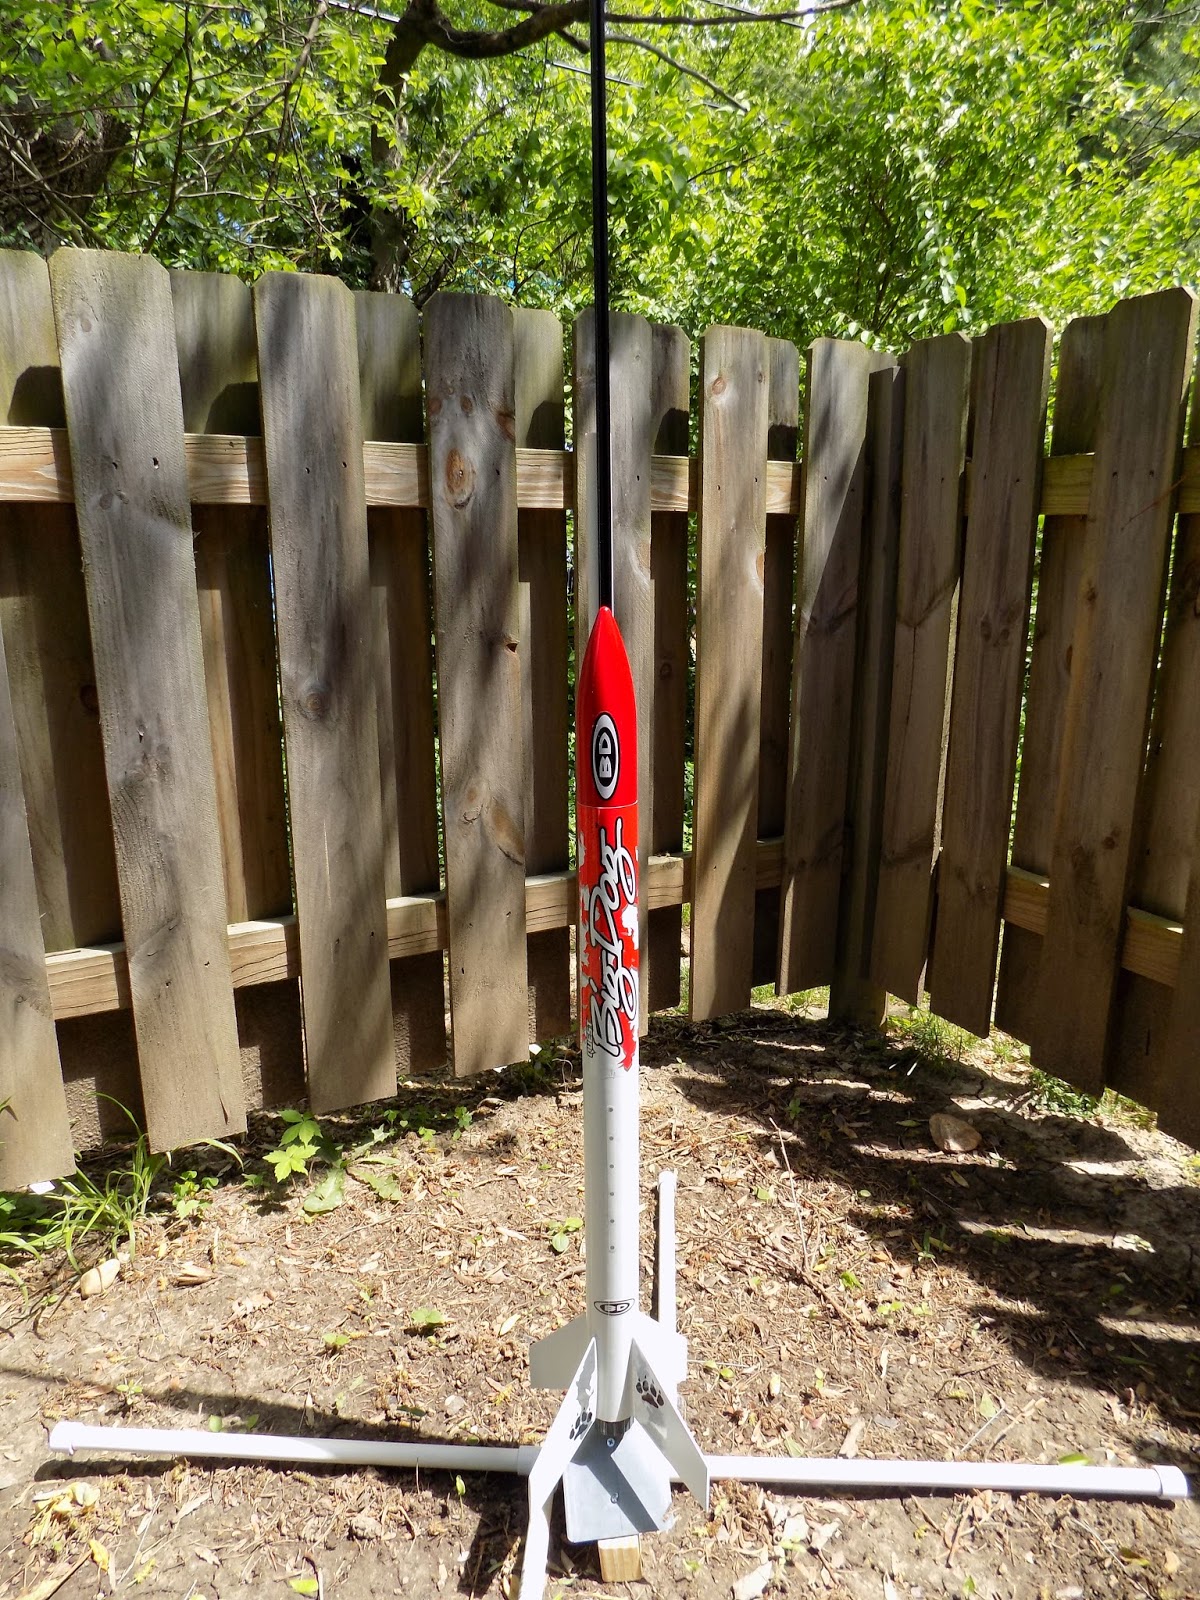
I put the nose cone on and slid it onto my rail launcher. The Big Dog is finally finished, and ready to fly.
There are a number of ways of building a micro rail launch pad, or of mounting a rail to an already-existing pad with a rod. We'll talk about that at another time, but you can easily find solutions on The Rocketry Forum or the NAR Facebook page.